pdalber
Junior Member

Posts: 75 
Likes: 37
Currently Offline
|
Post by pdalber on Jun 9, 2017 18:14:17 GMT -8
More project progress: Interior cabinets, the kitchenette, dinette booth seats and the gaucho bed. This part of our build seemed like it took forever because we would build stuff and then we would just store the stuff in the garage while we built more stuff. The building process also took longer than it should have, mainly because this was our first go at restoring a trailer and it was a learning process. Anyways, the original construction in the trailer was really bad. I tried my best to balance improving upon the original design without overbuilding things. Again, I have to thank a lot of people here on the forum for posting great pics of their builds, especially RinTin. We used pine lumber that was purchased from the big box stores, then ripped down to size on my table saw, to build the framework. We then covered the frames with 1/4" Birch I got from a specialty lumber store. 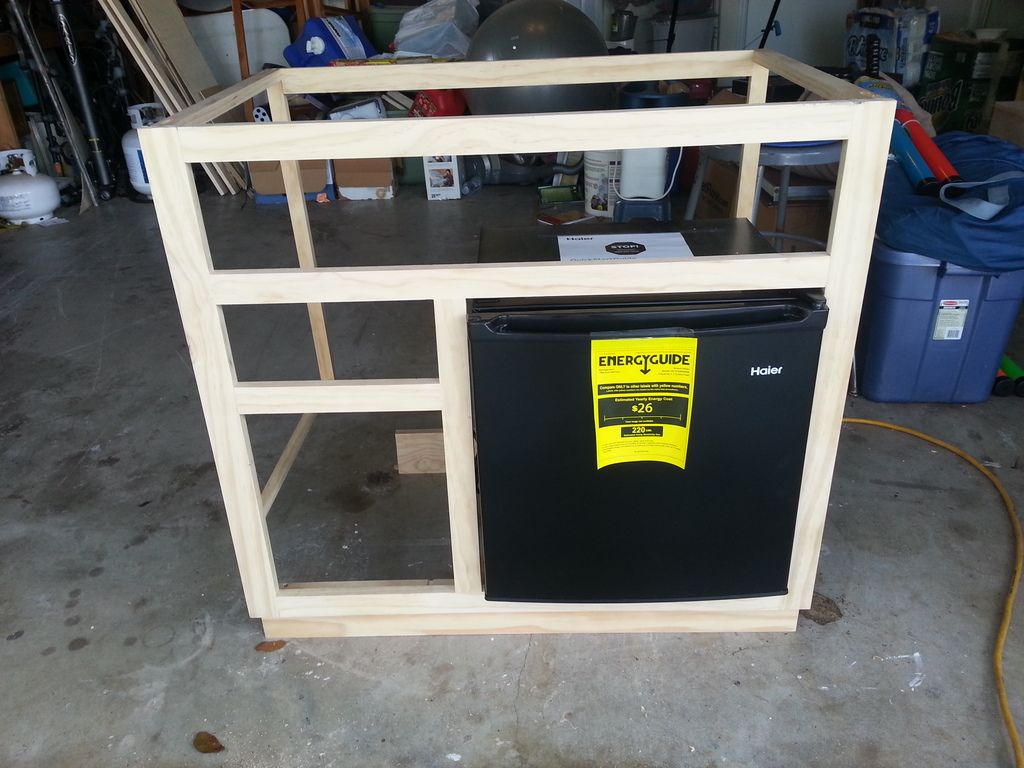 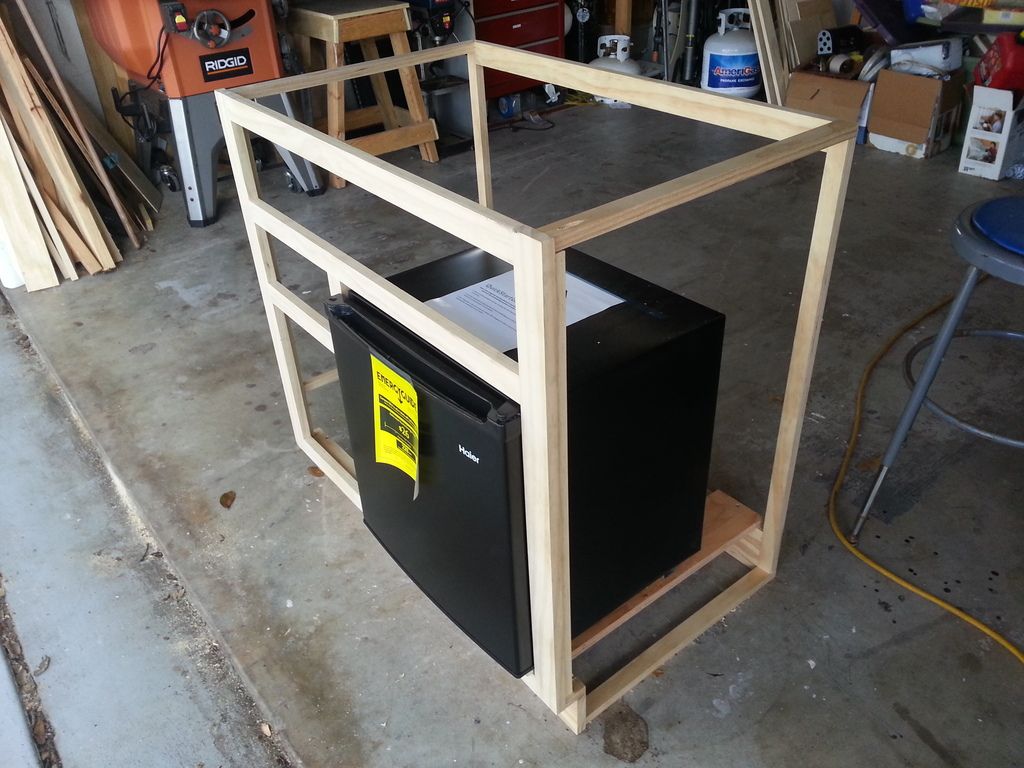 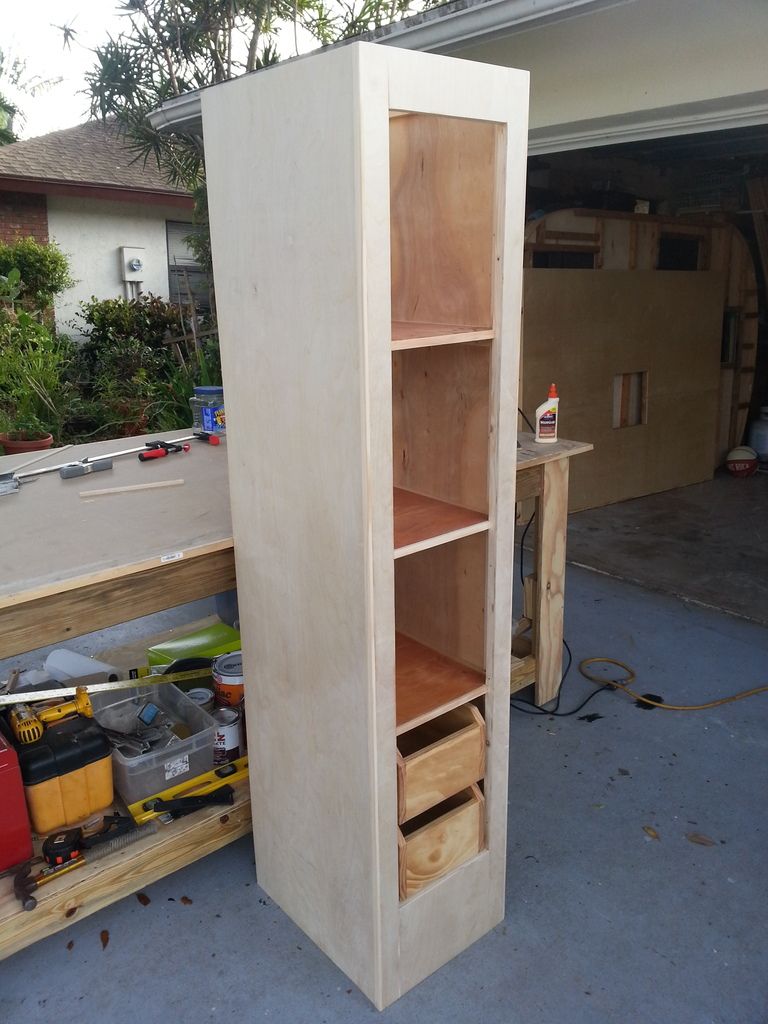 All of the birch was stained with multiple coats of amber shellac, covered with a seal coat and then finished off with a couple of coats of polyurethane. The technique I used was based on falconizer62's tutorial on the Repairing Yesterday's Trailers forum: repairingyesterdaystrailers.yuku.com/topic/382/Interior-Wood-Finishing-Tutorial#.WTtKsmjytPYI don't currently own a compressor that is suitable for HVLP spraying. So, I used the french polish method when applying the shellac and brushed the seal coat and polyurethane. I was very happy with the result, but will definitely consider purchasing a compressor for future products. 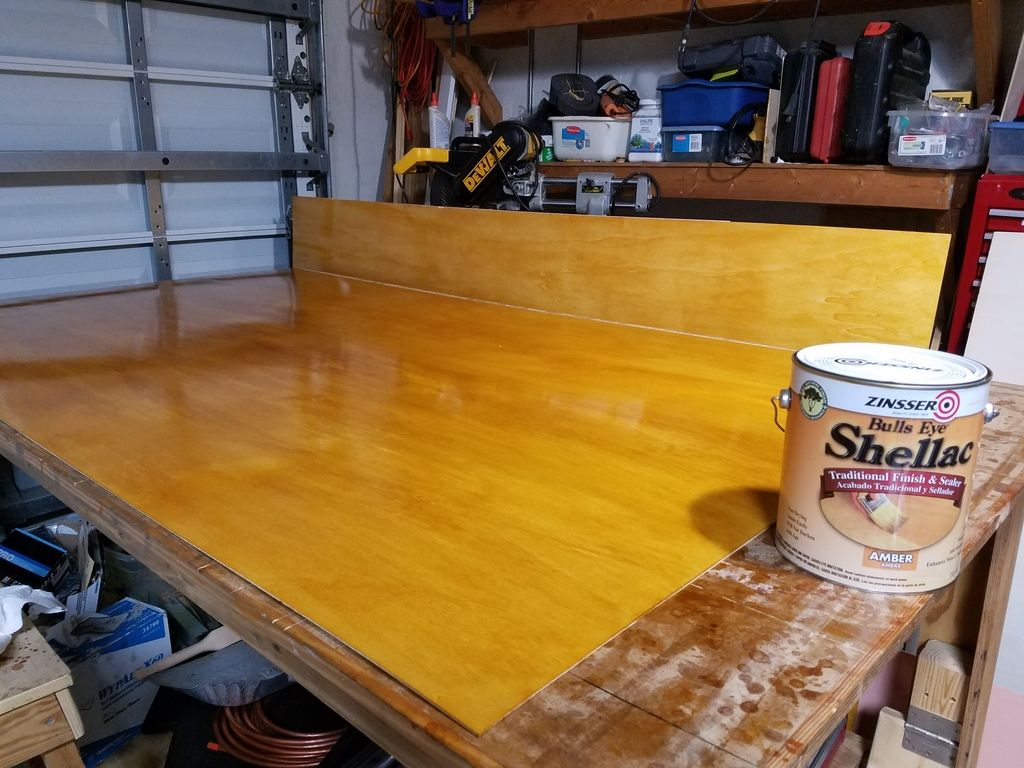 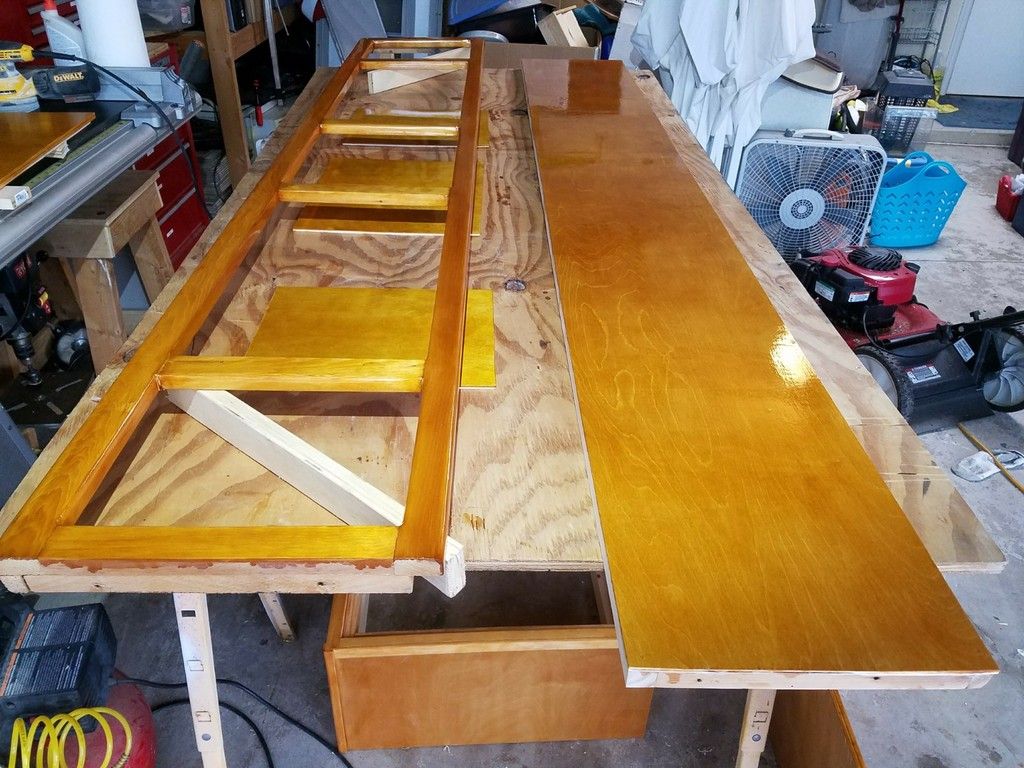 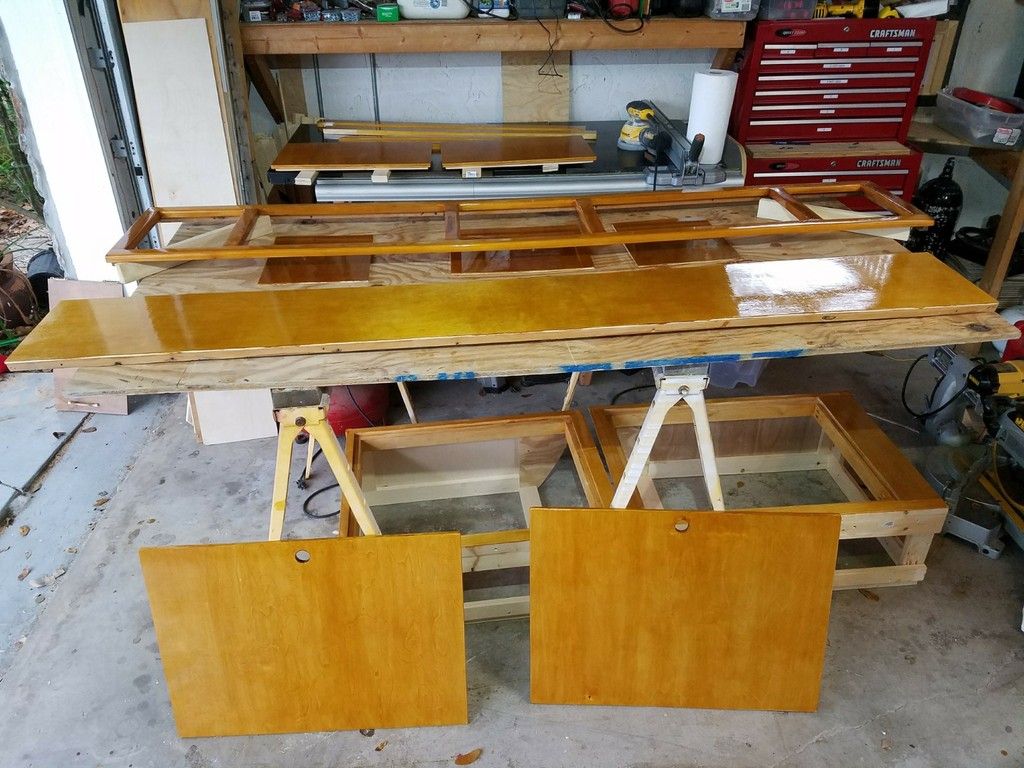 Finally, when the major building, sanding, shellacing and clear coating was done, we got to start re-assembling the trailer. This part, for me, was much more exciting because we could see real progress at the end of every day. The walls went up, the cabinets went in and the roof went on: 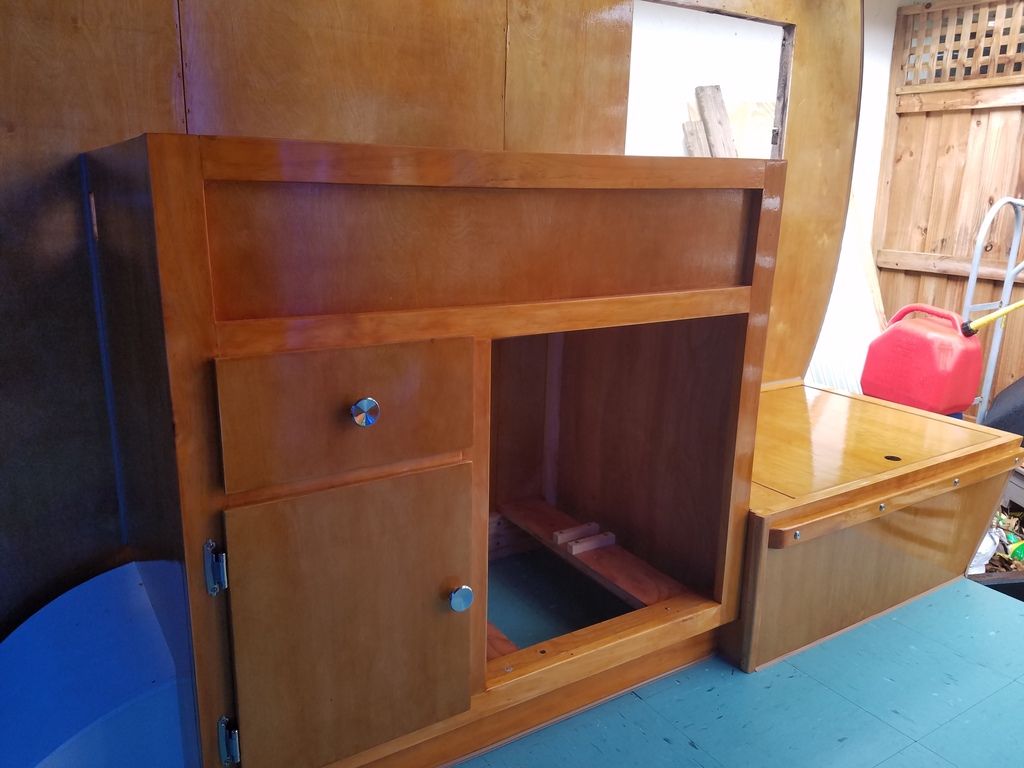   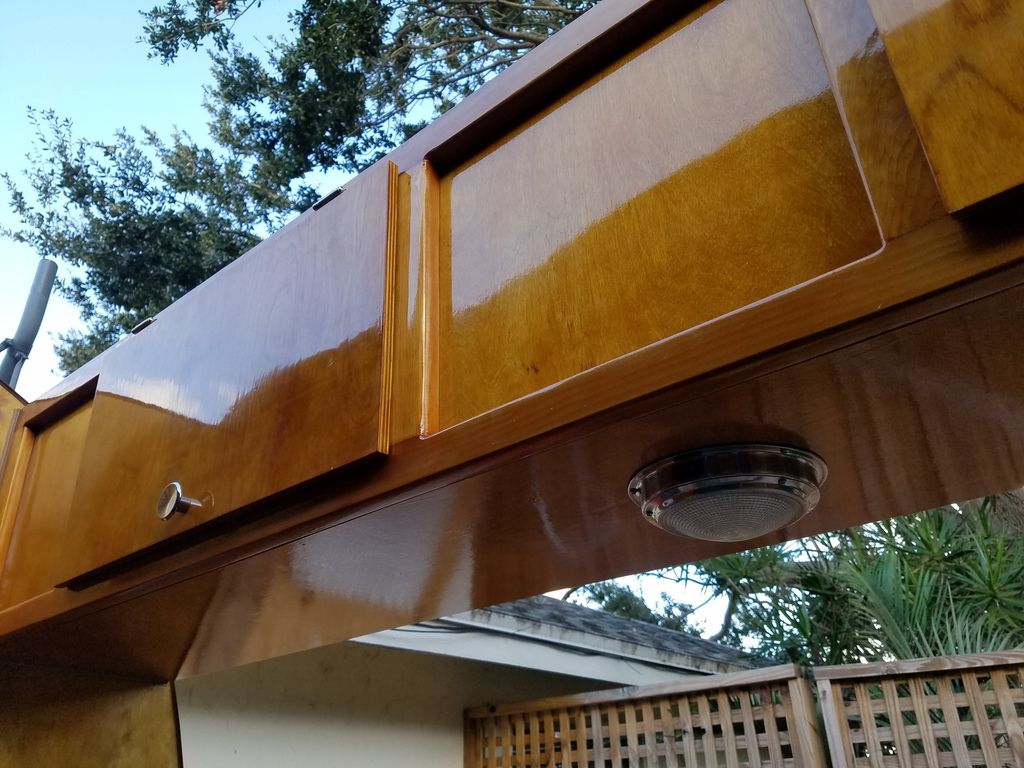 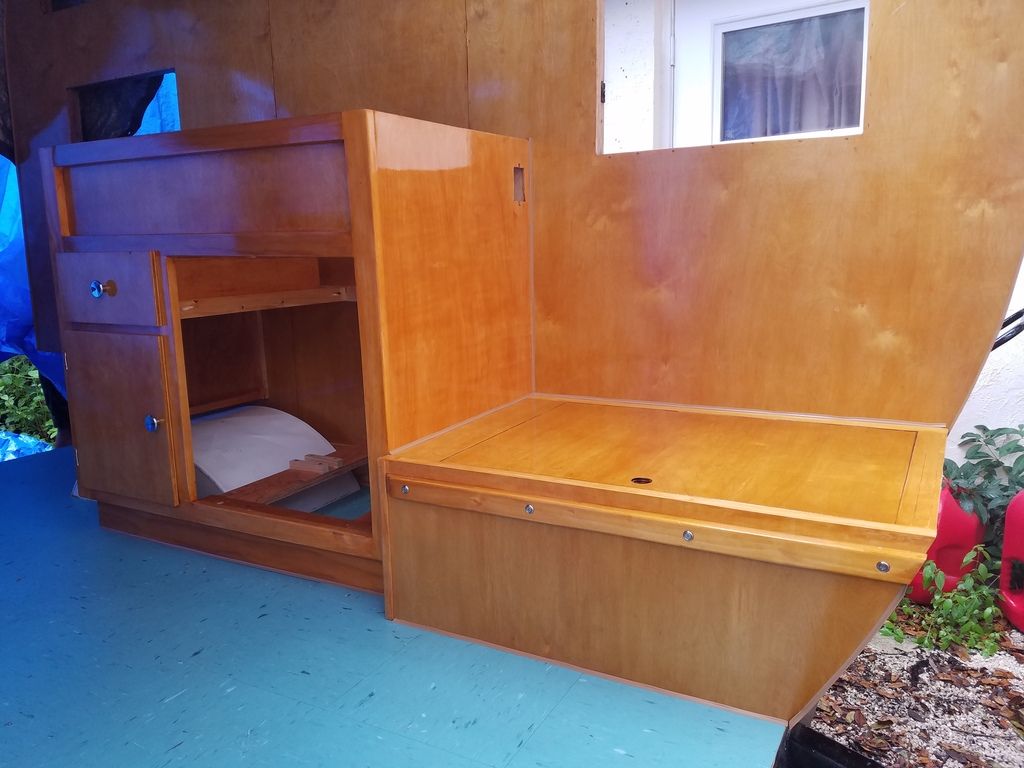 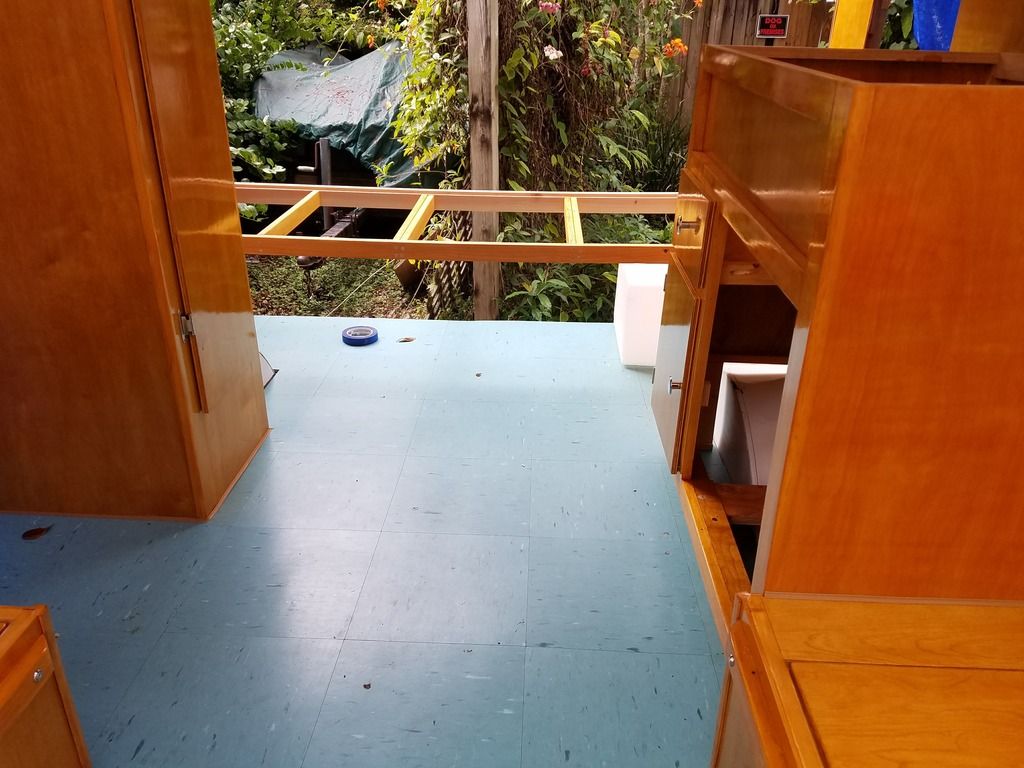 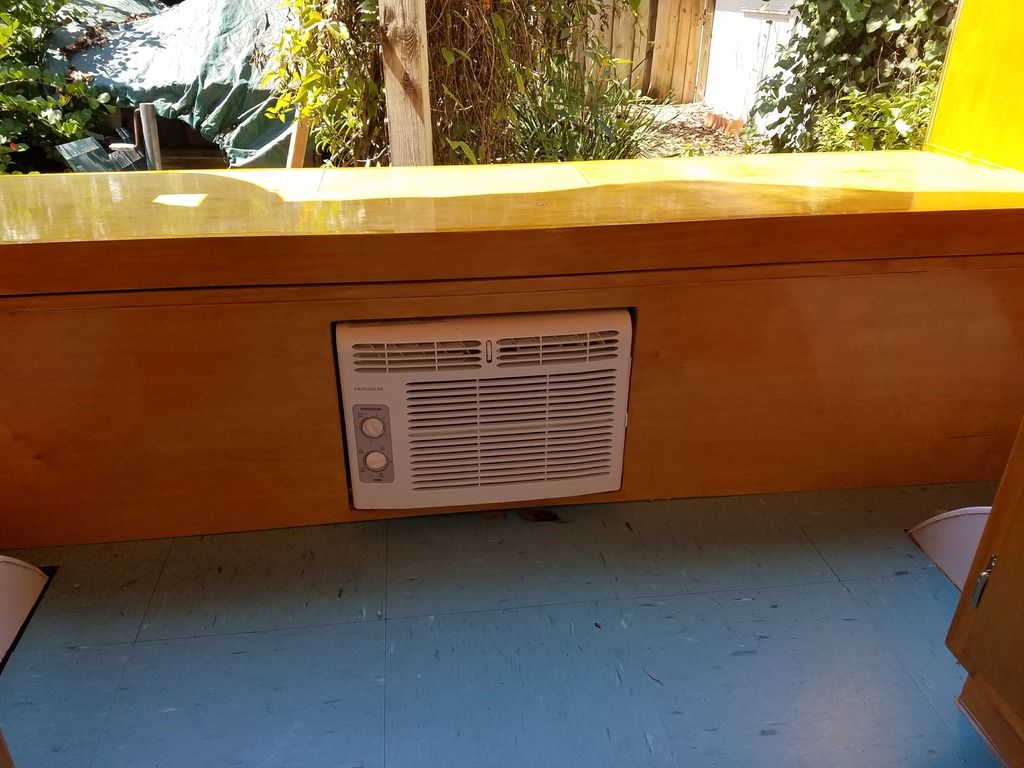  The gaucho bed design is a blatant rip-off from RinTin's Aloha project and, at this point, the AC was just dry fitted in the opening. I'll share the AC install plans when I get a little closer to being caught up to our current status (which won't be much longer). |
|
pdalber
Junior Member
Posts: 75
Likes: 37
Currently Offline
|
Post by pdalber on Jun 9, 2017 18:18:57 GMT -8
Wow.. its a Canadian company! That may be a better fit for me than some of the USA tiles I have been looking at. SaveSaveI had almost an entire box left over (I think I may have used 2 tiles). Its all yours if you want to pay shipping from South Florida!  |
|
ladywendolyn
2K Member

Posts: 2,315 
Likes: 928
1964 Golden Falcon
Currently Offline
|
Post by ladywendolyn on Jun 9, 2017 18:25:59 GMT -8
Wow.. its a Canadian company! That may be a better fit for me than some of the USA tiles I have been looking at. SaveSaveI had almost an entire box left over (I think I may have used 2 tiles). Its all yours if you want to pay shipping from South Florida! Hmm.. need to make friends with a long haul Canadian trucker! SaveSave |
|
mel
Senior Member
1964 Shasta Airflyte
Posts: 1,729
Likes: 523
Currently Offline
|
Post by mel on Jun 10, 2017 4:39:15 GMT -8
I love the way your shellac looks, so much different than mines. What process did you use for application? yours is much more shiny than mine.
|
|
pdalber
Junior Member
Posts: 75
Likes: 37
Currently Offline
|
Post by pdalber on Jun 10, 2017 6:48:55 GMT -8
I love the way your shellac looks, so much different than mines. What process did you use for application? yours is much more shiny than mine. The shine comes from two coats of polyurethane. After I applied enough shellac to get the color I wanted, I top-coated the shellac with Seal Coat 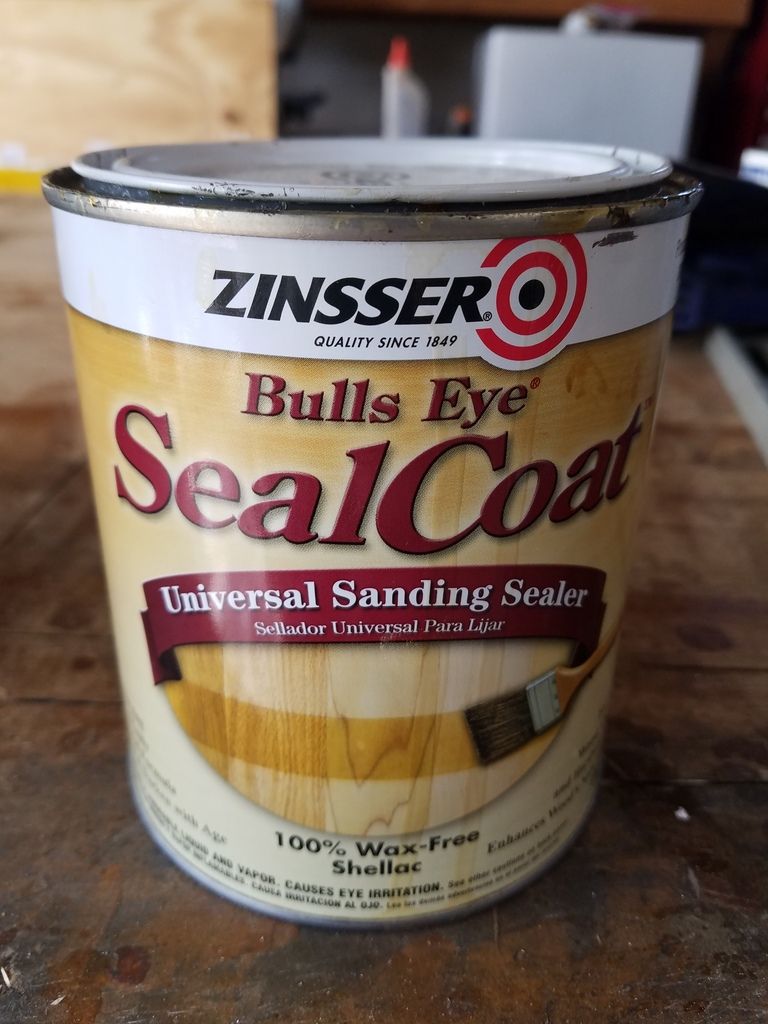 Apparently, the waxes in shellac don't allow polyurethane to bond well with the surface. By applying a couple of coats of the Seal Coat product, it creates a barrier that the polyurethane will stick to. It goes on very easily and dries quickly. Then, I applied a couple of coats of gloss polyurethane.  I sanded between coats, then sanded after the final coat with very fine sandpaper and buffed it with a polisher to get the shine. The sanding and polishing were pretty time consuming, but removed the brush marks and imperfections. |
|
pdalber
Junior Member
Posts: 75
Likes: 37
Currently Offline
|
Post by pdalber on Jun 10, 2017 19:28:01 GMT -8
Once the gaucho bed was in place, we installed some of the "modern conveniences" in the space under the bed. On the curb side was the electrical: a 45-amp converter/charger, an AGM battery, and circuit breakers. Here is an "in progress" photo of the install. We have since trimmed and (neatly) secured the wiring and the battery now sits in a frame with a strap holding it down. We mounted the 12v fuse panel against the back wall inside the closet (We figured it was more accessible there and we plan to put a fuse list inside the closet door). 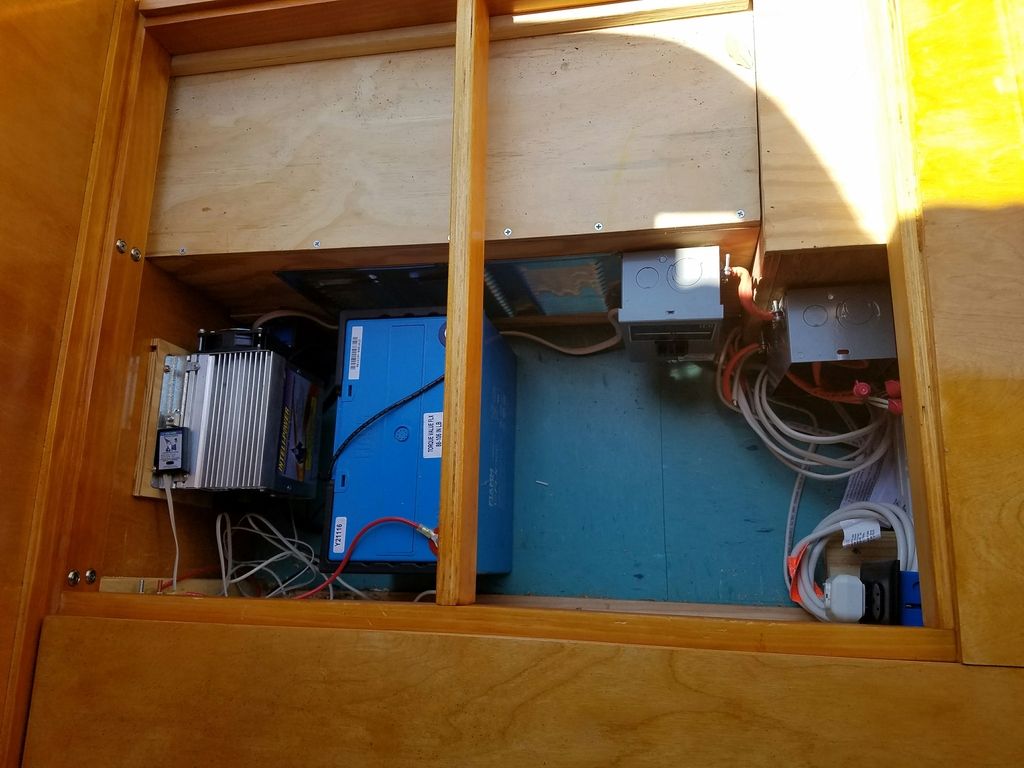 On the street side of the trailer, we installed a 10-gallon freshwater tank: 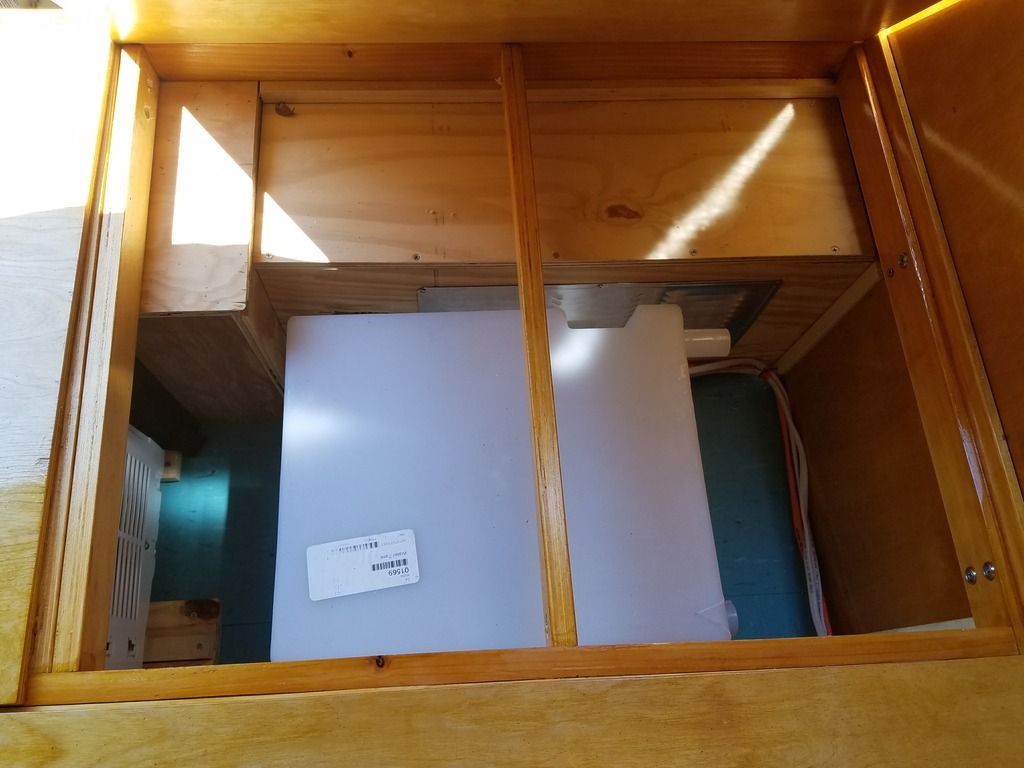 And, in the middle, we installed a window AC unit:  The AC install is still a work in progress and would probably be best described in detail on a seperate post or thread. Basically, the system draws in air through screens in the electrical and water tank areas, then vents it out throught the rear of the trailer. Condensation drips through the floor via a tube we plumbed into the pan of the AC. |
|
|
|
Post by vikx on Jun 11, 2017 20:38:10 GMT -8
Beautiful work!
I'm very curious how the A/C is going to do in the "real world" and if you'll need some computer fans or some such to help it out.
A/C is a very difficult install, especially to make it look nice. Yours does.
|
|
pdalber
Junior Member
Posts: 75
Likes: 37
Currently Offline
|
Post by pdalber on Jun 12, 2017 17:13:48 GMT -8
The air condition caused me a lot of stress. We knew the trailer would need AC if we were going to use it here in South Florida, but we had limited options for the install. We decided to take advantage of the space under the gaucho bed. The original design of the trailer had a dead space created by a "step" under the gaucho bed in the very rear. The space can be seen in these photos:  This is the view from the underside: 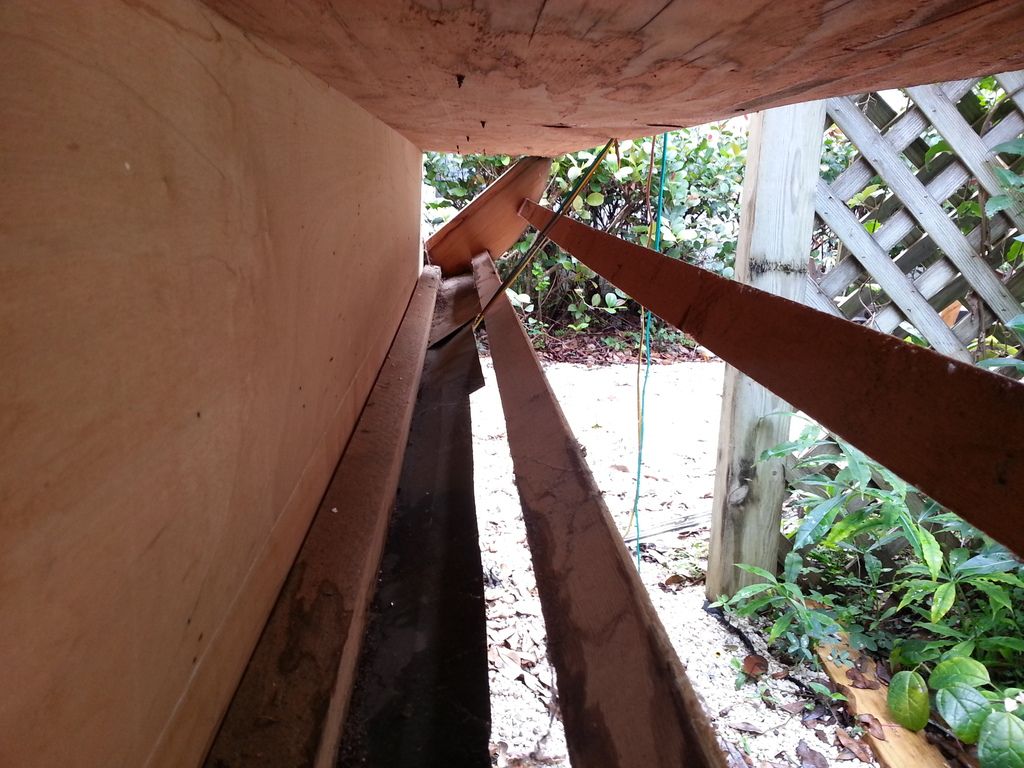 I decided to try and take advantage of this design and maximize the use of the space under the gaucho. It was decided that the AC would be mounted where once there had been an access door, facing forward, in the middle of the bed. Here is the basic plan: 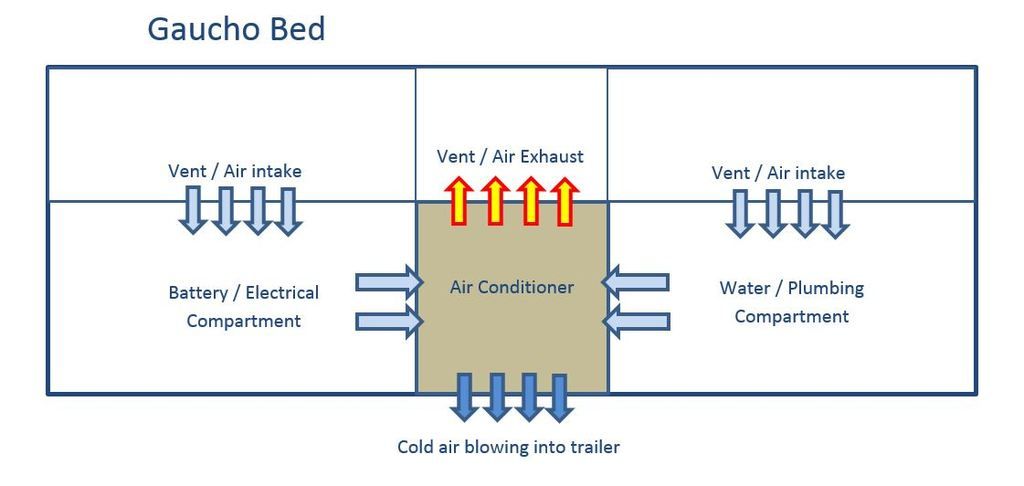 The dead space at the rear will be divided into three sections. The walls between the electrical and water compartments and the dead spaces to the rear have vents (with screens) to allow for the free flow of air. That air will flow into the sides of the AC, be blown across the condenser coils and out the back. The back of the air conditioner sits against back wall and there is foam moulding there to keep the hot air from leaking into the adjacent compartments. We installed a drain in the bottom of the AC pan so that condensation can drain out of the bottom of the trailer. The unit is mounted in such a way that it can be removed through the front for service (if needed). 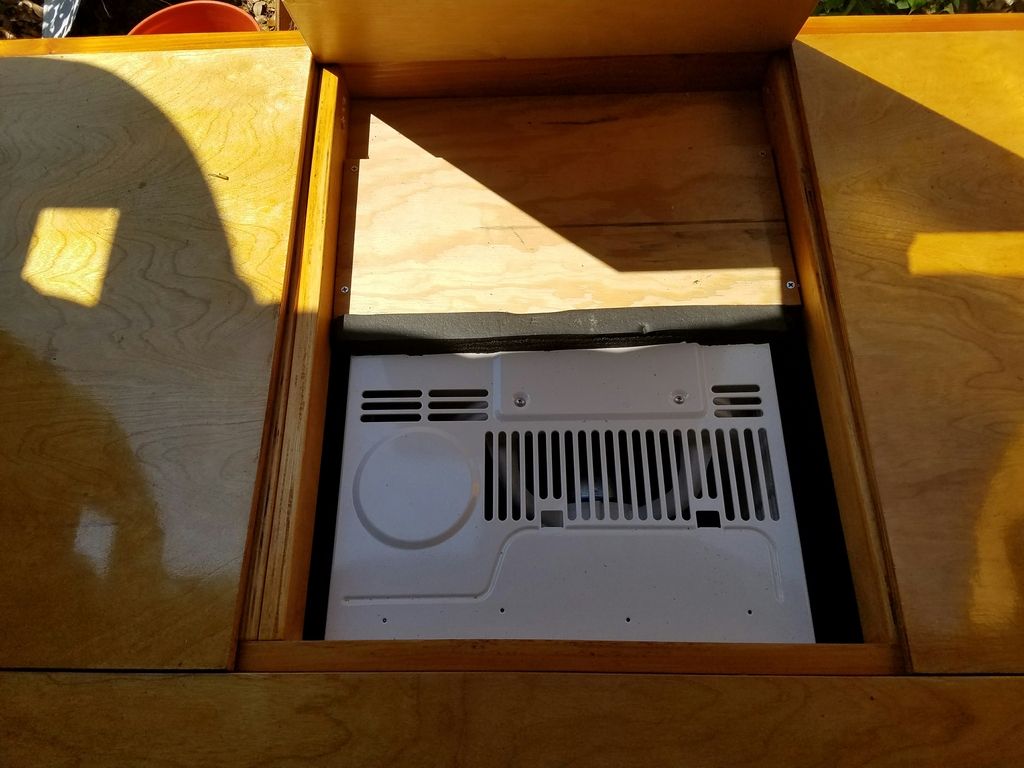 View from the rear: 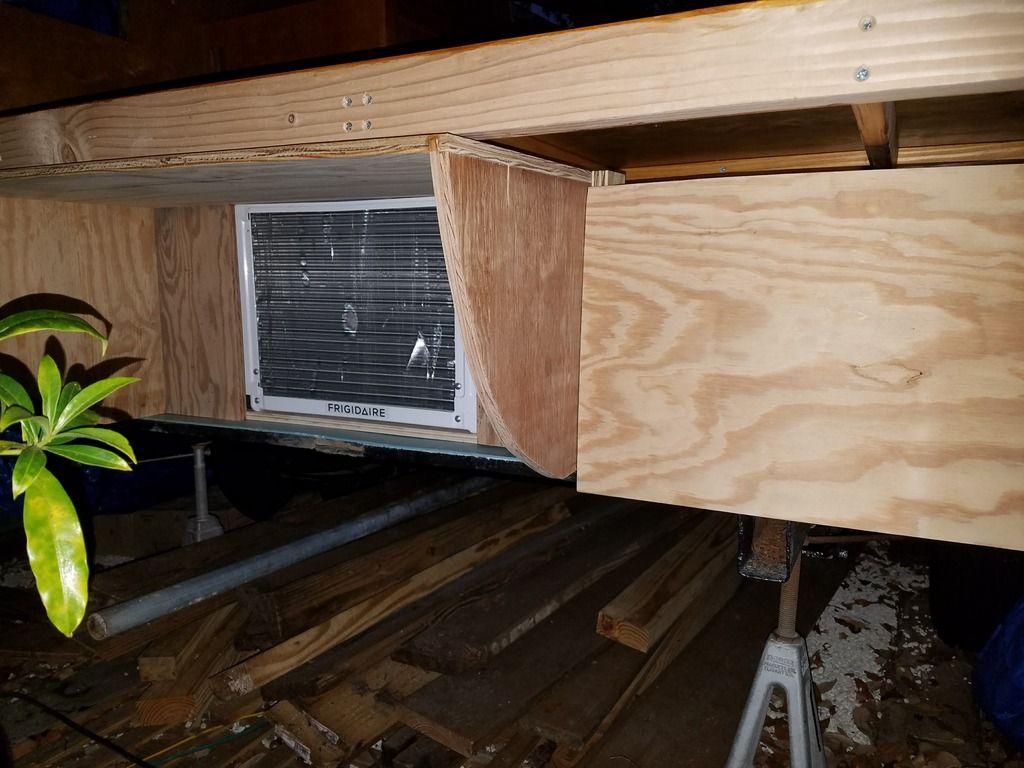 This pic was taken before the install was complete. The wood panel on the right (and the same panel on the opposite side of the AC) now has a stainless steel vent installed and the area at the top, under the bed, is covered. From here, I'm going to seal/paint all the wood and install some 2x2's to support the aluminum skin. When we install the new aluminum, the plan is to create openings near the bottom for ventilation. The openings on the intake sides will be smaller/narrower and should be barely visible. The exhaust vent in the center will need to be a bit larger and will be visible from the rear. But I'm thinking of hiding the vent behind a bumper and spare tire. The vent openings will utilize an aluminum screen material like this, and trimmed around the edges with some type of aluminum moulding: 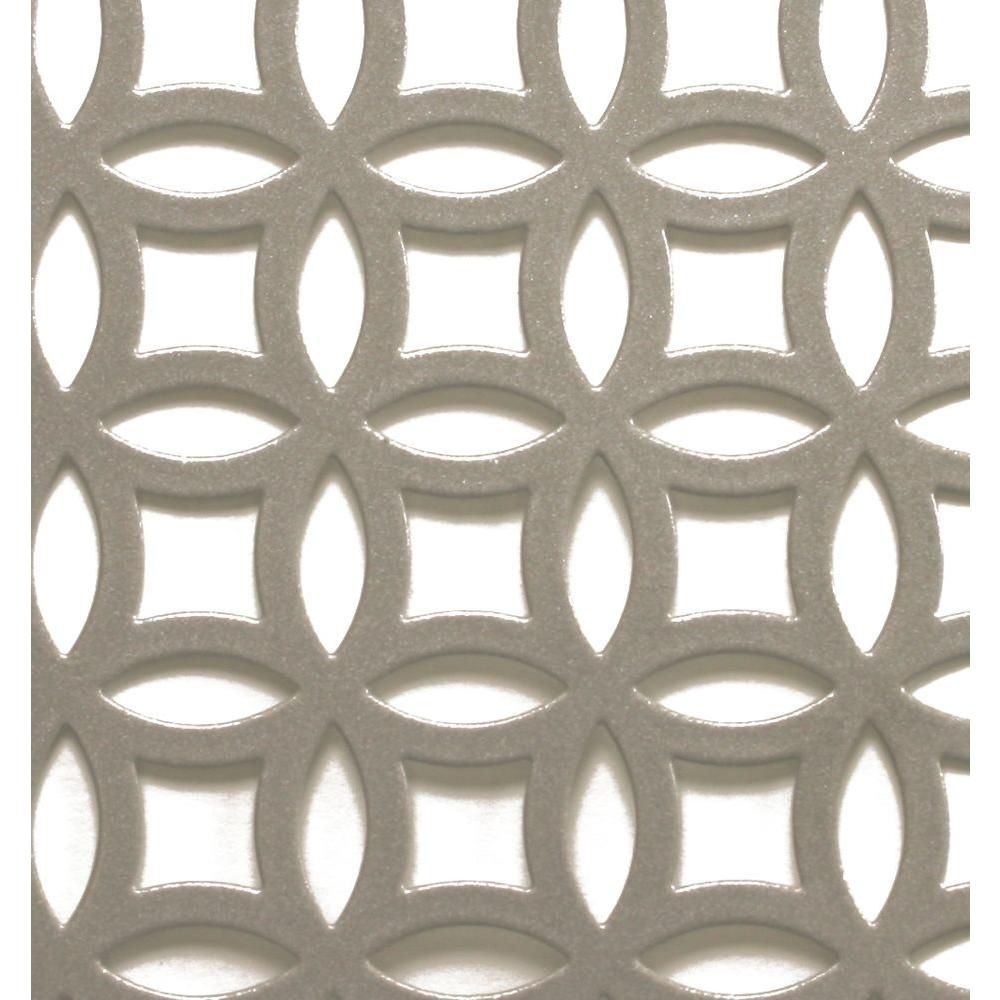 I plan to mock it all up with the old aluminum before the final install. |
|
|
|
Post by danrhodes on Jun 12, 2017 18:24:28 GMT -8
That is a clean install. I'm always amazed at the lengths and expense people go to install a $100 ac unit when a portable unit is not much more in the long run, but builds like this make me think it's worth it
|
|
pdalber
Junior Member
Posts: 75
Likes: 37
Currently Offline
|
Post by pdalber on Jun 14, 2017 20:21:17 GMT -8
Here are some more progress reports and photos. After getting the main interior components installed in the trailer, we closed in the front and back, I trimmed in the wheel wells and we completed the kitchen. For the front and back, we used 1/8" Birch plywood, which was shellaced, sealed and covered with 2 coats of polyurethane before before being installed. We also glued the 2x2 framing to the plywood beforehand. 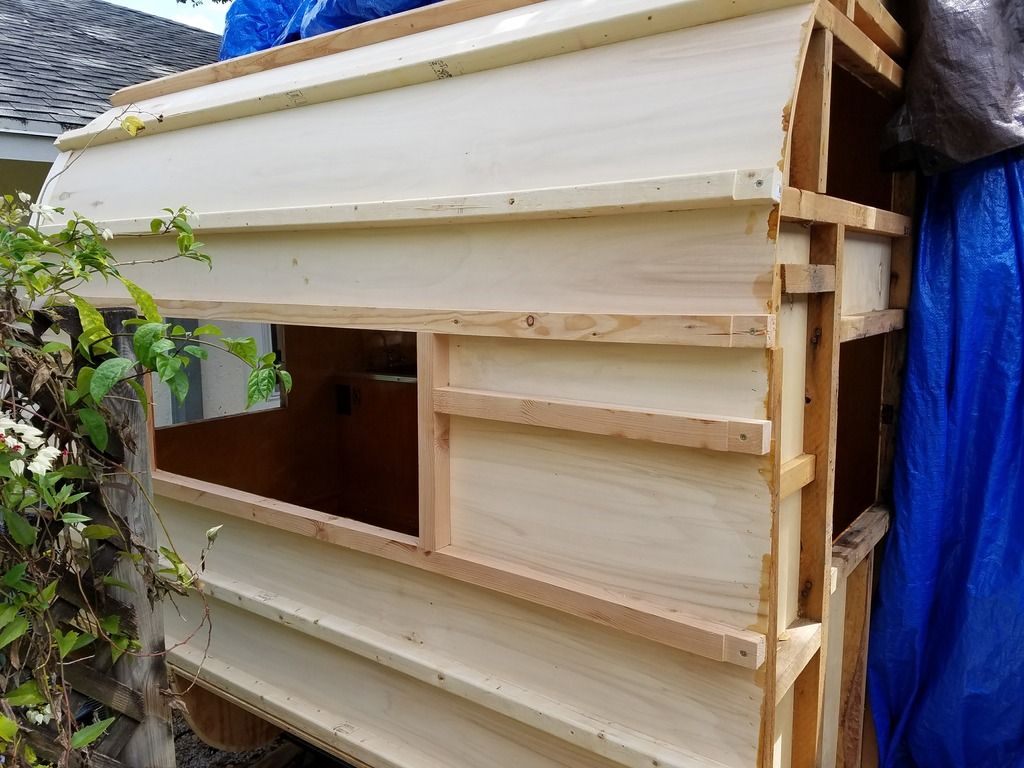 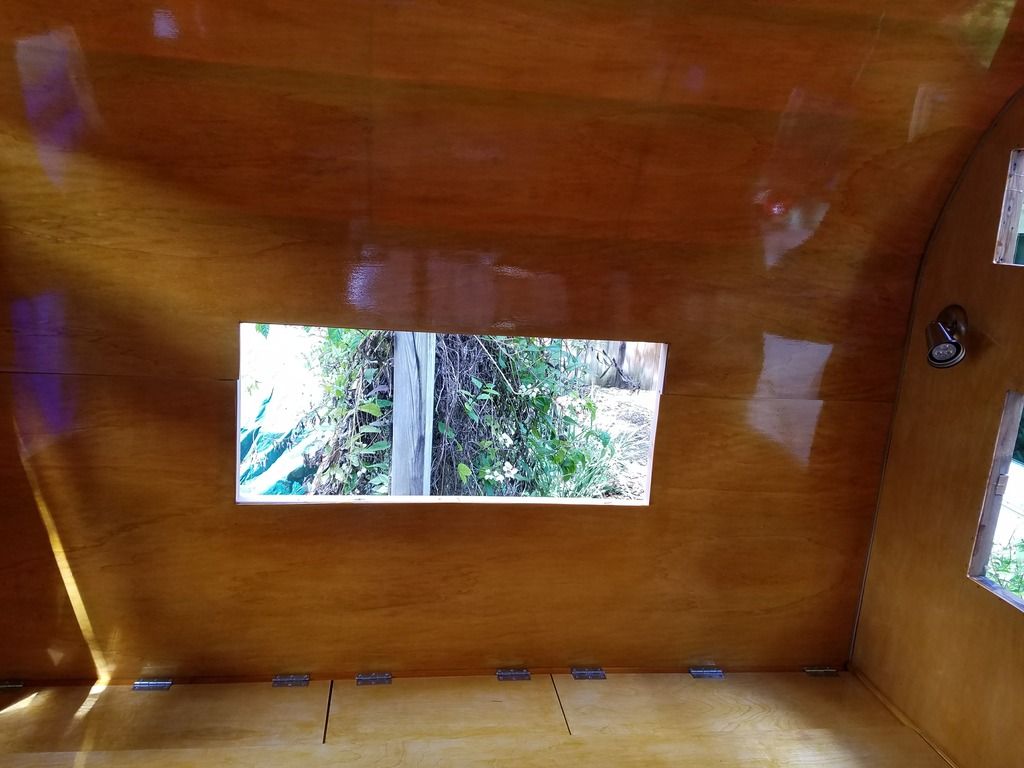 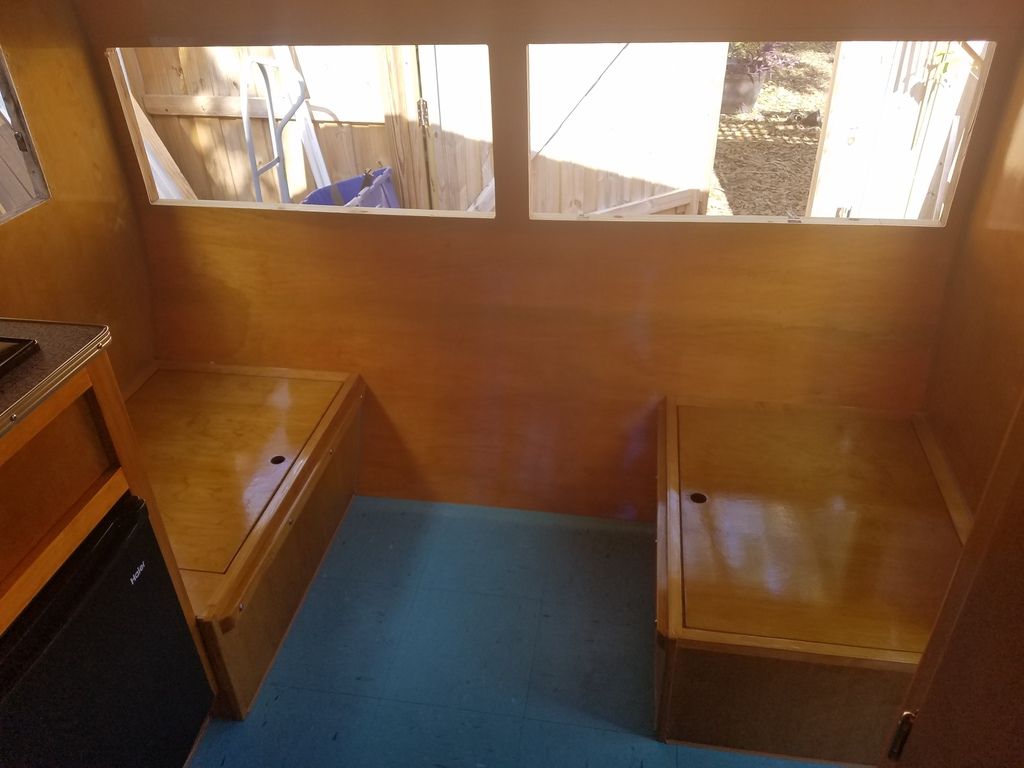 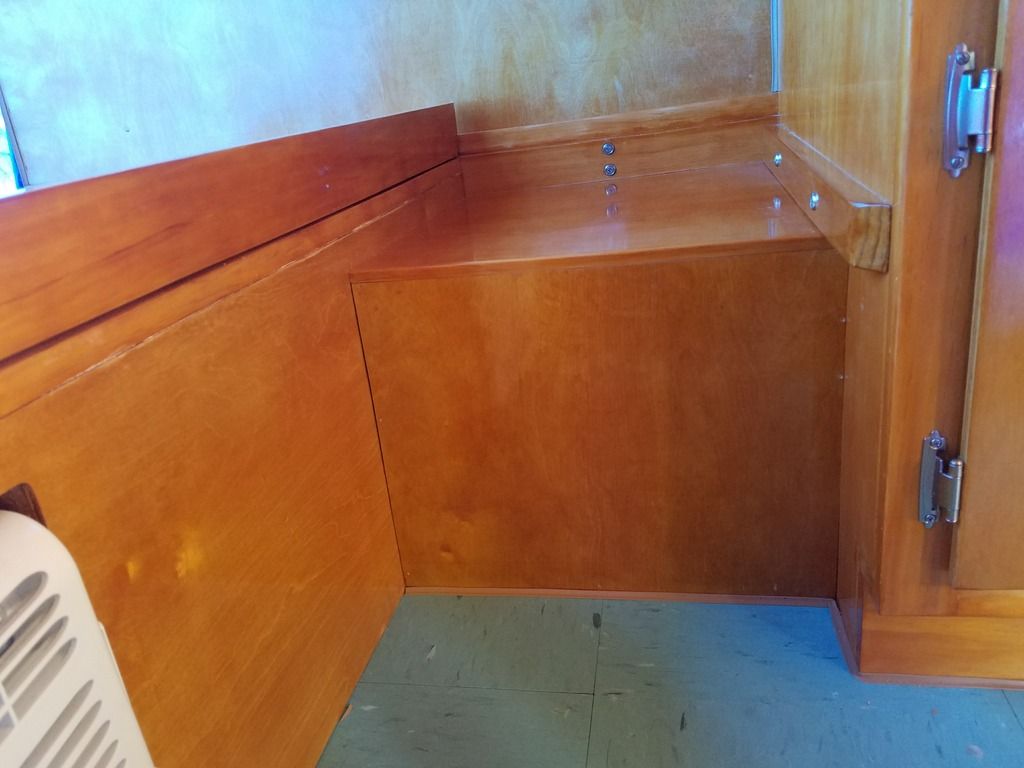 And here's a sneak peak at the new material for the cushions (After we bought the material, we couldn't help but wrap the cushions to see what they would look like): 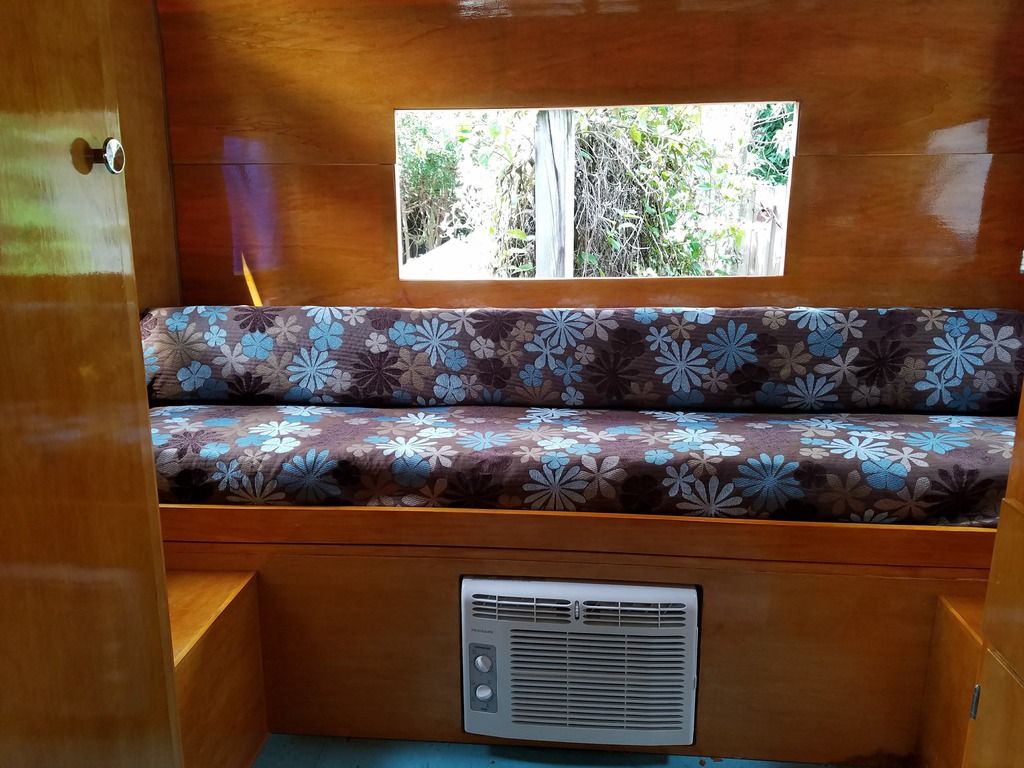 From there, we finished running wires and we installed new LP lines. We mounted two original light fixtures above the kitchen, one on either side of the cabinet, and installed LED fixtures under the cabinet. 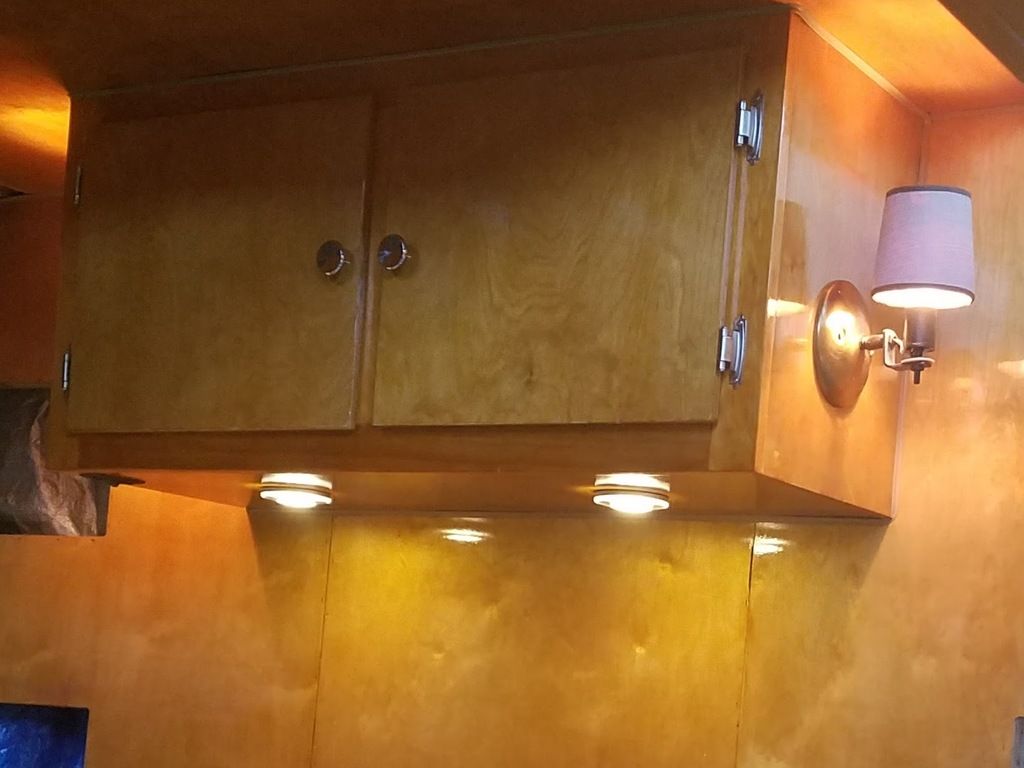 With new LP lines came fire in the stove and light from the origical LP lamp:  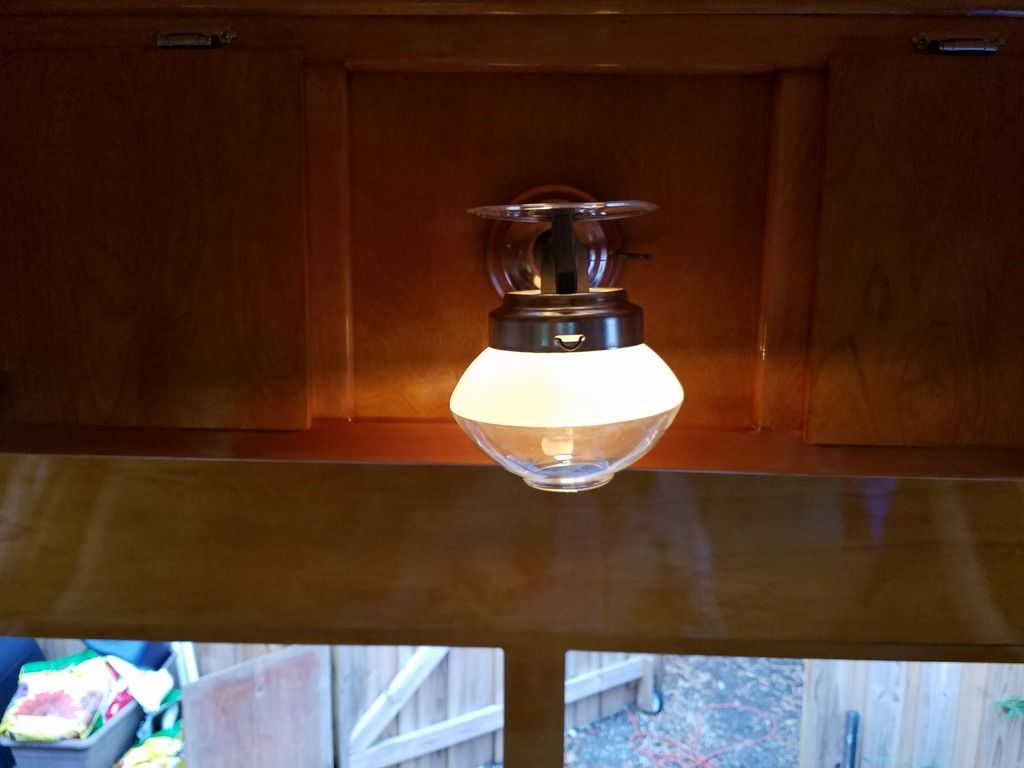 Finally, last week, I made and installed an aluminum back splash above the kitchen: 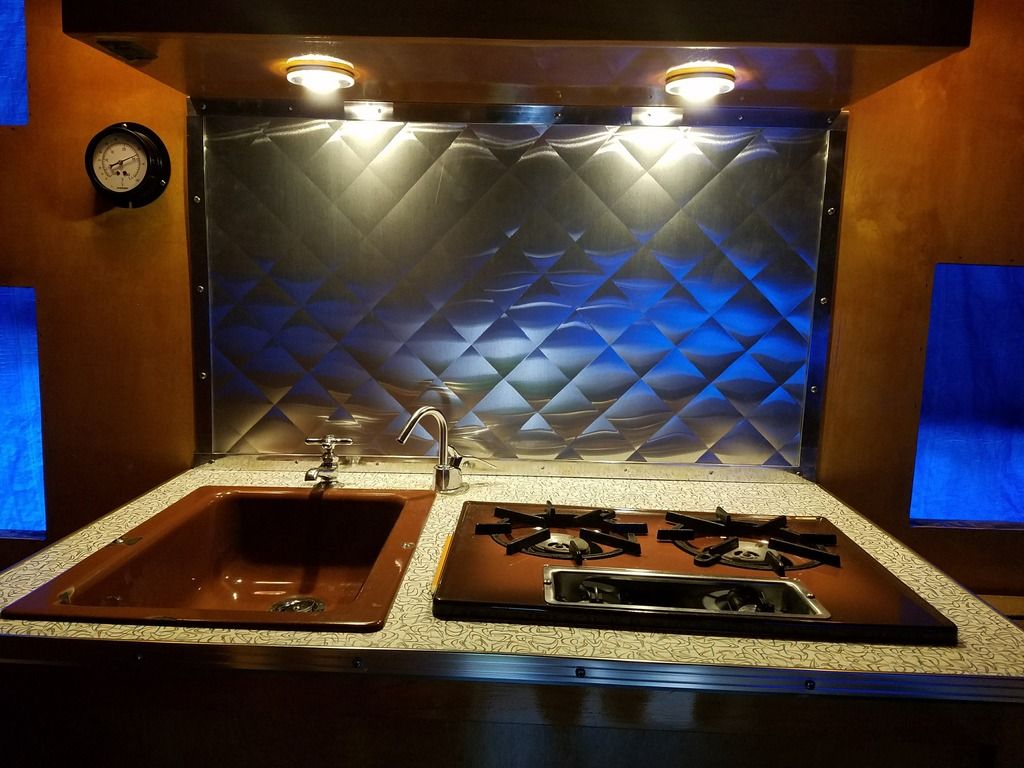 I bought the aluminum at HD and used the screen roller technique (posted here on the forum) to create the diamond pattern. The trim is just aluminum strips I polished on the buffing wheel. The fixture on the right is an old-school thermometer my buddy gave me. The line to the sensor runs down the wall (behind the paneling) and through the floor. The temperature sensor is mounted under the trailer. And that's it! We've reached the current status on the build. Thanks again to all the forum members who have posted so much useful information here. We could not have gotten to this point without your help. Now, hopefully it won't rain this weekend and we can get some more work done! |
|
pdalber
Junior Member
Posts: 75
Likes: 37
Currently Offline
|
Post by pdalber on Nov 13, 2017 18:28:38 GMT -8
So, its been a while since I posted on my project. I got pretty frustrated when a certain photo sharing app changed their "policy" and blocked everyone from seeing the images in my thread. But, now I'm almost finished and a solution has been found for the blocked photos, so I tought I'd share. Since the last time, I received a shipment from Hemet Valley RV and all new aluminum has been installed: 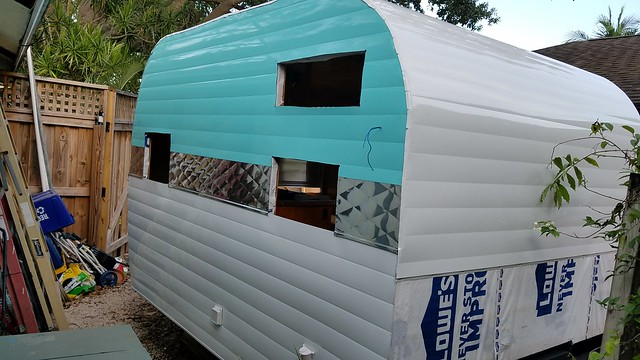 20170812_192120 20170812_192120 by pdalber, on Flickr Next came the windows, doors, and fixtures: 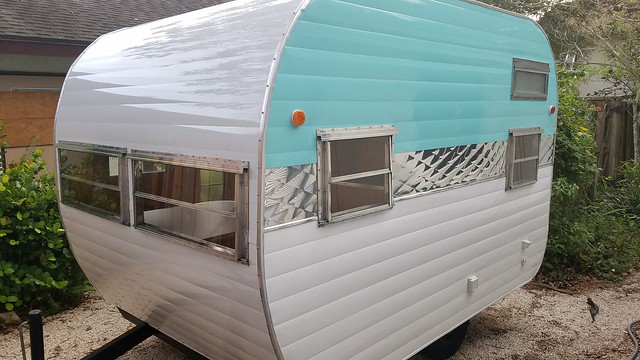 20170930_183750 20170930_183750 by pdalber, on Flickr I was really happy with the way the A/C venting came out. As you (hopefully) saw in an earlier post, I installed a window AC under the gaucho bed. I cut intake and exhaust vents in the rear panel, used expanded sheet aluminum to cover the holes and trimmed it out with aluminum strips. 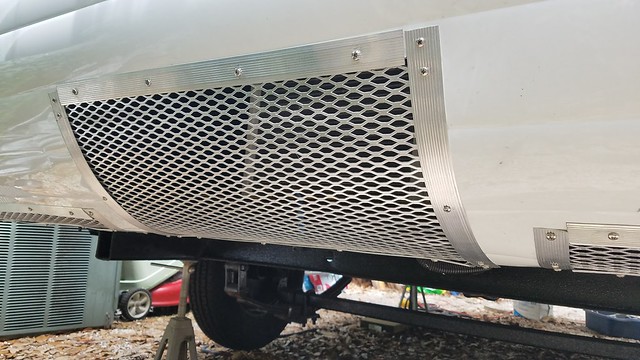 20170903_141048 20170903_141048 by pdalber, on Flickr 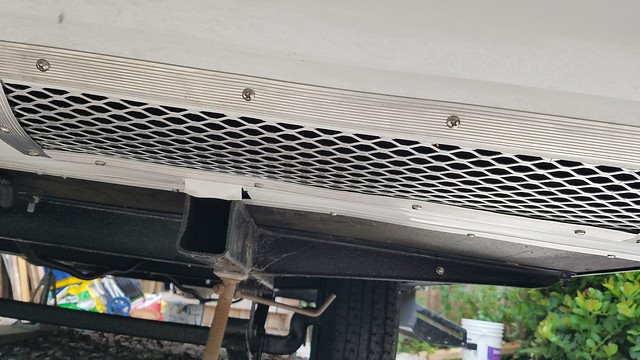 20170903_141053 20170903_141053 by pdalber, on Flickr 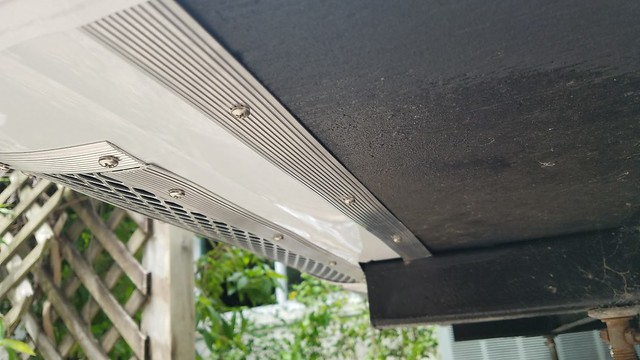 20170903_141107 20170903_141107 by pdalber, on Flickr This past weekend I cleaned up the aluminum frame for my rock guard and replaced the original fiberglass panels with polycarbonate roof panels from HD and a piece of lexan from a local plastic shop.  20171111_171755 20171111_171755 by pdalber, on Flickr While I was working outside, my wife was working on curtains and some final interior details: 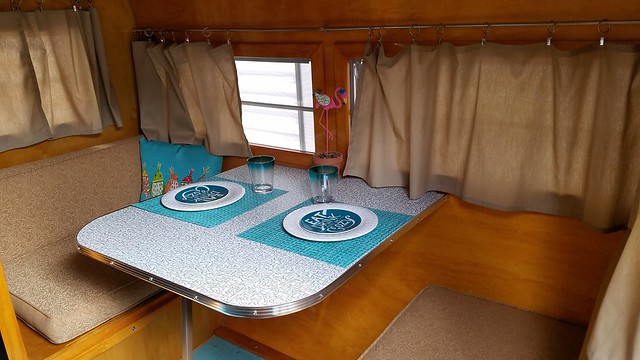 20171112_115942 20171112_115942 by pdalber, on Flickr 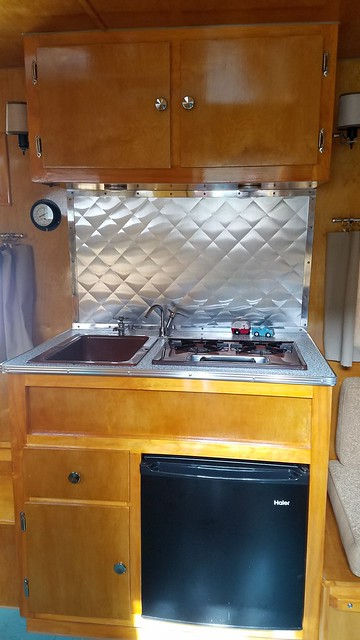 20171112_115951 20171112_115951 by pdalber, on Flickr 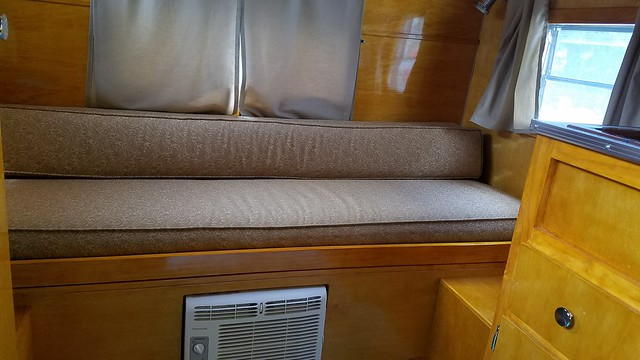 20171112_120002 20171112_120002 by pdalber, on Flickr We have new material to re-upholster the cushions, we're waiting on an awning from Marti's Awnings, and I ordered vinyl decals to replace the original logos. Aside from that, we're ready to go camping! |
|
mrmarty51
Leading Member
Posts: 1,787
Likes: 423
1972 HOMEMADE
Currently Offline
|
Post by mrmarty51 on Nov 13, 2017 18:55:23 GMT -8
You have done some might nice things with this camper.
Seems it is about time for You to enjoy it now. LOL
|
|
antonia
New Member
Posts: 1
Currently Offline
|
Post by antonia on Oct 21, 2020 13:13:13 GMT -8
I just purchased a 1965 Carolina Traveler. The young man I purchased it from accepted a title from DMV that has multiple errors. Where did you find the vin on your trailer? Thank you in advance.
|
|
|
|
Post by vikx on Oct 22, 2020 22:00:06 GMT -8
This member has not logged in since June of 2019. Post on the main board for help.
|
|


