gonekayaking
Active Member
 enjoying using my camper and not working on it anymore!
Posts: 410 
Likes: 75
1956 Shasta 1500
Currently Offline
|
Post by gonekayaking on Jun 19, 2013 10:41:07 GMT -8
"I found out the Tyron bands are super expensive, and that they probably don't come in such a small size.
We had a sway bar installed in Vegas after a day of 40mph winds with 75mph gusts. It does help, but it also makes a heck of a lot of noise at low speeds. Is that just because it's new or do I need to loosen it?"
|
|
gonekayaking
Active Member
enjoying using my camper and not working on it anymore!
Posts: 410
Likes: 75
1956 Shasta 1500
Currently Offline
|
Post by gonekayaking on Jun 19, 2013 10:41:23 GMT -8
"Wondering if that may be it. I bought it a Camper World, which I would ordinarily not do, but were were in Las Vegas, it was Sunday and well that was my choice. I'll give my local trailer place a holler and see what they say.
Vikx by backing off do you mean...loosening it? (going counterclockwise on the on/off lever)"
|
|
gonekayaking
Active Member
enjoying using my camper and not working on it anymore!
Posts: 410
Likes: 75
1956 Shasta 1500
Currently Offline
|
Post by gonekayaking on Jun 19, 2013 10:41:36 GMT -8
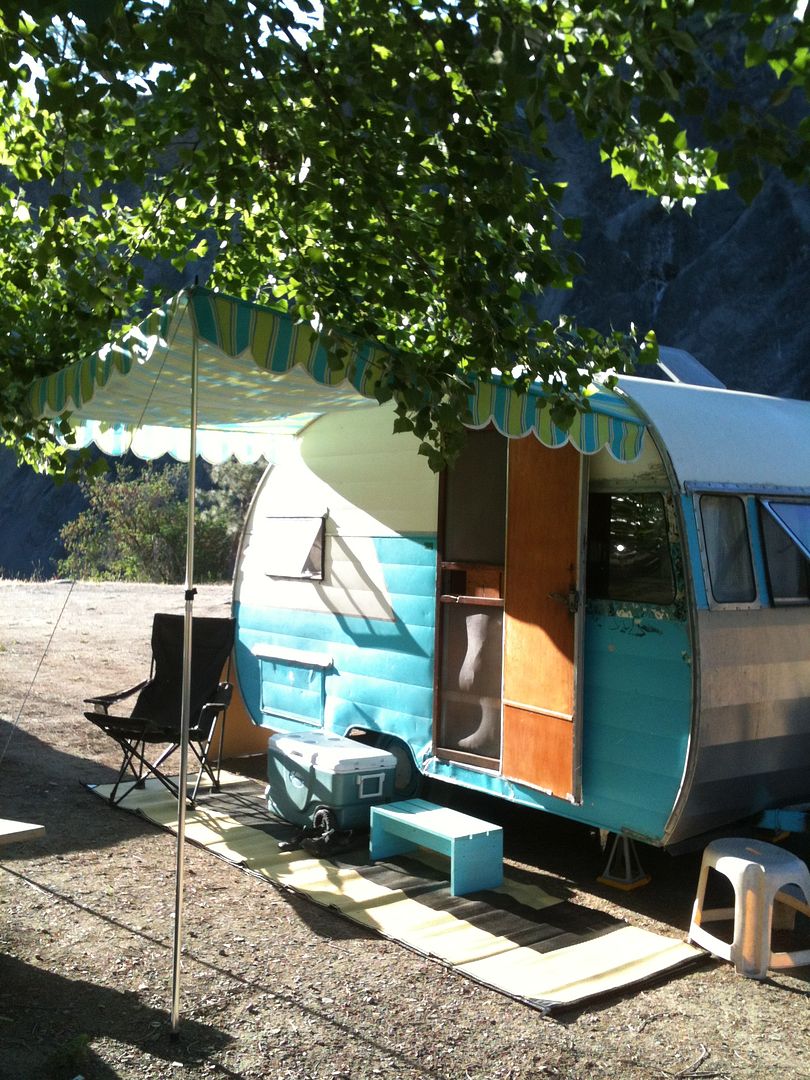
"Finally finished the table in boomerang laminate (got it over a year ago) and installed on the VTS table rail, with rockler folding hinge. Used aluminum face nosing from a great local supplier (they do have some other outlets) prohmi.com 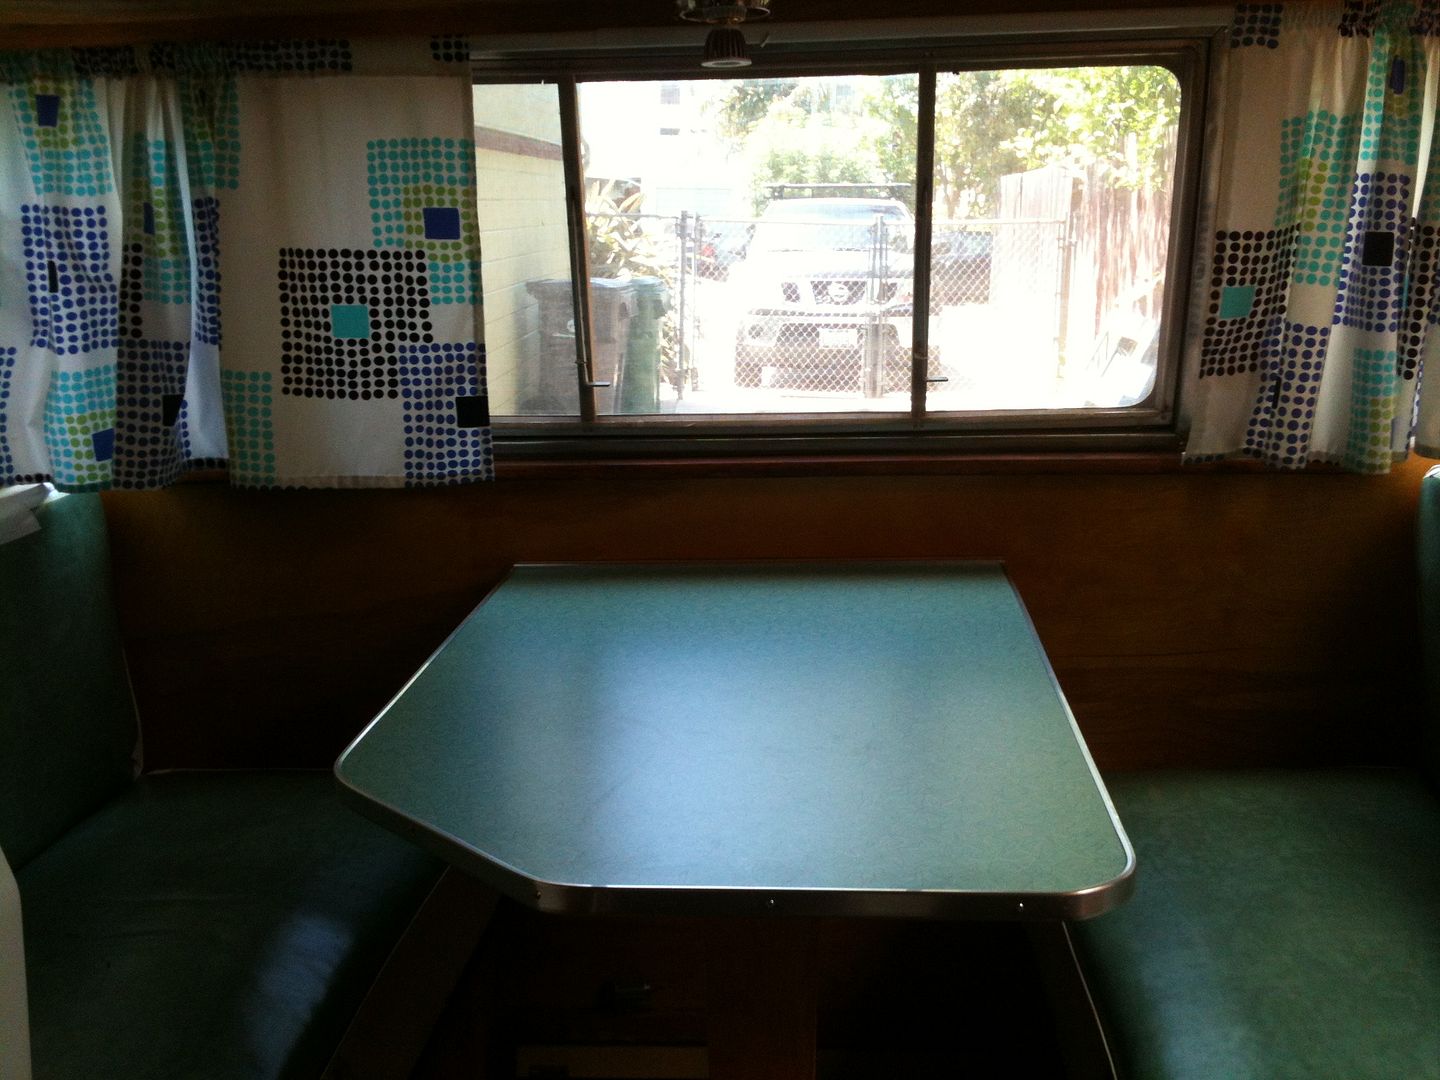 Also finished the awning! Haven't been able to set it up but did slide it in the rail. Used lithium powder for to lubricate the rail. Got keder awning rope, dacron trim and spur grommets from sailrite.com. A great source for supplies for the finishing touches, with some good streaming videos. 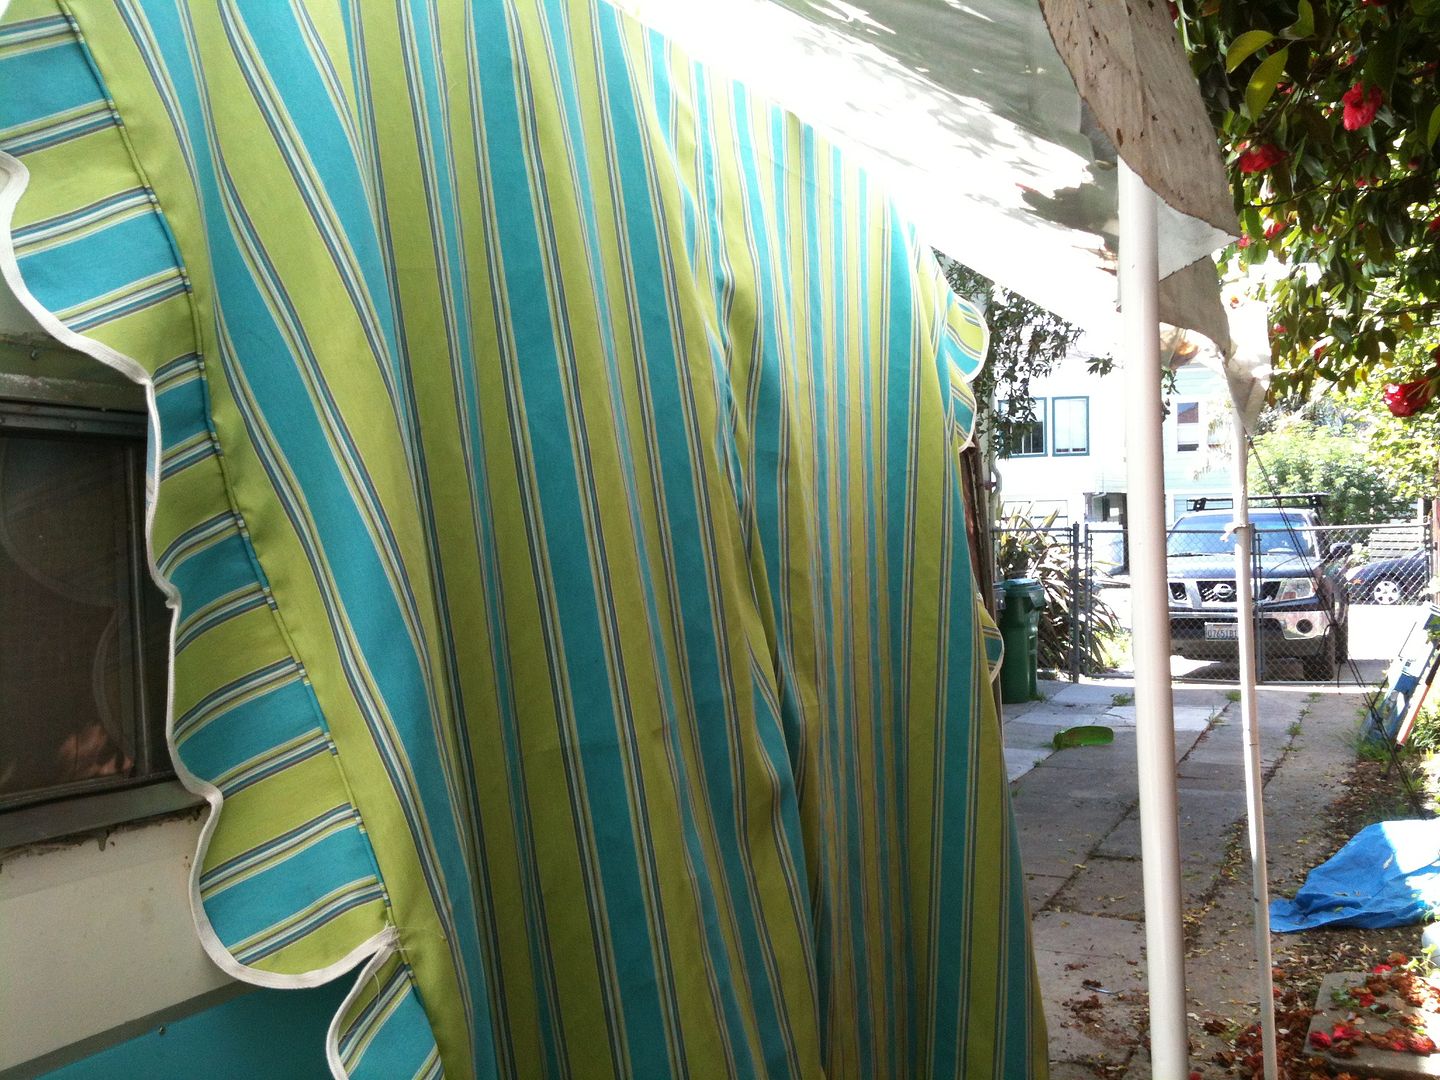 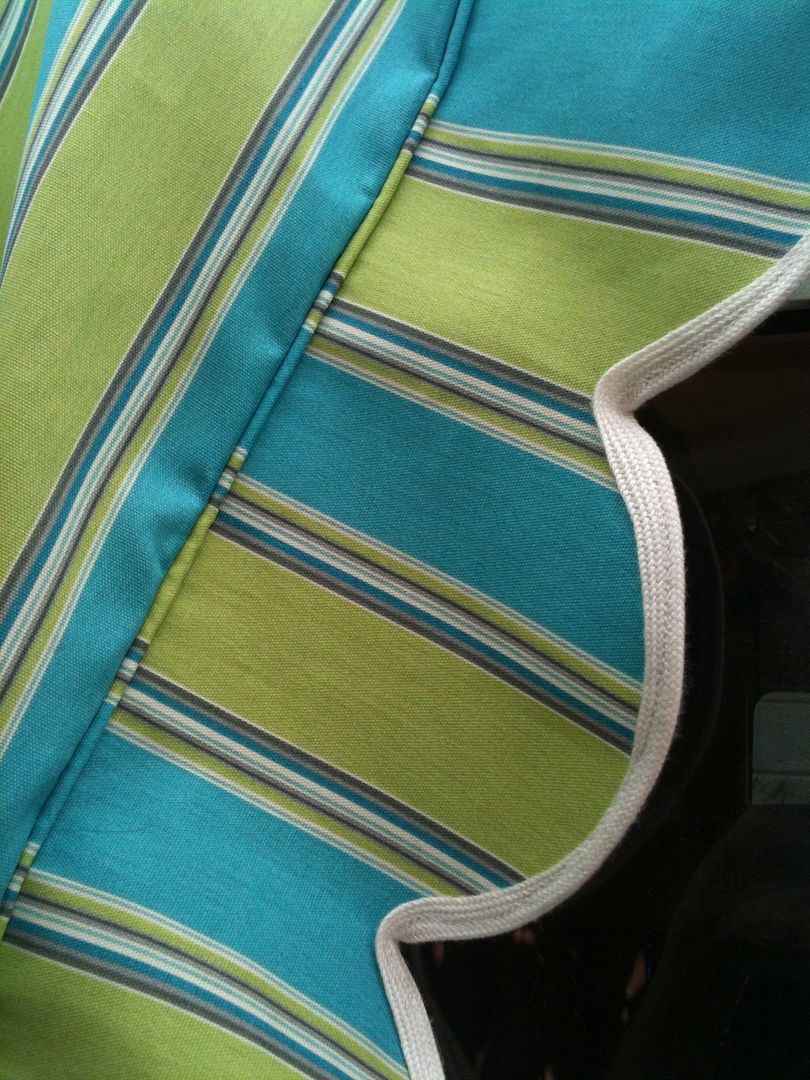 www.sailrite.com/Awning-Track-Sewn-to-Fabric-Keder-Rail-Strip-Streaming-Video www.sailrite.com/Awning-Track-Sewn-to-Fabric-Keder-Rail-Strip-Streaming-Video" |
|
gonekayaking
Active Member
enjoying using my camper and not working on it anymore!
Posts: 410
Likes: 75
1956 Shasta 1500
Currently Offline
|
Post by gonekayaking on Jun 19, 2013 10:41:59 GMT -8
"Aw shucks, guys and gals, thank you. It does feel good to be finally doing the things I thought I'd be doing to begin with over a year ago. STill a few more biggies-- upholstery of the seats, rebuilding the door anc cargo hatches, and last but not least....painting the exterior!
Harrison, the sail rite awning rope fits perfectly in the rail (not the vinyl the other one). I just sewed a couple of lines of straight stitches close together and then another along the bottom edge of the tape. I used heavy duty polyester thread (gutterman) and a universal needle...worked fine. I'll try to get a picture up soon, but basically it's exactly as shown on the sailrite video except of course on a larger scale."
|
|
gonekayaking
Active Member
enjoying using my camper and not working on it anymore!
Posts: 410
Likes: 75
1956 Shasta 1500
Currently Offline
|
Post by gonekayaking on Jun 19, 2013 10:42:14 GMT -8
|
|
gonekayaking
Active Member
enjoying using my camper and not working on it anymore!
Posts: 410
Likes: 75
1956 Shasta 1500
Currently Offline
|
Post by gonekayaking on Jun 19, 2013 10:42:29 GMT -8
"Making progress on doors-- the screen door, main door and baggage doors all need a rebuild. I've gotten the door framed out, doing insulation today. The metal trim pieces on the door were trashed so am waiting for new ones to be fabricated. Once I have those done I can do the final fitting. I know the belt sander will be put to use as the door opening is not square. 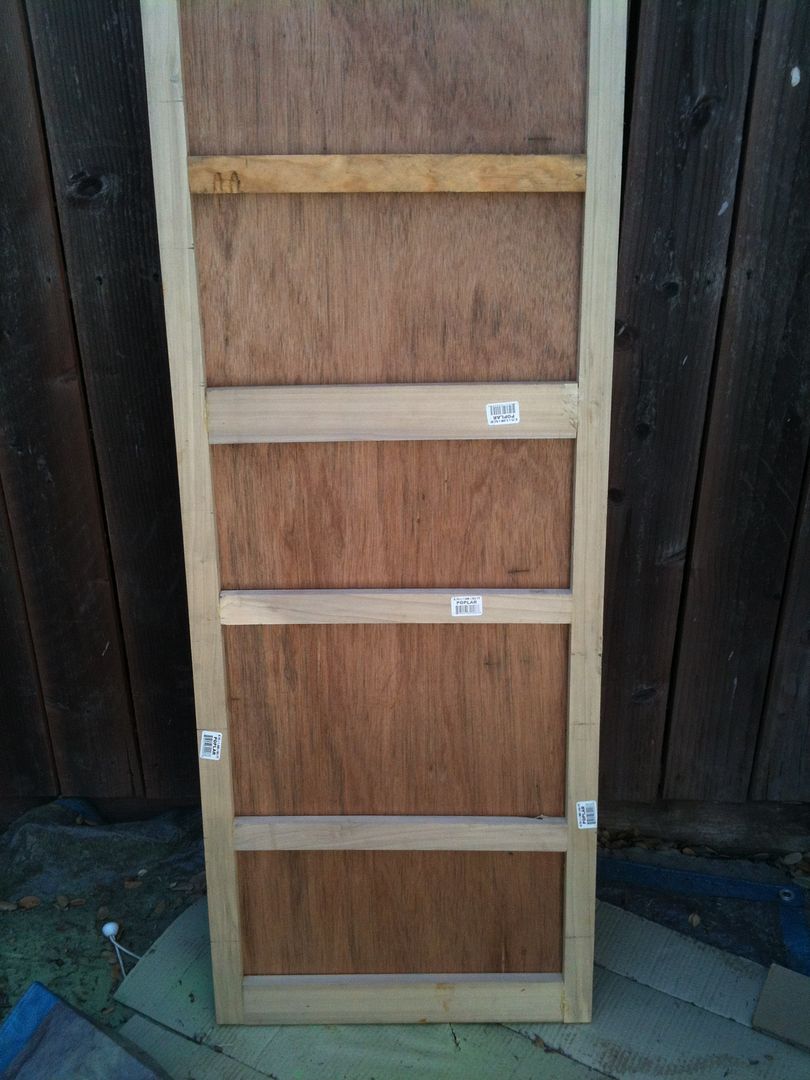 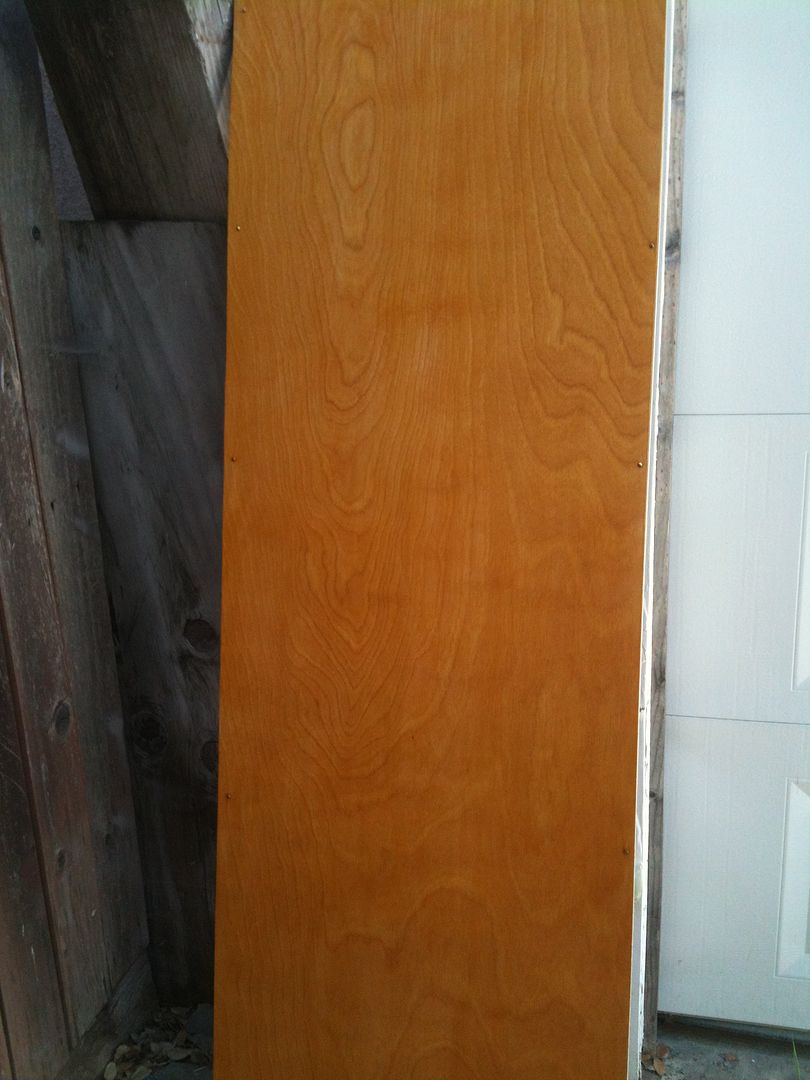 Yesterday I finished building the birch screen door--joined with 1/4"" dowels and gorilla glue, finished with a bunch of coats of shellac and french polish method. I'm really happy with how the screen door turned out--added additional pieces on the bottom panel to keep the dog from busting out the door. Since I don't have a router I used screen mold to create an edge for the sliding panel in the door and then left it sticking out on the other side to add some profile detail to that side. 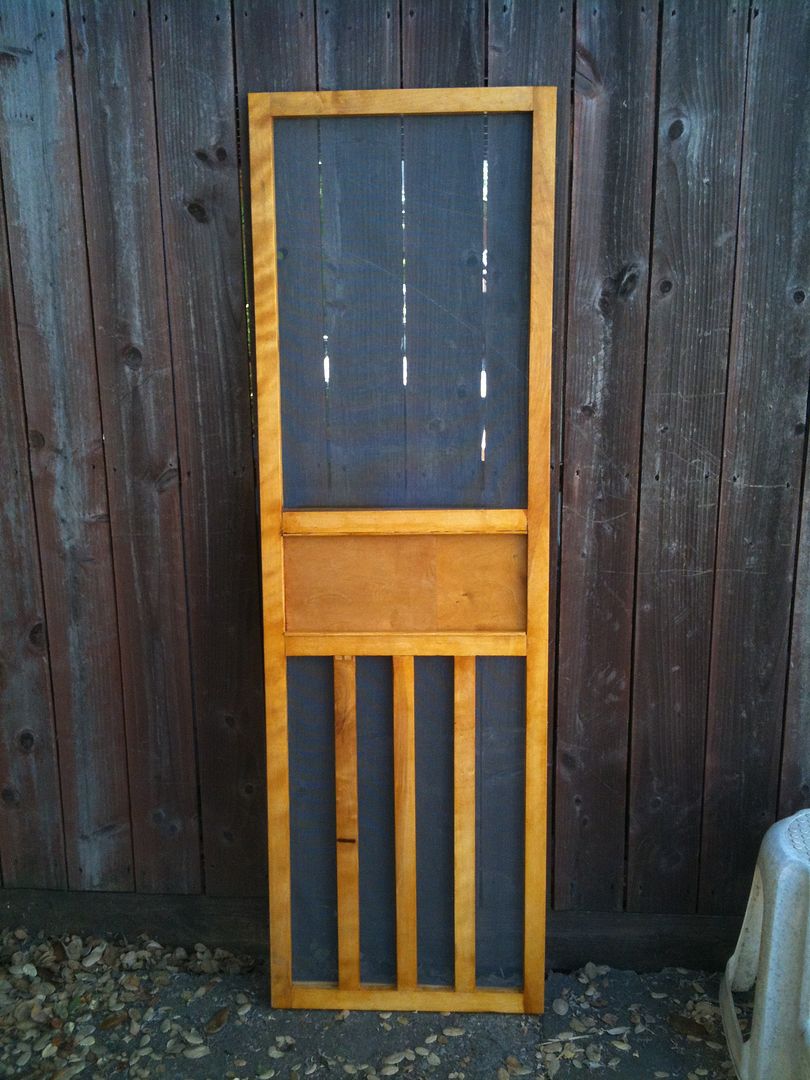 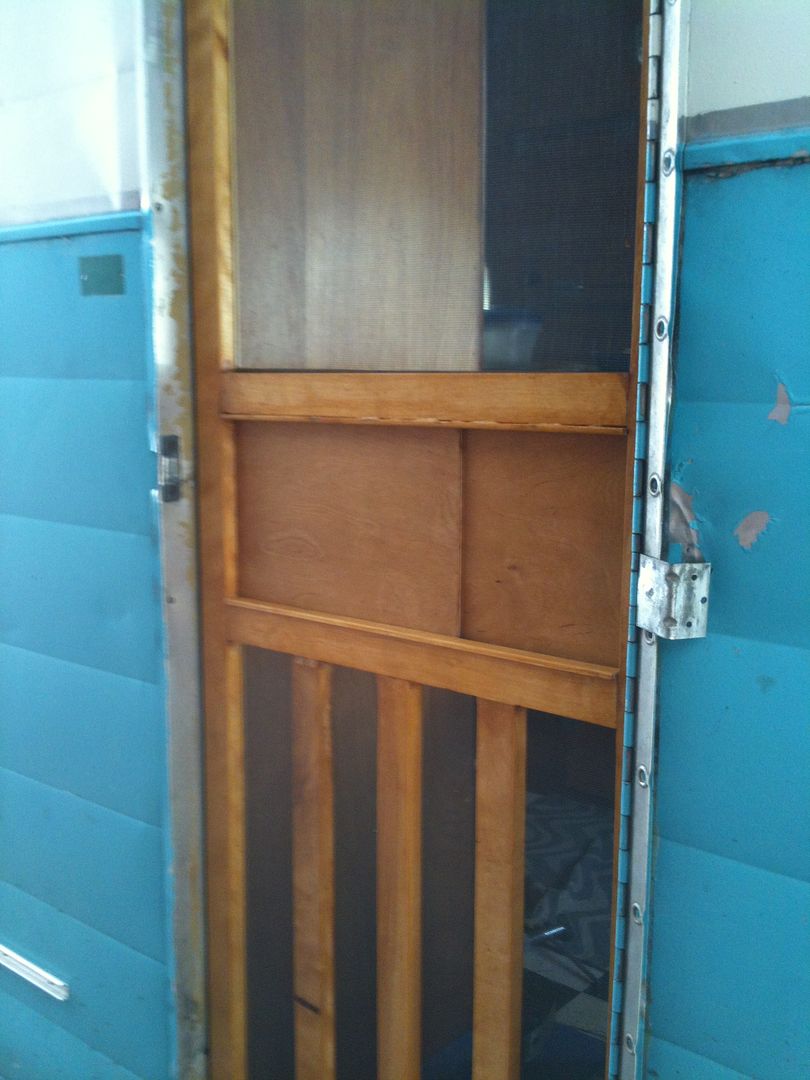 I'm keeping the outside lock handle but decided to replace the inside lock...it was just crappy looking. On order from VTS." |
|
gonekayaking
Active Member
enjoying using my camper and not working on it anymore!
Posts: 410
Likes: 75
1956 Shasta 1500
Currently Offline
|
Post by gonekayaking on Jun 19, 2013 10:42:47 GMT -8
"While I'm waiting for the aluminum door trim to be finished decided to put in the back splash that I bought a while back. It's that faux tin stuff...I figure if I don't like it down the road will be easy enough to replace but for now I like it. Decided to do something a little more contemporary...the design reminds me of water...in keeping with the watery theme of my trailer. 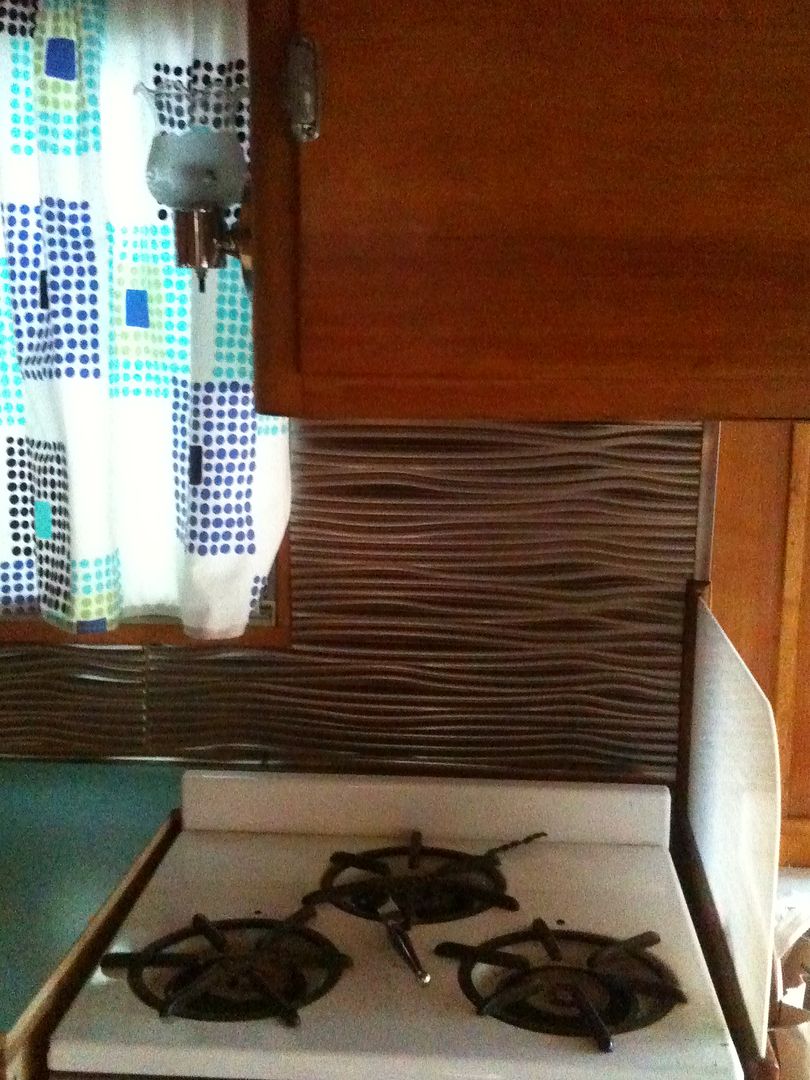 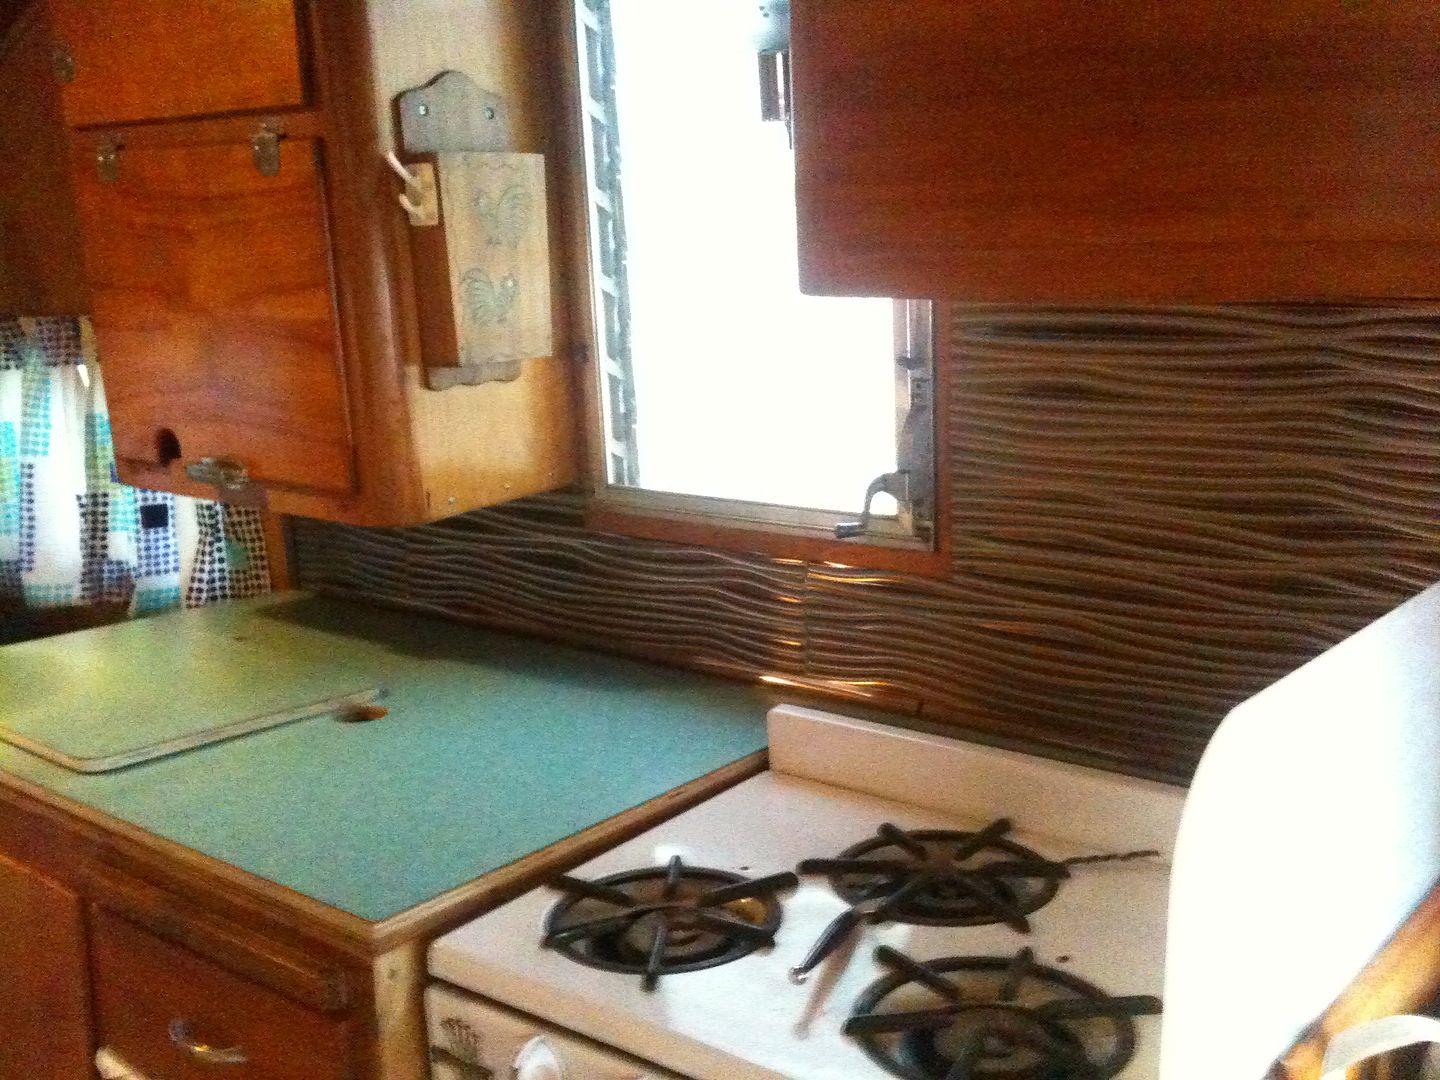 " |
|
gonekayaking
Active Member
enjoying using my camper and not working on it anymore!
Posts: 410
Likes: 75
1956 Shasta 1500
Currently Offline
|
Post by gonekayaking on Jun 19, 2013 10:43:05 GMT -8
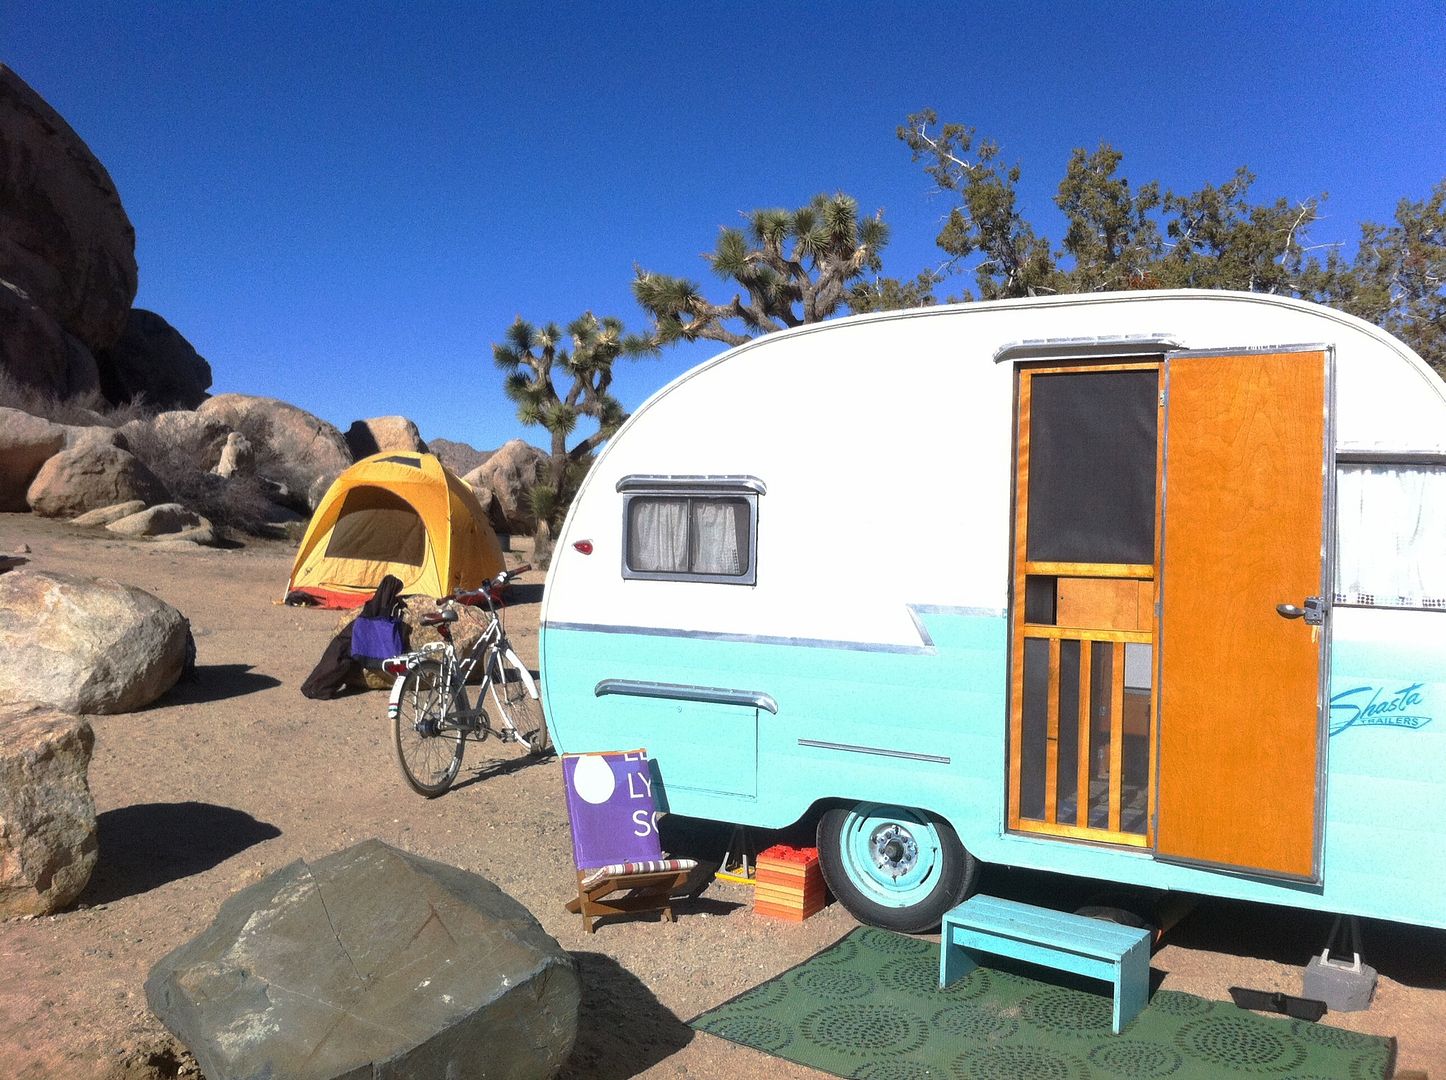
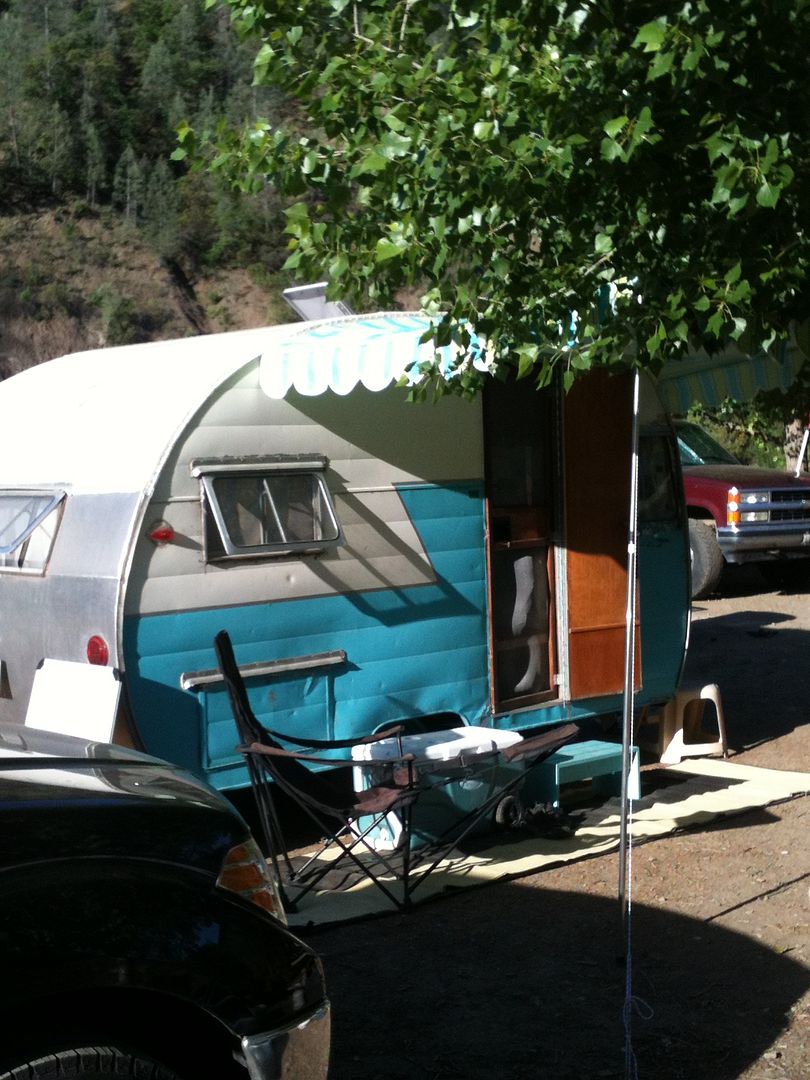
" [shadow=LimeGreen,left,300]Bought Paint!!![/shadow] Okay I am convinced after seeing the recent discussions that my best bet is to roll on (maybe a 15% chance I'll spray instead) Ace Rust Stop paint. I got out a swatch from my awning and my Benjamin moore Fan Deck and am set with 2 quarts of mexicali turquoise www.benjaminmoore.com/en-us/paint-color/mexicaliturquoise for the bottom half of my trailer. I am also toying with the idea of a thin lime green pin strip below the z which will be bare metal. Here's the awning fabric for a reminder-- in real life the awning looks more aqua, and the paint swatch looks less blue..so the paint will be the same tonal value as the awning just a bit lighter. Since I only have my narrow 10 ft wide driveway to work in I'm thinking spraying could be difficult. But I'm open to being convince otherwise if other think it is imminently preferable to rolling on as advised in the numerous threads on car resto forums, %50 paint job etc.... Let the prep work begin...hope to finish that this weekend and then paint in a couple of weeks!" |
|
gonekayaking
Active Member
enjoying using my camper and not working on it anymore!
Posts: 410
Likes: 75
1956 Shasta 1500
Currently Offline
|
Post by gonekayaking on Jun 19, 2013 10:43:22 GMT -8
" Ross - I think that your simple explanation about how these trailers were put together should go somewhere in one of the new owner or basic Shasta info sections. This is exactly how they were put together (as we figured out when we dismantled Hamlet), and why, despite the apparent flimsiness of the separate pieces, it all works when it's put together. The cabinets help give stability to the walls, the ceiling holds it all together and the 3/4 inch plywood strip that curves around all the ceiling panels, when held together by the ceiling crossbeams, provides the strength and stability to make it work. At least until the rot sets in. Any time one of these is reconstructed differently than it was initially, there is a chance that it will affect the overall strength of the trailer. It's always good to see folks who allow for that in reconstruction. Thanks for your erudite explanation. Huh? Are you sure you wanted to post this here?" |
|
gonekayaking
Active Member
enjoying using my camper and not working on it anymore!
Posts: 410
Likes: 75
1956 Shasta 1500
Currently Offline
|
Post by gonekayaking on Jun 19, 2013 10:43:37 GMT -8
Lynn did you wet sand between coats and wax at the end? My understanding is that these steps do a lot to minimize any texture left by the roller.
|
|
gonekayaking
Active Member
enjoying using my camper and not working on it anymore!
Posts: 410
Likes: 75
1956 Shasta 1500
Currently Offline
|
Post by gonekayaking on Jun 19, 2013 10:43:51 GMT -8
" Hamlet will go find a hole to crawl into now. Way too many things on the plate and not paying attention to where I am! Hamlet I do agree that the basic ""how they were built"" explanation should indeed be a sticky in the restoration thread...as a read this first kind of thing. And while the name comes from being a little canned ham, crawling in a hole would from a Will Shakespeare perspective be very appropriate for Hamlet to do ;D " |
|
gonekayaking
Active Member
enjoying using my camper and not working on it anymore!
Posts: 410
Likes: 75
1956 Shasta 1500
Currently Offline
|
Post by gonekayaking on Jun 19, 2013 10:44:05 GMT -8
Or perhaps if you are crazy enough to buy another one you could call her Ophelia.
|
|
gonekayaking
Active Member
enjoying using my camper and not working on it anymore!
Posts: 410
Likes: 75
1956 Shasta 1500
Currently Offline
|
Post by gonekayaking on Jun 19, 2013 10:44:17 GMT -8
Finished the Door, Cargo Door and Screen Door!!! woohoo. No pics because it just looks like it is supposed to look. One question though..the screen door will only stay closed when the latch is on. Is there a rull of thumb for mounting it to get it to close all the way? It's not hitting the jamb anywhere... the hinges are just really springy
|
|
gonekayaking
Active Member
enjoying using my camper and not working on it anymore!
Posts: 410
Likes: 75
1956 Shasta 1500
Currently Offline
|
Post by gonekayaking on Jun 19, 2013 10:44:32 GMT -8
Now that I'm back from vacation (without trailer) I'll give that a go and see if it helps.
|
|
gonekayaking
Active Member
enjoying using my camper and not working on it anymore!
Posts: 410
Likes: 75
1956 Shasta 1500
Currently Offline
|
Post by gonekayaking on Jun 19, 2013 10:44:44 GMT -8
|
|