Post by nccamper on Dec 7, 2014 21:24:22 GMT -8
 Compact-finished inside 2 by
 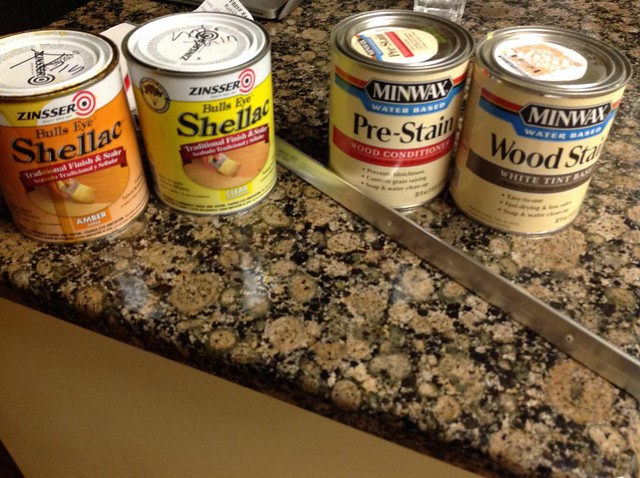 Compact-table new2 by
 Original table
 Compact-orginal table 2 by
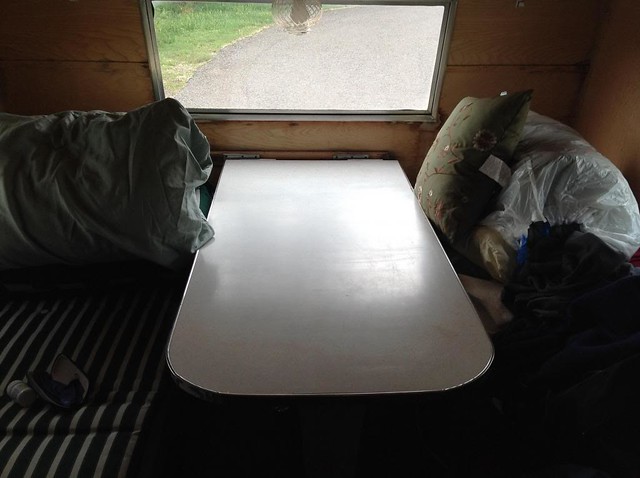
 Our 1962 Shasta Compact came with a 4' long table that weighs a ton. In a 10' camper, the table seemed silly. And very hard to handle in a small space. We wanted something smaller, for two people, without butchering a 52 year old table in perfect condition.
I thought I'd share an idea for a cheap table that worked out well. I priced out vintage Formica and at $330 a sheet for the style we liked, it wasn't happening. So I thought I'd try something different.
I bought a piece of 3/4" birch finished grade plywood. I had the stain tinted with Harvest Grain yellow and bought table trim from Vintage Trailer Supply.
www.vintagetrailersupply.com/Countertop_Edge_3_4_Polished_p/vts-710.htm
1. Small piece of finish grade plywood from Lowes: around $20
2. Wood conditioner and tinted stain: $27
3. VTS metal table trim: $18 (shipping and packing material brought it to $36. Ouch!)
4. Pine board for the leg: $8
5. Hinge for the leg: $2.50
Total: $93
I should have ordered a few of the table trim pieces at once for future projects. Shipping cost was a killer for just one piece. But until I held one in my hand, and was sure of the quality, I didn't want to pay for more than one.
What went right? The VTS table trim is very easy to wrap around the corners.
From the project I still have 95% of the stain and wood conditioner. If you try this, make sure you buy a wood conditioner for water based stain (if you use the same stain in the photo). I also have an extra hinge and enough pine for another leg.
Word of warning? The VTS table trim pieces are only long enough for a 30" x 24" table. You'll need two if you go longer.
Steps (Clearly spelled out in detail for newbies to woodwork):
Cut the plywood to size. Our table is 28" long by 2' wide. I made the rounded edges using a paint can as a guide. I used a jigsaw with a fine blade.
Sand with 220 to make smooth then wipe clean with tack cloth or dry cloth.
Brush on wood conditioner then wipe off excess after a few minutes. Stain within no more than 2 hours.
I did one coat of stain to match the yellow of the Shasta Compact sliding cabinets. More coats will obviously make the color more pronounced. Make sure you rub in the stain with a dry cloth to have an even coat. Let dry completely. I applied three coats of clear polyurethane sanding with 220 between each coat. Don't sand the last coat.
Cut the table leg to the height you want. Our leg was 27" high, 5 1/2" at the top tapering to 2 1/2" at the bottom. I used a router with a rounded bit on the edges but you could just sand a little off to round it.
I stained the leg with 3 coats of thinned Bulls Eye Amber shellac followed by 2 coats of clear. I thinned it a little to make it easier to work with.
Table trim: Start with the trim even on one back corner (I drilled a small pilot hole for each screw). Work your way around one screw at a time, gently bending the trim around rounded corners as you go. Trim the end with a (metal blade) hacksaw.
Screw the hinge on the leg then onto the table.
I reused the hardware on the old table to attach it to the wall.
I hope this helps anybody needing a new table.