ndpap
Active Member

Posts: 127
Likes: 17
Currently Offline
|
Post by ndpap on Aug 30, 2013 4:26:52 GMT -8
|
|
hoosierpoet
Active Member
Posts: 187 
Likes: 18
Currently Offline
|
Post by hoosierpoet on Aug 30, 2013 5:24:39 GMT -8
Congratulations! (That is my project for NEXT year!) I'd love to see them - but I couldn't find them! Maybe I'm doing something wrong? I went through the album, and did see the piping for the edge but not the seats themselves...
|
|
|
|
Post by universalexports on Aug 30, 2013 12:25:34 GMT -8
congrats, that looks great.
|
|
keri
Active Member
Posts: 127
Likes: 15
Currently Offline
|
Post by keri on Aug 30, 2013 14:29:20 GMT -8
Those look great! If you get a chance, would you take some pictures of how you stapled it around the hinges? I can't quite wrap my mind around how that works for some reason.
Thanks!!
|
|
lovnvintage
Full Member
Posts: 573
Likes: 85
Currently Offline
|
Post by lovnvintage on Aug 30, 2013 15:18:25 GMT -8
I got motivated by your post this morning and decided to go take the old vinyl off the set I need to do. I removed all the staples and pulled off the old covers easily. Then there was about 3" of cotton batting,that was actually still in good condition, pulled it off. while pulling I did see a mouse nest in the corner so pulled it out and found the little mouse still there hanging on one of the springs-of course by this time it was just hair on a skeleton. After getting all the batting off was inspecting the springs and found the original tag still attached to one of the springs with manufacturers name, address in CA and telephone #. Took a pic but will leave attached for the future. And that is as far as I got, but was interesting. Wonder what I will find in the other one.
|
|
ndpap
Active Member
Posts: 127
Likes: 17
Currently Offline
|
Post by ndpap on Aug 31, 2013 2:44:15 GMT -8
I got motivated by your post this morning and decided to go take the old vinyl off the set I need to do. I removed all the staples and pulled off the old covers easily. Then there was about 3" of cotton batting,that was actually still in good condition, pulled it off. while pulling I did see a mouse nest in the corner so pulled it out and found the little mouse still there hanging on one of the springs-of course by this time it was just hair on a skeleton. After getting all the batting off was inspecting the springs and found the original tag still attached to one of the springs with manufacturers name, address in CA and telephone #. Took a pic but will leave attached for the future. And that is as far as I got, but was interesting. Wonder what I will find in the other one. Let me know if you have any questions about the process. I went to a little old man about 35 miles away from home to buy good foam at the suggestion of many. I bought 2" foam and placed it on top of the springs the fit it in around the sides, sort of tucking it in and sprayed with fabric adhesive. then at the little old upholstery guys suggestion, I covered them with burlap completely and stapled to the frames. I have the covers done but I may go get med density batting and wrap that around the burlap. I will post pix when I am down. DO you have a commercial machine?  ALso I used a 1/4" welting foot which I got from the local sewing machine repair guy for $10... Could not have done the job without it. |
|
ndpap
Active Member
Posts: 127
Likes: 17
Currently Offline
|
Post by ndpap on Aug 31, 2013 3:08:43 GMT -8
Those look great! If you get a chance, would you take some pictures of how you stapled it around the hinges? I can't quite wrap my mind around how that works for some reason. T Keri, I updated the pictures to include the piece of fabric that is sewn in to cover the hinges. with the burlap I basically just cut the excess fabric of and pushed it behind the hinge the stapled the rest in place s1367.photobucket.com/user/ndpap/library/shasta%20benches?sort=3&page=1 |
|
lovnvintage
Full Member
Posts: 573
Likes: 85
Currently Offline
|
Post by lovnvintage on Aug 31, 2013 4:20:40 GMT -8
I have my foam ready and plan to put batting on top of that. I do not have a commercial machine, I have two machines but I use my old brother machine for the heavy duty jobs and it does great. I bought my welting already made so I wouldn't have to deal with making it, not that it is all that hard just time consuming. Hoping to get the cover made after the holiday.
My old ones have the cheesecloth sewn into the seam and that would go down between the top and bottom of the seats. I took lots of pics but believe you don't staple the extra material around the hinges it is to give when you are laying them down. My old covers are in pretty decent shape for copying just worn out around the welting mainly.
|
|
gonekayaking
Active Member
enjoying using my camper and not working on it anymore!
Posts: 410
Likes: 75
1956 Shasta 1500
Currently Offline
|
Post by gonekayaking on Aug 31, 2013 13:14:04 GMT -8
Looking really good. Definitely use some dacron batting. It should fit really tight before you go to staple the vinyl to the frame. If I were doing mine again I would have added more batting on the top layer. Keri....around the hinges you make a flap that is not stapled. There's a piece of muslin that you sew to the vinyl cover where it folds. I called them wings. It's one piece of muslin as long as the seats folded in half. The flaps are then stapled separately to each seat frame. The idea being it holds the cover in place when the seat is a seat (keeps it from poofing out). You can sort of see it in these pictures. The project all my bench upholstering pics s96.photobucket.com/user/benmy/library/Shasta%20Restoration%20pics/Shasta%20bench%20picturesspecifc pics of the "wings" before  new pulled between the two cushions and stapled to the inside edges of each frame piece  how it looked after being stapled. 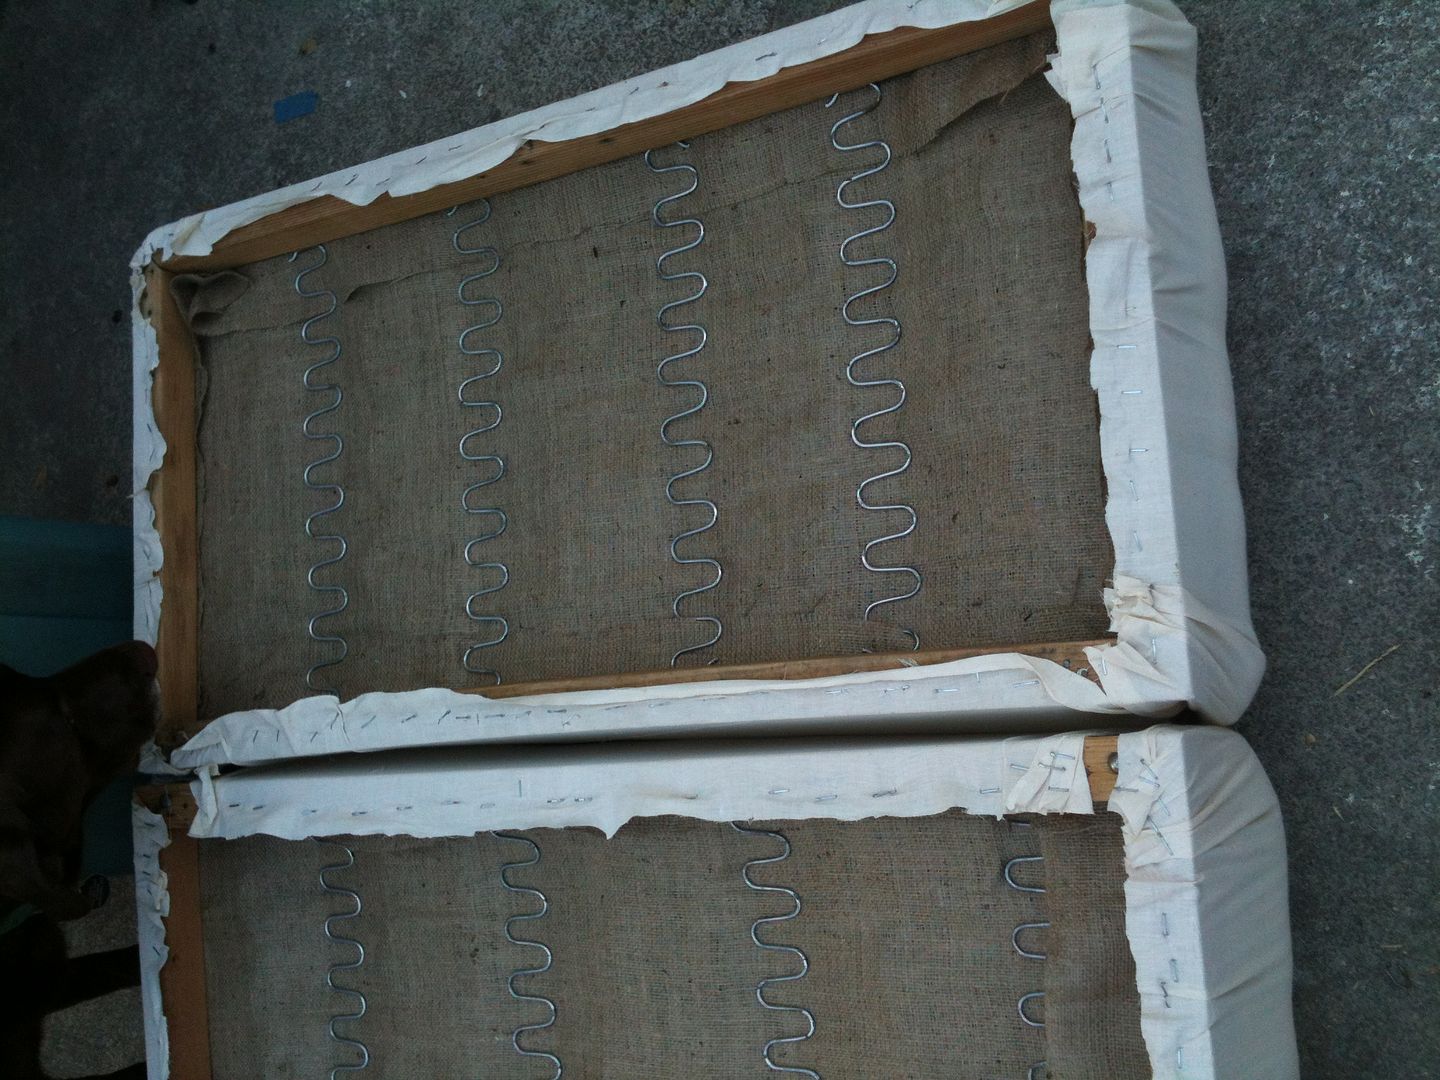 |
|
keri
Active Member
Posts: 127
Likes: 15
Currently Offline
|
Post by keri on Aug 31, 2013 17:30:42 GMT -8
Okay--I THINK I have this figured out in my head. Where the vinyl for the seat attaches to the vinyl for the back (in the crack where the top meets the bottom) you also sew a strip of muslin, then pull that muslin between the top and bottom and staple it to the frames so the vinyl in the crack stays in the crack. Right?
Why do you have to use muslin? Couldn't you just use the vinyl?
I've been sewing since for about 35 years and for some reason the construction of this thing is so confusing! Makes me wish the mice would have left me a LOT more to look at. So inconsiderate of them!!!
|
|
ndpap
Active Member
Posts: 127
Likes: 17
Currently Offline
|
Post by ndpap on Sept 1, 2013 12:08:08 GMT -8
Looking really good. Definitely use some dacron batting. It should fit really tight before you go to staple the vinyl to the frame. If I were doing mine again I would have added more batting on the top layer. Keri....around the hinges you make a flap that is not stapled. There's a piece of muslin that you sew to the vinyl cover where it folds. I called them wings. It's one piece of muslin as long as the seats folded in half. The flaps are then stapled separately to each seat frame. The idea being it holds the cover in place when the seat is a seat (keeps it from poofing out). You can sort of see it in these pictures. The project all my bench upholstering pics s96.photobucket.com/user/benmy/library/Shasta%20Restoration%20pics/Shasta%20bench%20picturesspecifc pics of the "wings" before new pulled between the two cushions and stapled to the inside edges of each frame piece how it looked after being stapled. When you were ready to staple the fabric on the seats did you do the wings( fabric that goes down in between and gets stapled to each side) or did you do the rest of it 1st and do those last? I am afraid to proceed!!!! |
|
gonekayaking
Active Member
enjoying using my camper and not working on it anymore!
Posts: 410
Likes: 75
1956 Shasta 1500
Currently Offline
|
Post by gonekayaking on Sept 1, 2013 12:13:00 GMT -8
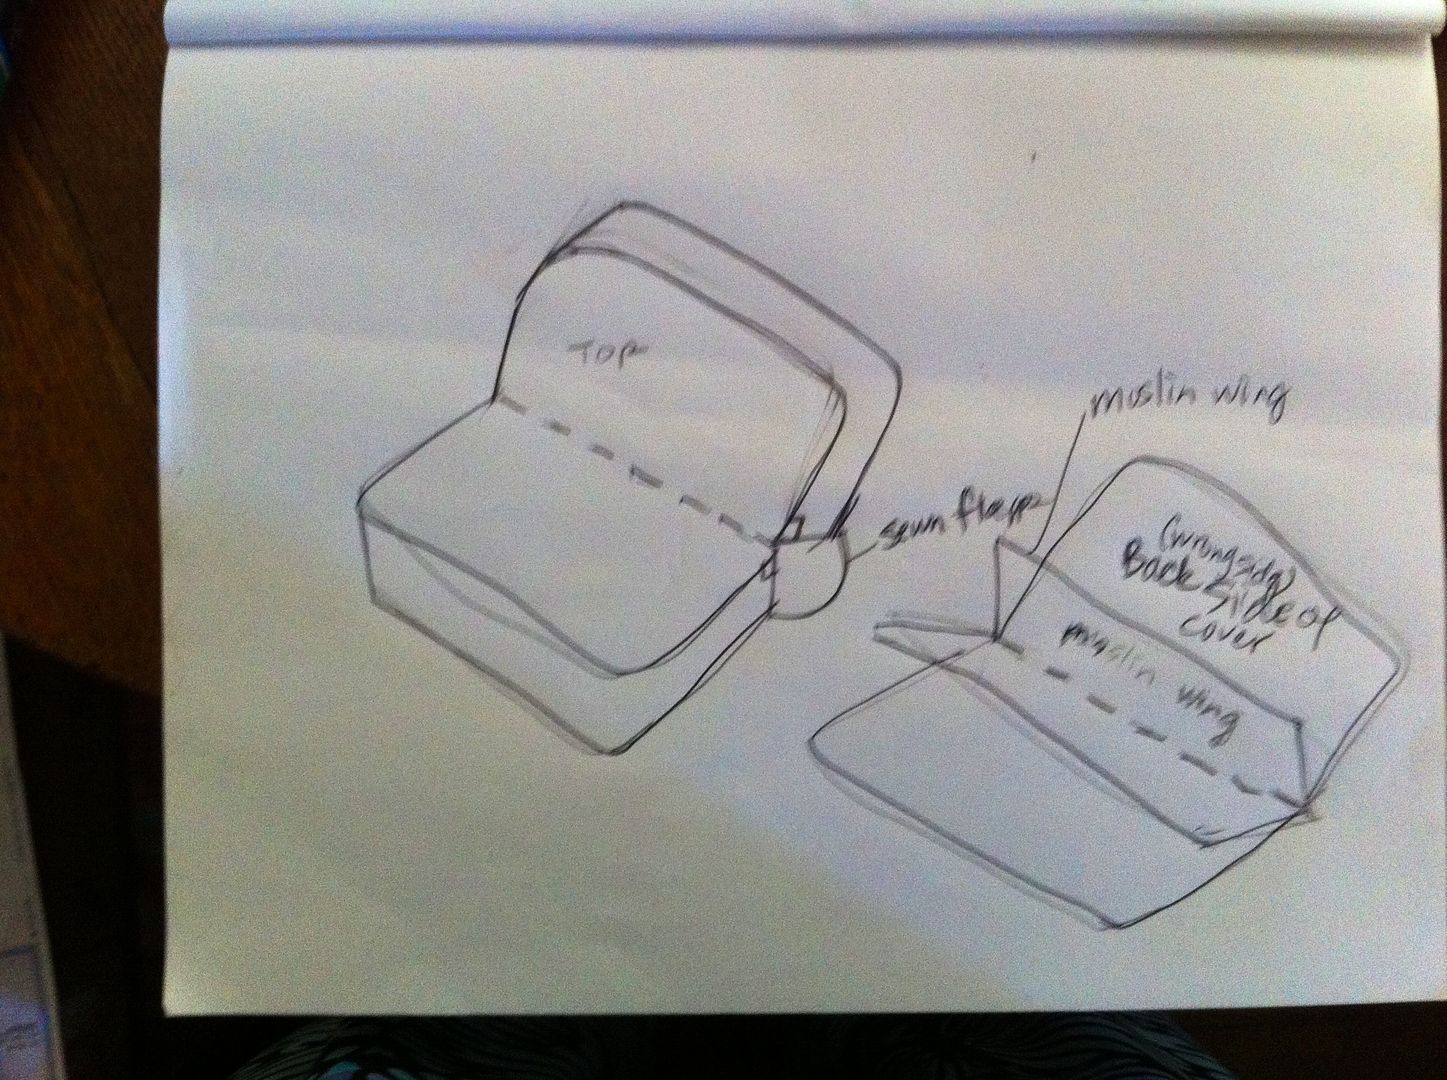 Hopefully this poorly drawn illustration will help. The top of the bench is all one piece (not a top or a bottom). Where the top half meets the bottom half (where the bench folds) sew the wing to the wrong side. The reason for muslin is basically two fold....one it's cheap! Two it will fit between the cushions more easily than vinyl and it's just easier to sew and staple than vinyl. You don't need it to be heavy duty. It will be easiest to sew the muslin "wing" on before you sew the sides on. Also I show here the flap that goes at the bend which collapses on itselft when the seat is used as a bed and covers the gap between the top and bottom when it's in the upright position. I drew it round here but it is really a square that connects the top side rail and the bottom side rails. |
|
ndpap
Active Member
Posts: 127
Likes: 17
Currently Offline
|
Post by ndpap on Sept 1, 2013 12:20:56 GMT -8
I have it all sewn together no problem because I used what was there as a template... I just don't know where to start to stable the fabric back on...ANd why aren't you camping? ?? |
|
gonekayaking
Active Member
enjoying using my camper and not working on it anymore!
Posts: 410
Likes: 75
1956 Shasta 1500
Currently Offline
|
Post by gonekayaking on Sept 1, 2013 12:26:54 GMT -8
Go look at a couple of upholstery videos on youtube to watch the stapling processe. You should start in the center of either the top or the bottom. Then go to the opposite side and put in a staple. Pulling as taught as you can. It would be good to have a helper....I did mine by myself and I'm sure thats' why i have puckers.
And I'm not camping cause it's labor day weekend!!!! We will camping 3 out of the next 4 weekends and 2 wknds a month through the winter. Labor Day weekend is my big clean up from the summer weekend, so I'm procrastinating here on the computer instead of taking bags of old clothes down to good will.
|
|
ndpap
Active Member
Posts: 127
Likes: 17
Currently Offline
|
Post by ndpap on Sept 1, 2013 17:44:14 GMT -8
After starting the stabling process, I had to step away from the project for a few... The seat fell and landed on a sharp object and punctured a hole in the seat!!!!!!!!!!!!UGHHHHHHH so I am in the process of replacing the seat panel...Now the sewing machine is acting up......OMG To be continued!!!!
|
|