|
|
Post by Teachndad on Dec 22, 2014 8:39:17 GMT -8
Hi,
I can't get the exterior water inlet off the original water tank. The tank is made of galvanized steel and then a piece of plumbing comes out of it and exits through the side skin to the inlet. The inlet appears to be threaded on there. I tried a pair of channel locks on it and it won't budge.
I then dropped on some liquid wrench on the inside as well as the outside threads yesterday, in hopes that it would loosen it up.
Any ideas?
Do people keep the original water tank or go for plastic? I was trying not to get any liquid wrench down the down tube and I think I succeeded. i would never drink out of the tank, but I would wash my hands in the water that would be in the tank, once restoration is finished.
Thanks
Rod
|
|
Paul B
Junior Member

Posts: 73 
Likes: 31
Friendship Vacationaire
Currently Offline
|
Post by Paul B on Dec 22, 2014 18:49:03 GMT -8
Rod,
My tank was junk when I removed it. My only concern was to not scratch the exterior or wreck the inlet fitting.
I removed the four screws attaching the outside inlet filler to the skin. With the filler free I was able to slide the tank about an inch toward the outside wall. This gave me about a inch of clearance between the outside skin and the filler. My tank had a threaded collar. Using two large pipe wrenches I was able to unscrew the pipe from the tank. Then I slid the pipe out through the wall.
If you don't want to salvage the pipe you could cut it with a hack saw or saws all. In my case is was eraser to use pipe wrenches.
With the pipe and inlet fitting on the bench I was able to unscrew the inlet fitting from the pipe without wrecking it.
Best,
Paul B
|
|
|
|
Post by vikx on Dec 22, 2014 20:46:28 GMT -8
The best way is to cut the pipe as close to the tank as possible. Put the cut off in a vice and heat (CAREFULLY!) the inlet around the threads. Use welding gloves to unscrew. The inlet is the important part. The tank should be replaced. I use ABS or poly. ABS is easier. No hurry on a tank, that come later.
|
|
Ten
3K Member

Posts: 3,432
Likes: 1,467
70 Shasta 16SC + 1964 Airflyte
Currently Offline
|
Post by Ten on Dec 23, 2014 4:23:14 GMT -8
Hi Rod, Those old galvanized tanks are often junk. They may look good at first glance, but the bottom sides can be full of holes...so that you don't realize the damage till your floor is full of water. Most people will replacewith plastic tanks. The are really not that expensive and can usually be had in sizes that are real close to the original dimensions. This was mine (64 Airflyte): 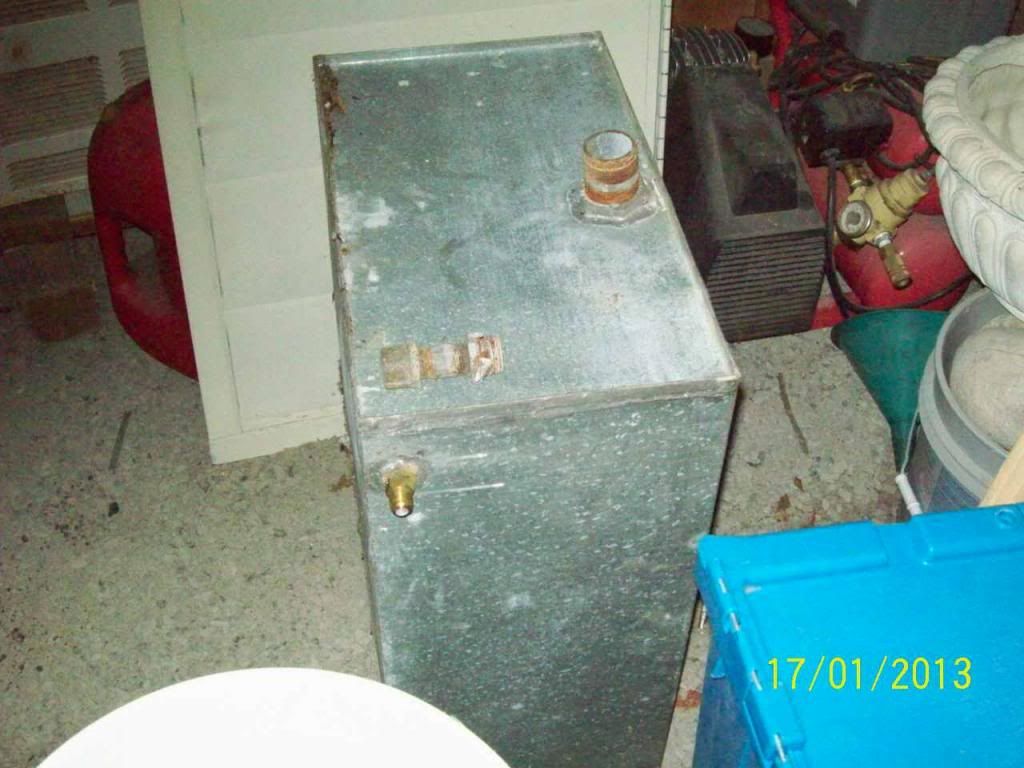 But this is the bottom after trying to unscrew the cap off the drain: 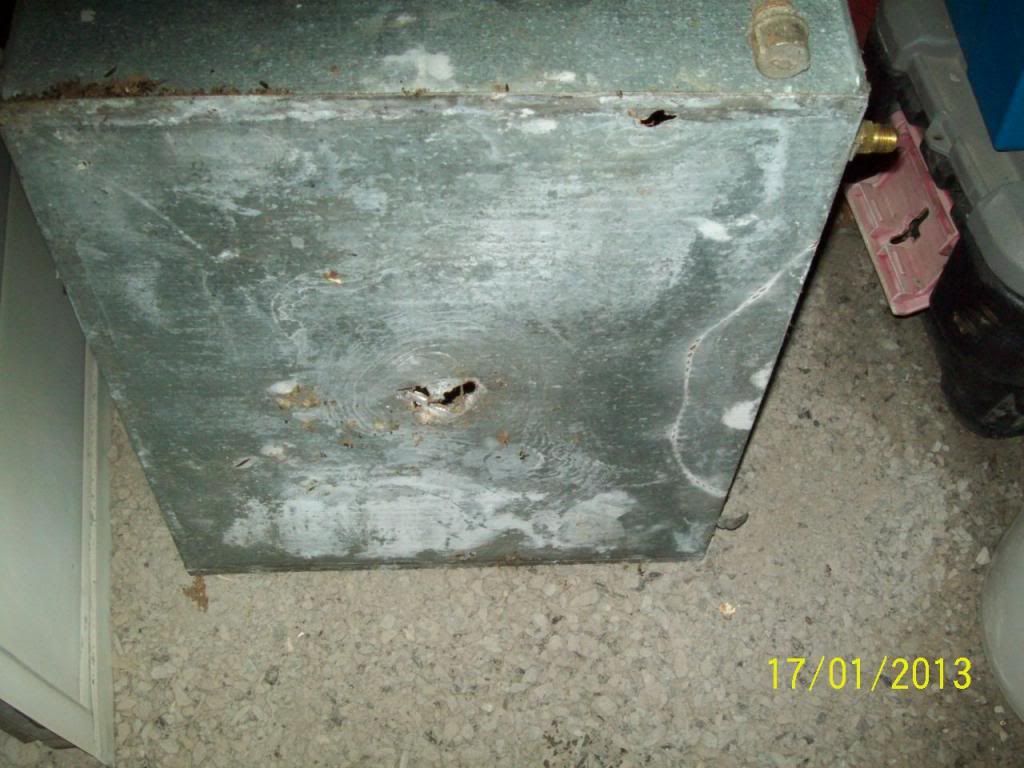 Cutting it loose to work on it is probably the best way to remove the exterior fitting. The inlet to the tank is about a 1-1/2" pipe nipple: 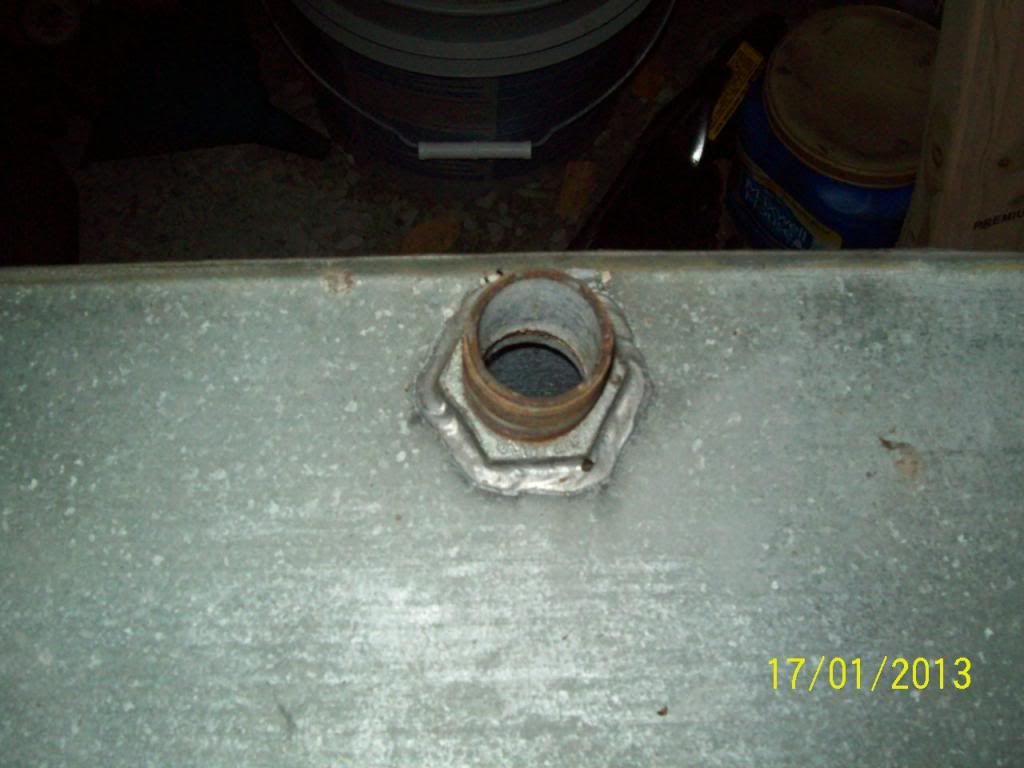 It is important to use a lot of patience with a little finesse to remove the filler. "Hurry" does not work: 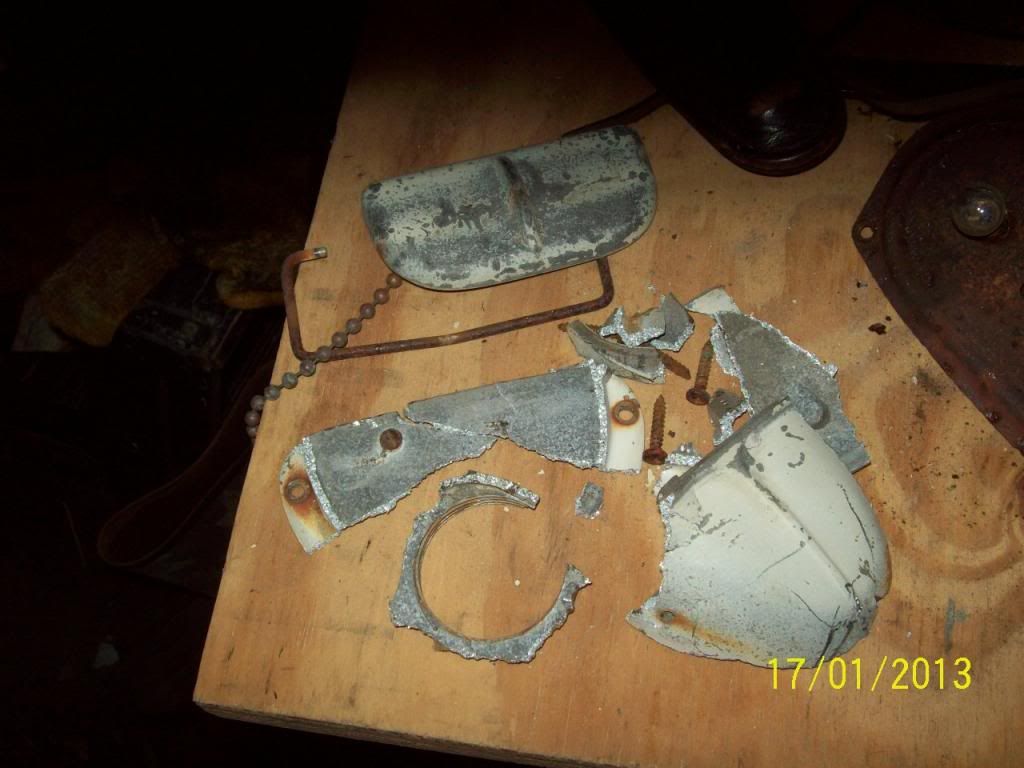 |
|
|
|
Post by Teachndad on Dec 23, 2014 18:03:15 GMT -8
Thanks Ten for the pix. Sorry about the unfortunate demise of your filler.  I will go the saw route. There is about 1.5" of play to work with on the interior. I don't have a sawsall, so I am using the tried and true hacksaw. Just bought new blades. Cheers. Rod |
|
|
|
Post by vikx on Dec 23, 2014 21:46:36 GMT -8
Also try turning the blade 90* in the hacksaw to better clear the trailer skin. Sometimes it's easier to cut on the inside...
|
|
mobiltec
5K Member
I make mistakes so you don't have to...
Posts: 9,822
Likes: 3,749
1954 Jewel In Progress...
Currently Offline
|
Post by mobiltec on Dec 25, 2014 20:10:48 GMT -8
Usually they will not unscrew no matter what you do. You need a sawzall. They are a great tool and can be used for all kinds of things. Cutting the filler tube as close to the tank as possible allows re-use of the filler. But then your next problem will be finding tubing that will fit over the outside of the old filler tube and also on to the inlet of the new tank. That one always makes me tear what hair I have left out.  |
|
|
|
Post by Teachndad on Dec 26, 2014 8:31:51 GMT -8
Yes, the Saws All will be on the list of tools to get next. I did get the neck cut off to the water tank with the hacksaw and that left about 3/4" of steel pipe attached to the filler. For a while, I thought I had lost the filler cover. I thought I had last placed it on the ground just under the filler and two days ago I had used a leaf blower to clean up the area.... Last night, when I realized that the filler cap was missing, I spent an hour on my hands and knees scouring through leaves near the trailer and also through a full size garbage can this morning. At wits end, I went for one last scan. Luck was with me.  I spied my vinegar rust container and realized that I hadn't checked it in a while. I wasn't even sure I had put something in it. I open the container and its got some moldlike blob growing in it and I can't see the bottom of the container. Ewe, I think, " Better dump that". But, just before tossing it, I thought to probe around in the container. I probe with my gloved finger. It hits something. Could it be? Yep, you guessed it! Eureka, I had found it! I guess the moral to the story is to keep parts together as much as possible, and never leave anything on the ground. ********************** So, if Larry loses/pulls his hair over reconnecting the inlet to a new tank, then what are ya'all using to make the connection to the new tank? Also, the lever on the filler lid is frozen. How can I unfreeze it? The vinegar bath didn't work. Cheers. Rod |
|


