ndpap
Active Member
  
Posts: 127
Likes: 17
Currently Offline
|
Post by ndpap on Apr 21, 2014 2:45:32 GMT -8
I am fighting with my boyfriend(cheap laborer) over whether or not we can keep the graphics on the side of the camper. He says it can't be done...I say Bullsh** and it will be done. What kind of tape would we use to tape off the design to paint and do we do design 1st then the rest of the camper? THe last camper we did ( Astrofltye) we just tractor paint which worked well.
|
|
SusieQ
Global Moderator     
Posts: 4,781 
Likes: 1,197
'62 Shasta Compact
Currently Offline
|
Post by SusieQ on Apr 21, 2014 5:35:53 GMT -8
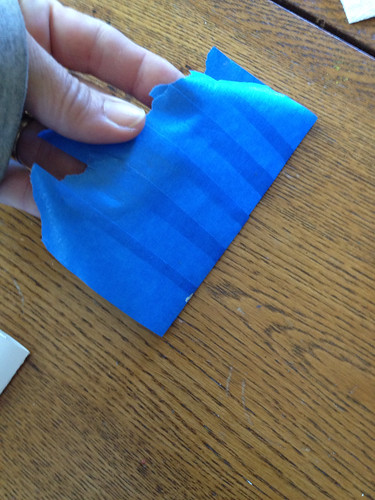
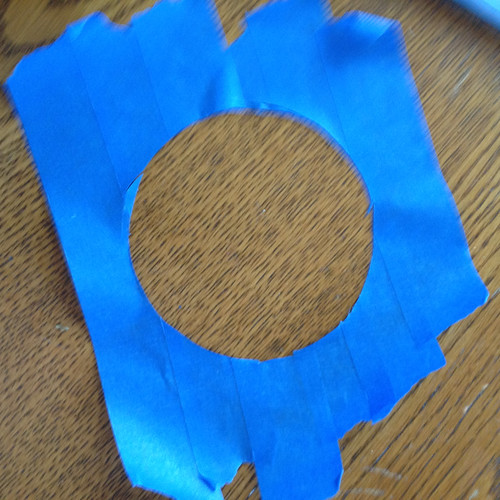
I'm on your side about keeping graphics! Check out the site below and scroll down to the section about painting a Z stripe. I think there is some info there that could be beneficial to you. www.freewebs.com/kc8jwa/painttechniques.htm?referer=aff_cj_2470763_3747368_11715080_1kr4jnd1z6g6mI took a look at your graphic. I'll post a pic for you if you want me too. The circle could be a little challenging. I would follow the directions for the Z stripe but make a circle template from cardboard or thick tag board, poster board. Make a square of paint tape 3 or 4 inches larger than your circle by overlapping strips of paint tape. Put your cardboard circle in the middle of your square. Cut around your circle with a craft knife. That should leave you circle template you can adjust to fit the stripe in your graphic. I just made you a photo tutorial if I can get pics uploaded to my FLICKR account. Yes, I just happen to have paint tape sitting on my kitchen table, and an empty glass for a circle template. |
|
txoil
Active Member
  
Posts: 459
Likes: 149
1960 Shasta Deluxe 19
Currently Offline
|
Post by txoil on Apr 21, 2014 6:45:35 GMT -8
Make a stencil of the graphic, and put a few SMALL marks on the aluminum as reference points, and then spray sealer over the old paint. When the sealer is cured, spray the base color on the entire camper. The stencil and reference marks will let you line up your new graphics exactly where they belong, then use quality masking tape and paper to mask off the design. Shoot your secondary color(s) and then when tape free remove masking materials. Follow with clear if you are using an automotive base/clear system. Voila~
|
|
SusieQ
Global Moderator     
Posts: 4,781 
Likes: 1,197
'62 Shasta Compact
Currently Offline
|
Post by SusieQ on Apr 21, 2014 7:02:12 GMT -8
One of my pics didn't upload but I think you can fill in the blank.   image image by susieqilvu, on Flickr  image image by susieqilvu, on Flickr Don't stop to take pics when you're cutting and you'll get a better looking circle,  And use the wide tape for a big circle. And you probably know how to do this but if you don't have something for your circle template, like a big plate, cut a piece of string the size of your circle radius, tie it to your exacto, and thumb tack it to your cardboard. |
|
John Palmer
Leading Member
    Hi, From a vintage trailer guy located in Santa Ana, CA. It's good to see lots of activity here.
Posts: 1,772 
Likes: 625
Currently Offline
|
Post by John Palmer on Apr 21, 2014 8:33:15 GMT -8
Don't cheap out when you buy masking tape. You do not want the tape to pull the new paint under the tape. Do not leave the tape on the trailer of more than one day, and never "in the sun". It's worth the extra cost for the blue 3M tape. Also buy only fresh tape from an auto body supply. They sell a "plastic like" thin line tape in 1/4" for making curves and designs. It gives you a sharp edge, it will not "leak under". This tape is very flexible, and you can easily tape circles. Just lay them out with a soft pencil and a compass. Pull the tape before the paint is dry. When you remove the tape, pull it at a 90 degree angle away from the new paint to prevent lifting the new paint.
|
|
bmxovich
Active Member
  
Posts: 187 
Likes: 69
1952 Airfloat Skipper
Currently Offline
|
Post by bmxovich on Apr 21, 2014 15:01:29 GMT -8
They sell a "plastic like" thin line tape in 1/4" for making curves and designs. It gives you a sharp edge, it will not "leak under". This tape is very flexible, and you can easily tape circles. Exactly, it's "3M Fine Line" tape. Any auto paint store will have it. Also, if you do pick it up at an auto paint store, they can steer you toward a good quality masking tape to do the remainder of the masking. Sometimes the blue long mask doesn't like to stick to itself where you overlap it. And sometimes it can be a little too tacky on a freshly painted surface. The Fine Line tape is the key though. |
|
|
|
Post by vikx on Apr 21, 2014 21:47:38 GMT -8
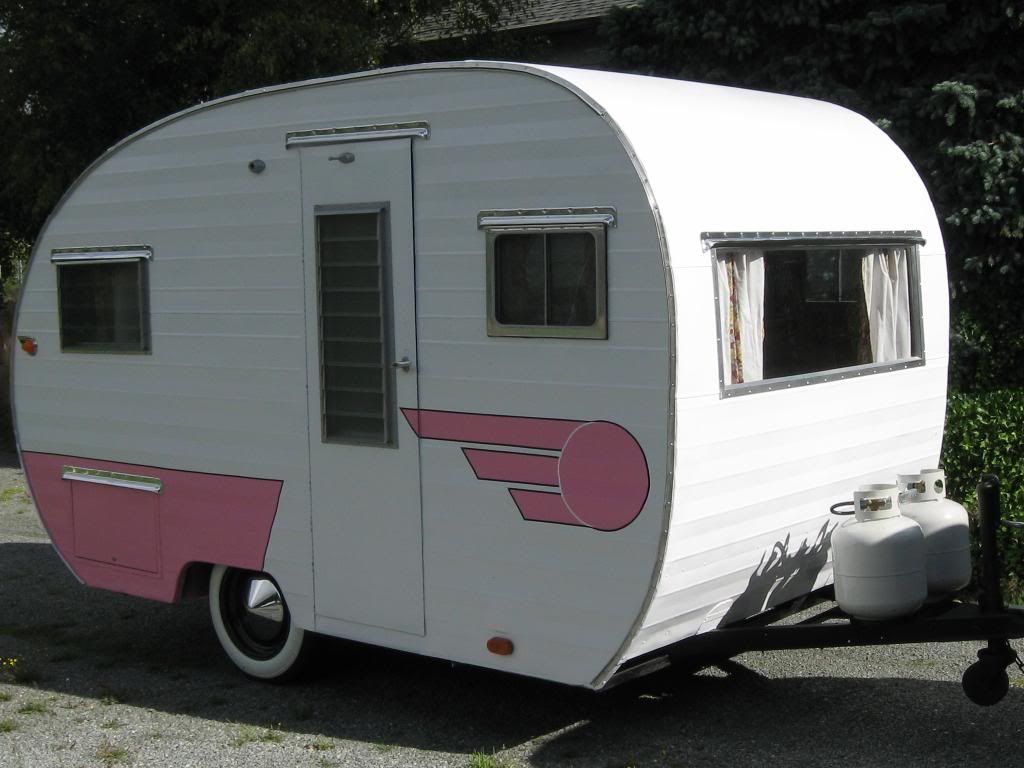
This trailer was done with the fine line tape:  The black lines are automotive trim tape. |
|
CorvettCrzy
Full Member
    
Posts: 935 
Likes: 273
'58 Corvette, '64 Franklin
Currently Offline
|
Post by CorvettCrzy on Apr 23, 2014 19:52:21 GMT -8
I'm on your side about keeping graphics! Check out the site below and scroll down to the section about painting a Z stripe. I think there is some info there that could be beneficial to you. www.freewebs.com/kc8jwa/painttechniques.htm?referer=aff_cj_2470763_3747368_11715080_1kr4jnd1z6g6mI took a look at your graphic. I'll post a pic for you if you want me too. The circle could be a little challenging. I would follow the directions for the Z stripe but make a circle template from cardboard or thick tag board, poster board. Make a square of paint tape 3 or 4 inches larger than your circle by overlapping strips of paint tape. Put your cardboard circle in the middle of your square. Cut around your circle with a craft knife. That should leave you circle template you can adjust to fit the stripe in your graphic. I just made you a photo tutorial if I can get pics uploaded to my FLICKR account. Yes, I just happen to have paint tape sitting on my kitchen table, and an empty glass for a circle template. You are PRICELESS!!! |
|