mobiltec
5K Member
 I make mistakes so you don't have to...
Posts: 9,822 
Likes: 3,749
1954 Jewel In Progress...
Currently Offline
|
Post by mobiltec on Feb 5, 2024 20:24:51 GMT -8
Very nicely done. And correctly I might add. Beautiful work. They are great trailers for sure.
|
|
jester76
Junior Member

Posts: 55
Likes: 17
1954 Aljoa sportsman
Currently Offline
|
Post by jester76 on Feb 5, 2024 21:37:37 GMT -8
A very inspirational and well done project. Thanks for having the patience to share. Thanks turbodaddy, love your signature |
|
jester76
Junior Member
Posts: 55
Likes: 17
1954 Aljoa sportsman
Currently Offline
|
Post by jester76 on Feb 7, 2024 18:04:52 GMT -8
Very nicely done. And correctly I might add. Beautiful work. They are great trailers for sure. Thank you, when I started my journey just by looking around at the ocean of different types of trailers, I was a Shasta guy, I always liked the shape best, but after finding the aljoa I did a lot of research and found that Shasta tended to have more rot problems and just like Griswold cast iron pans they were more sought after and thus more spendy, my good friend actually lived down the street from the plant down in Southern California, and he remembered them being talked up a lot. I do think they are well built,. It's interesting to see how similar they all are though. Thanks for all your input. |
|
|
|
Post by Teachndad on Feb 9, 2024 6:11:00 GMT -8
Yah, Jesse, amazing work! I loved your treatment of hiding the AC unit with and the use of a draw slides. You got some mad skills there, bub. I wanted to comment on the fridge trim issue.  I read in a magazine that you can use a vinyl door sweep to replace that now very brittle door trim. They are all cracked and chipped. I refer to the door sweeps that have self adhesive on the back. You can get them at any of the big box stores. Cut to size. Buy the color white. I think I saved the article to reference. I will see if I can find it. Also, I have a post here on VTT that describes how I replaced the fan motor and the saga it entailed for anyone researching Marvel fridges. In doing that research, I found folks painting the interior and getting continuous off gassing. I then found references to milk paint that can be used and that doesn't off gas. I have yet to paint the interior of my fridge and the outside is still in original but decent condition. You did a MARVELous job on your fridge painting. And nice sleuthing finding the source of the smell. Finally, these fridges as you may or may not know were designed to double as an ice box. Hence the angled tray on the top and the holes from the top tray for a drain line down to below the trailer. I will be camping for 7 days in April with my 1955 Rod and Reel and I am gonna find out how efficient this really works  when I dry camp for 4 out of the 7 nights. Cheers, Rod |
|
|
|
Post by vikx on Feb 9, 2024 13:22:47 GMT -8
Adding to Rod's info, I spray painted the outside cardboard of my Marvel fridge and it stank for days. Finally had to use Kilz to stop the odor. It was a very nasty chemical smell, possibly fire resistant?
|
|
jester76
Junior Member
Posts: 55
Likes: 17
1954 Aljoa sportsman
Currently Offline
|
Post by jester76 on Feb 10, 2024 17:04:43 GMT -8
thanks for the input rod, i'll look into the door sweep issue. as far as the off gassing i noticed that after opening the door for the first time in a few days, so i put a little fan in there for about a week now with the door open, we'll see how that works. when we would go camping recently i started using our cooler for mostly water bottles and soda type drinks and i use a vintage coleman dual purpose cooler/icebox for meats, mainly stuff i dont want getting soggy in a cooler full of melting ice. it has a bin on the top to put a block of ice, as it melts it stays contained in the ice bin that actually has a spigot to get ice water. that old school cooler keeps meat cool and ice frozen for over three days, i get home and i still have a block of ice to put in the freezer, so i'm hoping that that marvel will keep for at least just as long, i'd be happy with that. I am going to need to find a wire shelf to hold the block of ice though, mine is missing. i took a dishwasher drain hose and connected to the bottom of the marvel box to drain outside under, I've seen a plumber years ago just cut some sponge material to insert into the drain tube at the floor lin e to keep insects out and water can still flow out, otherwise i saw somewhere someone put an inline style prefilter on the end as well.
thanks again
|
|
jester76
Junior Member
Posts: 55
Likes: 17
1954 Aljoa sportsman
Currently Offline
|
Post by jester76 on Feb 10, 2024 18:28:51 GMT -8
These are a few of the before and after pics of the window restoration, cured aged silicone is one of the harder things to remove, i found that just rubbing the silicone with my milwaukee gloves worked the best to peel it off.  Screenshot_20230909_115922_Photos Screenshot_20230909_115922_Photos by Jesse Kunda, on Flickr The front windows took the most abuse and some were inoperable.  Screenshot_20230909_115911_Photos Screenshot_20230909_115911_Photos by Jesse Kunda, on Flickr Some were hit hard enough that the glass was broken  KIMG5876 KIMG5876 by Jesse Kunda, on Flickr I tried re- rolling the drip cap with a drill bit and duckbills, still a bit rough. The front frame is actually original here but the two side windows are from a donor trailer that was the same size.  20230909_113309 20230909_113309 by Jesse Kunda, on Flickr  20230909_113333 20230909_113333 by Jesse Kunda, on Flickr  20230802_174040 20230802_174040 by Jesse Kunda, on Flickr A little comparison of before and after. The donor trailer had been painted with some nasty, awful, wretched silver paint that was next to impossible to remove, nonetheless, tis no longer. The new rubber seals came from vintage trailer supply, strongly suggest using btw  20230812_203635 20230812_203635 by Jesse Kunda, on Flickr  20230812_203543 20230812_203543 by Jesse Kunda, on Flickr Vintage trailer supply also carries these little screws and nuts that are a perfect match. If i do it again thats what i'll do first, what i had done before getting those, was to bath the screws in muriatic acid for a few seconds, cleans all the rust off instantly, then rinse with water, dry and then douse with WD40, i just kept them in a tin, clean and rust free, but they are dark, compared to the VTS new ones. 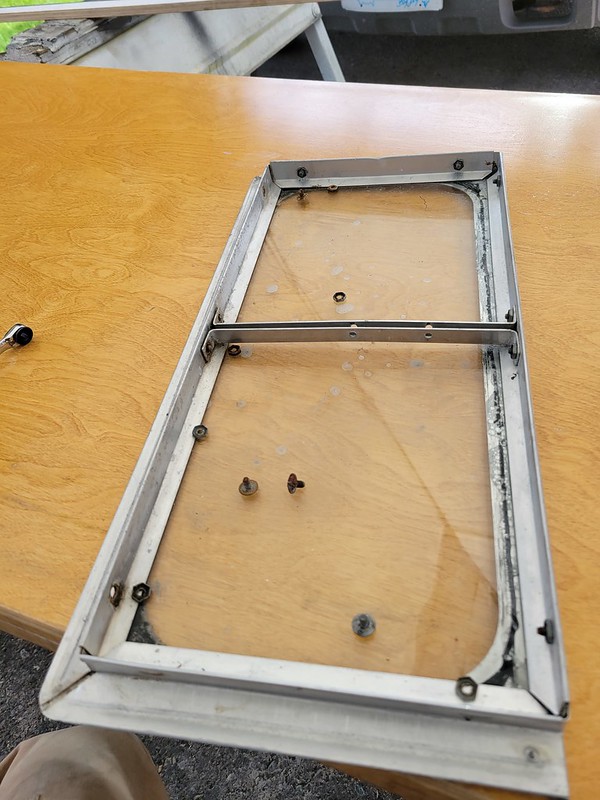 20230812_131435 20230812_131435 by Jesse Kunda, on Flickr A LOT of fly poop! 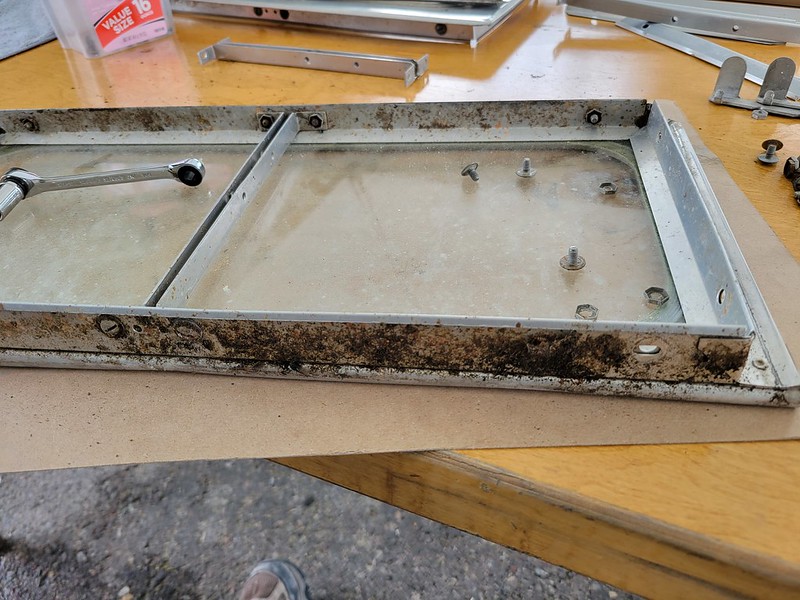 20230812_152025 20230812_152025 by Jesse Kunda, on Flickr I started the polishing of the trims using a stand alone buffing wheel, which is a must, however, i ended up finding that i had more control and could get a safer more precise control by using three screws to hold down the piece on a piece of plywood on a tall sawhorse, then used my right angle hand held buffing rotary wheel on them. 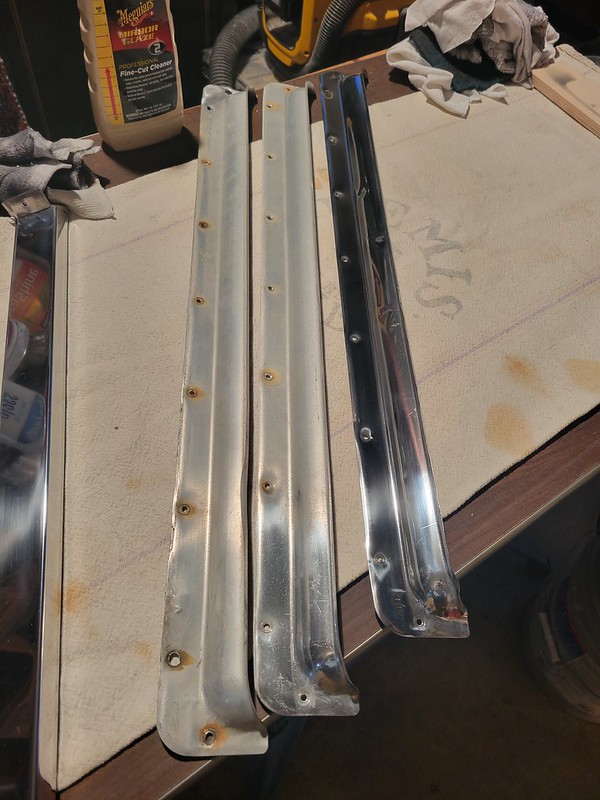 20230622_215327 20230622_215327 by Jesse Kunda, on Flickr 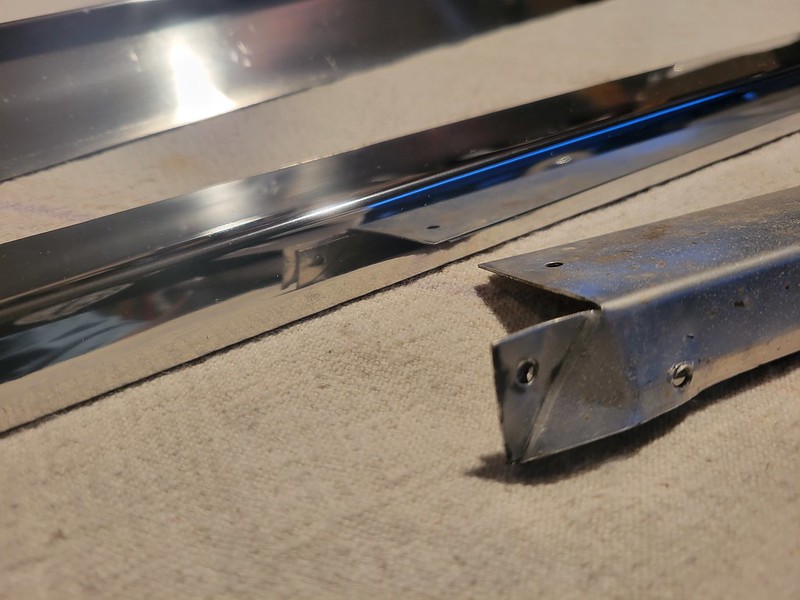 20230622_214805 20230622_214805 by Jesse Kunda, on Flickr  20230622_215349 20230622_215349 by Jesse Kunda, on Flickr  20230623_110809 20230623_110809 by Jesse Kunda, on Flickr I was surprised at just how rotten the bottom rail was here. 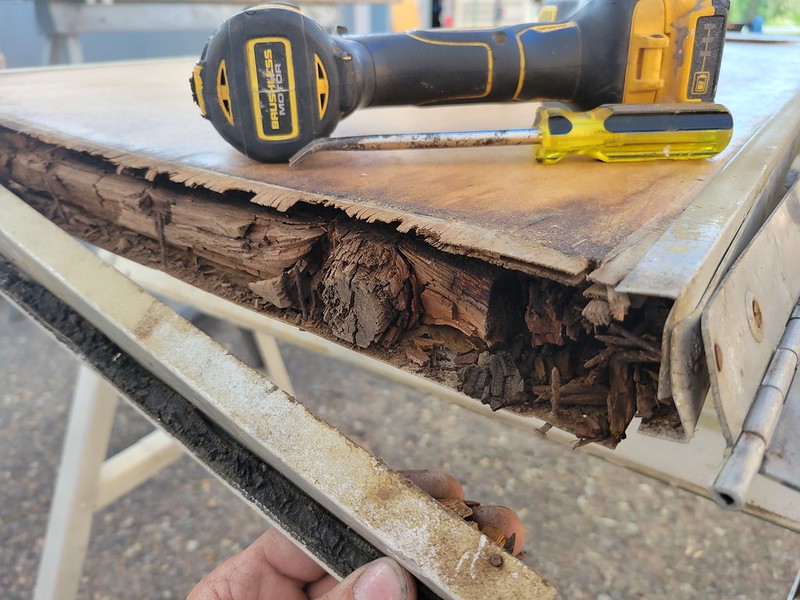 20230623_112806 20230623_112806 by Jesse Kunda, on Flickr So I replaced the bottom rail as well as about 8 inched of the stiles going up the sides and renforced that and then rigid foam for insulation and it was a much stiffer door.  20230714_151141 20230714_151141 by Jesse Kunda, on Flickr Every thing here still works, just polished it up, lubed up. need to find a new lock cylinder, no keys. 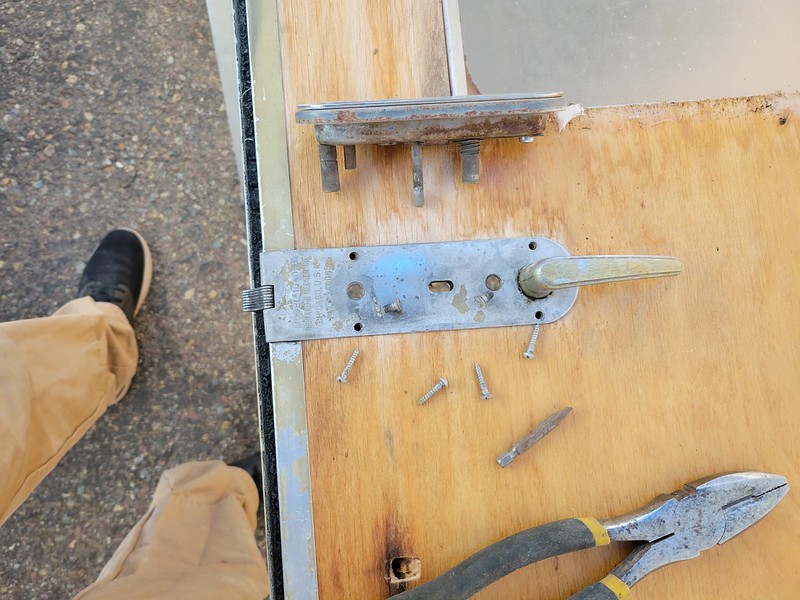 20230623_111511 20230623_111511 by Jesse Kunda, on Flickr  20230820_223553 20230820_223553 by Jesse Kunda, on Flickr Never could find one picture of a screen door from an aljoa, so i guessed. neat thing here is that the lumber is from fir trusses i removed from a house last spring, all resawn to expose beautiful old growth vertical grain fir, and the screens are also from that house built in 1948, so, all period materials. even the plywood for the sliding handle hole. 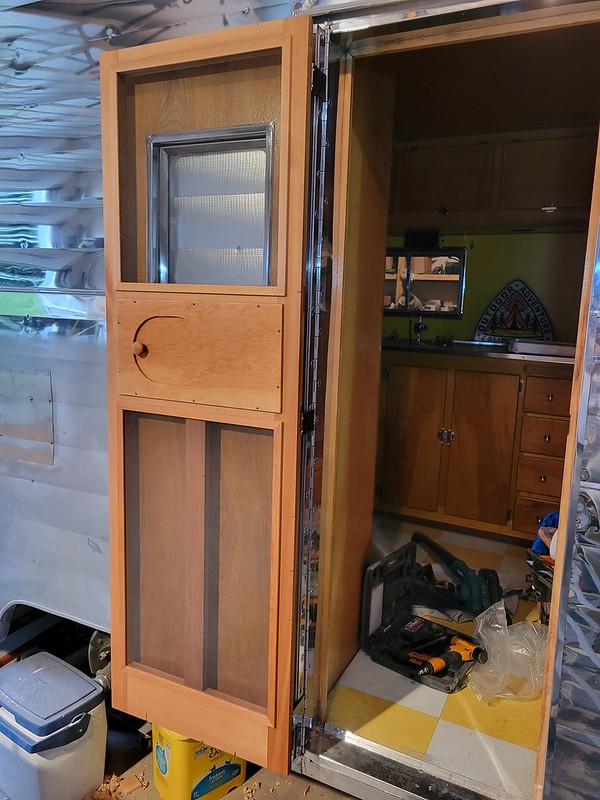 20231022_173416 20231022_173416 by Jesse Kunda, on Flickr I actually started to shellack this and changed my mind and oiled it insteadf with linseed oil, you cant see the difference in the color there except in the photo.  20231022_173430 20231022_173430 by Jesse Kunda, on Flickr |
|
|
|
Post by Teachndad on Feb 11, 2024 6:52:31 GMT -8
Jesse, Thanks for posting all these pictures. I have polished window frame envy.  I especially liked how you repaired the bottom of the door picture as well as the window polishing and lets not forget that screen door! We can all appreciate your work and learn. Cheers, Rod |
|
|
|
Post by vikx on Feb 11, 2024 12:42:57 GMT -8
It's lookin' GOOD!
|
|
jester76
Junior Member
Posts: 55
Likes: 17
1954 Aljoa sportsman
Currently Offline
|
Post by jester76 on Feb 11, 2024 15:06:38 GMT -8
Thank you all for your support and comments, trust me when i say it is much appreciated. We put so much of ourselves in this hobby/addiction/past time/therapy,.....and as far as my end is concerned not many people get to see the amount of work we do. So it is nice to see others appreciate it. I hope someday soon I'll be able to travel around some rallies and see so much more.
|
|
nccamper
Administrator 
Posts: 7,744
Likes: 2,871
1962 Forester- 1956 Shasta
Currently Offline
|
Post by nccamper on Feb 11, 2024 18:28:06 GMT -8
A thing of beauty...
|
|
jester76
Junior Member
Posts: 55
Likes: 17
1954 Aljoa sportsman
Currently Offline
|
Post by jester76 on Feb 18, 2024 15:01:14 GMT -8
Jesse, Thanks for posting all these pictures. I have polished window frame envy. I especially liked how you repaired the bottom of the door picture as well as the window polishing and lets not forget that screen door! We can all appreciate your work and learn. Cheers, Rod Ironically, sadly, about half of the damage done to some windows such as a fold or a crease came from me getting the edge caught on the buffing wheel wrong. I was tired, my neck and back were sore from hours of buffing and i was making mistake after mistake over and over, should've taken a break and come back later. |
|
jester76
Junior Member
Posts: 55
Likes: 17
1954 Aljoa sportsman
Currently Offline
|
Post by jester76 on Feb 18, 2024 16:33:45 GMT -8
This is one of those right wrong or otherwise scenerios for me. Not really sure if insulating with rigid foam is ok in a trailer like this, but I did it. I really wanted to use polyiso and get a whole r-10 rating but that was going to be so expensive so i just used all the scraps that i had been saving from work for all these years.  20230708_110248 20230708_110248 by Jesse Kunda, on Flickr I used a little trim router to dado out all the wire chases. I cut everything on my table saw starting from the largest openings down to the smaller ones to use the scraps as effeciently as possible. 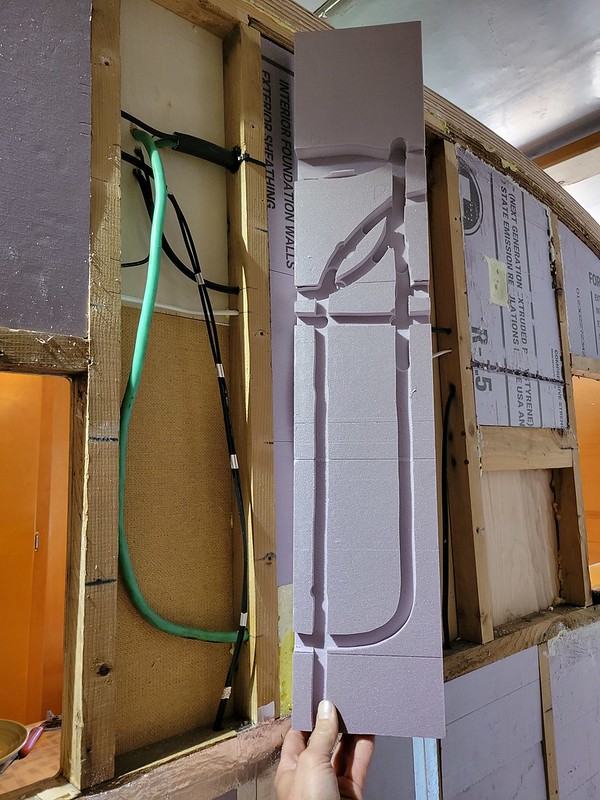 20230708_105750 20230708_105750 by Jesse Kunda, on Flickr  20230706_205027 20230706_205027 by Jesse Kunda, on Flickr For the roof panels that roll downhill, I used my table saw to slice grooves about every inch or so apart and about 4/5 thru so that the panel would wrap around the curvature, leaving the uncut side out and the scored side in. 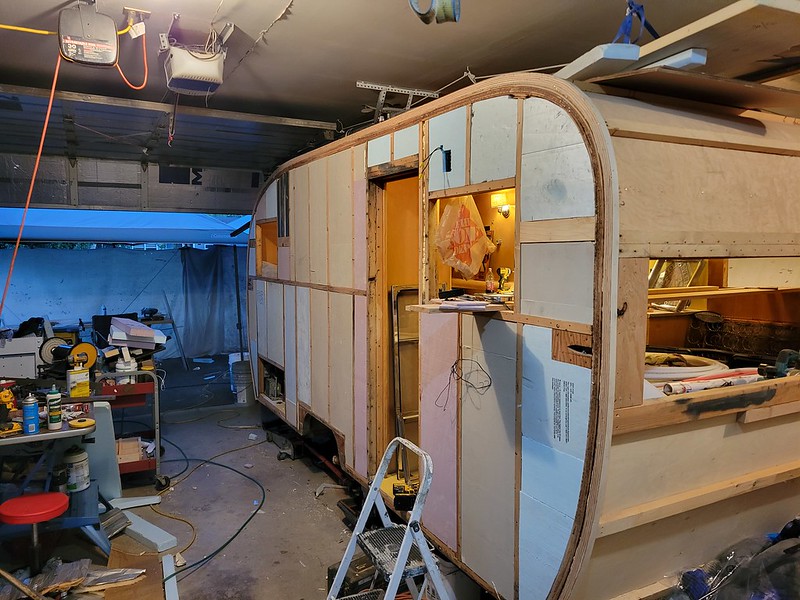 20230701_215259 20230701_215259 by Jesse Kunda, on Flickr Ahhhh, after 3 long years, the first piece of siding goes back into place. Very surprisingly the screw holes all lined up just perfectly 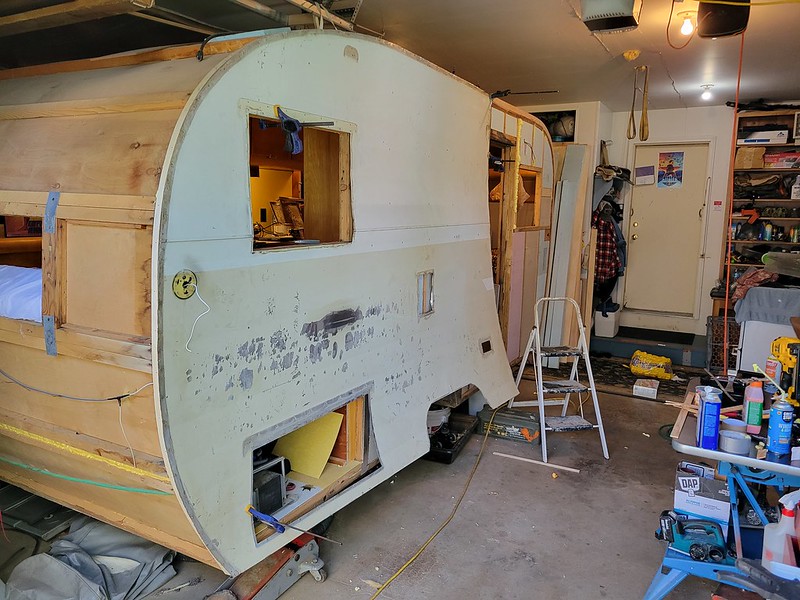 20230702_172142 20230702_172142 by Jesse Kunda, on Flickr As for stripping the paint off though trial and error i found this to work the best and easiest and safest 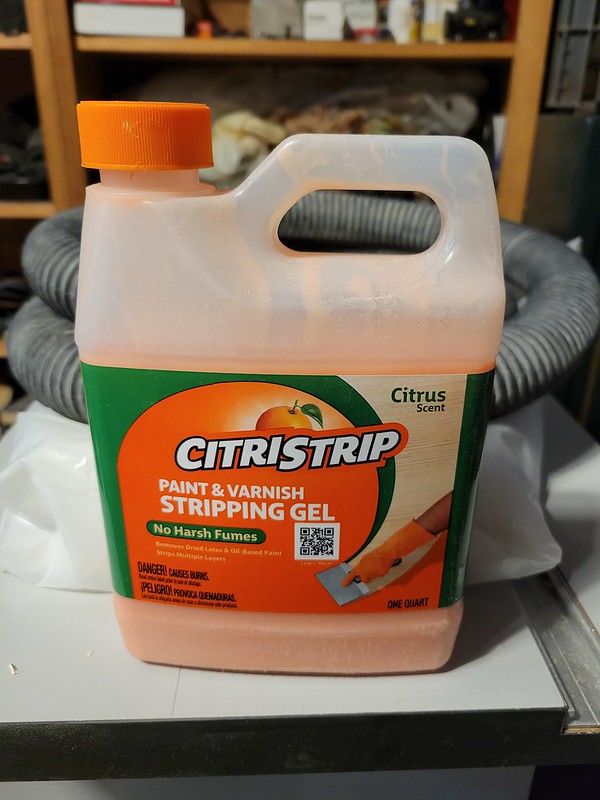 1708302093629 1708302093629 by Jesse Kunda, on Flickr after a while I found that after the paste was applied it can dry to quickly and end up inert or non effective.  20230714_181142 20230714_181142 by Jesse Kunda, on Flickr I then started pasting manageable portions at a time, then covered it in painters plastic and moved on to the next portion. then when it was time it just peeled off magnificently, way much less mess too.  20230714_181150 20230714_181150 by Jesse Kunda, on Flickr The trick is getting enough paste on and not wasting too much either. any paint that didnt just fall of actually came off with a sponge and water, very few portions were just stubborn as heck. 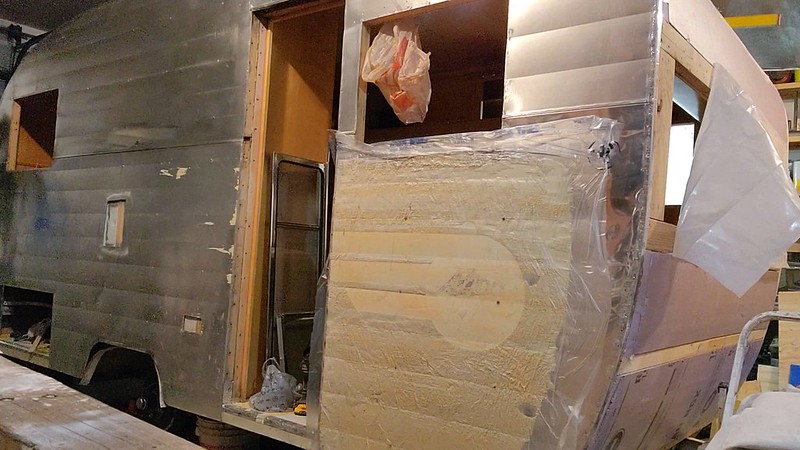 20230714_232650~2 20230714_232650~2 by Jesse Kunda, on Flickr So these next 2 pics show an anomaly in the way the aluminum reflects light. I wonder if these trailers were still using surplus aluminum sheets from ww2 aircraft production. Maybe they were different grades or anodized v.s. non ad. I'm actually quite worried that out in the sunlight it's going to look all milky. one p[ic is with the garage door open and the other closed.  20230902_115741 20230902_115741 by Jesse Kunda, on Flickr 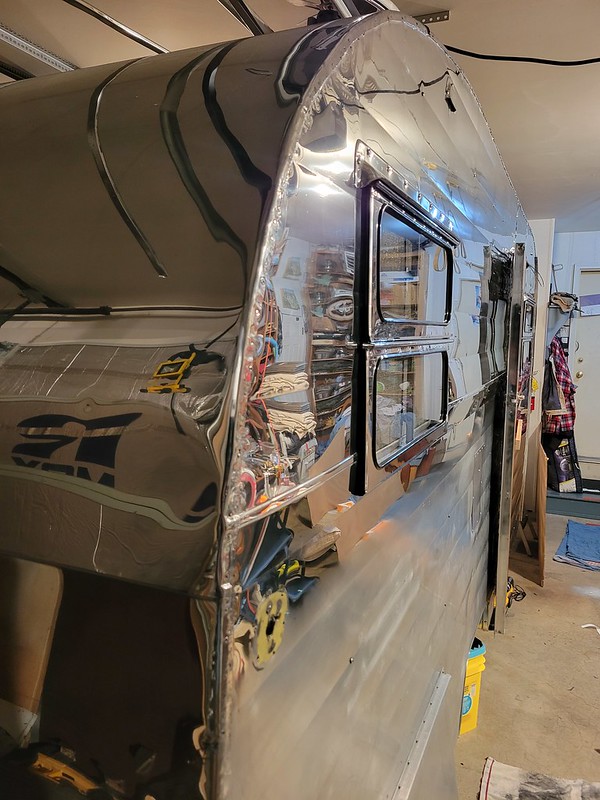 20230906_221013 20230906_221013 by Jesse Kunda, on Flickr Up close it's quite mirror like, in one type of light... 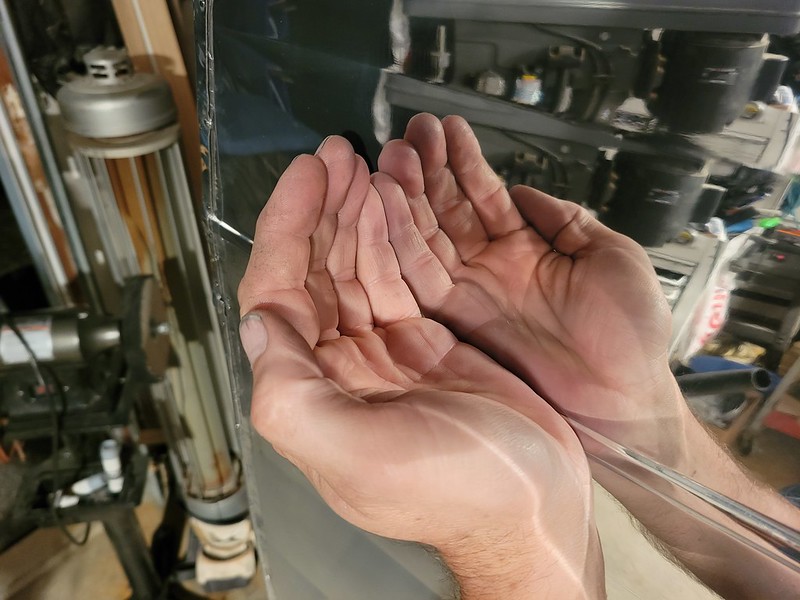 20230906_221200 20230906_221200 by Jesse Kunda, on Flickr And then sometimes its kinda milky. 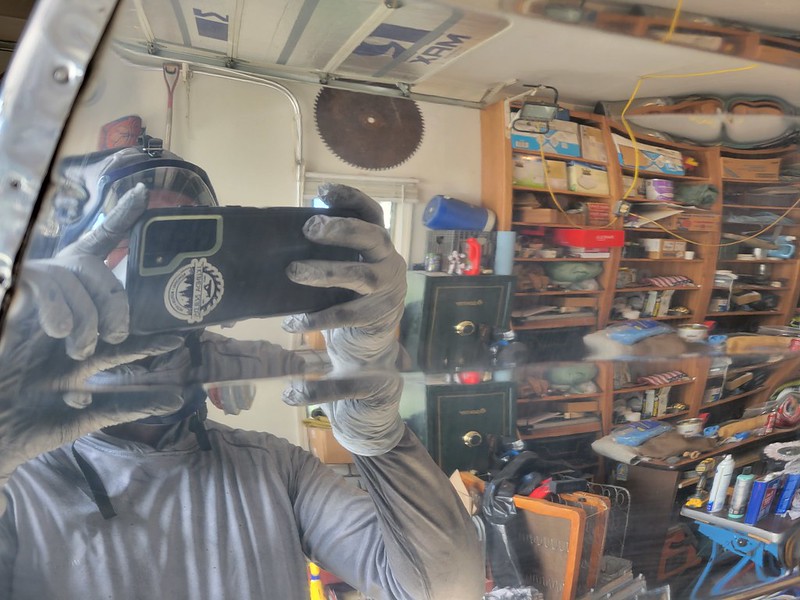 20230902_115627 20230902_115627 by Jesse Kunda, on Flickr It's mainly this back panel thats different than the others, it looked different from the moment it was stripped bare. I also note that not all aluminum sheets were atatched the same side out, some were gloss out and others were dull side out.  20230902_115735 20230902_115735 by Jesse Kunda, on Flickr Here it"s the same time, same light but different angles. 20230902_115741 by Jesse Kunda, on Flickr Some areas this is really noticable, under certain light though, very fine micro scratches from buffing. I've been buffing everything with an angle grinder style rotary wheel buffer with renegade product and wheels meant for aluminum. seems as though no matter how much i tried i could never get past these micro scratches. 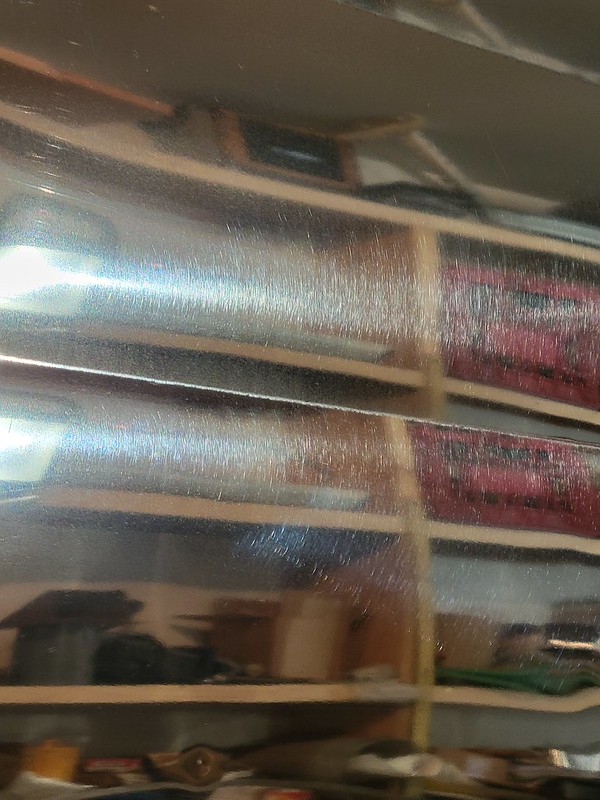 20230902_115655 20230902_115655 by Jesse Kunda, on Flickr |
|
John Palmer
Senior Member
 Hi, From a vintage trailer guy located in Santa Ana, CA. It's good to see lots of activity here.
Posts: 1,628
Likes: 575
Currently Offline
|
Post by John Palmer on Feb 18, 2024 23:14:03 GMT -8
Jesse I hesitate to give you any advice because it looks like you are making good progress. Some of my advice might be a little hard to pick up because I do not have the ability to do photos which help explain techniques.
Polishing eyebrows........IMO the single most dangerous tool in any shop is a bench grinder/polisher. I hope you did not suffer any injuries when your window frame got sucked in and bent. These are tips that might not help you now that you have most of your windows done. It is my hope it saves someone from getting hurt. It helps to take all of your eyebrows and stack them together, longest on top, to shortest on the bottom. You will have much less chance of getting them sucked into the polishing wheel if they are stacked and have some body thickness, not just a thin single eyebrow. It also helps with heat, just keep do a little, and move it to the bottom of the stack. After you get all the ends done, just flip it around and keep trucking. Do all of your straightening and metal work before polishing.
When using any polishing wheel (bench mounted/base mounted/ or handheld, do not use the wheel at 90 degrees to the object you are polishing. Hold the work as roughly 45 degrees to the wheel. With the polishing wheel on an angle, you have more surface contact area and less chance of having the metal get sucked in.
If you have access to a finger or box brake you can fix that window frame and damaged hinge. You can buy .032" 5000 series aluminum sheet at any metal supply store. The stores in my area have small pieces cut up in nominal sizes so you do not have to buy a full 12' sheet. I have built entire Hehr Standard windows using only a shear and a brake.
If you talk to fifty people that build shinny trailers, you will get fifty different ways to polish aluminum. IMO, none are right, and none are wrong. What's important is to find a way that works for you. What I'm going to tell you is not the only way to polish aluminum, it's just what works for me on both full trailers and also parts. The size might be different, but the technique is exactly the same. I have read a lot of different views on the topic. I have had a chance to sit through a few seminars on polishing aluminum given by Zephyr Polishing from Ontario, CA. They brought in one of their customers that owned a polishing company that only did Fuel Tankers, Milk Tankers, and polished semi-truck wheels. It was very interesting to sit and listen to his different ideas. Basically, it comes down to this, you cannot polish anything to a mirror finish UNTIL IT'S ALREADY SMOOTH. If you begin the polishing before the scratches are removed, you will only end up with polished scratches. Polishing any metal is the same as sanding any wood. You start out with a fine sandpaper grit and keep progressing down (a lower number) in the grit number until the scratches in the metal are the same as your sand paper. You have now found your beginning point. Your next step is to use a slightly finer grit and sand out all of the scratches, then the next finer grit, etc. You cannot start any polishing until you have sanded ALL the scratches to a level of 400 grit "or finer like 600/800". I use a DA (dual action) air driven sander from HF. Nothing fancy at this point. Don't waste your time with any cheap sand paper designed for sanding wood. You need a quality sanding paper. I buy my 100/roll for under fifty bucks, (50 cents per disc).
The first polishing step is with a very stiff starched airway pad on your hand-held buffer. The way the pad is sewn floppy prevents the aluminum and compound from building up on the pad. Believe me, you do not want to spend half your time cleaning the pad. The Airway floppy pads are sold by many companies. The pads are sewn in a direction, and you have to use them in the correct rotation, or they will bounce, so there's a right and a wrong direction to mount the pads. I use a bar of emery compound for this first cutting step. Nothing fancy, about $10 to $12 for a large bar. Your metal would look 90% polished after this step IF YOU DID THE SANDING STEP FIRST. You will be able to see yourself in the metal but will have some swirl marks from the emery compound.
Never, never switch compounds on a pad. You need to have a dedicated pad for every compound you use. It's best to use a felt marker and mark the direction of rotation, and the compound used on each pad wheel so you can keep track.
Polishing step number two is with a softer pad, and a less aggressive compound.
Polishing step number three is to shift to a Cyclo Polisher which is dual action and dual pads. For polishing the final swirl marks out I use any kind of fine grit polish I might have in the shop. I like Nuvite Grade S to remove the final marks. 99% of people use TOO MUCH COMPOUND (myself included). Just place a finger dab about every six to eight inches apart. I use any old cotton T-shirt or sweatshirt wrapped around the Cyclo dual action polisher. All of the final marks will disappear at this step. This is also the point that you can do any touch ups for bird poop, etc.
Final word of advise, never park your newly polished trailer next to anything you care about. I have killed lawns and melted plastic RV rugs with the sun reflection off of the polished aluminum.
Good luck with your project.
John Palmer
|
|
|
|
Post by Teachndad on Feb 19, 2024 10:03:38 GMT -8
Thank you John,
That description no doubt took a lot of time to compose and edit. It's invaluable information.
Cheers,
Rod
|
|


 when I dry camp for 4 out of the 7 nights.


