SusieQ
Global Moderator 
Posts: 4,781 
Likes: 1,197
'62 Shasta Compact
Currently Offline
|
Post by SusieQ on May 9, 2014 9:17:28 GMT -8
Thought I'd revisit this thread. I finally attempted to remove the glass in my rear window, against my husband's advice. He thought it might be cheaper to take it to a glass shop rather than risk breaking it. He almost had me convinced but once I saw Mobil's video, I had to try. And it worked. I did watch Mobiltec's video and I'm glad I waited until he made it. I didn't have his little tool but I had a very small sewing screw driver. I was going to use a tiny crochet hook but couldn't find my little one. I do think it would have worked. It was really easy. Now I can order my glazing tape. Stay tuned to see if I successfully get it replaced. ] 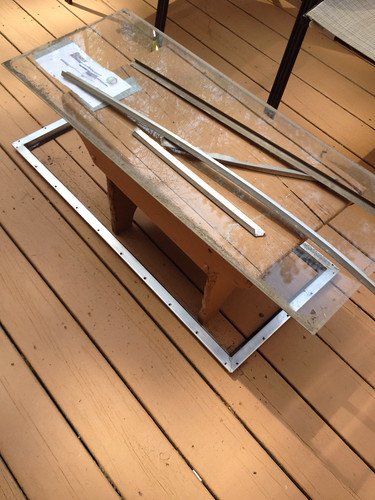 |
|
|
|
Post by vikx on May 9, 2014 21:14:52 GMT -8
"tiny crochet hook". LOL. I love the way some of our ladies use their tools... I have some of my mom's stuff and it comes in very handy. She used to do small metal art out of tin cans. The sharpest NEEDLE nose pliers are to die for...
|
|
pirateslife
Active Member

Posts: 426 
Likes: 137
1969 Shasta Compact
Currently Offline
|
Post by pirateslife on May 10, 2014 18:05:27 GMT -8
well, during the downpour we had today, i went out and spent some time in the trailer, and guess what....a small leak around the rear window (and one side one. the good thing is it wasnt the glass. im almost convinced it may be the seam in the narrow strip of metal, as both leaks were about 6 inchs up from the bottom of the windows and more to the outside of the frame. just a very small stream that dried up very quickly with the inside open. Gonna have to do some serious cypherin on these and may end up pulling the windows; but i really dont think its the putty tape. first thing is to check the tightness of off the screws first. UGH! Although the bright side is, i am building it backwards and was able to find them before covering them up. These would take years to show through the way they are just running the metal on the sides.
|
|
mobiltec
5K Member
 I make mistakes so you don't have to...
Posts: 9,822
Likes: 3,749
1954 Jewel In Progress...
Currently Offline
|
Post by mobiltec on May 10, 2014 20:25:12 GMT -8
I put about 3 inches worth of an extra line of putty tape above and below the pitsburg locks. It takes up the space of the locks and feathers out the seal from the locks. I put the tape on the metal itself and then just apply the window with it's putty tape over it as normal.
|
|
pirateslife
Active Member
Posts: 426
Likes: 137
1969 Shasta Compact
Currently Offline
|
Post by pirateslife on May 11, 2014 6:41:04 GMT -8
I put about 3 inches worth of an extra line of putty tape above and below the pitsburg locks. It takes up the space of the locks and feathers out the seal from the locks. I put the tape on the metal itself and then just apply the window with it's putty tape over it as normal. This is the way I done it after seeing it in one of your vids..everything "looks" sealed. Thinking of trying to work a very fine bit of tape up in the seam near where it's leaking. Even for a roofer that can find a leak anywhere, this ones gonna be tough |
|
|
|
Post by vikx on May 11, 2014 21:50:14 GMT -8
Here's a door area with added putty in the skin low areas. The rest goes on the flange and when married, the seal is complete. 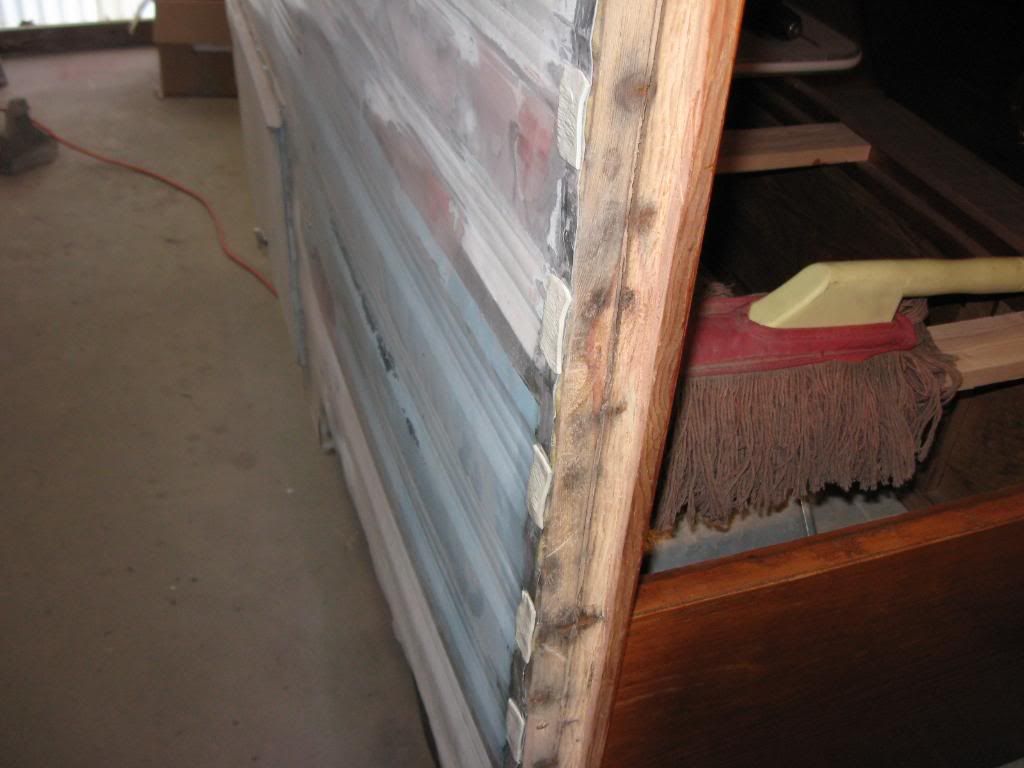 |
|


