Post by wisconsinjoe on Nov 10, 2020 10:59:58 GMT -8
I reiterate using a zero clearance blade insert with a splitter behind the blade on a table saw. Those two things help keep this dangerous machine a bit safer by preventing kickback. A buddy (retired career carpenter) took off the end of his thumb when a narrow offcut fell into the wide blade insert and shot back at unavoidable speed and force.
By the way, I also used my bandsaw for just a few of the tiles where I needed an L-shaped cut. Because the blade was plain steel (NOT carbide), it definitely got dulled. Oh well, another $8 down the drain. Small price to pay for such a nice affordable floor.
The great thing about VCT is that the adhesive goes on opaque and dries clear. Not only does that tell you it’s ready, it allows you to see all your layout lines. Since there were many custom cut tiles, I was able to cut, place, and label each one prior to installation, both as notes written on the floor and tape on the tiles. I even drew grain direction on the floor to avoid brain cramp mistakes at the final stage.
It took only about 20 minutes to place the tiles and press them in with a laminate roller. I hand felt each intersection to check for “lipping” and simply hammered with a block of wood to press down where it stayed. All in all, it was one of the easiest and most rewarding jobs that I ever did, and not worth all of the anxious worry (...that I do with every new thing I try. Basically EVERYTHING in building this trailer).
 20201109_120614 by Joe Mirenna, on Flickr
******
In the shop I use only two basic wood finishes. The first one is MinWax Wipe-On Poly (satin sheen), basically a solvent thinned poly that goes on with a rag rather than a brush, and avoids any vertical surface heavy sags that plague the brush version. Because it dries tacky very fast, there is a bit of a trick to this: work quickly, rub on and wipe off in one direction, and DON’T touch it again. If you are finishing a wide surface, work quickly in parallel strips going with the wood grain, overlapping just the edge of the previous layer. You need at least 4 coats, but you can do two per day. Between coats, lightly sand with 400 grit paper. It should fracture into a white powder. If it gums up the paper, it is not dry enough. But the end result is a near lacquer finish that can take table top abuse.
The other finish I use (besides latex paint) is Watco Danish Oil (natural, not dyed). It is a linseed oil mixed with polymers that seep into the wood, rather than a surface top coat layer like poly. Like the latter, it immediately stains the wood to its natural finished color. But unlike poly, it is easily repaired. This is what I use on all furniture quality work in the shop. Multiple coats can build up a satin sheen, but I’m lazy and like to use just one coat. After it dries for a few days you can add a liquid wax, rubbed in with 400 grit sandpaper, and buff to a sheen.
 20201109_165630 by Joe Mirenna, on Flickr
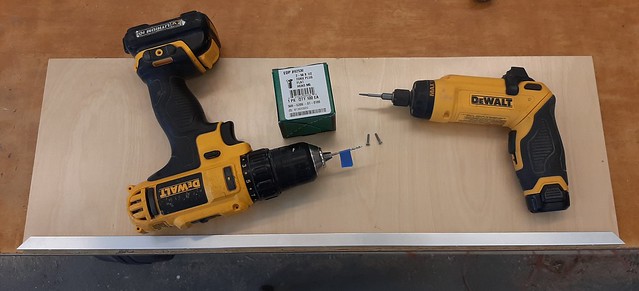
Here’s an example where its repairability helps: When installing the walnut floor trim, I had to screw the step tread into the riser. I counter-sunk a ⅜ hole with a brad point bit, into which screws sat well below the surface. When the plugs got sanded down, the finish was destroyed. But, a quick wipe with some Watco immediately blended the new work.
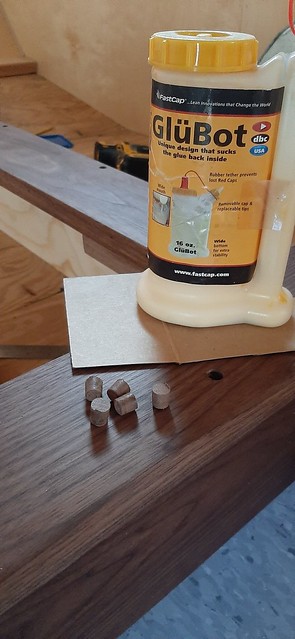
By the way, plugging screw holes is a method I use a lot. An inexpensive plug cutter creates a slightly tapering shape that you coat with yellow glue and tap into the hole. If you are super careful, you can match grain and make those plugs almost disappear when finished. I didn’t try that, preferring to actually see the plugged holes. Kind of goes with the industrial look, like exposed screws holding the ceiling to the rafters.
 20201109_125406 by Joe Mirenna, on Flickr
 20201109_224030 by Joe Mirenna, on Flickr
The one trick to know is how to trim the plugs flush. Use a sharp chisel, but DON’T try to cut it flush. The wood grain will follow the angled line of the original board and very easily you can be slicing from the wrong direction and end up with the plug splitting off below the surface. Rather, make your first chop high on the plug to see which direction the cut line follows. Then, trim to about a 16th inch. When dry, I usually use that chisel to pry up most of the overflow glue, then sand with a RO sander through the grits (120 to 320). A Watco wipe later and you are done.
 20201109_134028 by Joe Mirenna, on Flickr
 20201109_224523 by Joe Mirenna, on Flickr
 20201109_225500 by Joe Mirenna, on Flickr
 20201109_165950 by Joe Mirenna, on Flickr
******
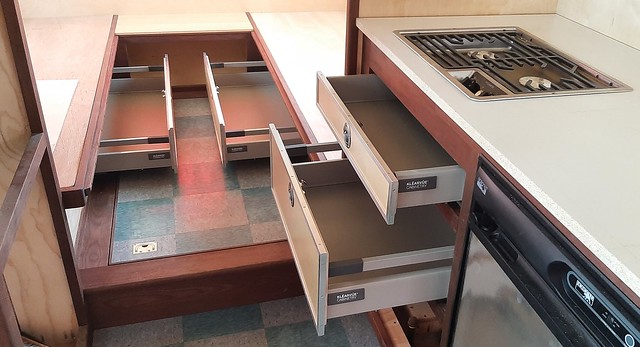
The thing I like about the old Jayco frame on this camper is that it is low to the ground and avoids needing a step at the door. They did this by arching the frame above the axle and by angling up both the tongue and the rear. That awkward rise in the back suggested a raised floor (7-¼ inches) to level out. It also created a reason to make a hinged floor/door to store things like awning, poles, and bed extension panels.
The process was pretty simple. A plywood frame would support a horizontal face frame built floor trim, which would support the vertical face frames for the bed/sofa platforms. This camper will feature opposing sofas that serve as 28 x 75 single beds, and will easily convert to a full sized bed in the center. The benefit, especially to this old fellow is that mid-night sleep pee breaks allow you to slip out of bed at the foot, hopefully without waking your partner. We’re happy that the inside person doesn’t have to crawl over the other, as happens with many camper beds. This is definitely our favorite feature from the Friendship Vacationaire that we are copying.
You can see how pocket hole screws are so valuable. With their washer heads and self-drilling tips, they are also perfect for attaching things straight on, like this step riser, or cabinets to walls and ceiling rafters.
 20201109_120752 by Joe Mirenna, on Flickr
 20201109_121146 by Joe Mirenna, on Flickr
 20201109_121242 by Joe Mirenna, on Flickr
 20201109_121727 by Joe Mirenna, on Flickr
 20201109_123935 by Joe Mirenna, on Flickr
 20201109_124519 by Joe Mirenna, on Flickr
 20201109_225141 by Joe Mirenna, on Flickr
******
The floor door ended up working out well. I cut a piece of plywood slightly larger than needed and laid out tiles to match the lower floor, making sure that no tile would extend to the edge of the plywood. That left a straight edge to trim on the table saw after calculating how much to remove to fit a walnut banding. I ran masking tape along those cut edge lines and kept it there until the walnut could be glued, sanded and finished with Watco.
Attaching the piano hinge was quite easy to line up the door with the insert frame and to pre-drill all the holes. When it was time to install, it was a piece of cake (with a helper positioning the door).
 20201109_163127 by Joe Mirenna, on Flickr
 20201109_163103 by Joe Mirenna, on Flickr
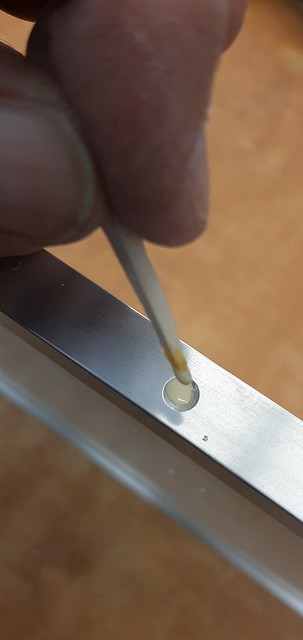
The one thing I lost a little sleep over was inlaying the flush mount retractable stainless steel handle (...another cool piece of hardware found in the boating world). With only two tries, a sample to practice on, and three hours of work, I made a jig with some plywood, strips of scrap, some hot melt glue, and a trim router. Then it was just a matter of careful measurement, setting the depth of the router accurately and running the lead face around the frame. There was an odd shaped deeper cut to be made, but it was not difficult to hand rout after drawing the pattern on the routed surface. I kept the frame jig clamped just in case the router ran away from my control (...it didn’t). A final squaring up the rounded rectangle corners with a chisel, and there she sits nestled so nicely flush with the floor. Satisfying.
 20201109_224619 by Joe Mirenna, on Flickr
 20201109_224723 by Joe Mirenna, on Flickr
 20201109_224826 by Joe Mirenna, on Flickr
 20201109_225005 by Joe Mirenna, on Flickr
******
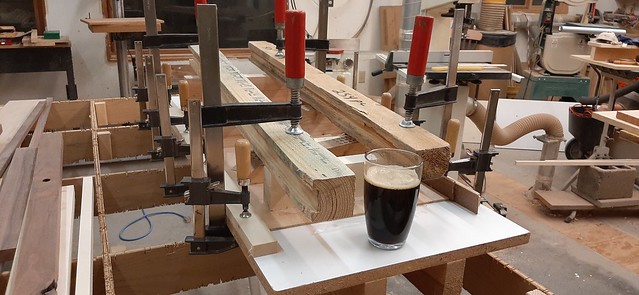
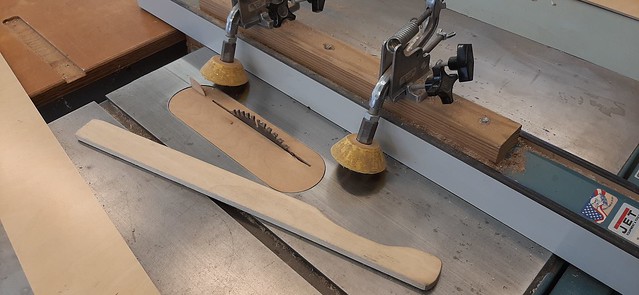
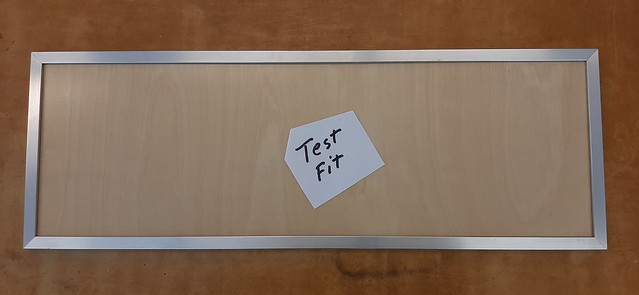
The last thing I want to show is how I often make frame and panel cabinetry. Many woodworkers either rout or table-saw a rabbet or dado into a frame to capture a flat or raised panel. I almost always use plywood, or shop sawn veneer glued to plywood, that I pre-finish. However, I find it easier to just make a simple face frame with pocket hole screws, and then add small quarter inch strips of matching hardwood.
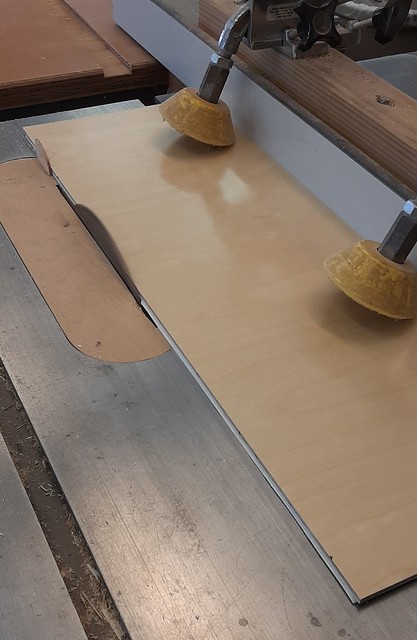
In fitting those strips, I carefully measure and cut on a miter saw, apply glue sparingly, hold in place with a small offset spacer jig, and nail with a 23 gauge headless pin nailer. If glue squeezes out, I let it dry for a half hour and then carve away the rubbery glue with a sharp chisel. After drying, it is simple to cut the filler panel and fit from the rear, capturing it with more of those quarter inch strips. It’s okay to be sloppier with the glue on that back side.
 20201109_125910 by Joe Mirenna, on Flickr
 20201109_131757 by Joe Mirenna, on Flickr
 20201109_132400 by Joe Mirenna, on Flickr
 20201109_131853 by Joe Mirenna, on Flickr
 20201109_133816 by Joe Mirenna, on Flickr
Of course, to do this you will need a surface planer (and that zero clearance table saw insert with attached splitter), those essential workhorse tools in my workshop. To be able to create any thickness of wood is the main trick for any woodworker, and something that comes in mighty handy in this project.
By the way, I also used my bandsaw for just a few of the tiles where I needed an L-shaped cut. Because the blade was plain steel (NOT carbide), it definitely got dulled. Oh well, another $8 down the drain. Small price to pay for such a nice affordable floor.
The great thing about VCT is that the adhesive goes on opaque and dries clear. Not only does that tell you it’s ready, it allows you to see all your layout lines. Since there were many custom cut tiles, I was able to cut, place, and label each one prior to installation, both as notes written on the floor and tape on the tiles. I even drew grain direction on the floor to avoid brain cramp mistakes at the final stage.
It took only about 20 minutes to place the tiles and press them in with a laminate roller. I hand felt each intersection to check for “lipping” and simply hammered with a block of wood to press down where it stayed. All in all, it was one of the easiest and most rewarding jobs that I ever did, and not worth all of the anxious worry (...that I do with every new thing I try. Basically EVERYTHING in building this trailer).
20201109_120614 by Joe Mirenna, on Flickr******
In the shop I use only two basic wood finishes. The first one is MinWax Wipe-On Poly (satin sheen), basically a solvent thinned poly that goes on with a rag rather than a brush, and avoids any vertical surface heavy sags that plague the brush version. Because it dries tacky very fast, there is a bit of a trick to this: work quickly, rub on and wipe off in one direction, and DON’T touch it again. If you are finishing a wide surface, work quickly in parallel strips going with the wood grain, overlapping just the edge of the previous layer. You need at least 4 coats, but you can do two per day. Between coats, lightly sand with 400 grit paper. It should fracture into a white powder. If it gums up the paper, it is not dry enough. But the end result is a near lacquer finish that can take table top abuse.
The other finish I use (besides latex paint) is Watco Danish Oil (natural, not dyed). It is a linseed oil mixed with polymers that seep into the wood, rather than a surface top coat layer like poly. Like the latter, it immediately stains the wood to its natural finished color. But unlike poly, it is easily repaired. This is what I use on all furniture quality work in the shop. Multiple coats can build up a satin sheen, but I’m lazy and like to use just one coat. After it dries for a few days you can add a liquid wax, rubbed in with 400 grit sandpaper, and buff to a sheen.
20201109_165630 by Joe Mirenna, on FlickrHere’s an example where its repairability helps: When installing the walnut floor trim, I had to screw the step tread into the riser. I counter-sunk a ⅜ hole with a brad point bit, into which screws sat well below the surface. When the plugs got sanded down, the finish was destroyed. But, a quick wipe with some Watco immediately blended the new work.
By the way, plugging screw holes is a method I use a lot. An inexpensive plug cutter creates a slightly tapering shape that you coat with yellow glue and tap into the hole. If you are super careful, you can match grain and make those plugs almost disappear when finished. I didn’t try that, preferring to actually see the plugged holes. Kind of goes with the industrial look, like exposed screws holding the ceiling to the rafters.
20201109_125406 by Joe Mirenna, on Flickr20201109_224030 by Joe Mirenna, on FlickrThe one trick to know is how to trim the plugs flush. Use a sharp chisel, but DON’T try to cut it flush. The wood grain will follow the angled line of the original board and very easily you can be slicing from the wrong direction and end up with the plug splitting off below the surface. Rather, make your first chop high on the plug to see which direction the cut line follows. Then, trim to about a 16th inch. When dry, I usually use that chisel to pry up most of the overflow glue, then sand with a RO sander through the grits (120 to 320). A Watco wipe later and you are done.
20201109_134028 by Joe Mirenna, on Flickr20201109_224523 by Joe Mirenna, on Flickr20201109_225500 by Joe Mirenna, on Flickr20201109_165950 by Joe Mirenna, on Flickr******
The thing I like about the old Jayco frame on this camper is that it is low to the ground and avoids needing a step at the door. They did this by arching the frame above the axle and by angling up both the tongue and the rear. That awkward rise in the back suggested a raised floor (7-¼ inches) to level out. It also created a reason to make a hinged floor/door to store things like awning, poles, and bed extension panels.
The process was pretty simple. A plywood frame would support a horizontal face frame built floor trim, which would support the vertical face frames for the bed/sofa platforms. This camper will feature opposing sofas that serve as 28 x 75 single beds, and will easily convert to a full sized bed in the center. The benefit, especially to this old fellow is that mid-night sleep pee breaks allow you to slip out of bed at the foot, hopefully without waking your partner. We’re happy that the inside person doesn’t have to crawl over the other, as happens with many camper beds. This is definitely our favorite feature from the Friendship Vacationaire that we are copying.
You can see how pocket hole screws are so valuable. With their washer heads and self-drilling tips, they are also perfect for attaching things straight on, like this step riser, or cabinets to walls and ceiling rafters.
20201109_120752 by Joe Mirenna, on Flickr20201109_121146 by Joe Mirenna, on Flickr20201109_121242 by Joe Mirenna, on Flickr20201109_121727 by Joe Mirenna, on Flickr20201109_123935 by Joe Mirenna, on Flickr20201109_124519 by Joe Mirenna, on Flickr20201109_225141 by Joe Mirenna, on Flickr******
The floor door ended up working out well. I cut a piece of plywood slightly larger than needed and laid out tiles to match the lower floor, making sure that no tile would extend to the edge of the plywood. That left a straight edge to trim on the table saw after calculating how much to remove to fit a walnut banding. I ran masking tape along those cut edge lines and kept it there until the walnut could be glued, sanded and finished with Watco.
Attaching the piano hinge was quite easy to line up the door with the insert frame and to pre-drill all the holes. When it was time to install, it was a piece of cake (with a helper positioning the door).
20201109_163127 by Joe Mirenna, on Flickr20201109_163103 by Joe Mirenna, on FlickrThe one thing I lost a little sleep over was inlaying the flush mount retractable stainless steel handle (...another cool piece of hardware found in the boating world). With only two tries, a sample to practice on, and three hours of work, I made a jig with some plywood, strips of scrap, some hot melt glue, and a trim router. Then it was just a matter of careful measurement, setting the depth of the router accurately and running the lead face around the frame. There was an odd shaped deeper cut to be made, but it was not difficult to hand rout after drawing the pattern on the routed surface. I kept the frame jig clamped just in case the router ran away from my control (...it didn’t). A final squaring up the rounded rectangle corners with a chisel, and there she sits nestled so nicely flush with the floor. Satisfying.
20201109_224619 by Joe Mirenna, on Flickr20201109_224723 by Joe Mirenna, on Flickr20201109_224826 by Joe Mirenna, on Flickr20201109_225005 by Joe Mirenna, on Flickr******
The last thing I want to show is how I often make frame and panel cabinetry. Many woodworkers either rout or table-saw a rabbet or dado into a frame to capture a flat or raised panel. I almost always use plywood, or shop sawn veneer glued to plywood, that I pre-finish. However, I find it easier to just make a simple face frame with pocket hole screws, and then add small quarter inch strips of matching hardwood.
In fitting those strips, I carefully measure and cut on a miter saw, apply glue sparingly, hold in place with a small offset spacer jig, and nail with a 23 gauge headless pin nailer. If glue squeezes out, I let it dry for a half hour and then carve away the rubbery glue with a sharp chisel. After drying, it is simple to cut the filler panel and fit from the rear, capturing it with more of those quarter inch strips. It’s okay to be sloppier with the glue on that back side.
20201109_125910 by Joe Mirenna, on Flickr20201109_131757 by Joe Mirenna, on Flickr20201109_132400 by Joe Mirenna, on Flickr20201109_131853 by Joe Mirenna, on Flickr20201109_133816 by Joe Mirenna, on FlickrOf course, to do this you will need a surface planer (and that zero clearance table saw insert with attached splitter), those essential workhorse tools in my workshop. To be able to create any thickness of wood is the main trick for any woodworker, and something that comes in mighty handy in this project.