kwaggs
Junior Member

Posts: 77
Likes: 10
Currently Offline
|
Post by kwaggs on Nov 30, 2013 16:15:49 GMT -8
SO, this is where I will start. I bought a '61 Airflyte that I gutted to fully restore, while disassembling I noticed the street side front corner was stuffed with Steel Wool from the PO because there was a gap from the outer skin and the inner paneling so they filled it steel wool. After total disassembly and starting to reassemble I notice the street side aluminum sticks out MUCH farther on the street side then it does on the curb side. SO my question is, can I trim the aluminum skin on the street side to be just 3/4" past the inner panel to SQUARE up the front and close that gap? Here are some pictures of what I am referring to. I need some veterans who know the whole process of restoring these campers to guide me in the right direction. 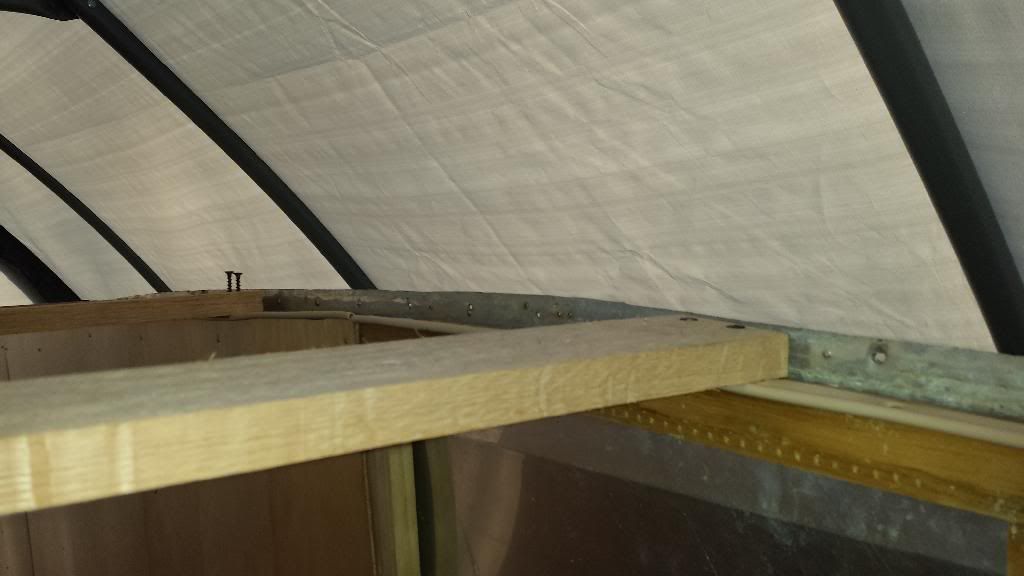 As you can see from this picture up top it is 3/4" and is where it should be. 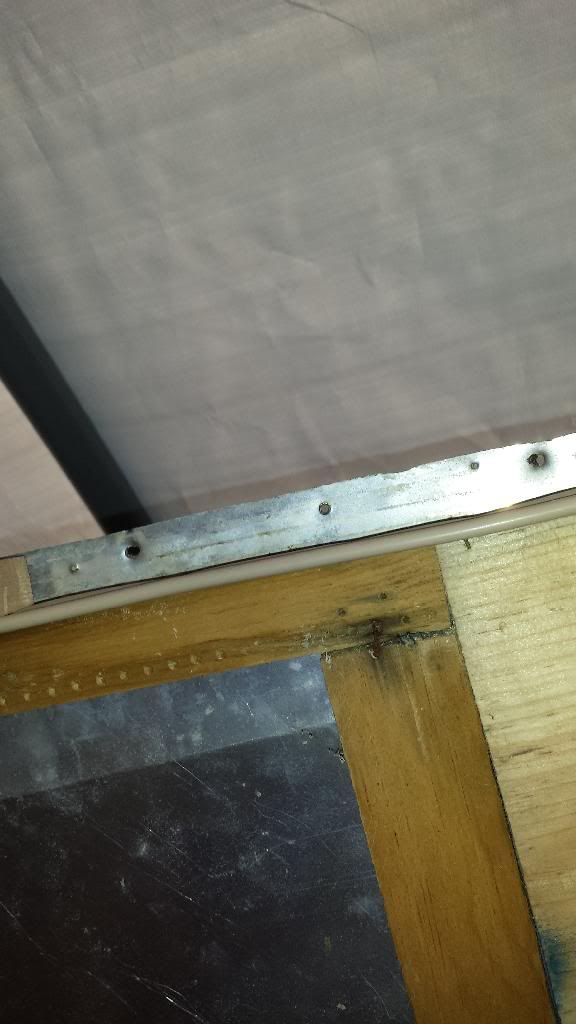 Coming forward towards the front of the camper it is still 3/4" 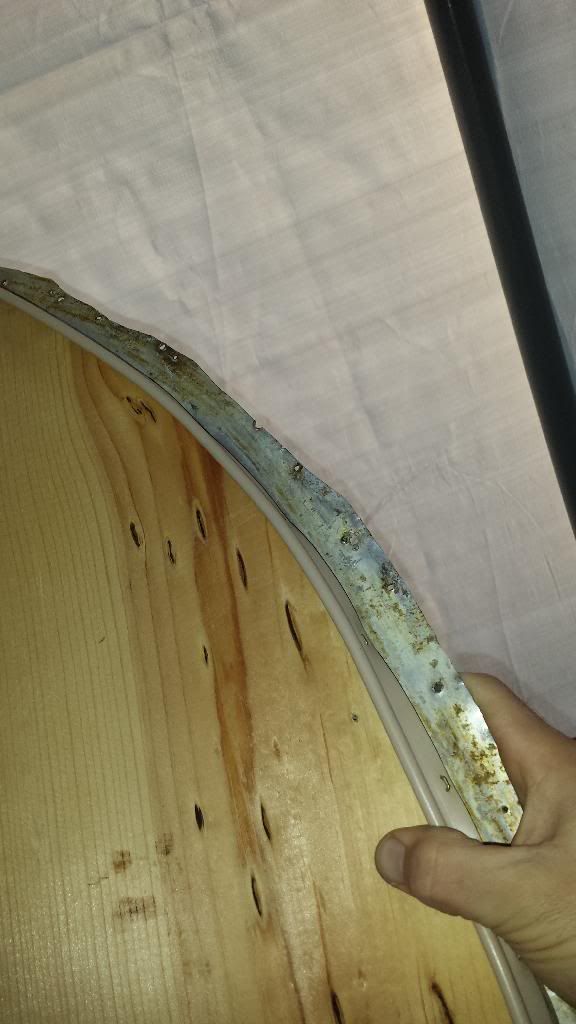 It looks like the PO either trimmed the aluminum here or the factory trimmed it to fit the roof over??? Confused why its cut..... 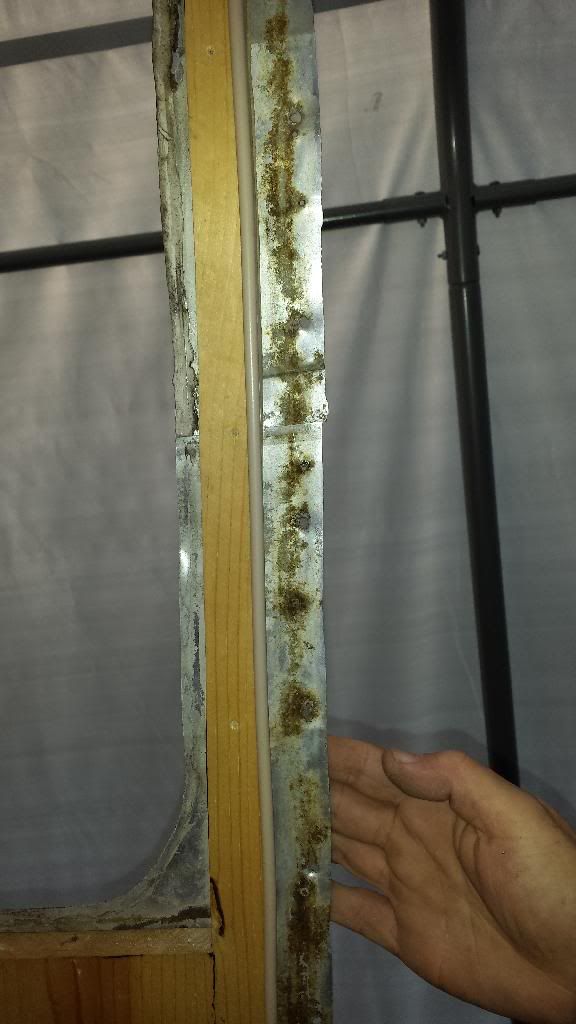 Coming down the front in front of the window it starts to get a little long, not too bad noticeable.  Coming down towards the bottom it starts to really overpass the framing. 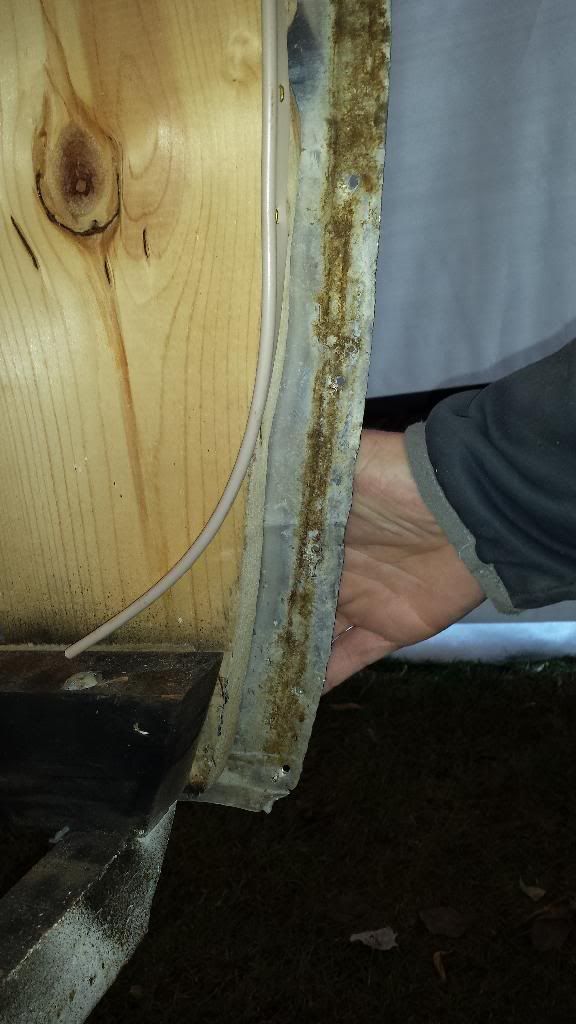 Now Im pretty sure that the outer skin should not be farther forward then 3/4" past that framing correct? 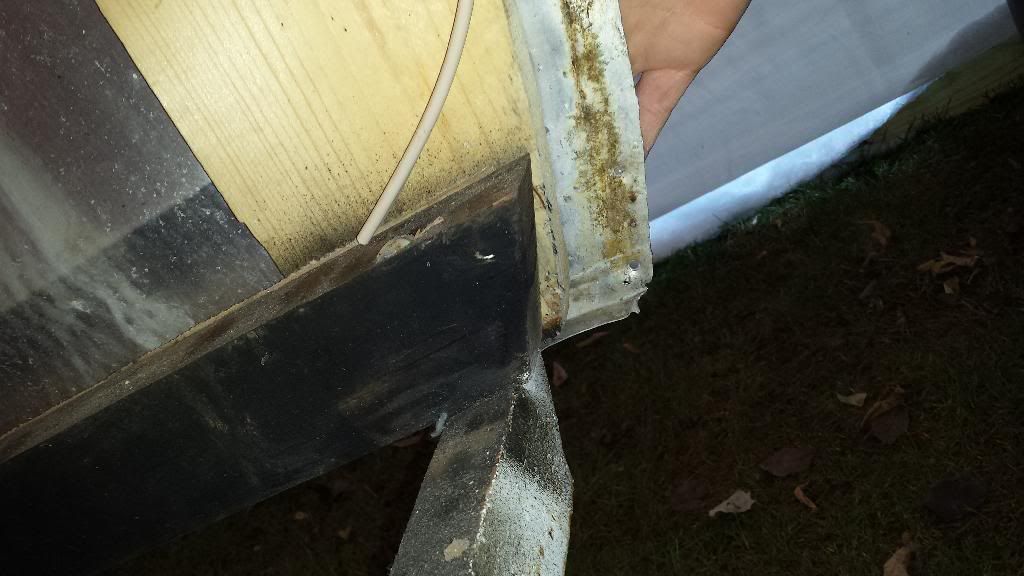 I know I need to sand the 1x10 I made that corner with to match the original floor frame but the skin still sticks out WAY past the froor frame. Isnt that skin ONLY supposed to be past the FLOOR FRAME 3/4"? Is the outer skin being out that far causing a huge gap when the front lower aluminum is wrapped over the edge and screwed down? What are those screws anchoring to if there isnt any wood behind? Can I trim that outer skin to 3/4" without affecting the rest of it fitting together? Need some input please! |
|
smccusk
Active Member
63 SC Restoration in progress
Posts: 202 
Likes: 41
1963 Shasta SC
Currently Offline
|
Post by smccusk on Nov 30, 2013 18:04:18 GMT -8
kwaggs, The answer to that question is yes, the side panel should end flush with the kerfed plywood (3/4 past the framing). That's odd, maybe Shasta messed up the the wall size or placement…perhaps it was late Friday afternoon quality control at the factory or lack there of.
|
|
|
|
Post by schweetcruisers on Nov 30, 2013 18:14:33 GMT -8
Shasta was(is) not known for quality, a lot of us have found major quality issues from the factory. My metal subframe tapered 1" at the rear cross member, it wouldn't have been so bad had it been a even taper but the first 3 cross members were all one length and then bam, the last one was a inch shorter.
So yes cut the excess off!
|
|
mobiltec
5K Member
 I make mistakes so you don't have to...
Posts: 9,822
Likes: 3,749
1954 Jewel In Progress...
Currently Offline
|
Post by mobiltec on Nov 30, 2013 18:36:20 GMT -8
This is not a problem but it seems to be something that has happened quite a bit and not just to Shastas. I've seen this before. Even the Forester I did in Colorado which I liked so much was a quarter inch bigger than the top of the curbing and framing. They just added another quarter inch of plywood curbing to make up for it when the mistake was found. The mistake was that they started to route away the metal around the curbing and the whistle must have blown for everyone to leave. I know this because I found the place where the guy had just started to route and then abandoned the project. Then someone came along and added an extra quarter inch of curbing to match up with the metal that had not been routered away.
Anyhow, I made my new curbing which matched up with my new framing and then gook my Shears from Home Depot that cost $30.00 and have removable blades and cut the metal down to the curbing all the way around both sides of the trailer. Then I put the top, front and rear back on and everything was fine. The J Rail was an inch or two too long now but that was better than too short.
You can use a router if you are brave enough to try it and risk the $30 bit. I would just get the bitchen American made shears they sell at Home Depot instead. They are great for cutting metal in close like with this project. I also use them to trim the new roof, front and rear panels on the sides down to half inch fold over. I'll see if I can find a photo of those shears. They are great and a must have.
|
|
kwaggs
Junior Member
Posts: 77
Likes: 10
Currently Offline
|
Post by kwaggs on Nov 30, 2013 18:53:49 GMT -8
I really appreciate the response to this issue. I tried to figure it out in my mind why it would have hung over so far and I could not come up with a reason. I was assuming I could just trim it back until it was the 3/4" over the curbing, which I am going to be using P.V.C. instead of the 3 layers of 1/4" ply. So trimming the side panel back should have no affect on the very front aluminum sheet fitting over then and sealing the gap. Well then I will be adding my P.V.C. and trimming the aluminum to match that. Thanks again.
|
|
mobiltec
5K Member
I make mistakes so you don't have to...
Posts: 9,822
Likes: 3,749
1954 Jewel In Progress...
Currently Offline
|
Post by mobiltec on Nov 30, 2013 18:55:43 GMT -8
I can not find those shears on the Home Depot website but I know they sell them. They are Gray in color and have replacable blades and say Made In USA on them! Very light weight and easy to use. I'll take a picture of mine in the morning and place it here and also in the TOOLS section.
But you can just cut the metal down to the top of the curbing once installed. You may have to trim the top of the window pieces a bit because now you will loose a little height. Not a problem though. Make sure every thing is fitting right before you begin stapling.
|
|
|
|
Post by vikx on Nov 30, 2013 22:35:10 GMT -8
Great help above! Glad the skin was too Big ....
|
|


