Alaska Shasta
Active Member

Posts: 230
Likes: 246
1964 Shasta
Currently Offline
|
Post by Alaska Shasta on Sept 16, 2018 18:27:14 GMT -8
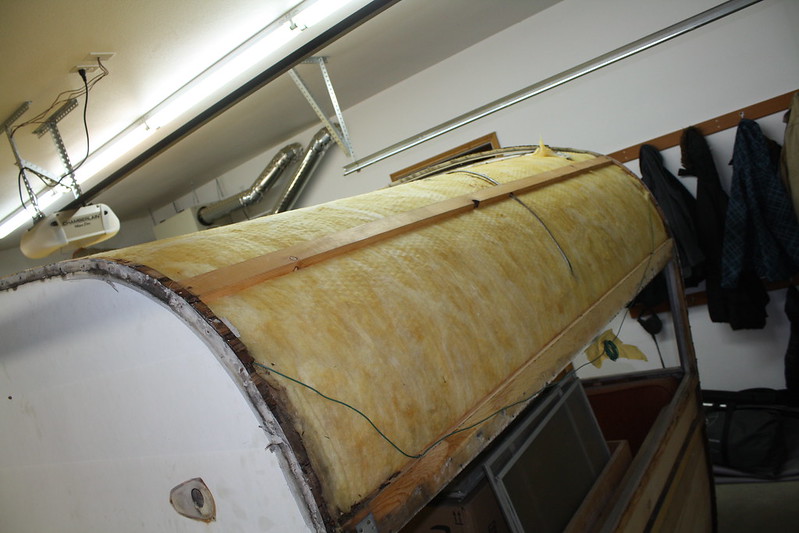
Had a productive weekend. Took off the lower streetside skin off, removed all the screws holding the remaining j-rail on, removed the Hehr roof vent, roof skin can now be removed, and replaced the bad wood on the lower back half of the street side. 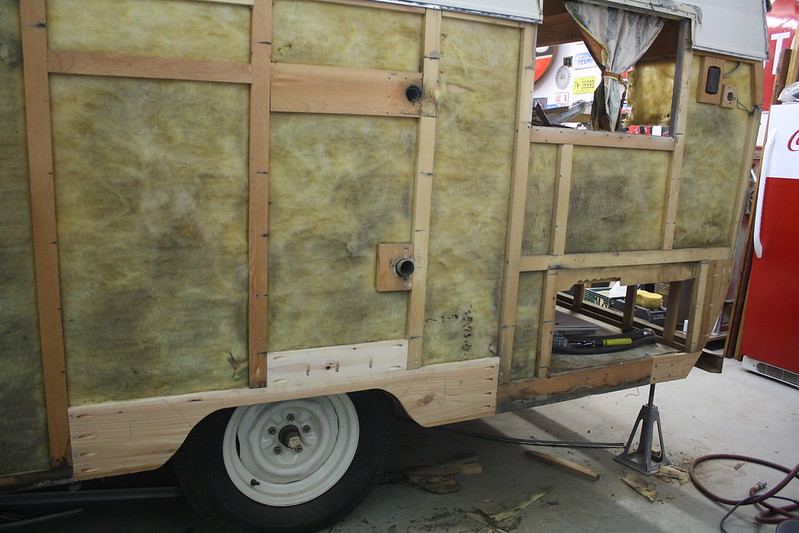 IMG_2059 IMG_2059 by Bryan Port, on Flickr |
|
Alaska Shasta
Active Member
Posts: 230
Likes: 246
1964 Shasta
Currently Offline
|
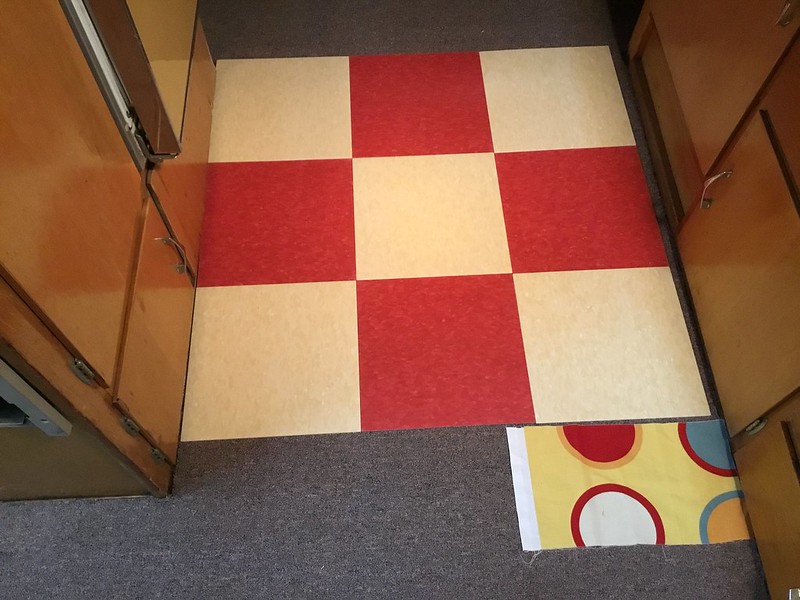
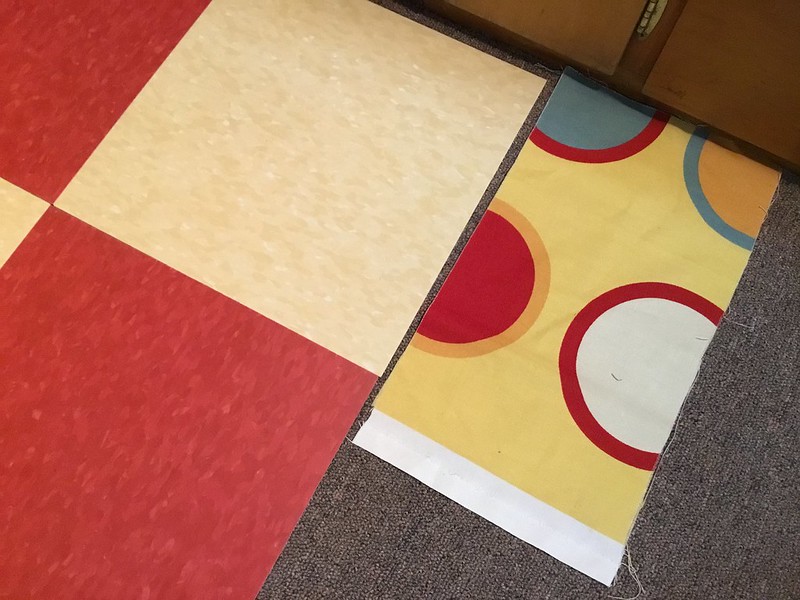
Post by Alaska Shasta on Sept 19, 2018 21:06:43 GMT -8
|
|
|
|
Post by vikx on Sept 19, 2018 22:03:08 GMT -8
Great color combos!
|
|
shastatom
Full Member
I can chase women or fix campers, I choose to fix what I understand........... campers.
Posts: 745 
Likes: 419
Shasta 54,57 1500 58 Airflyte
Currently Offline
|
Post by shastatom on Sept 20, 2018 3:56:22 GMT -8
I like it. Nice matching.
|
|
Alaska Shasta
Active Member
Posts: 230
Likes: 246
1964 Shasta
Currently Offline
|
Post by Alaska Shasta on Sept 27, 2018 18:16:09 GMT -8
|
|
Alaska Shasta
Active Member
Posts: 230
Likes: 246
1964 Shasta
Currently Offline
|
Post by Alaska Shasta on Oct 13, 2018 17:43:01 GMT -8
Cut out the 1/8" birch plywood, and fitted it for the rear of the camper, then shellacked it. First time using shellac. Crazy animal. Not used to a finish drying so quickly. Got the hang of it, and I am happy with the results. Then installed the new panel today. 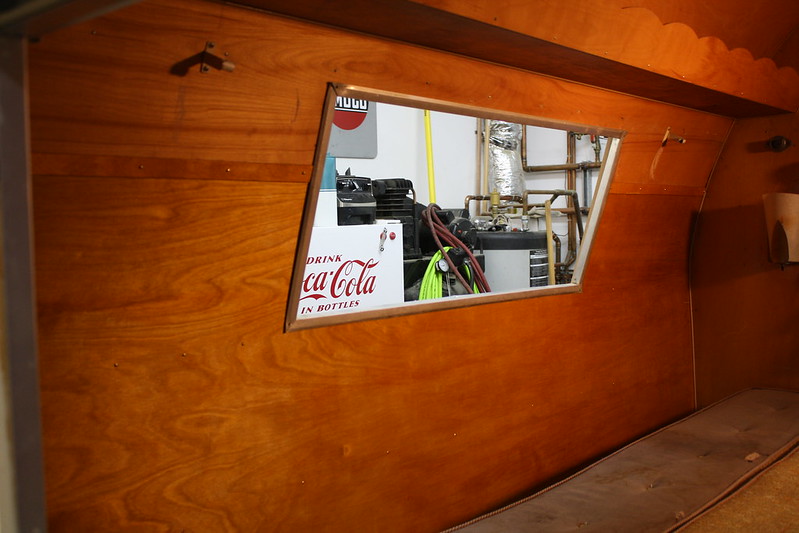 IMG_2214 IMG_2214 by Bryan Port, on Flickr 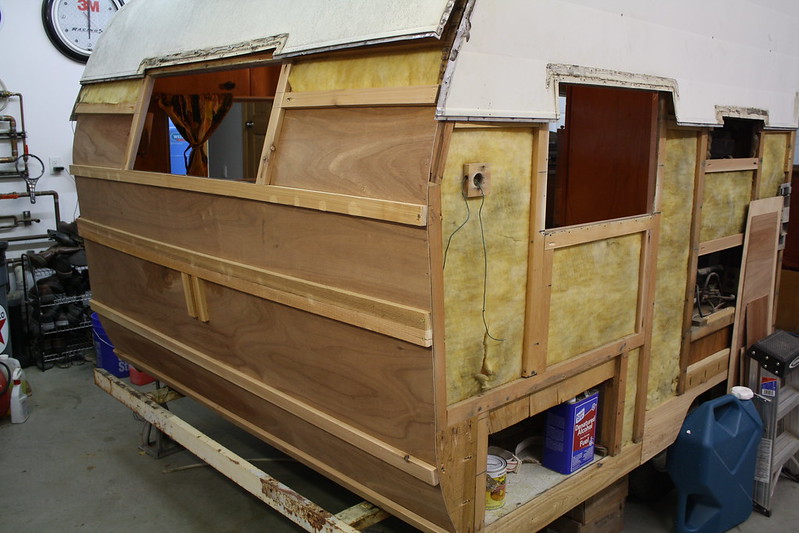 IMG_2212 IMG_2212 by Bryan Port, on Flickr |
|
|
|
Post by vikx on Oct 13, 2018 19:44:15 GMT -8
Really looks nice, Shasty!
|
|
Alaska Shasta
Active Member
Posts: 230
Likes: 246
1964 Shasta
Currently Offline
|
Post by Alaska Shasta on Oct 18, 2018 19:53:23 GMT -8
|
|
Alaska Shasta
Active Member
Posts: 230
Likes: 246
1964 Shasta
Currently Offline
|
Post by Alaska Shasta on Oct 22, 2018 19:26:56 GMT -8
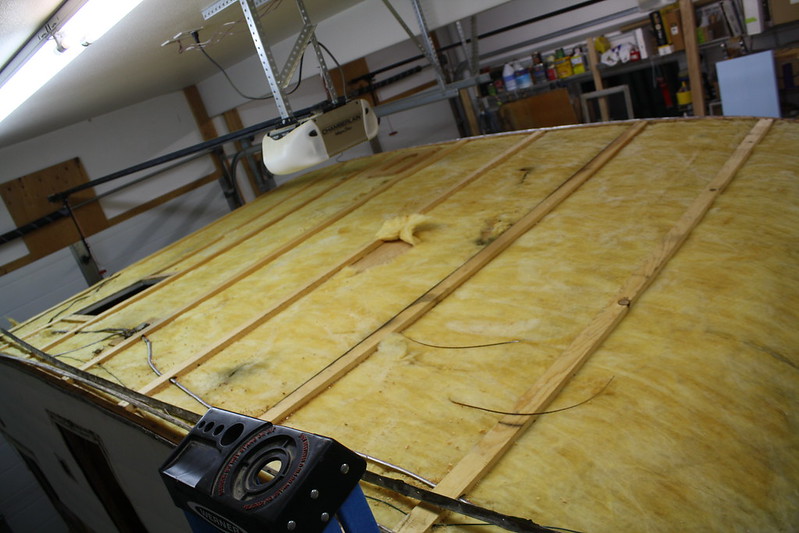
Four of my roof spars were bowed inward quite a bit. The others were all in good shape. This weekend I replaced the four bowed ones with new oak ones with steel flat stock screwed to one edge for strength. So the roof is done. Hurray! Now onto the front panel, and the dinette sides. 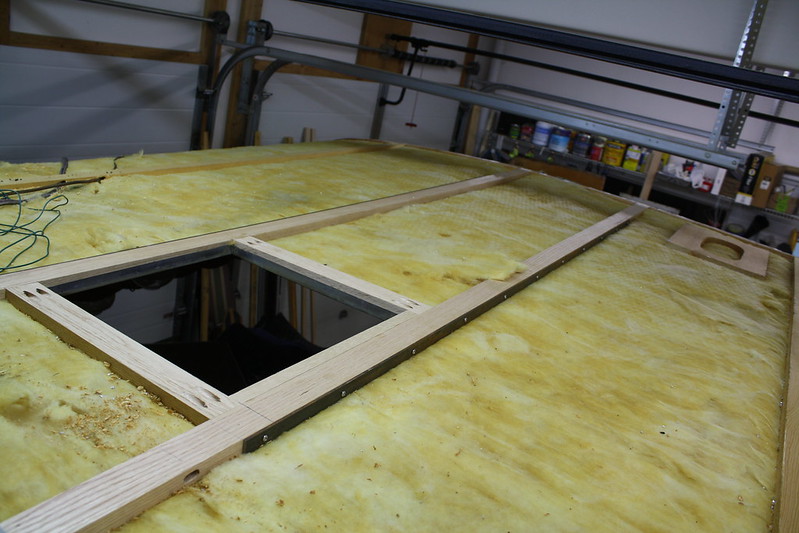 IMG_2224 IMG_2224 by Bryan Port, on Flickr 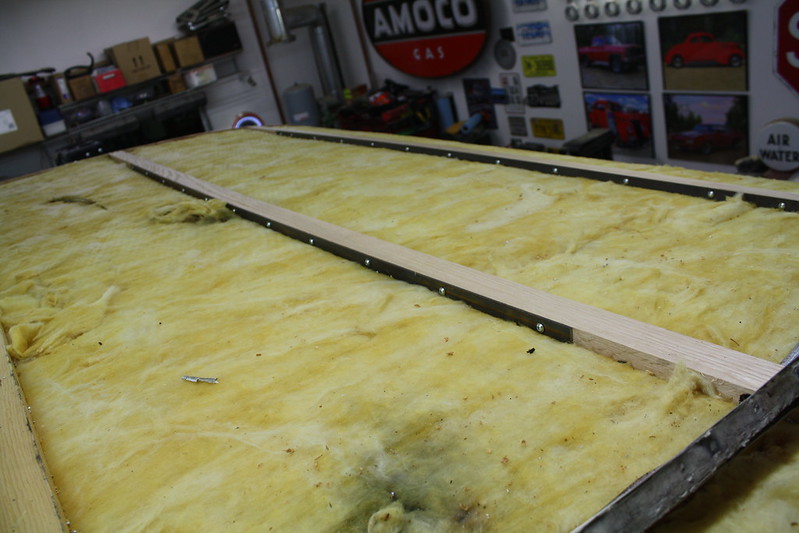 IMG_2223 IMG_2223 by Bryan Port, on Flickr |
|
|
|
Post by vikx on Oct 22, 2018 19:30:17 GMT -8
I like the steel reinforcement, very strong. I recommend shimming your vent up higher than the rest of the rafters. I do about 3/4 of an inch but 1/2 is better than nothing.
|
|
Alaska Shasta
Active Member
Posts: 230
Likes: 246
1964 Shasta
Currently Offline
|
Post by Alaska Shasta on Oct 22, 2018 19:33:36 GMT -8
I like the steel reinforcement, very strong. I recommend shimming your vent up higher than the rest of the rafters. I do about 3/4 of an inch but 1/2 is better than nothing. Great advice. I will do so. Thanks |
|
|
|
Post by vikx on Oct 22, 2018 19:36:45 GMT -8
There's lots of ways to do the shims.. You can glue/tack layers or cut plywood. I always taper the edges so the metal wont crease. If you need photos let me know.
|
|
Alaska Shasta
Active Member
Posts: 230
Likes: 246
1964 Shasta
Currently Offline
|
Post by Alaska Shasta on Oct 23, 2018 11:31:41 GMT -8
There's lots of ways to do the shims.. You can glue/tack layers or cut plywood. I always taper the edges so the metal wont crease. If you need photos let me know. I think I am going to glue it down. interesting you mentioned tapering the shim. I was going to do that for your reason stated. Thanks again! |
|
pdalber
Junior Member
Posts: 75
Likes: 37
Currently Offline
|
Post by pdalber on Oct 23, 2018 17:42:41 GMT -8
I can't quite tell from your pics, but you should make sure the top of the steel reinforcement is a little lower than the top of your wooden rafter. If the steel is in contact with the aluminum roof, it might create galvonic corrosion.
|
|
|
|
Post by vikx on Oct 23, 2018 20:15:29 GMT -8
I agree on the corrosion. Some ways to remedy that: duct tape over the rafters, a layer of insulation and as pdalber mentioned, keep the metal just below the wood edge. Duct tape comes in very handy for lots of things...
|
|