strange1
Active Member

Posts: 159 
Likes: 103
1965 Shasta Airflyte
Currently Offline
|
Post by strange1 on Apr 10, 2018 13:33:54 GMT -8
I'm headed out in 2 weeks. I'm towing my '65 Airflyte with our Chevy Colorado. I'm sure others will chime in before then...but this will be our maiden voyage and I'll be happy to report how it goes. Here's looking to the weekend of April 20th. What year is your Colorado? Please do report back after  and have a wonderful time on your maiden voyage in that pretty camper. My Colorado is the old style...not the newer bigger trucks. 2010... it has the 3.5L 5-cylinder motor in it and has been a very good truck. I'm considering a full size truck but have got this for now. I'll let you know how it goes. |
|
strange1
Active Member
Posts: 159
Likes: 103
1965 Shasta Airflyte
Currently Offline
|
Post by strange1 on Apr 6, 2018 15:08:11 GMT -8
I'm headed out in 2 weeks. I'm towing my '65 Airflyte with our Chevy Colorado. I'm sure others will chime in before then...but this will be our maiden voyage and I'll be happy to report how it goes. Here's looking to the weekend of April 20th.
|
|
strange1
Active Member
Posts: 159
Likes: 103
1965 Shasta Airflyte
Currently Offline
|
Post by strange1 on Apr 5, 2018 8:27:46 GMT -8
Well look what I got today... New brakes & hubs showed up. Couldn't wait to get them installed.  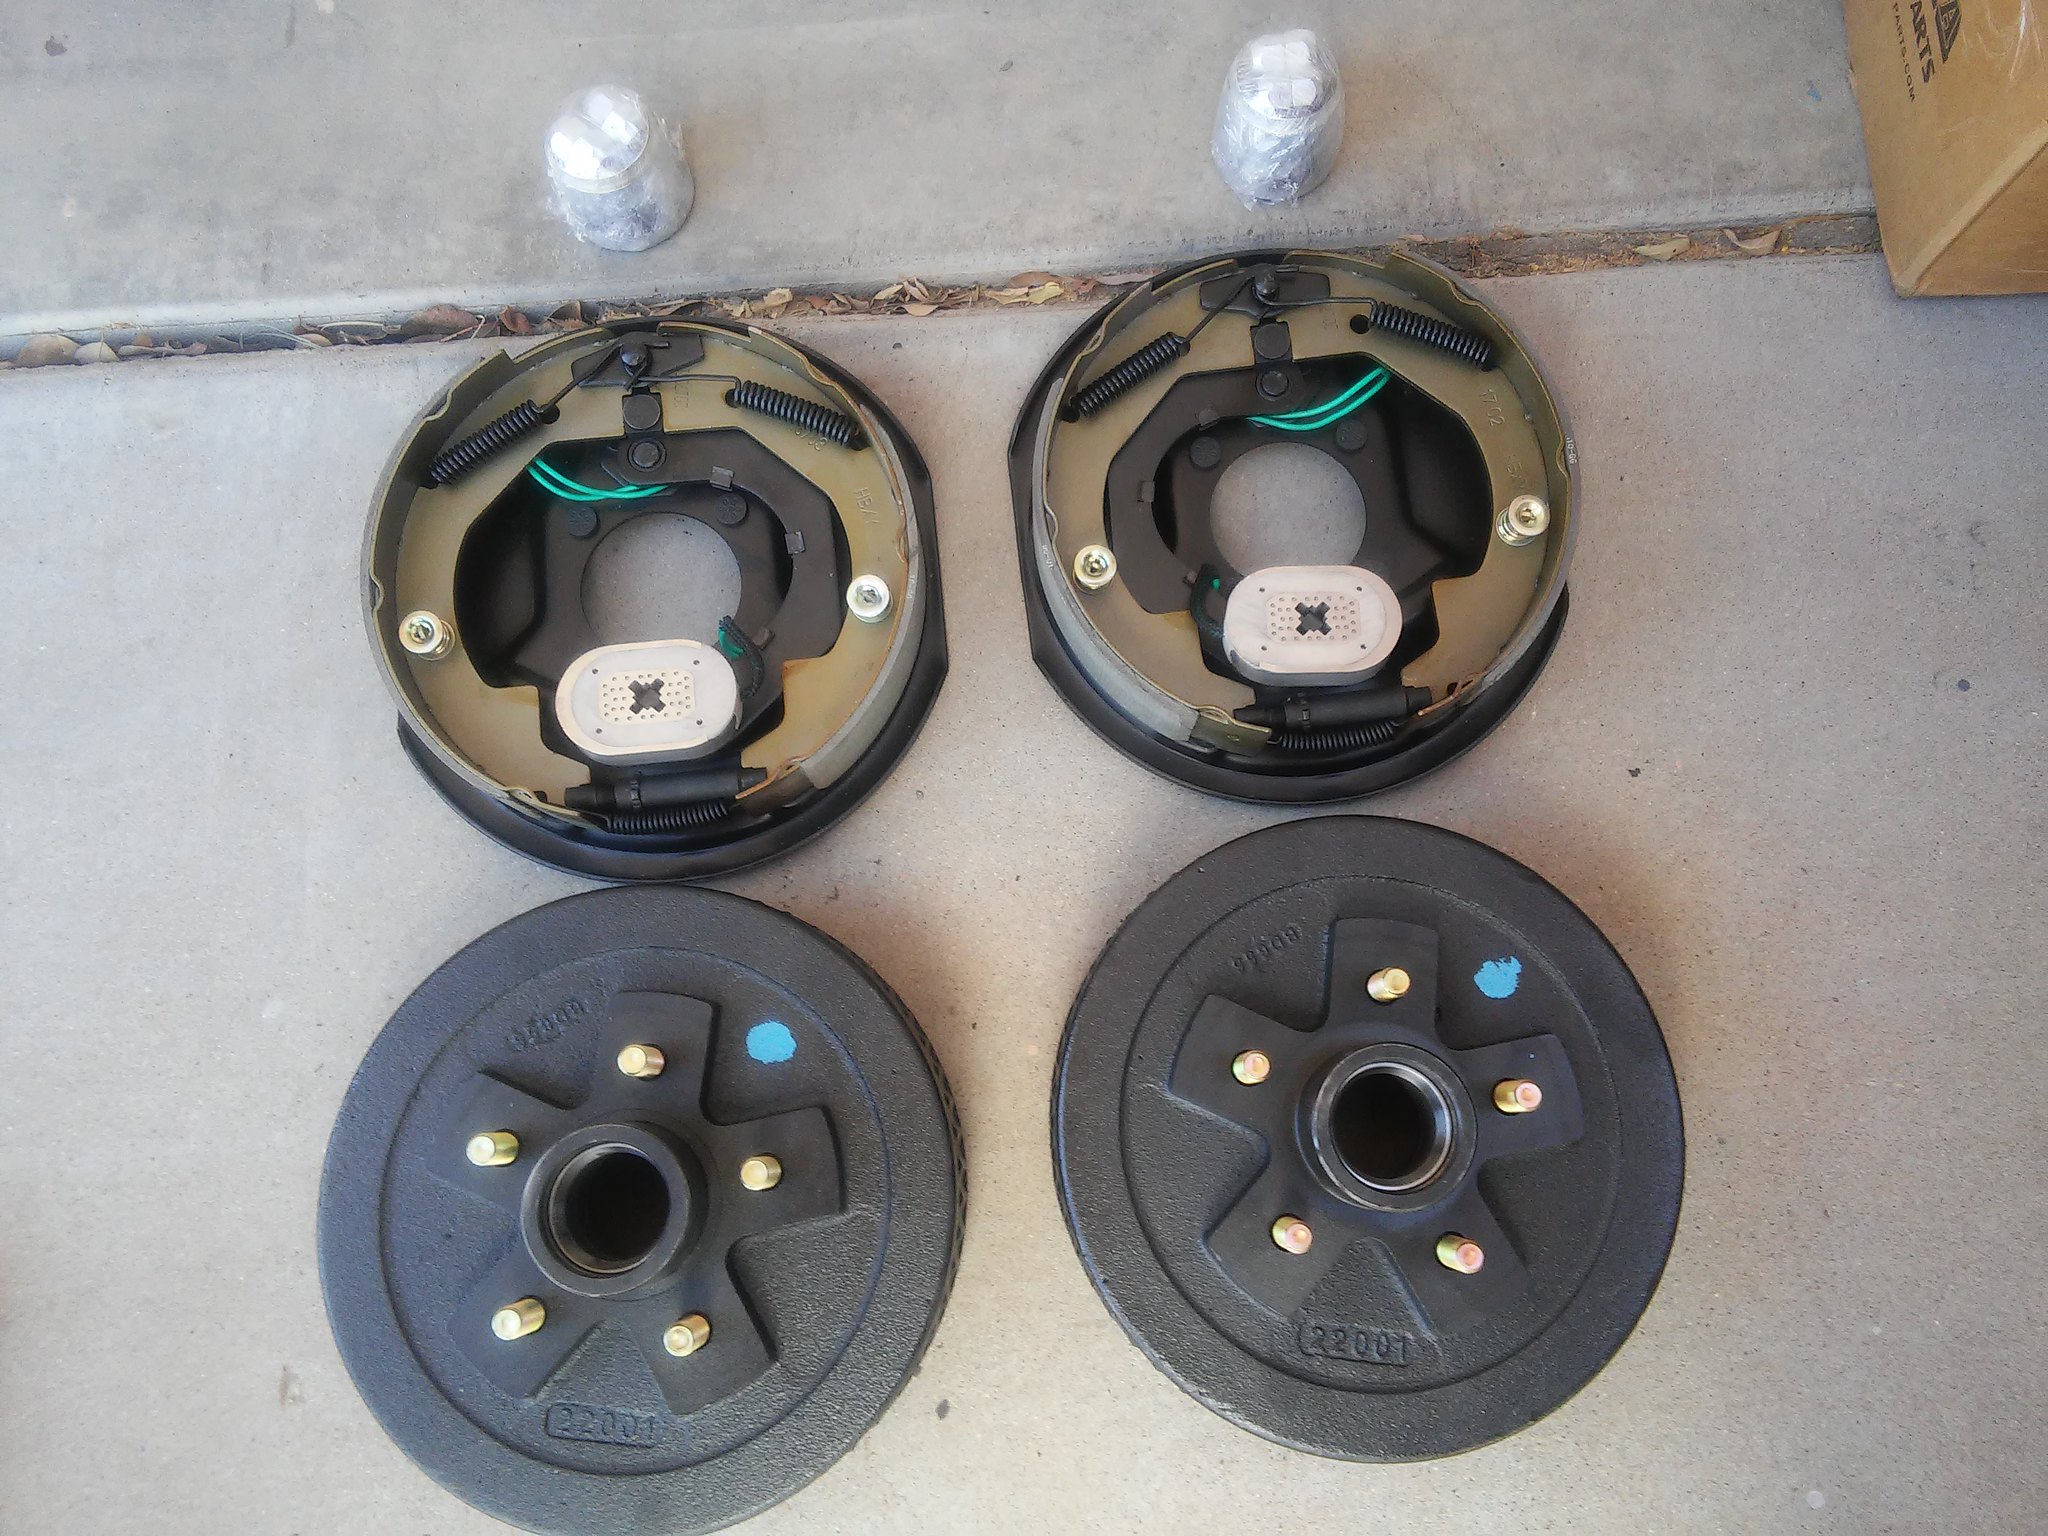 Only thing about the kit I didn't like was it didn't come with new nuts & washers to mount to my axle flange...I had to dig out the old ones. Otherwise very nice kit. 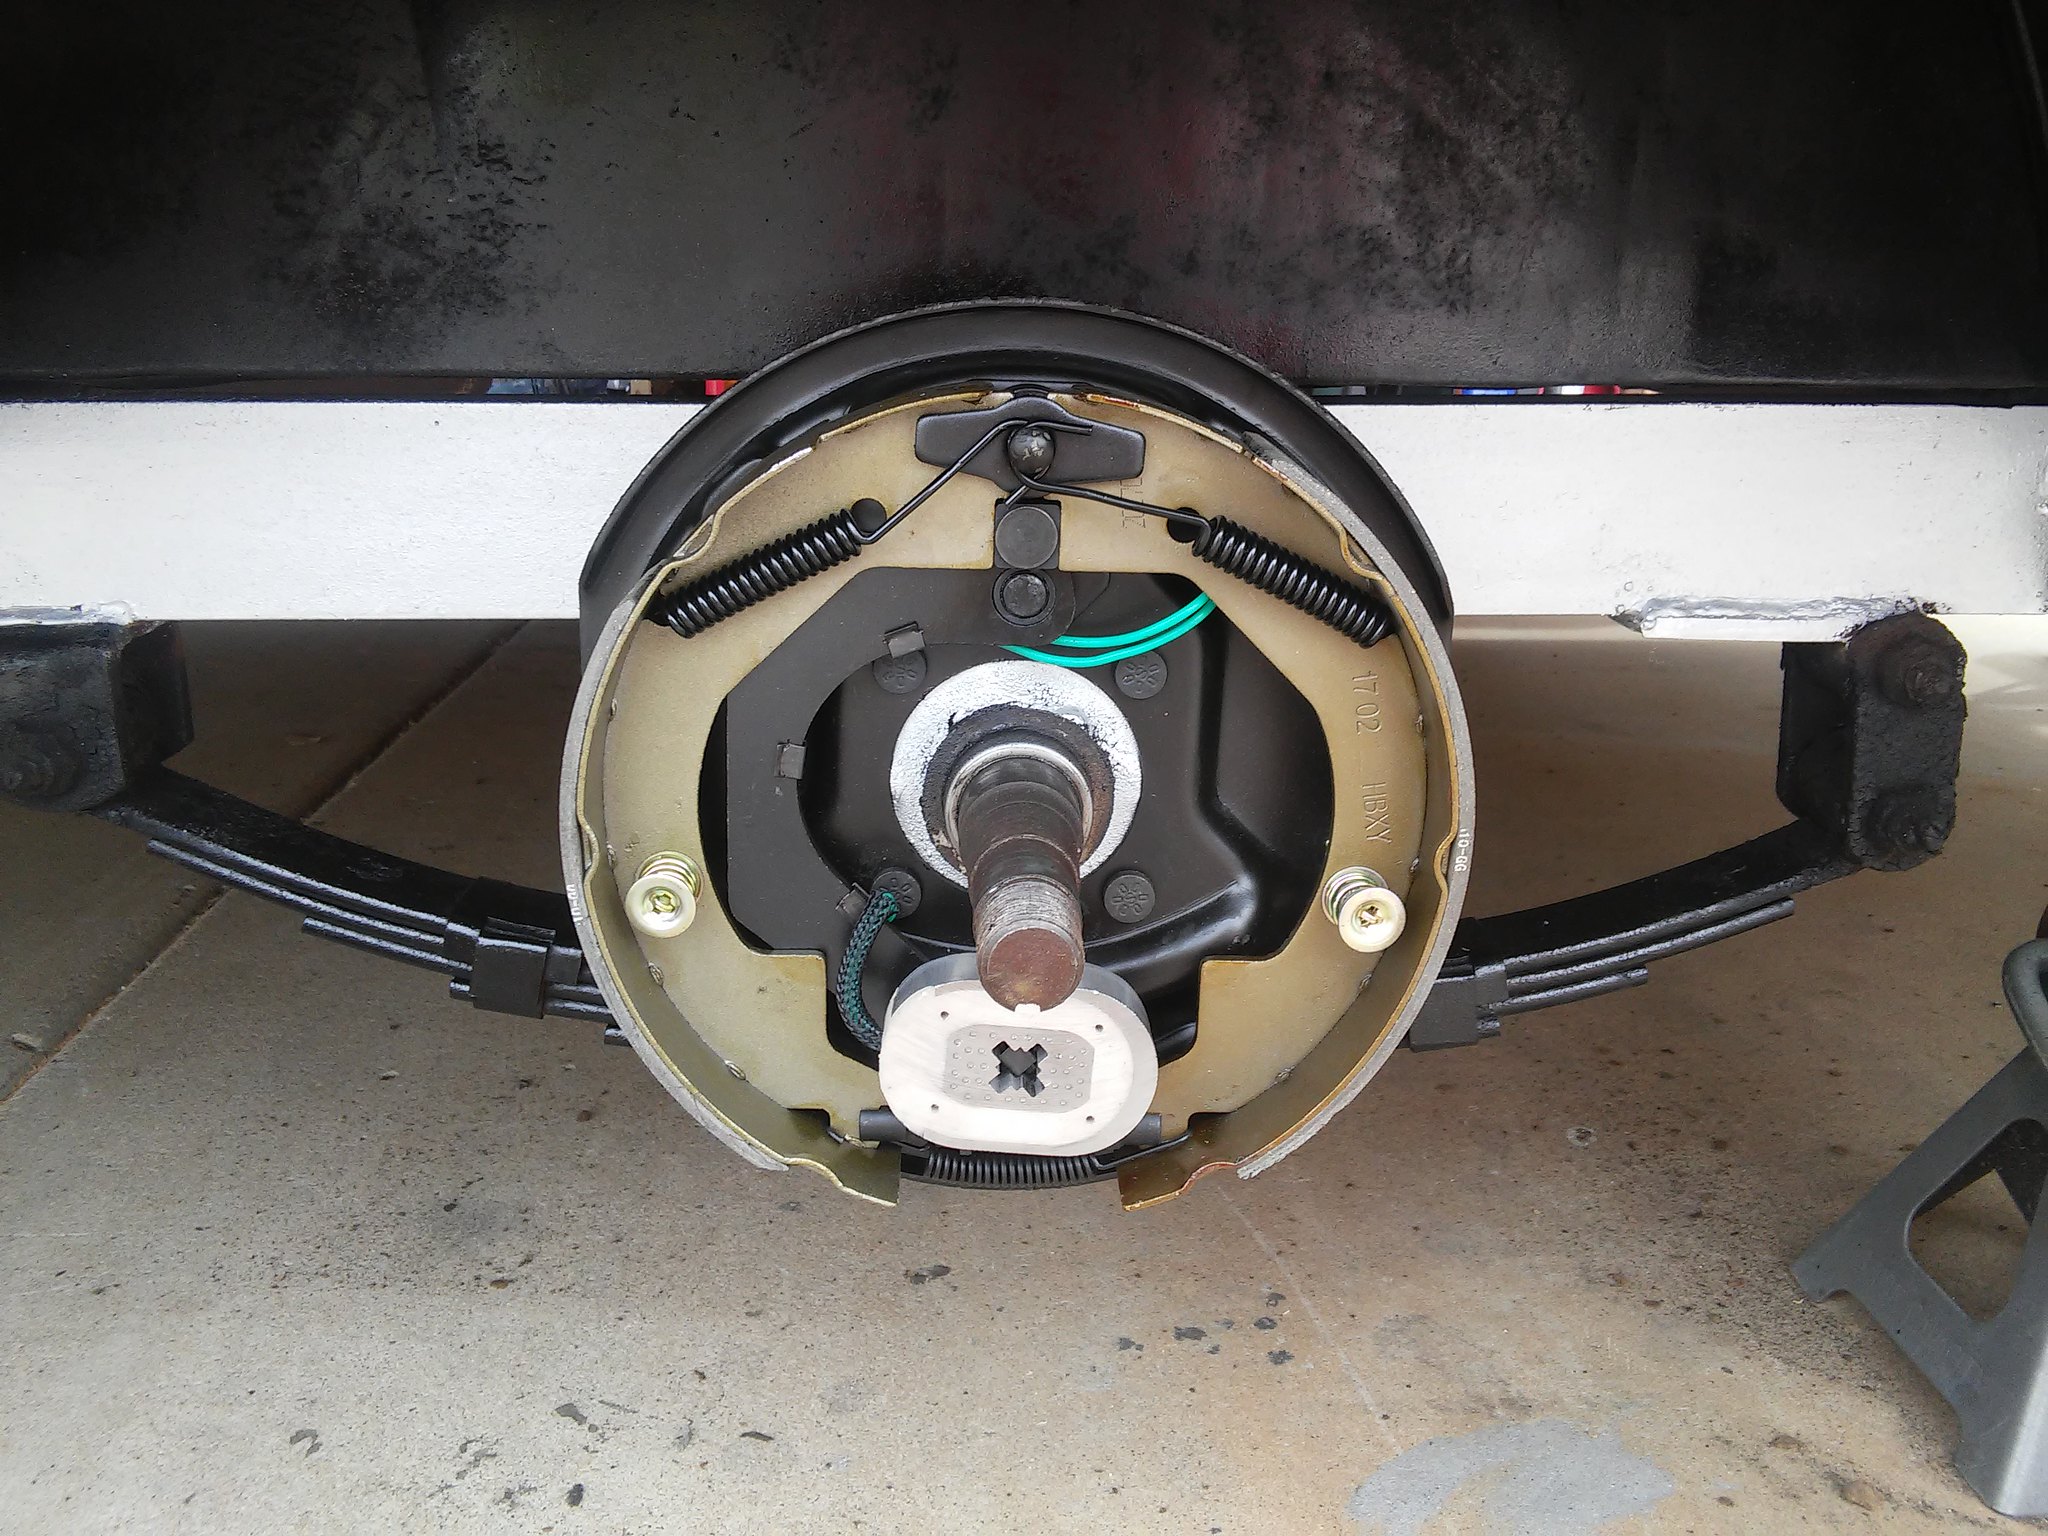 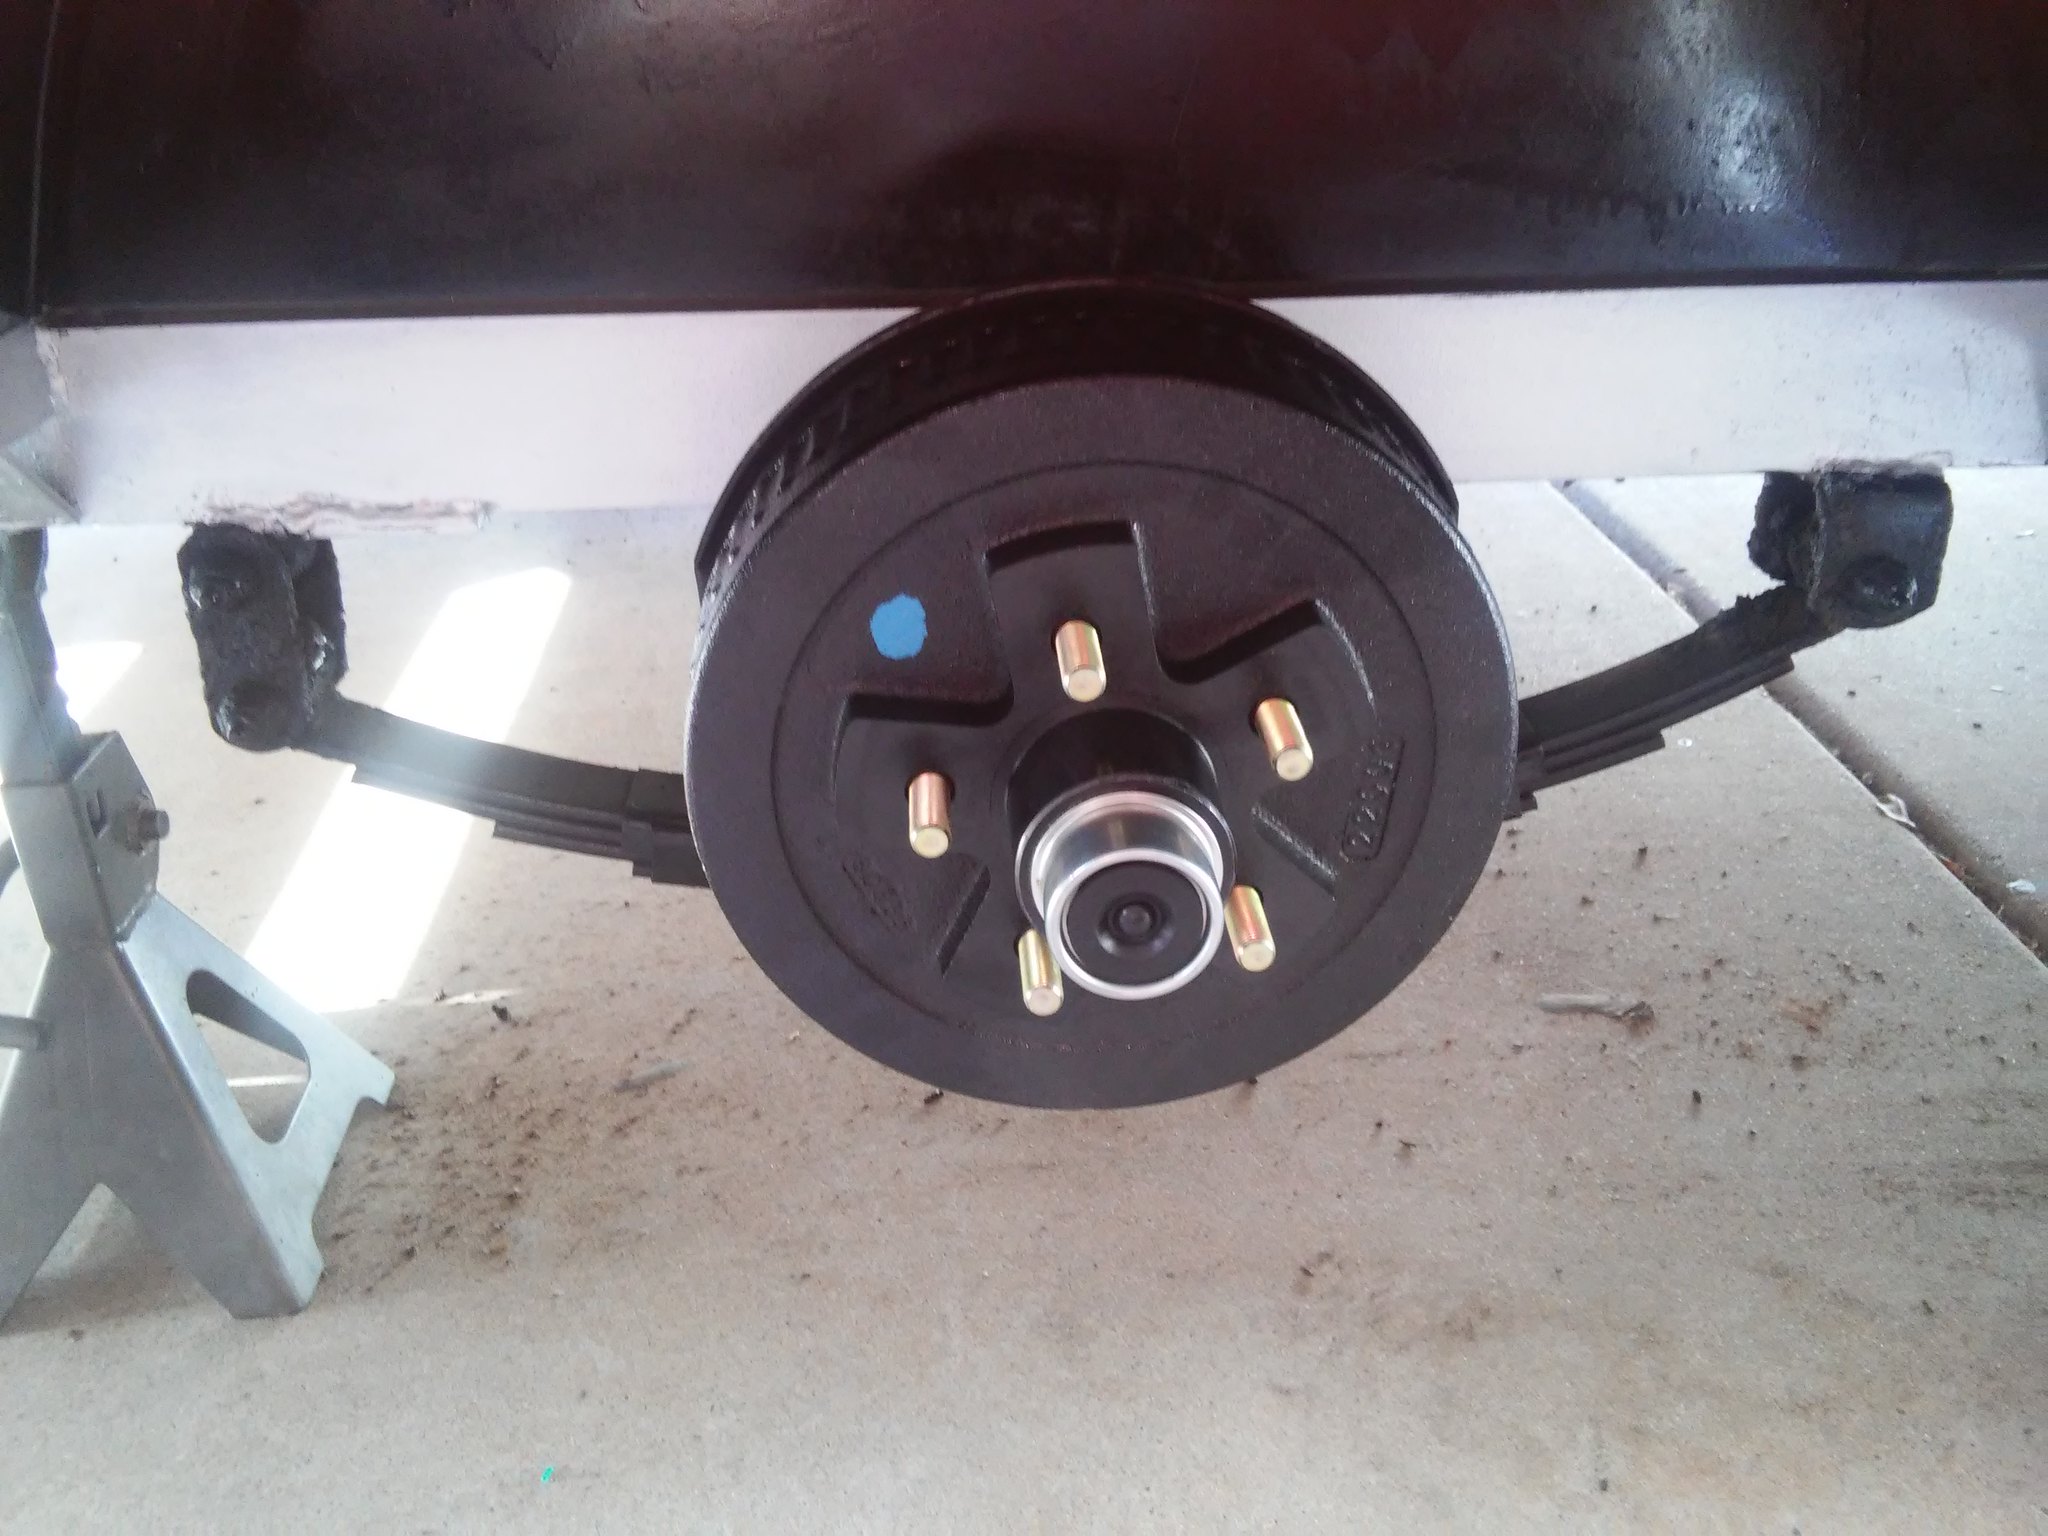 To be continued... |
|
strange1
Active Member
Posts: 159
Likes: 103
1965 Shasta Airflyte
Currently Offline
|
Post by strange1 on Apr 2, 2018 7:29:49 GMT -8
|
|
strange1
Active Member
Posts: 159
Likes: 103
1965 Shasta Airflyte
Currently Offline
|
Post by strange1 on Mar 31, 2018 20:26:02 GMT -8
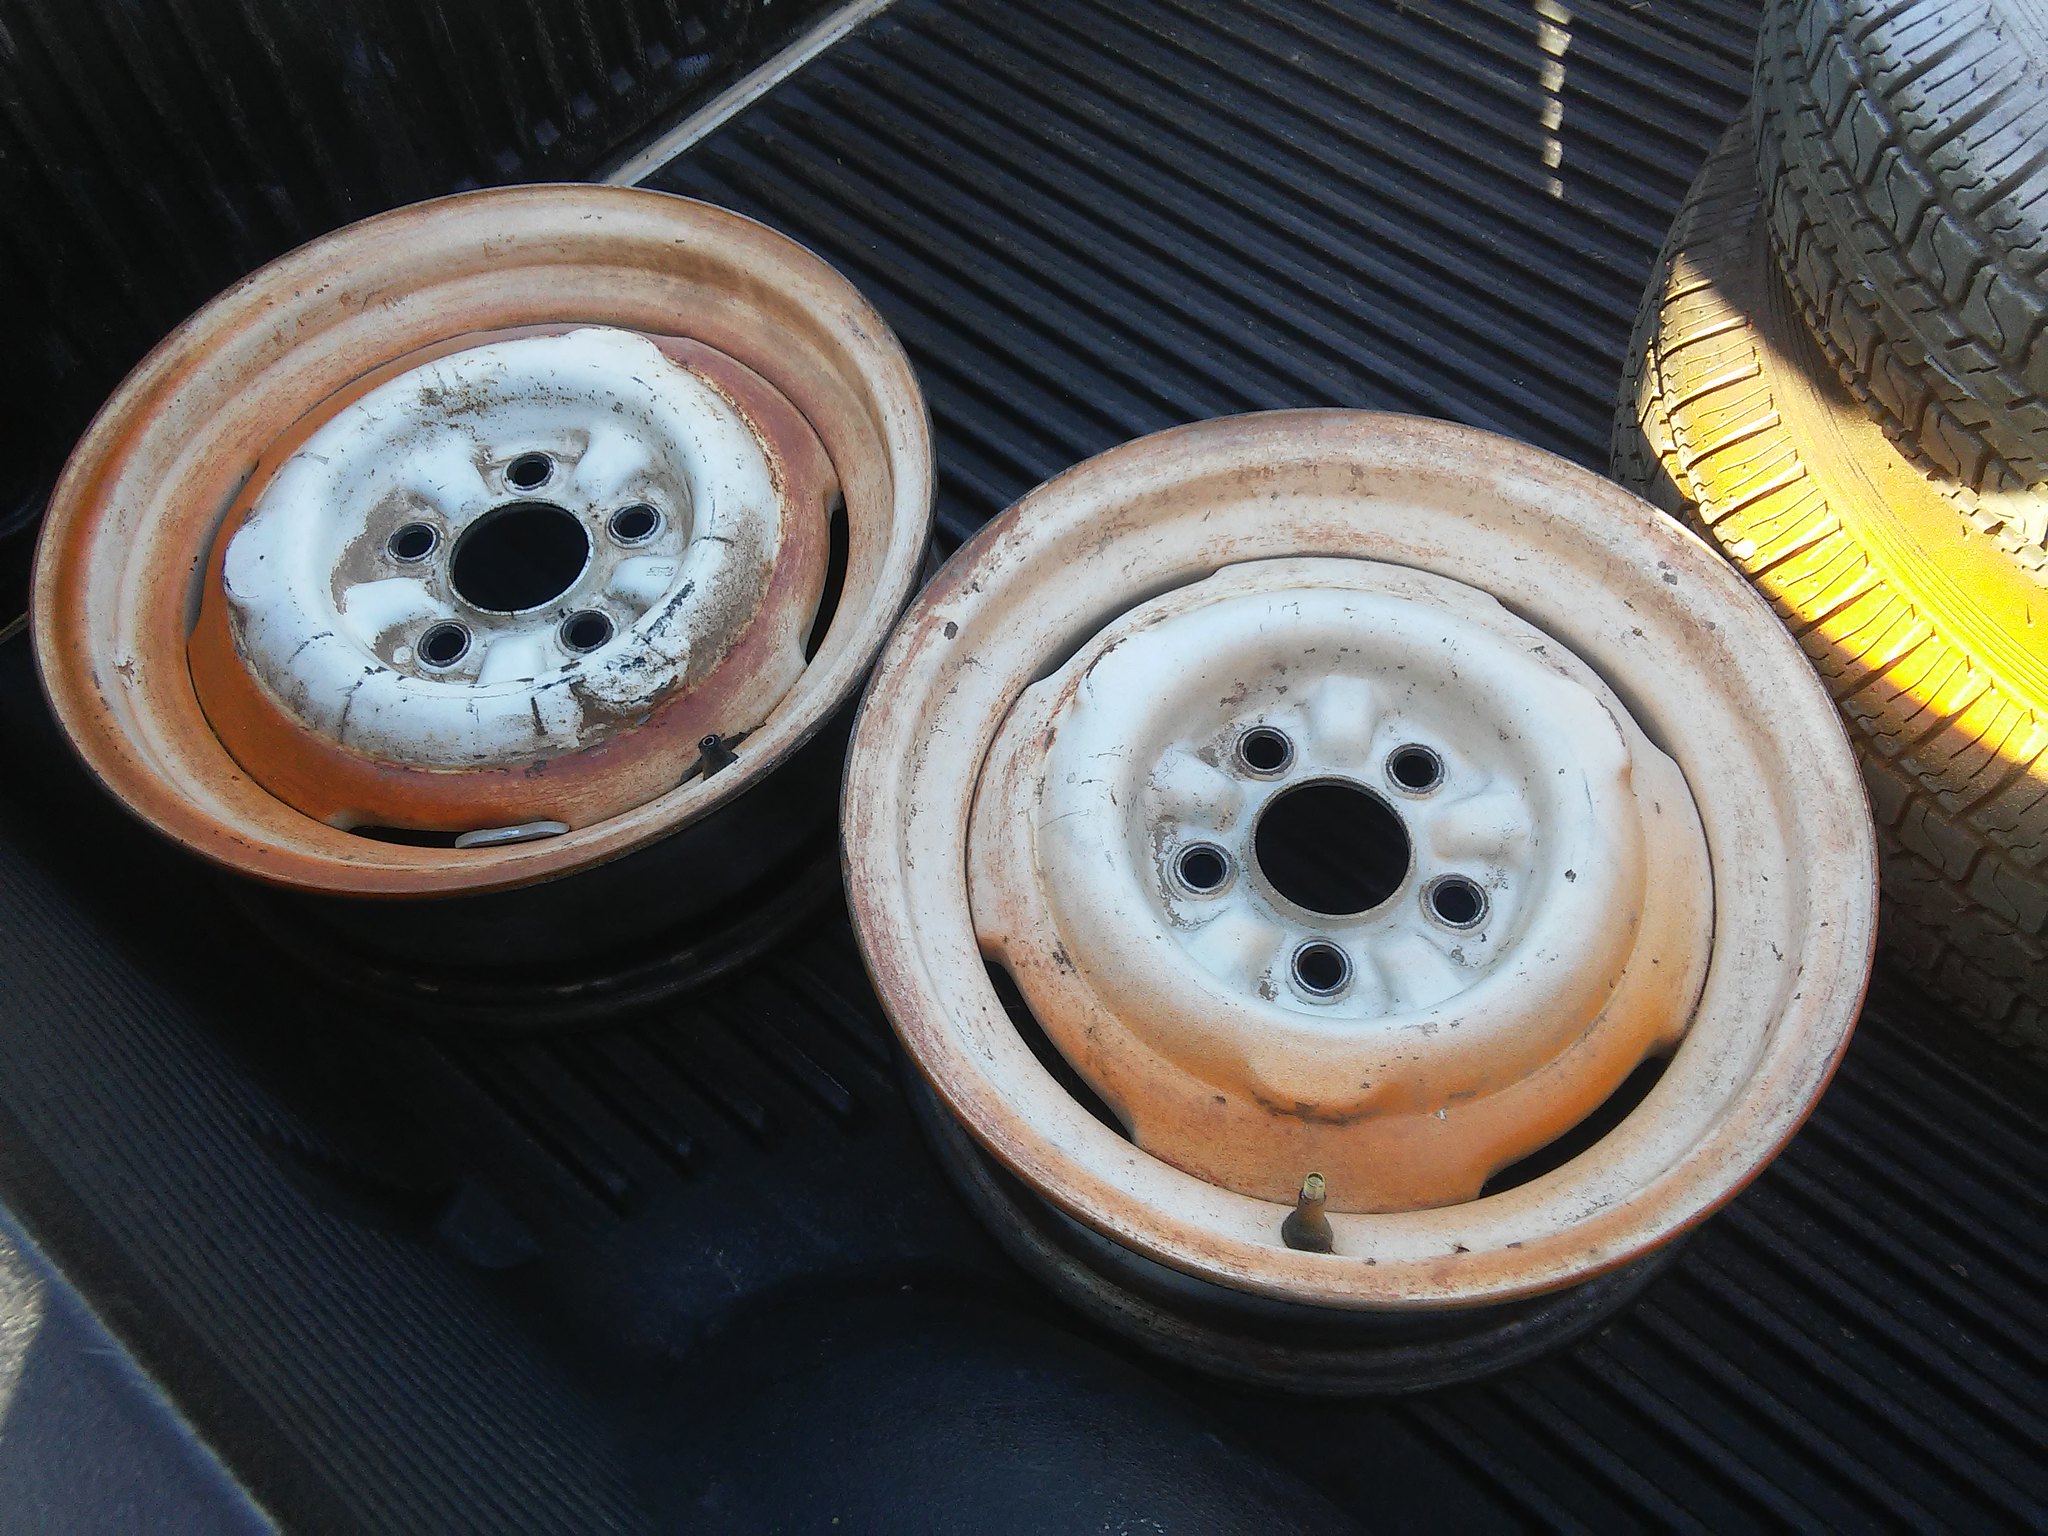
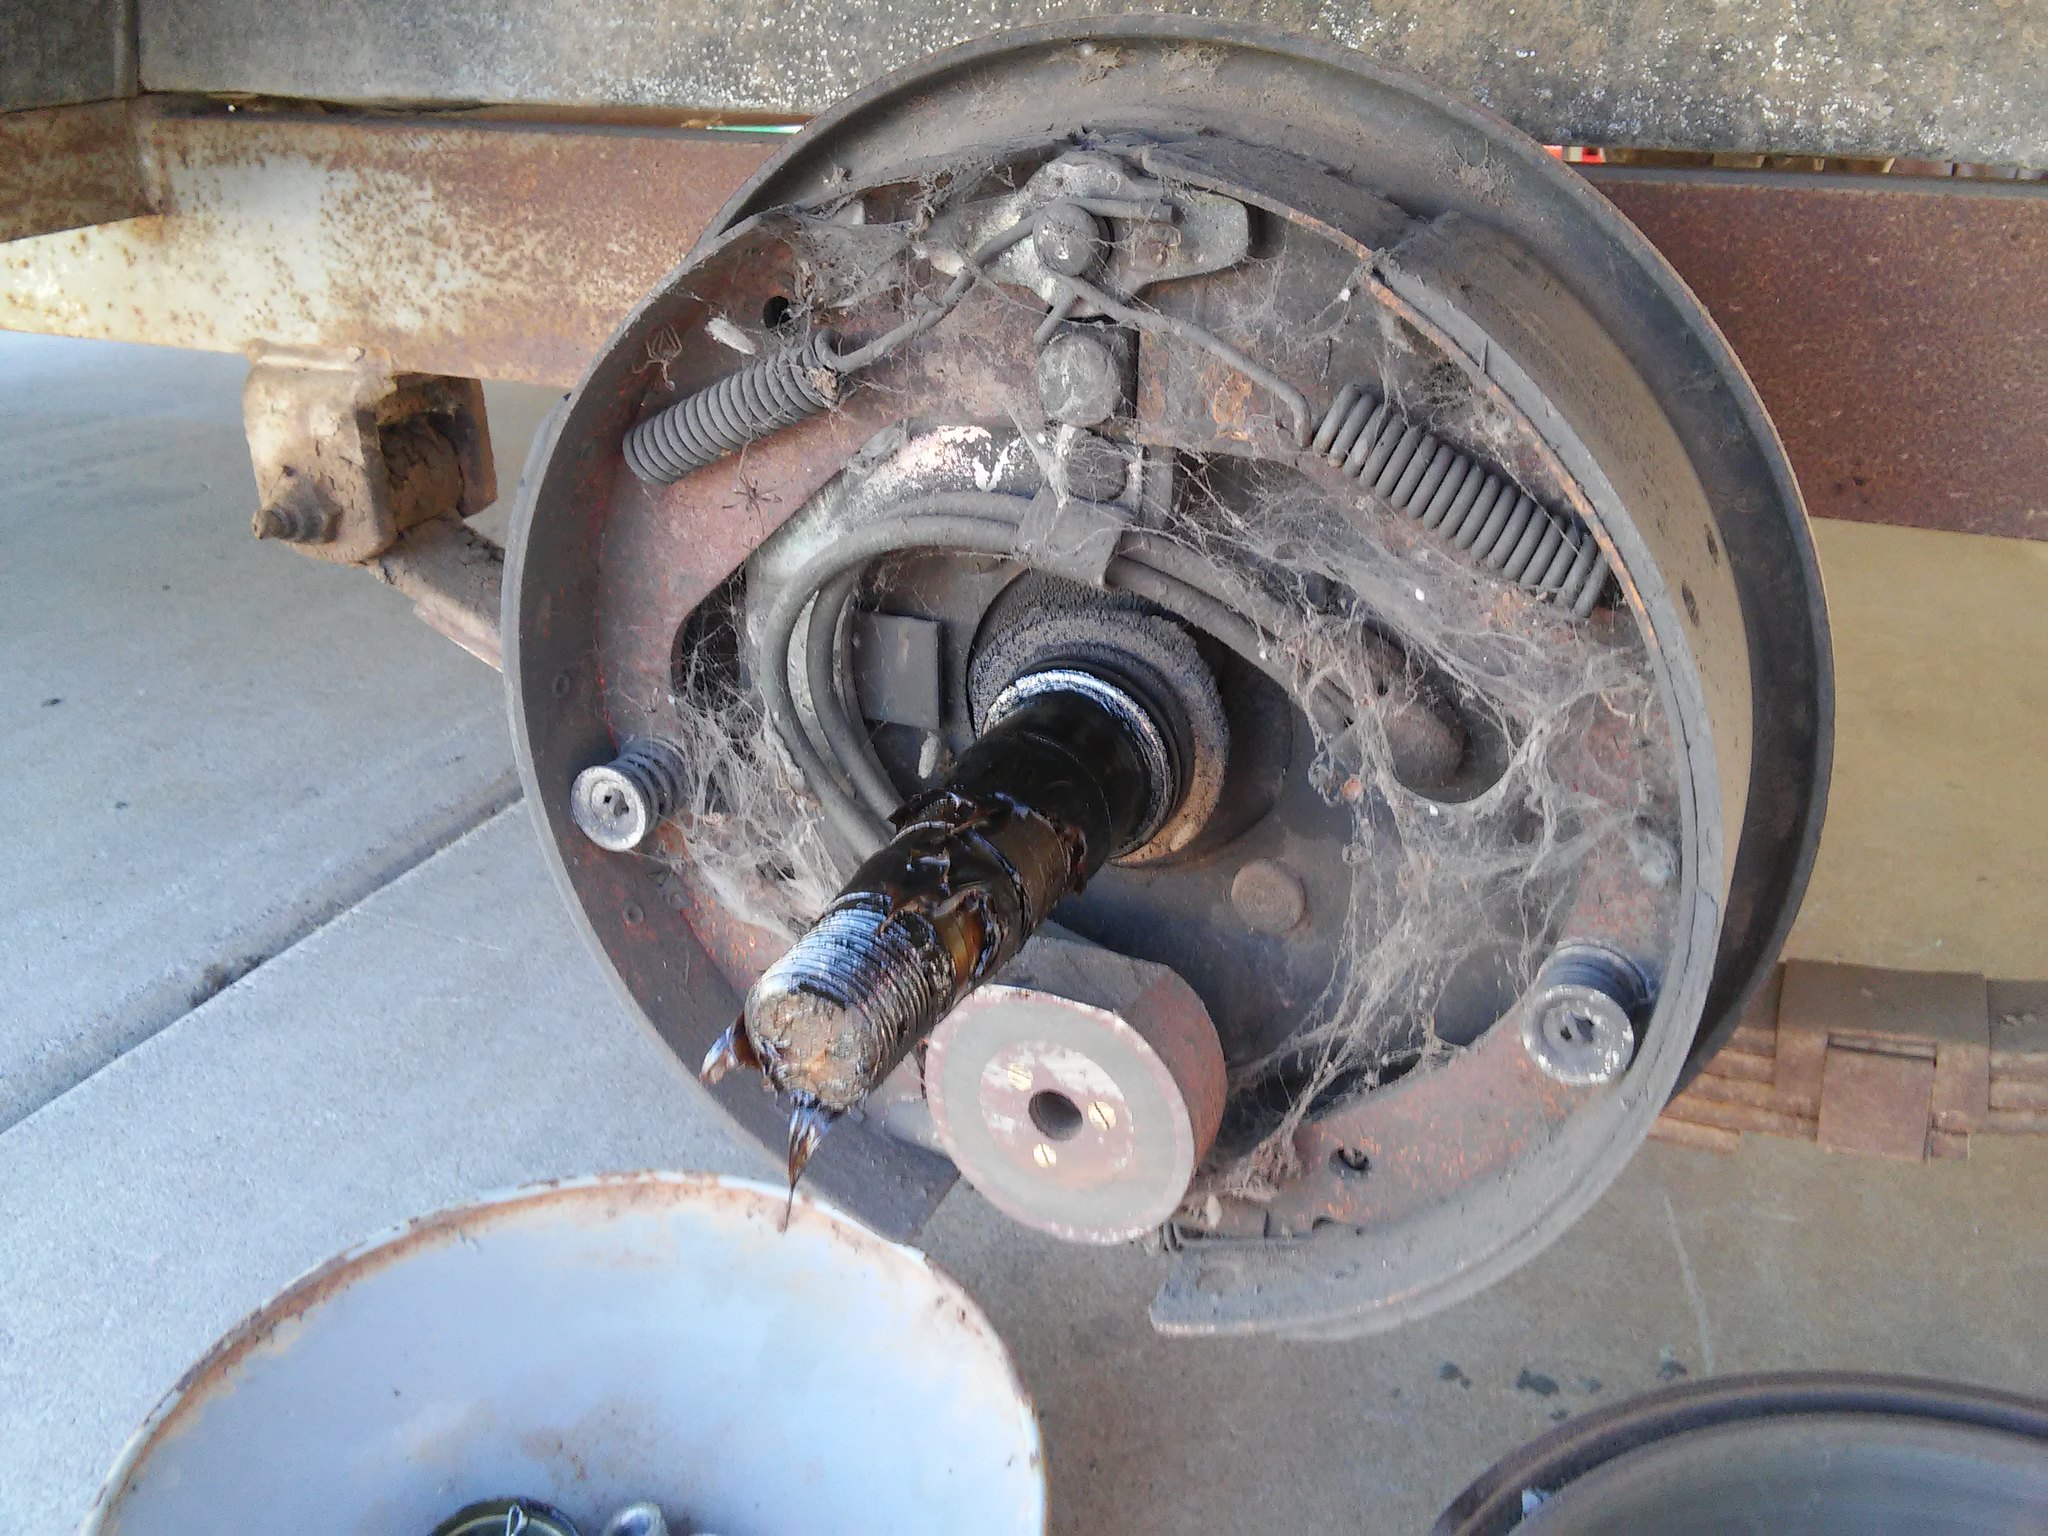
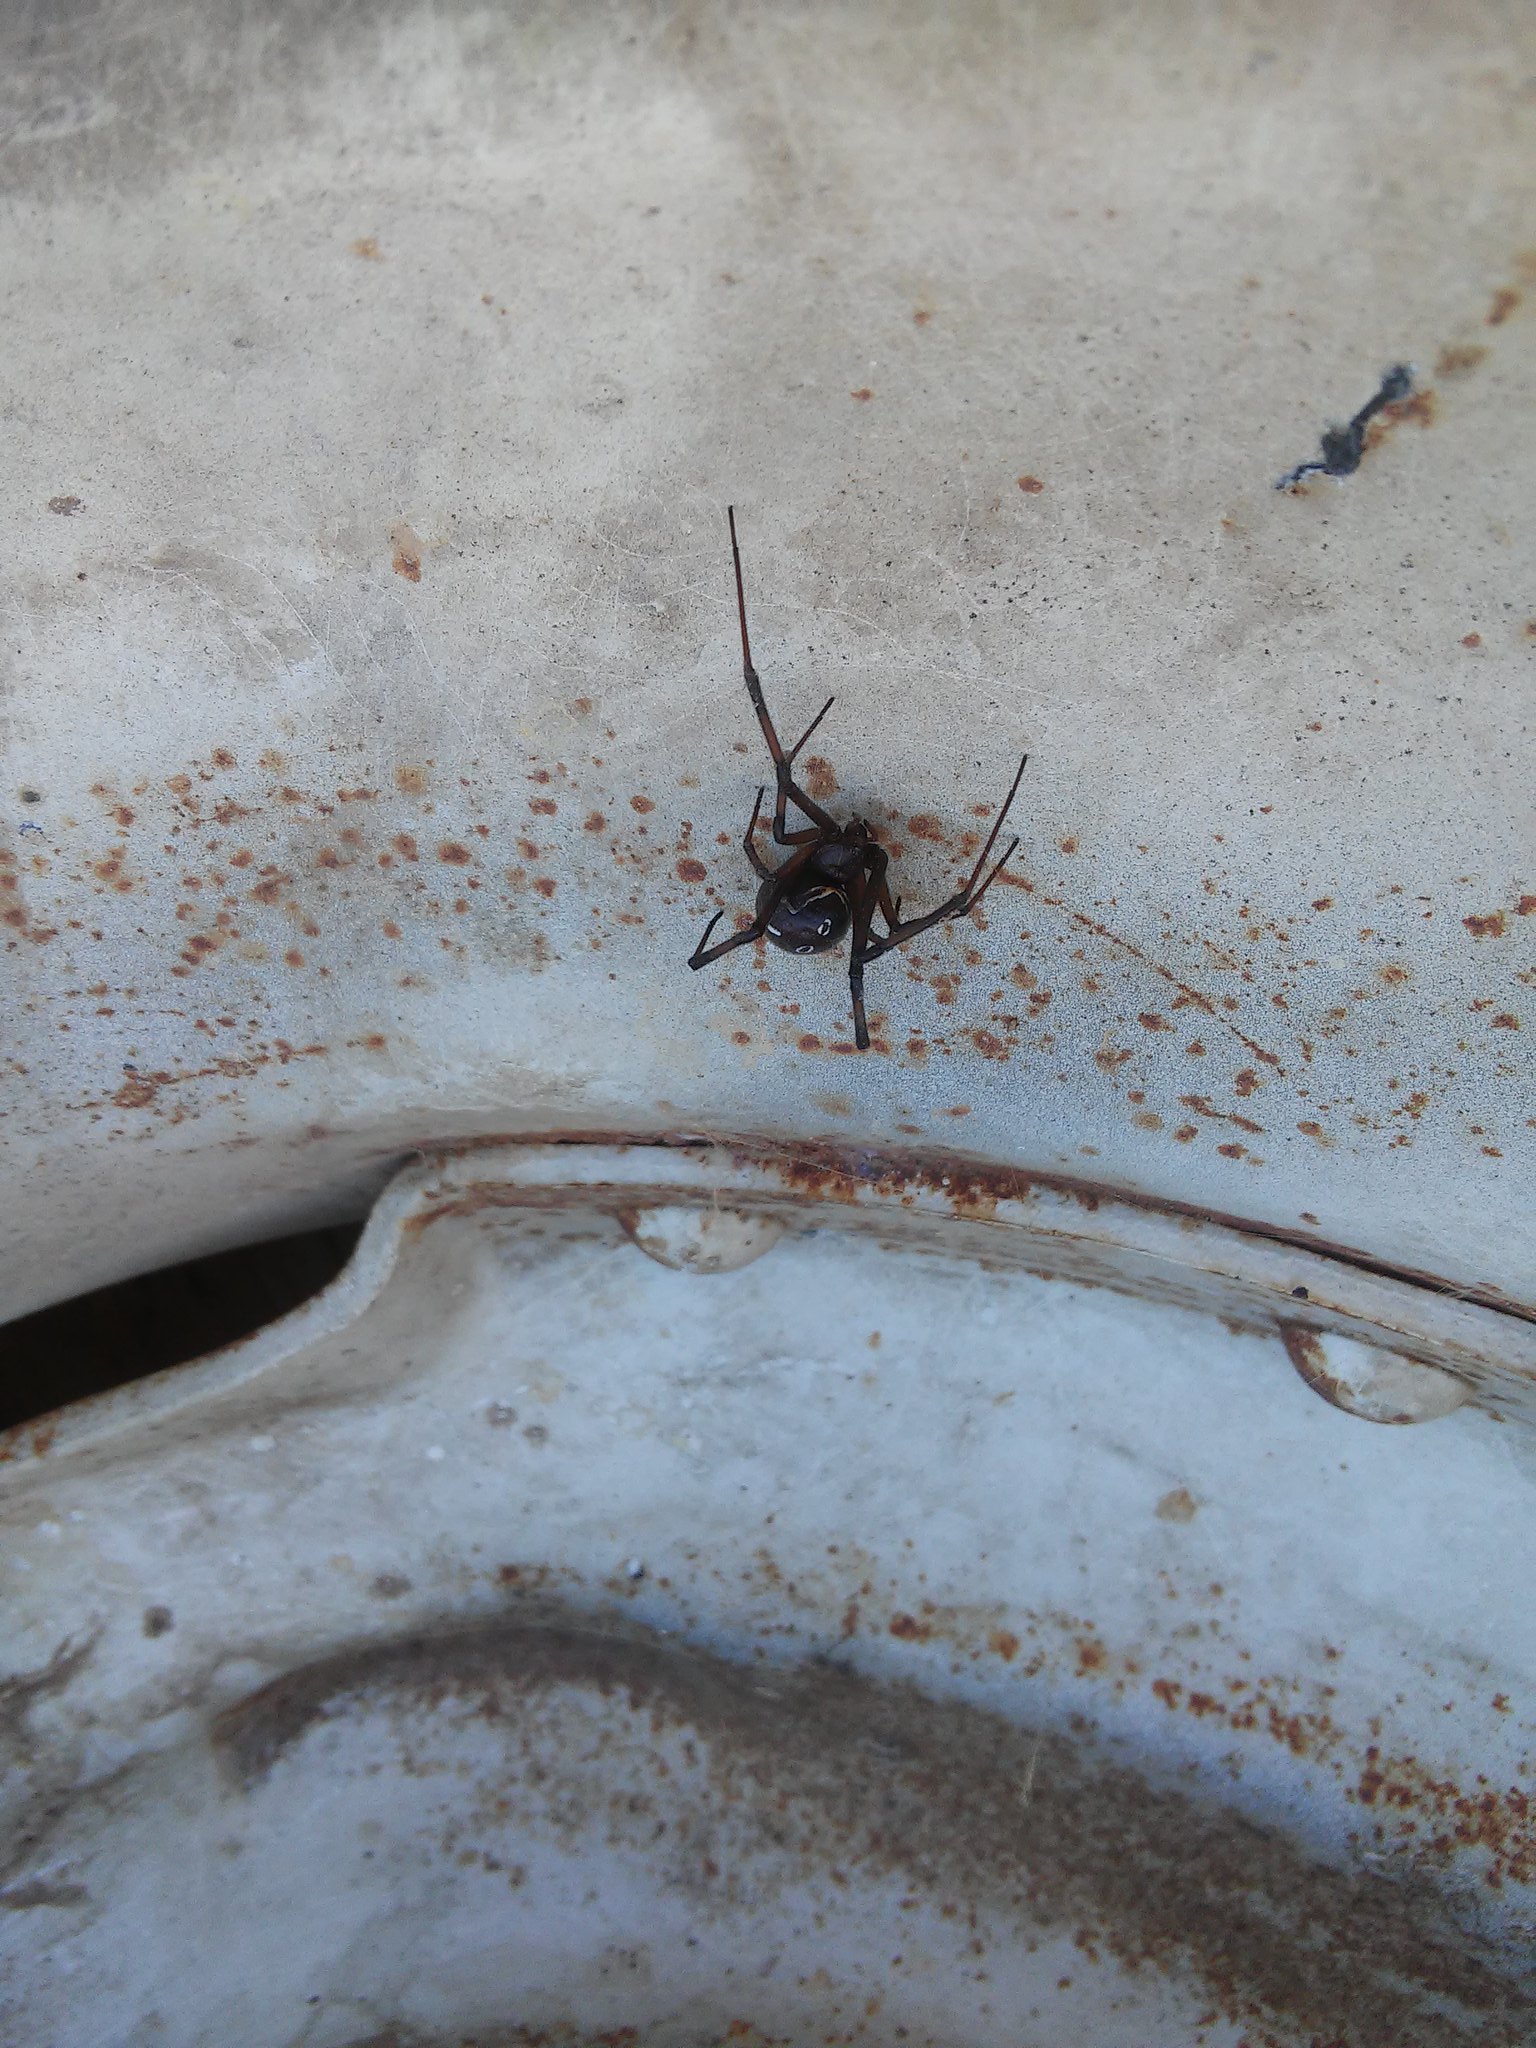
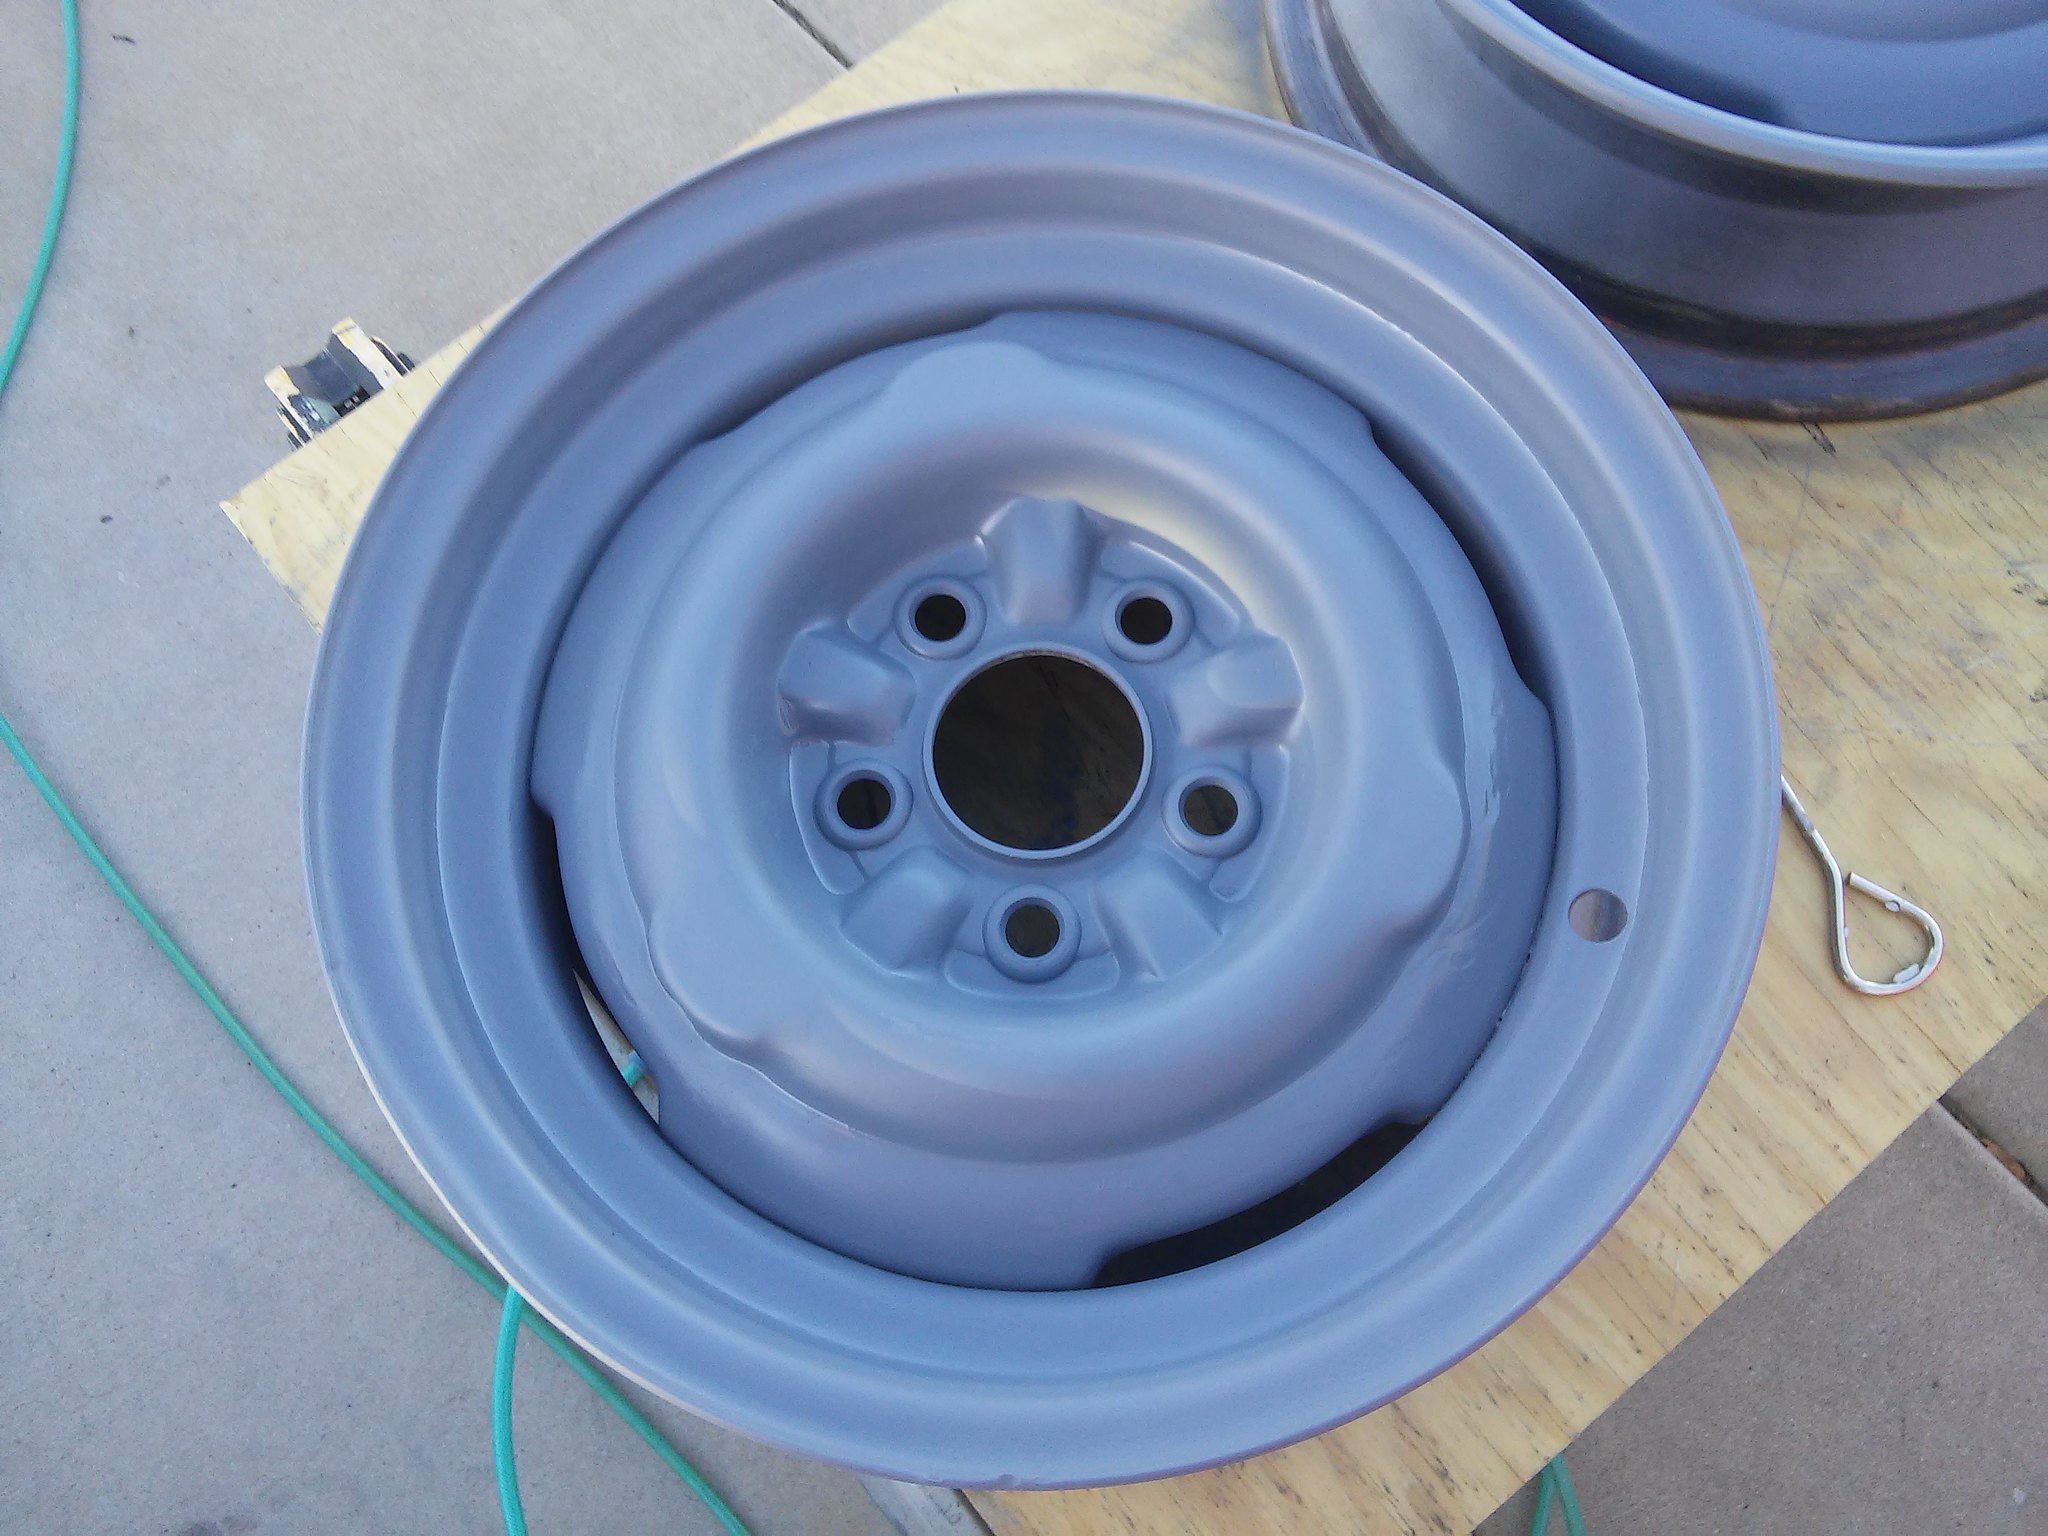
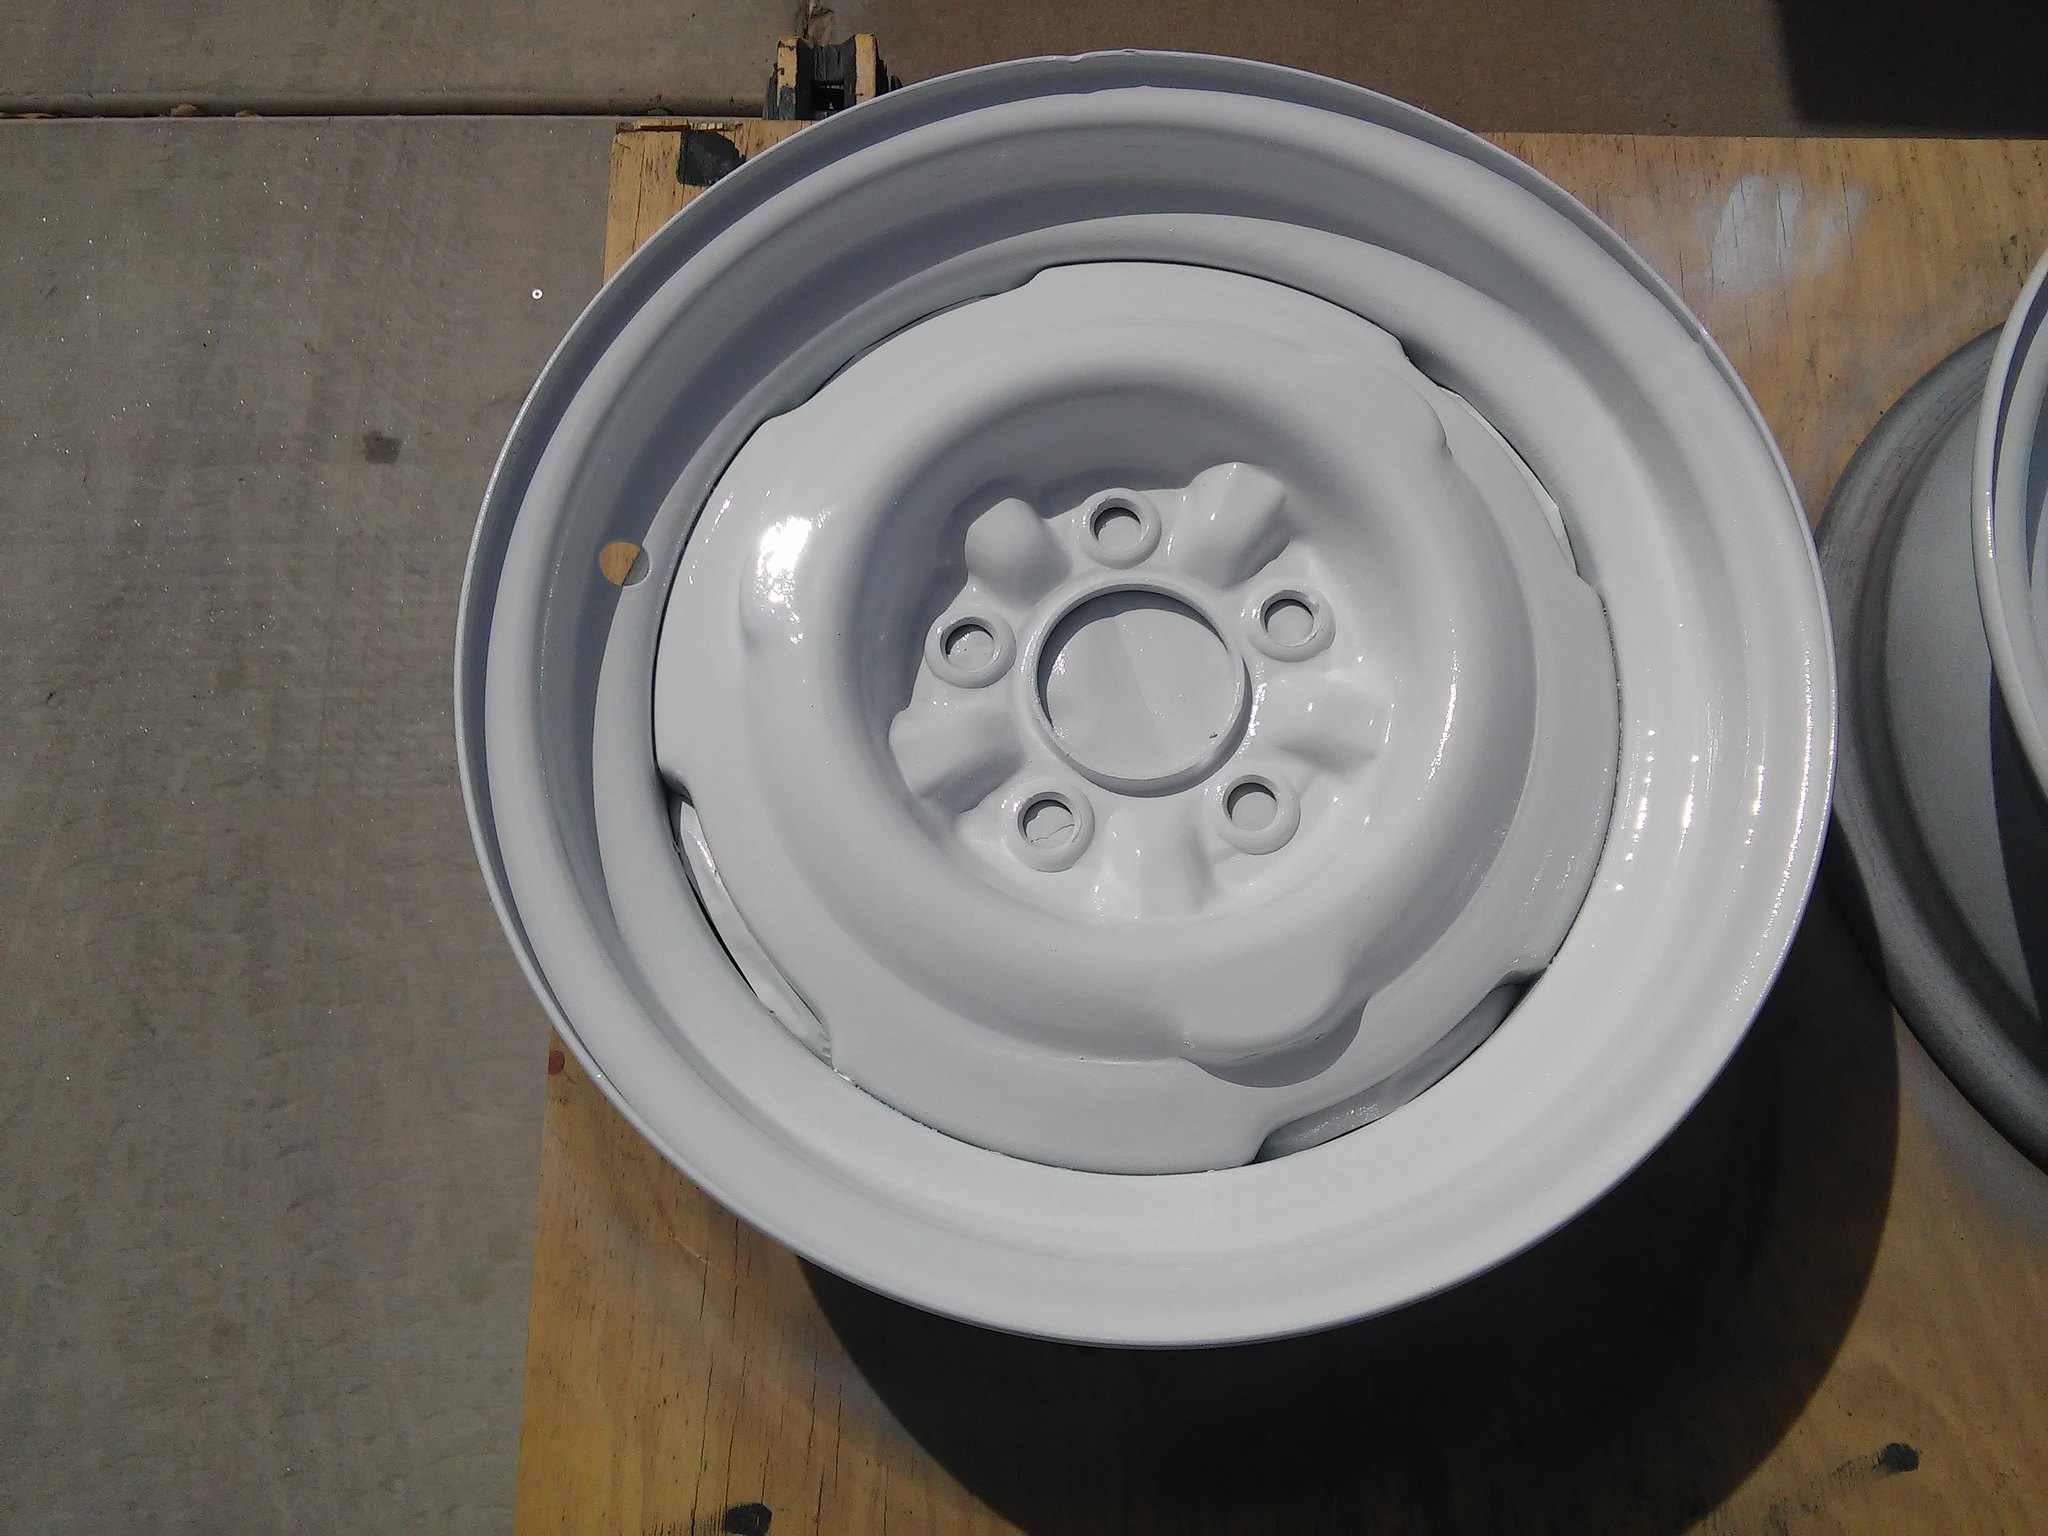
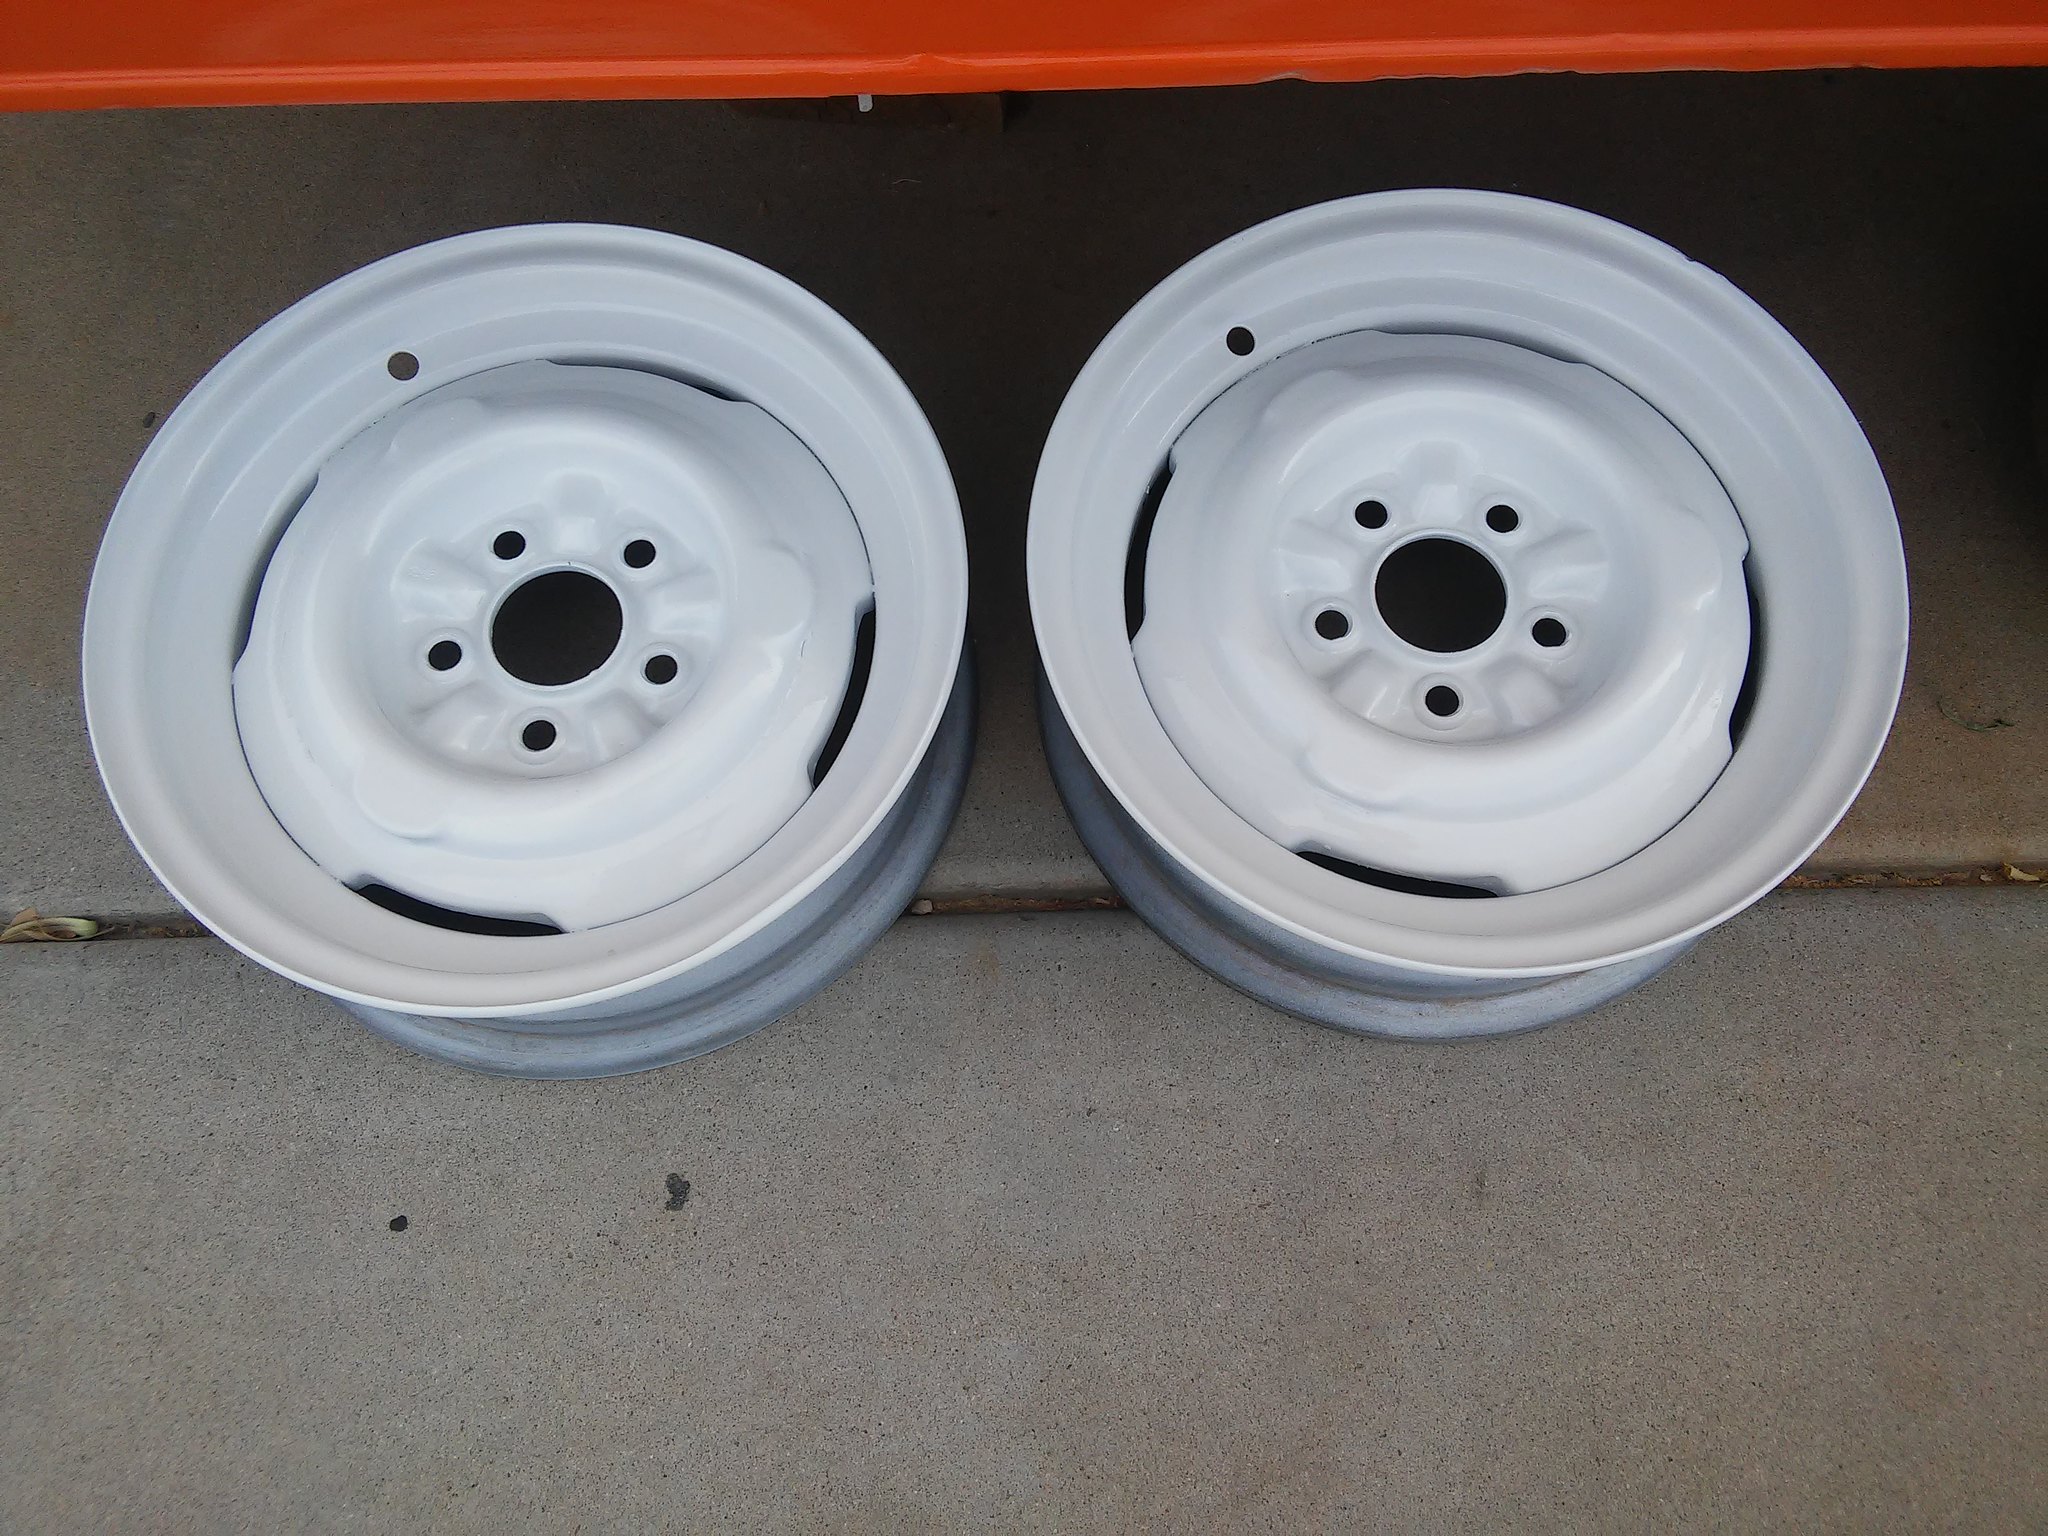
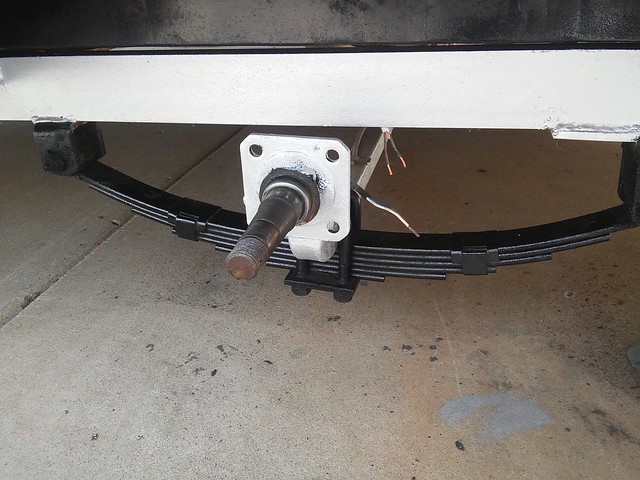
I finally got to working on the wheels and tires. I had the old tires removed from the wheels so I could paint them. I will also be re-doing the brakes... I decided to just order everything new from electric brakes, drums, springs, bearings and seals... I went with a set from Amazon...the kit should be here is a couple more days. So I had to hurry and get everything torn down, cleaned up and painted. Here's a little step by step. Wheels & Tires to be replaced. 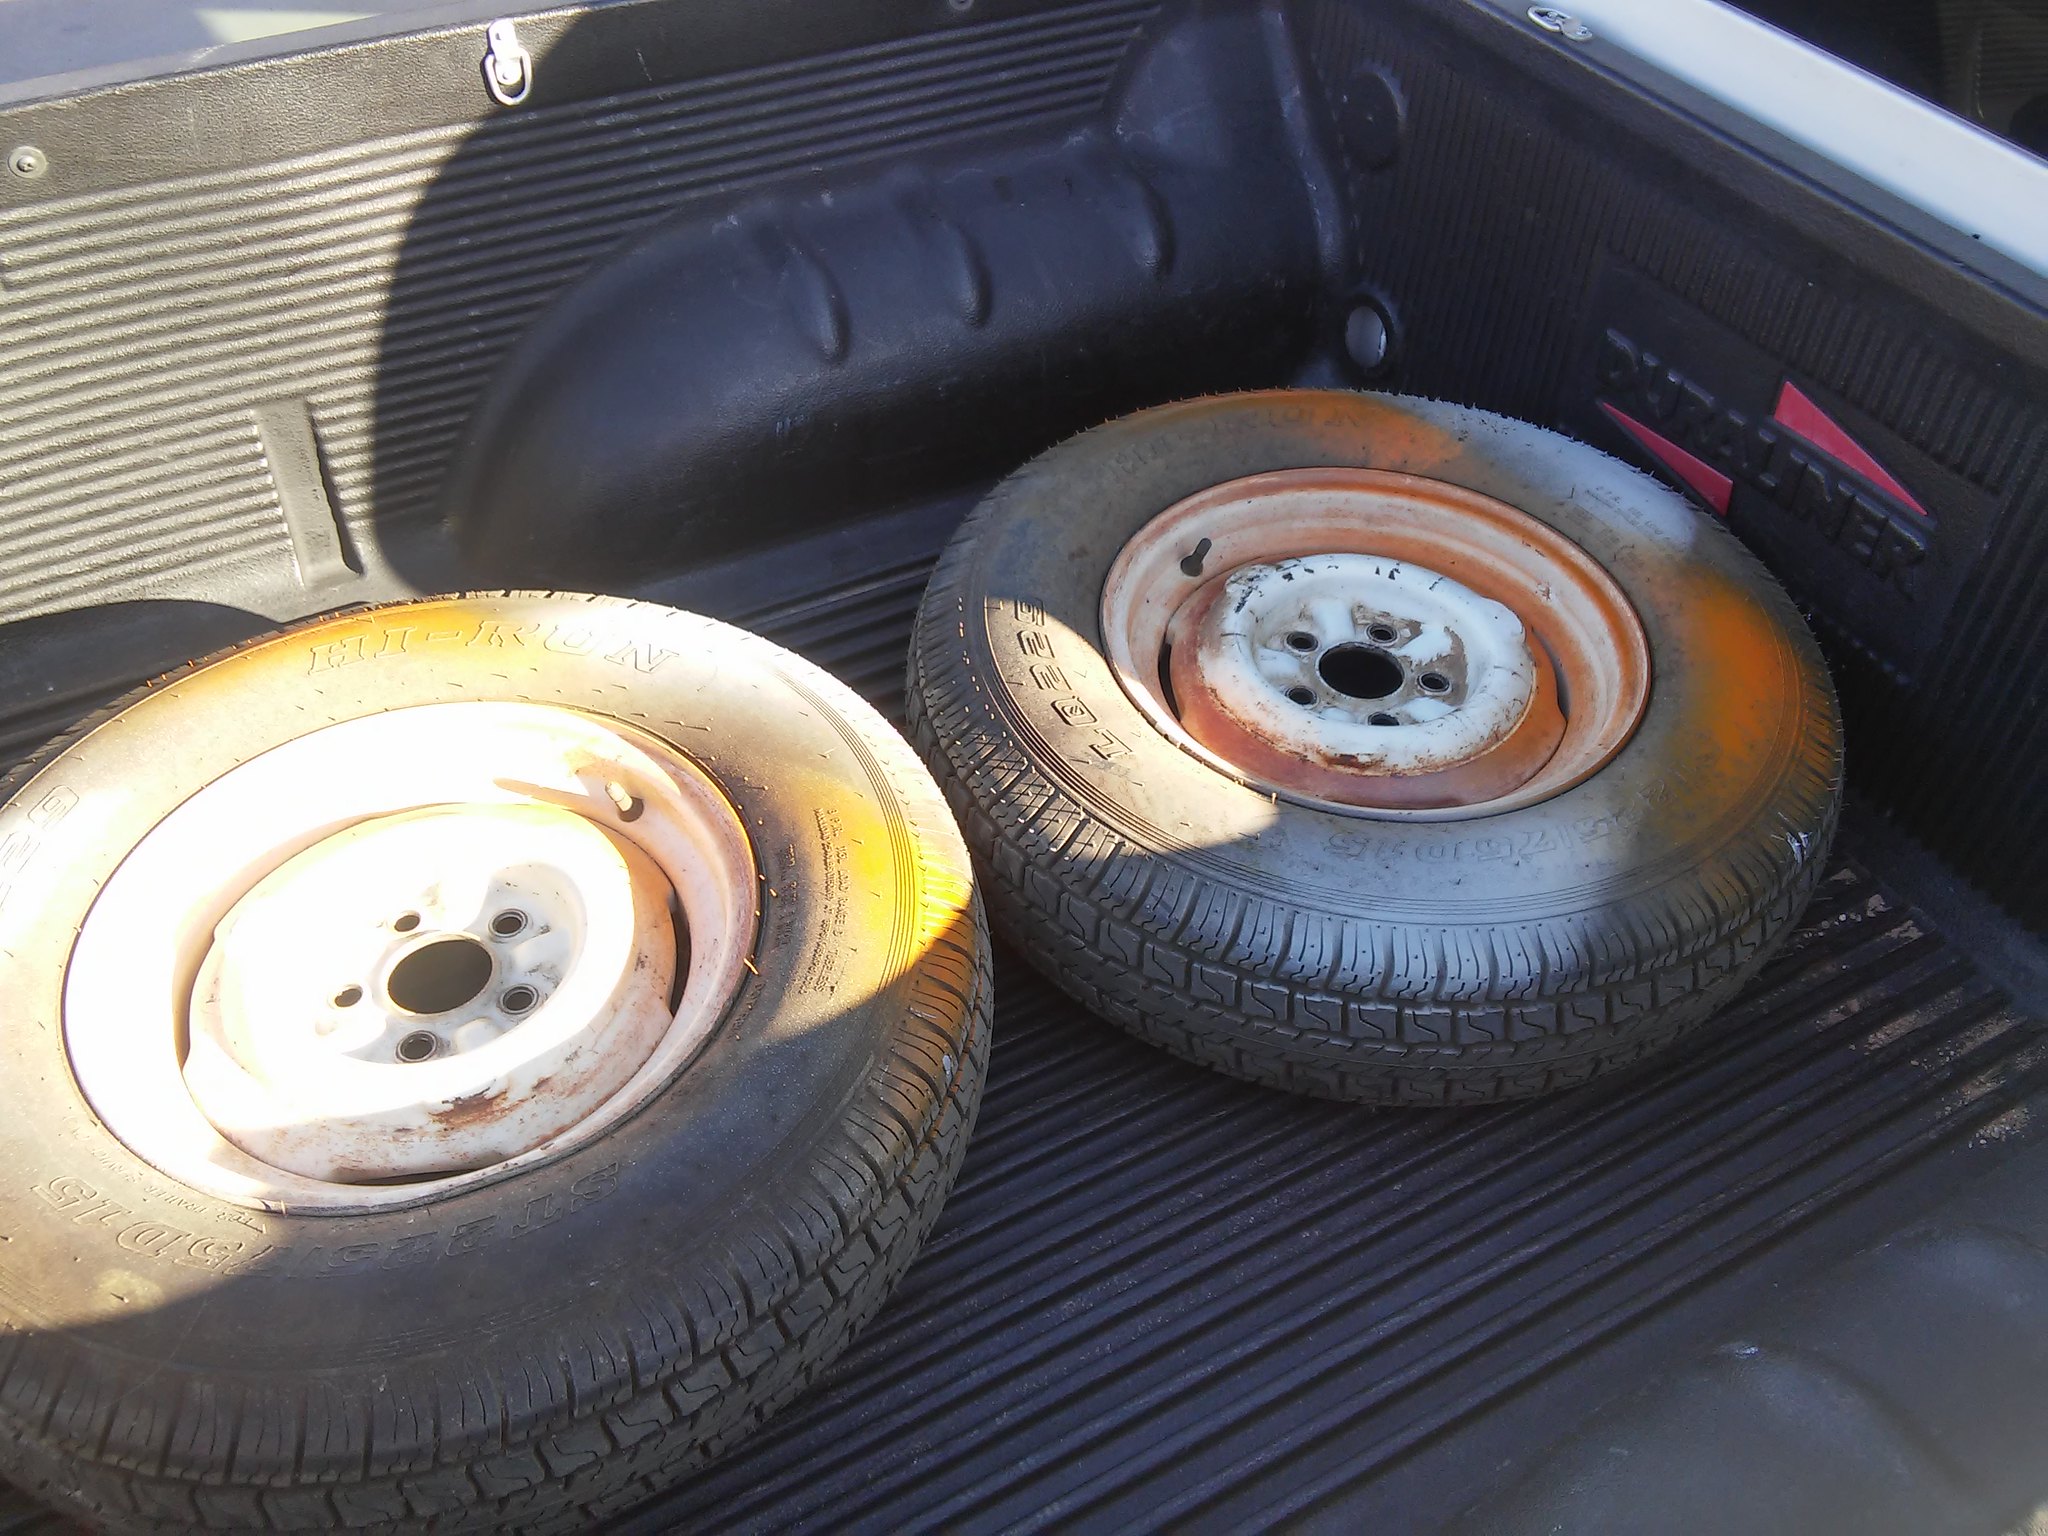 Tires removed...
 A peek behind the drum...lots of creepy crawlies!
I found this good sized Black Widow hanging out on the back of one of the wheels. She rode with me to the tire shop...hung in there during the un-mounting, rode home and even hung around for me to sand the fronts...flipped the wheel over and there she was. It's already getting warm in AZ...!
Any way here's how they turned out...
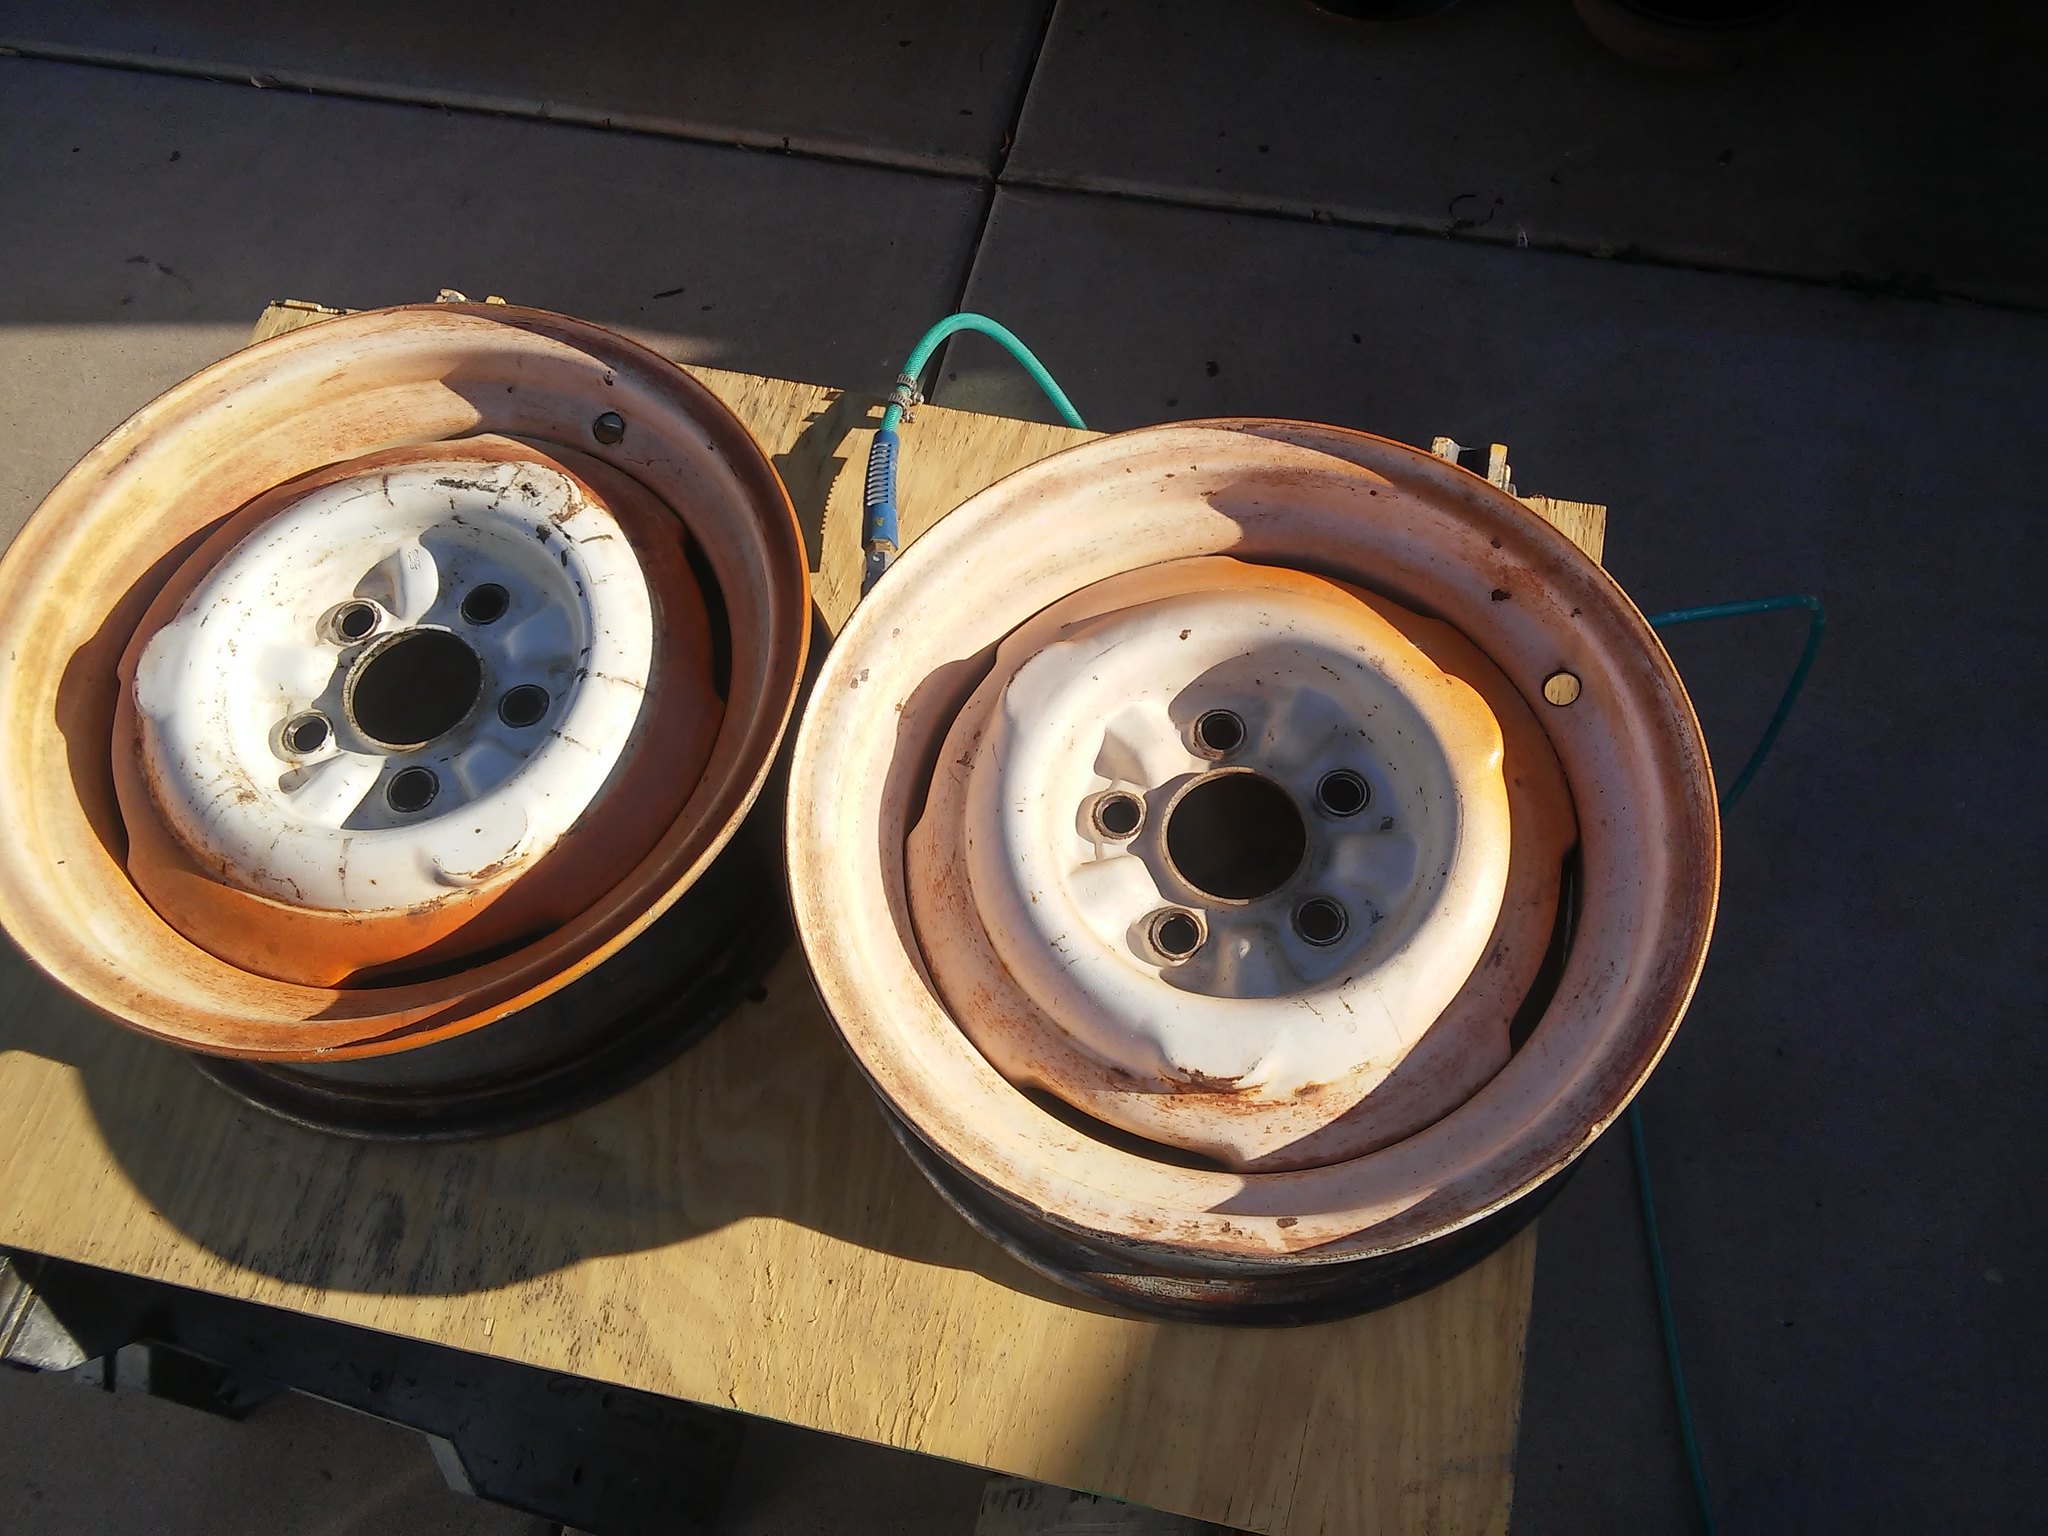
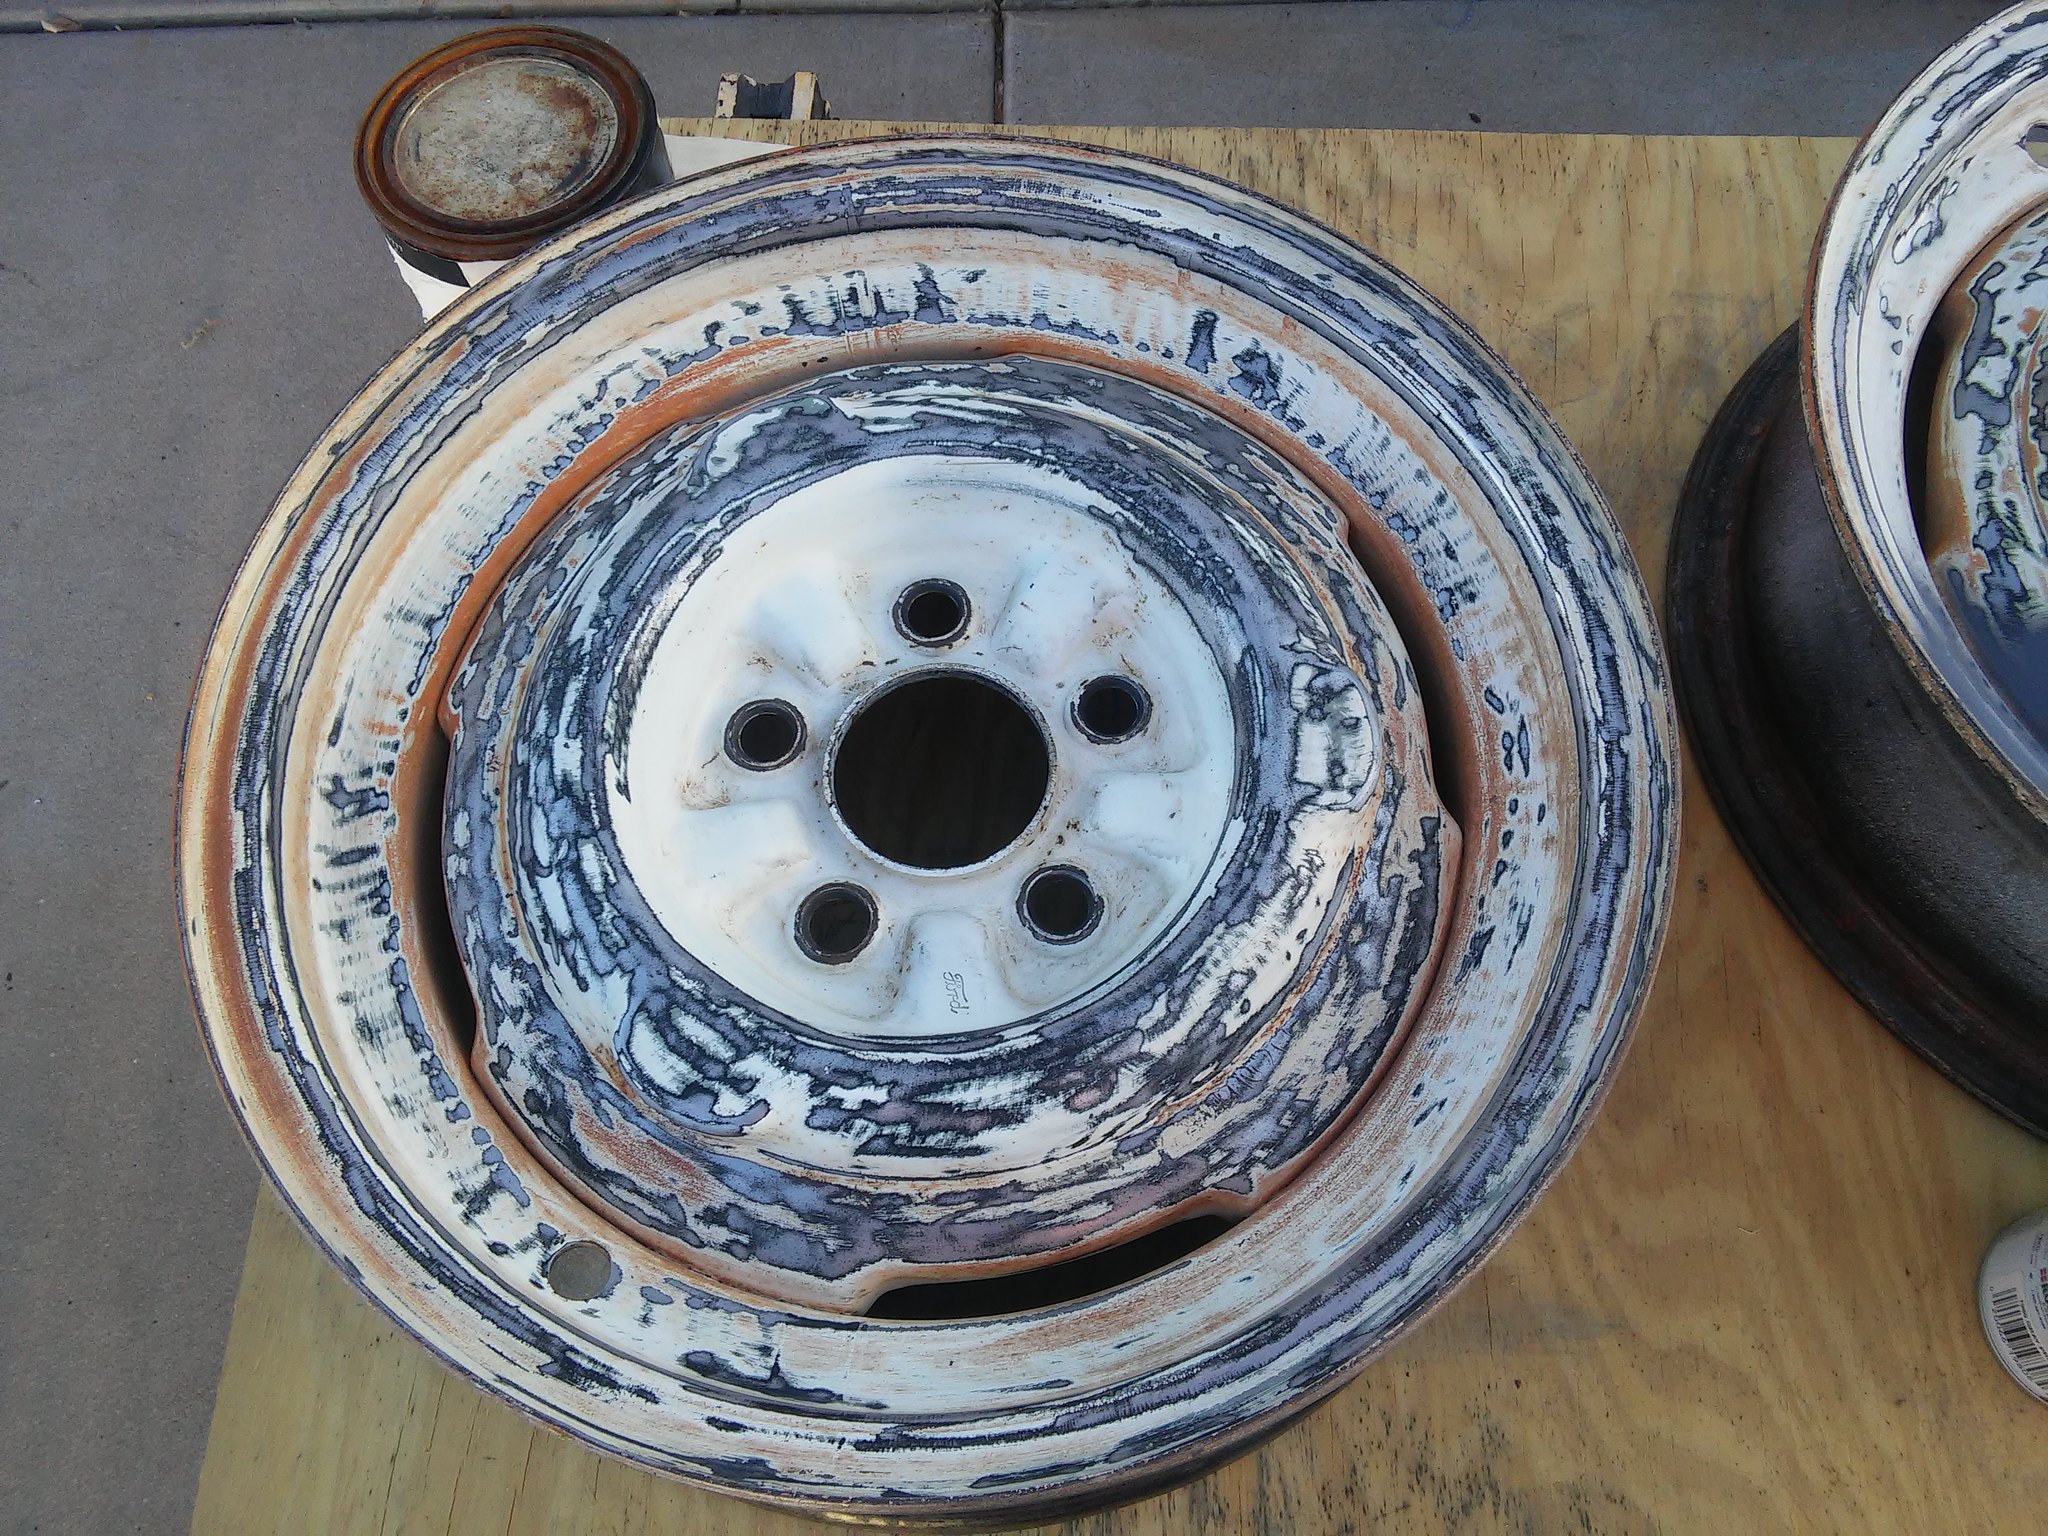
I'm wondering if these wheels are original to my trailer? Does anyone know if Shasta used FORD wheels? It's definitely stamped on the wheel... They are a 5 x 4 1/2 bolt pattern...very interesting.

Here is how the backs turned out...
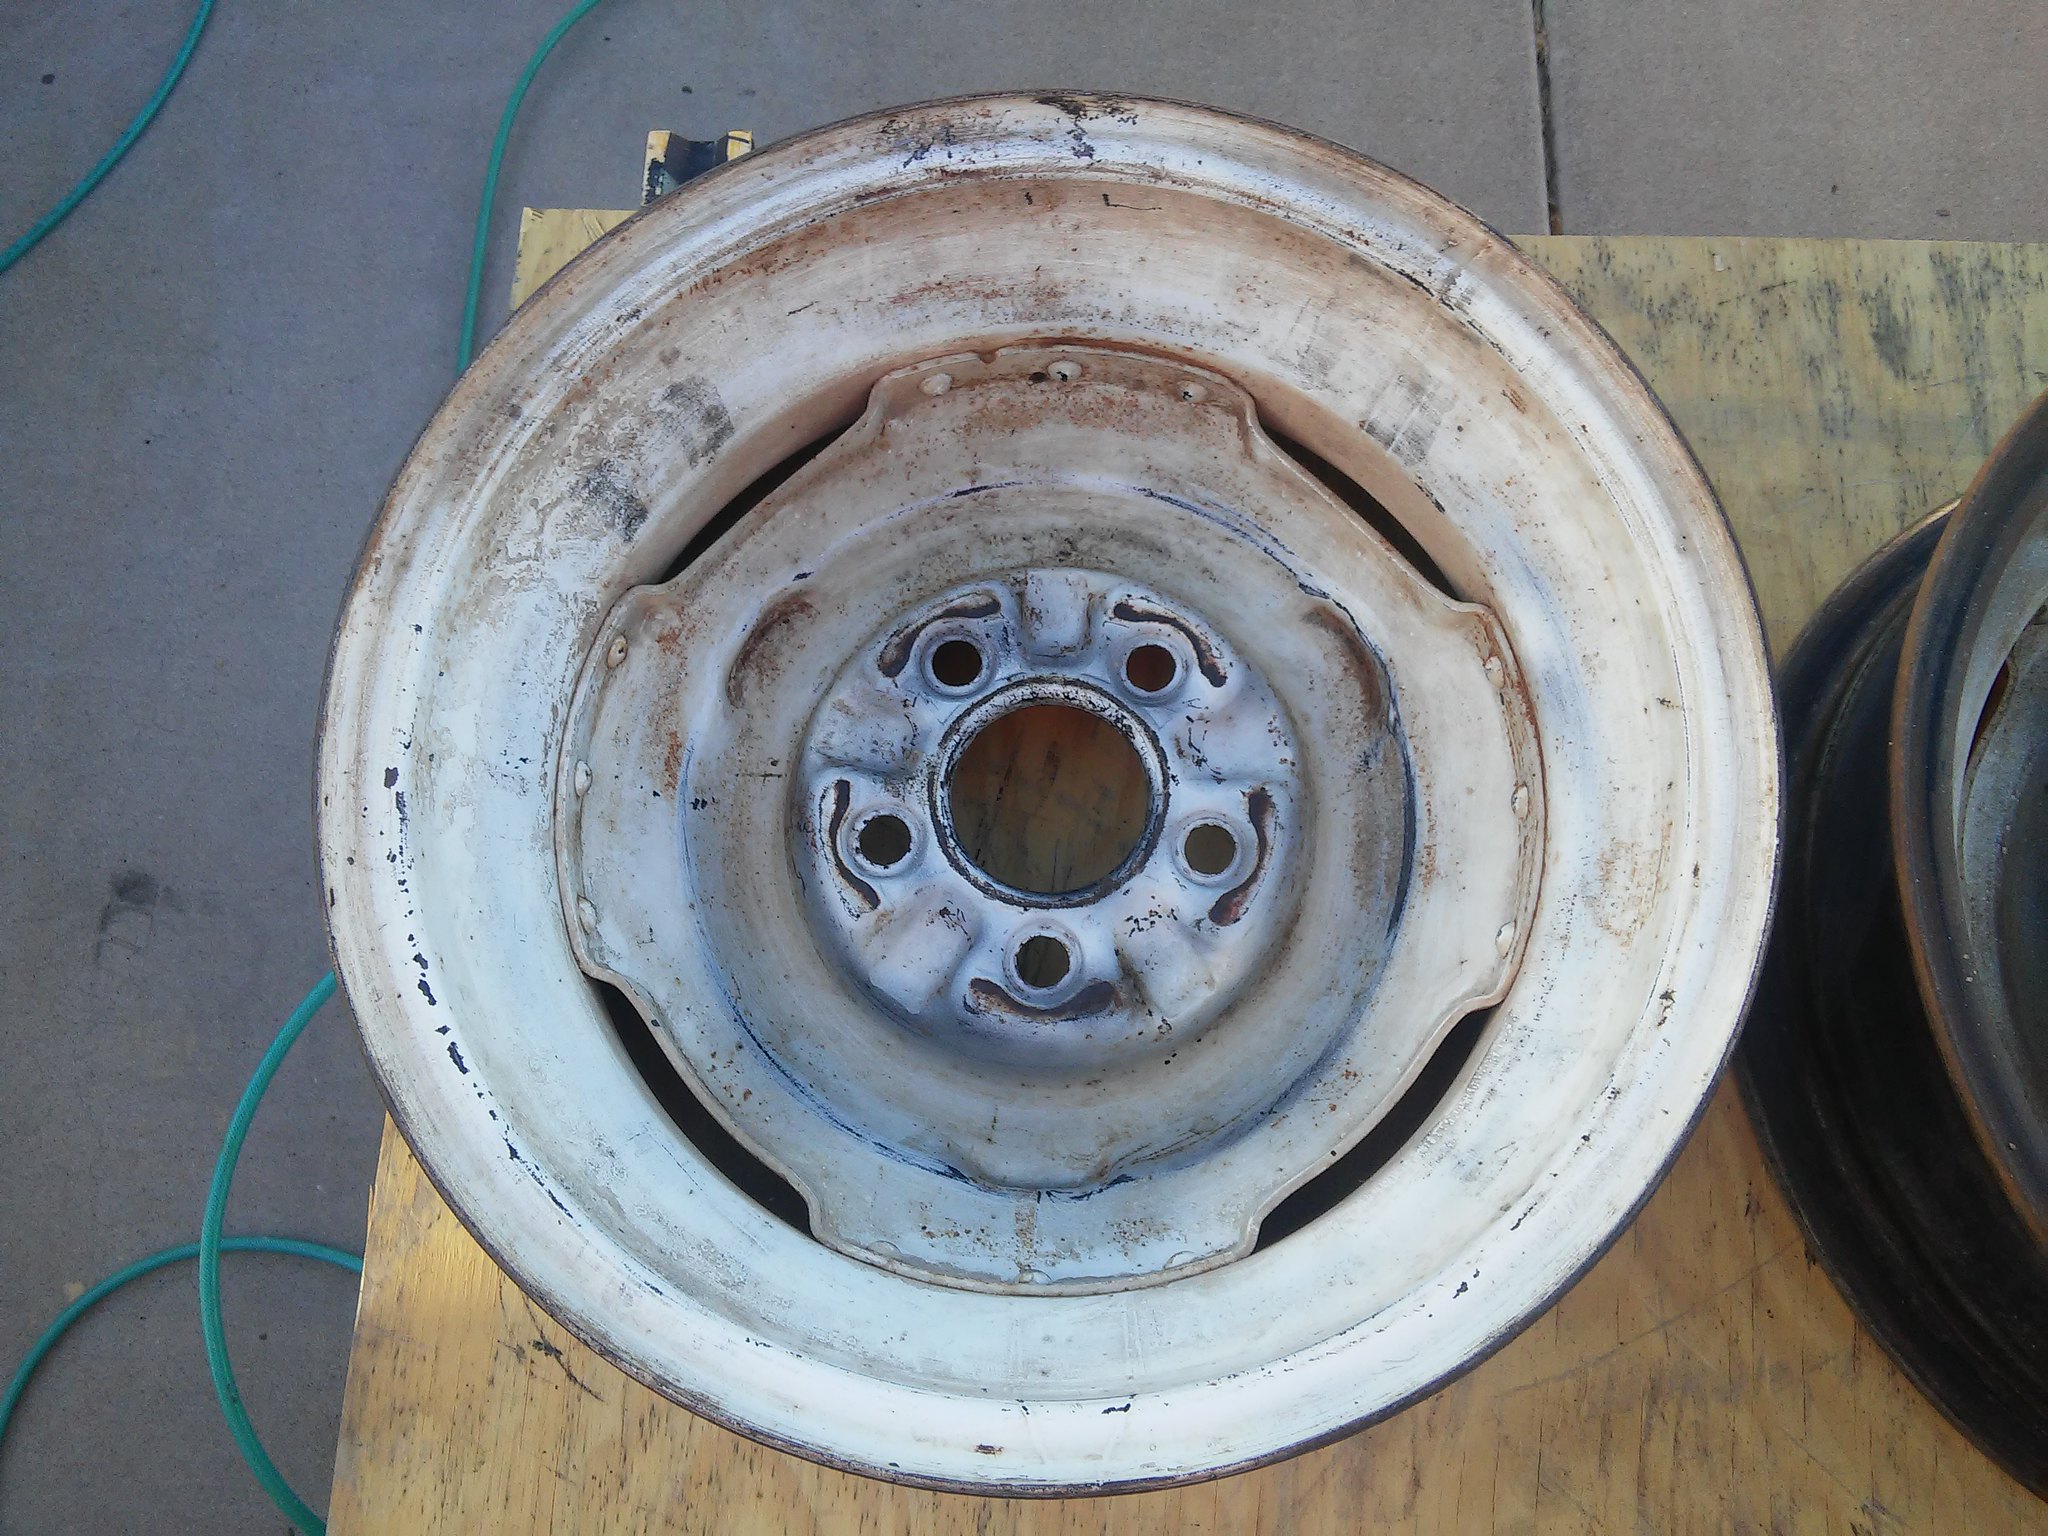

Ready for new shoes...
Here's the axle all cleaned up and painted...waiting for the new brakes & drums. To be continued...
 Getting real close to our maiden voyage. Once the wheels are back together I still need to finalize a few electrical issues. I got an inverter I need to get installed. I'm also going to re-do all the gas fittings on the hard line in. I want to re-do all the joints and make sure they are good and sealed...and that's it. Camping here we come.
|
|
strange1
Active Member
Posts: 159
Likes: 103
1965 Shasta Airflyte
Currently Offline
|
Post by strange1 on Mar 28, 2018 16:53:32 GMT -8
We need pics...
|
|
strange1
Active Member
Posts: 159
Likes: 103
1965 Shasta Airflyte
Currently Offline
|
Post by strange1 on Mar 28, 2018 16:32:43 GMT -8
Very nice...Thanks for sharing.
|
|
strange1
Active Member
Posts: 159
Likes: 103
1965 Shasta Airflyte
Currently Offline
|
Post by strange1 on Feb 14, 2018 8:44:36 GMT -8
I made up a couple of spring sliding locks for the rock guard. Mine were missing and I know I'd need something to keep it locked down while on the road. It's all these little finishes that keep adding up...but I'm getting closer to finished.  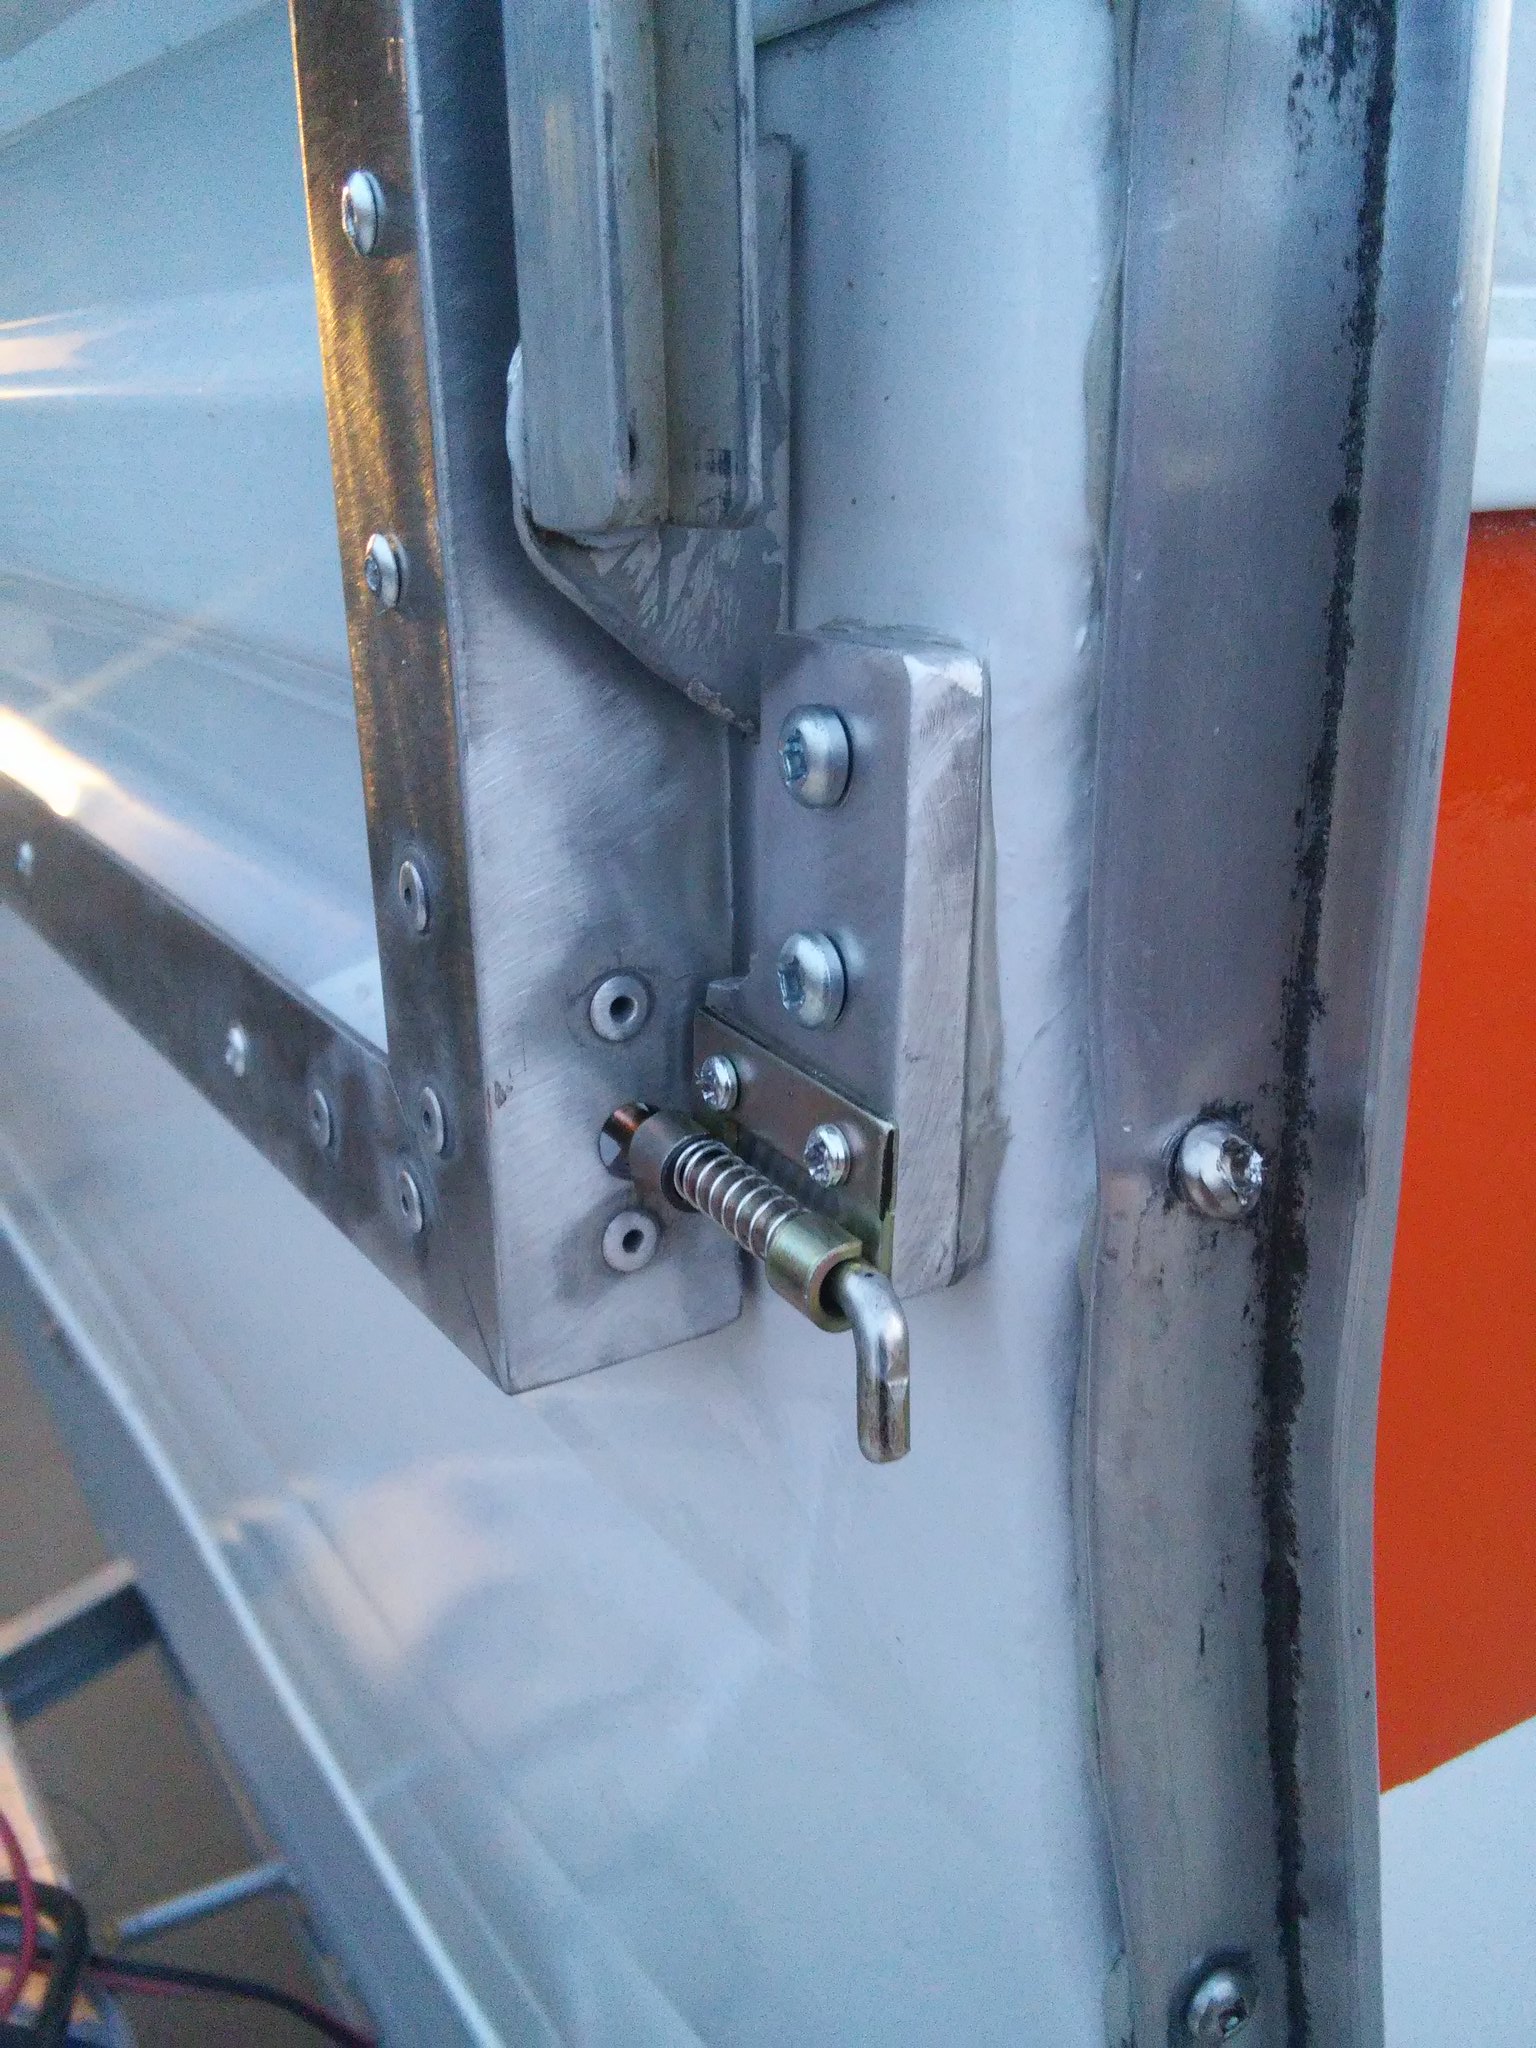 |
|
strange1
Active Member
Posts: 159
Likes: 103
1965 Shasta Airflyte
Currently Offline
|
Post by strange1 on Feb 12, 2018 13:03:52 GMT -8
Here is my layout...all labeled nicely. 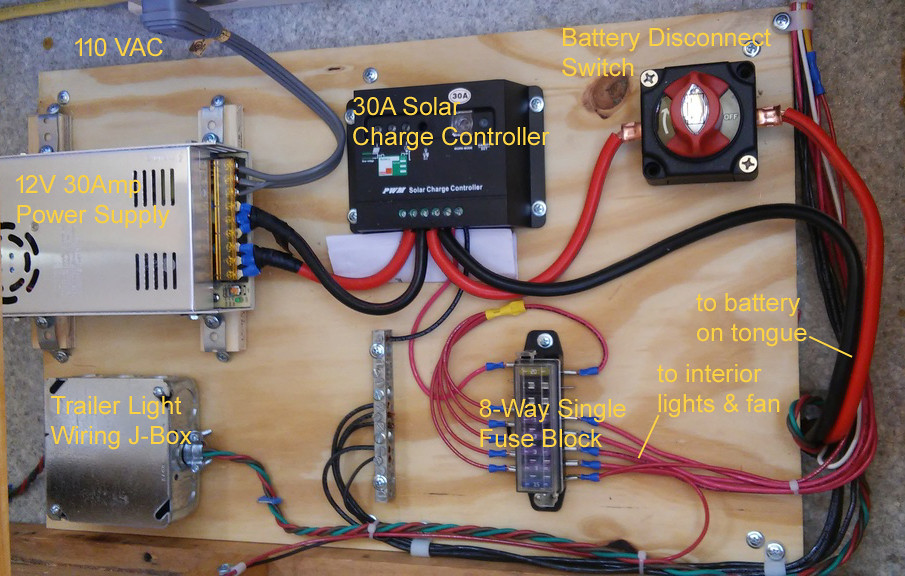 If I recall correctly. The reason we used the solar charge controller is if I am plugged into 110V and I leave the switch to the battery in the ON position the controller will both power the 12V system in the trailer AND charge the battery. Turn the switch OFF and of course the battery stops charging. I do not have any solar panels yet...but if I ever do I'll also have the option to run the wiring from the panels to the controller to power the 12V in the trailer and charge the battery. As I said I relied on my son's expertise. I'll double check it with him. If I'm wrong about this I'll let you know. |
|
strange1
Active Member
Posts: 159
Likes: 103
1965 Shasta Airflyte
Currently Offline
|
Post by strange1 on Feb 11, 2018 21:50:39 GMT -8
Got a few more things done on Saturday. First I removed the old roof vent. There never appeared to be a leak issue up there. I just wanted to install an electric fan. Here are a few pictures of the process... Here's the original roof vent...signs of a little hail damage over the years. 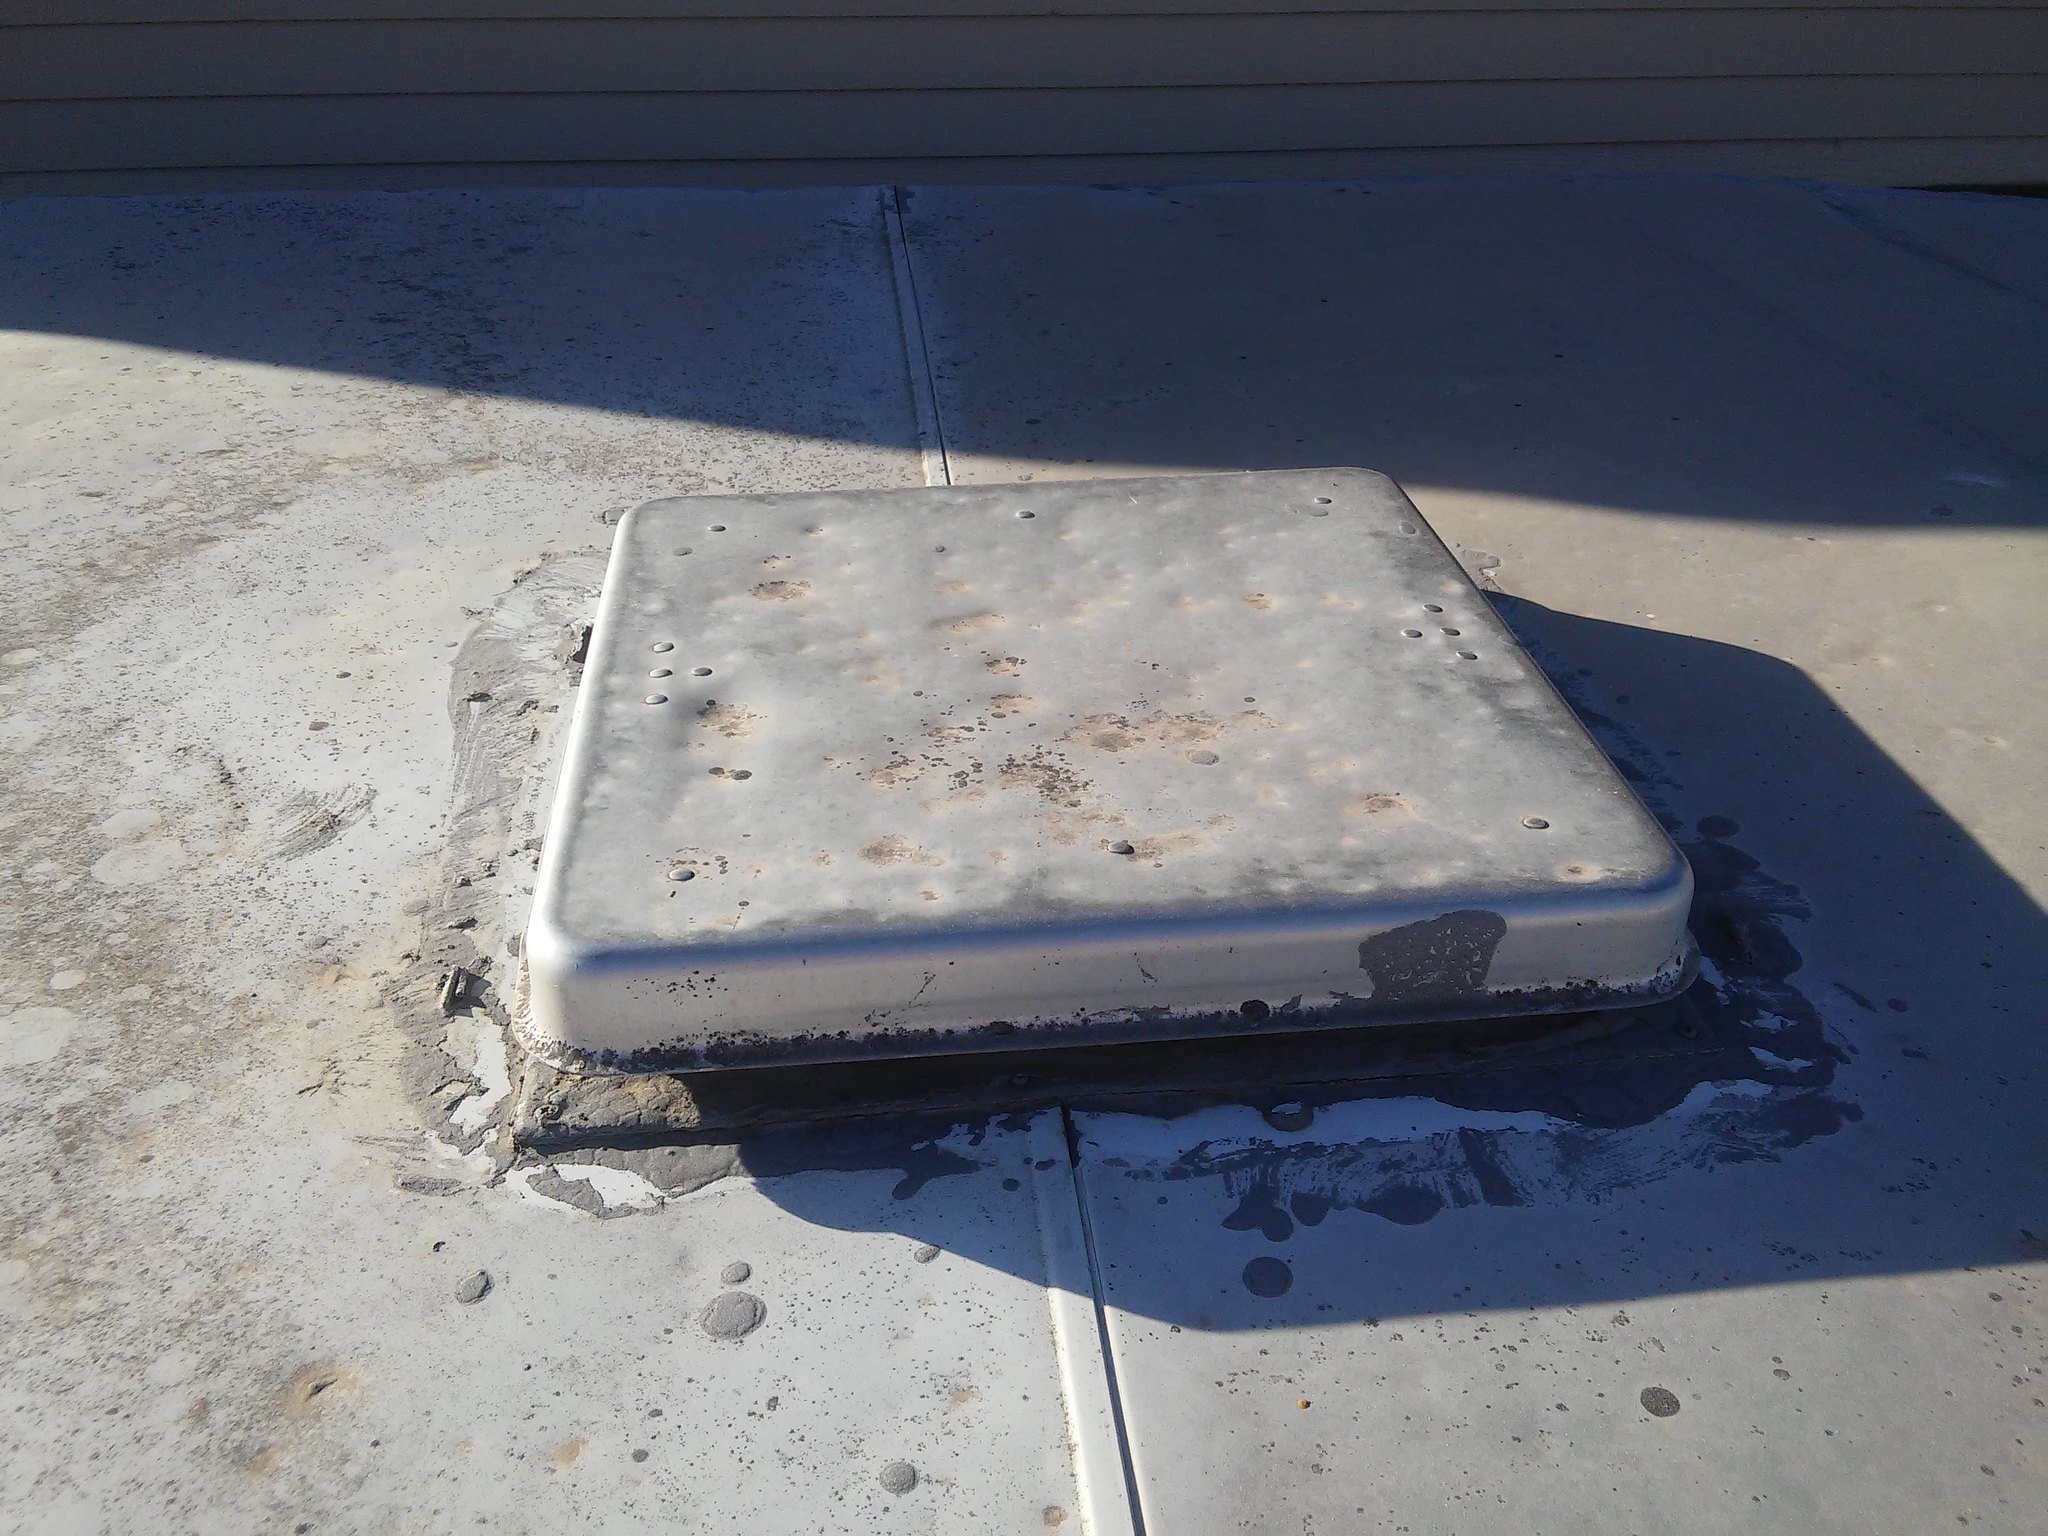 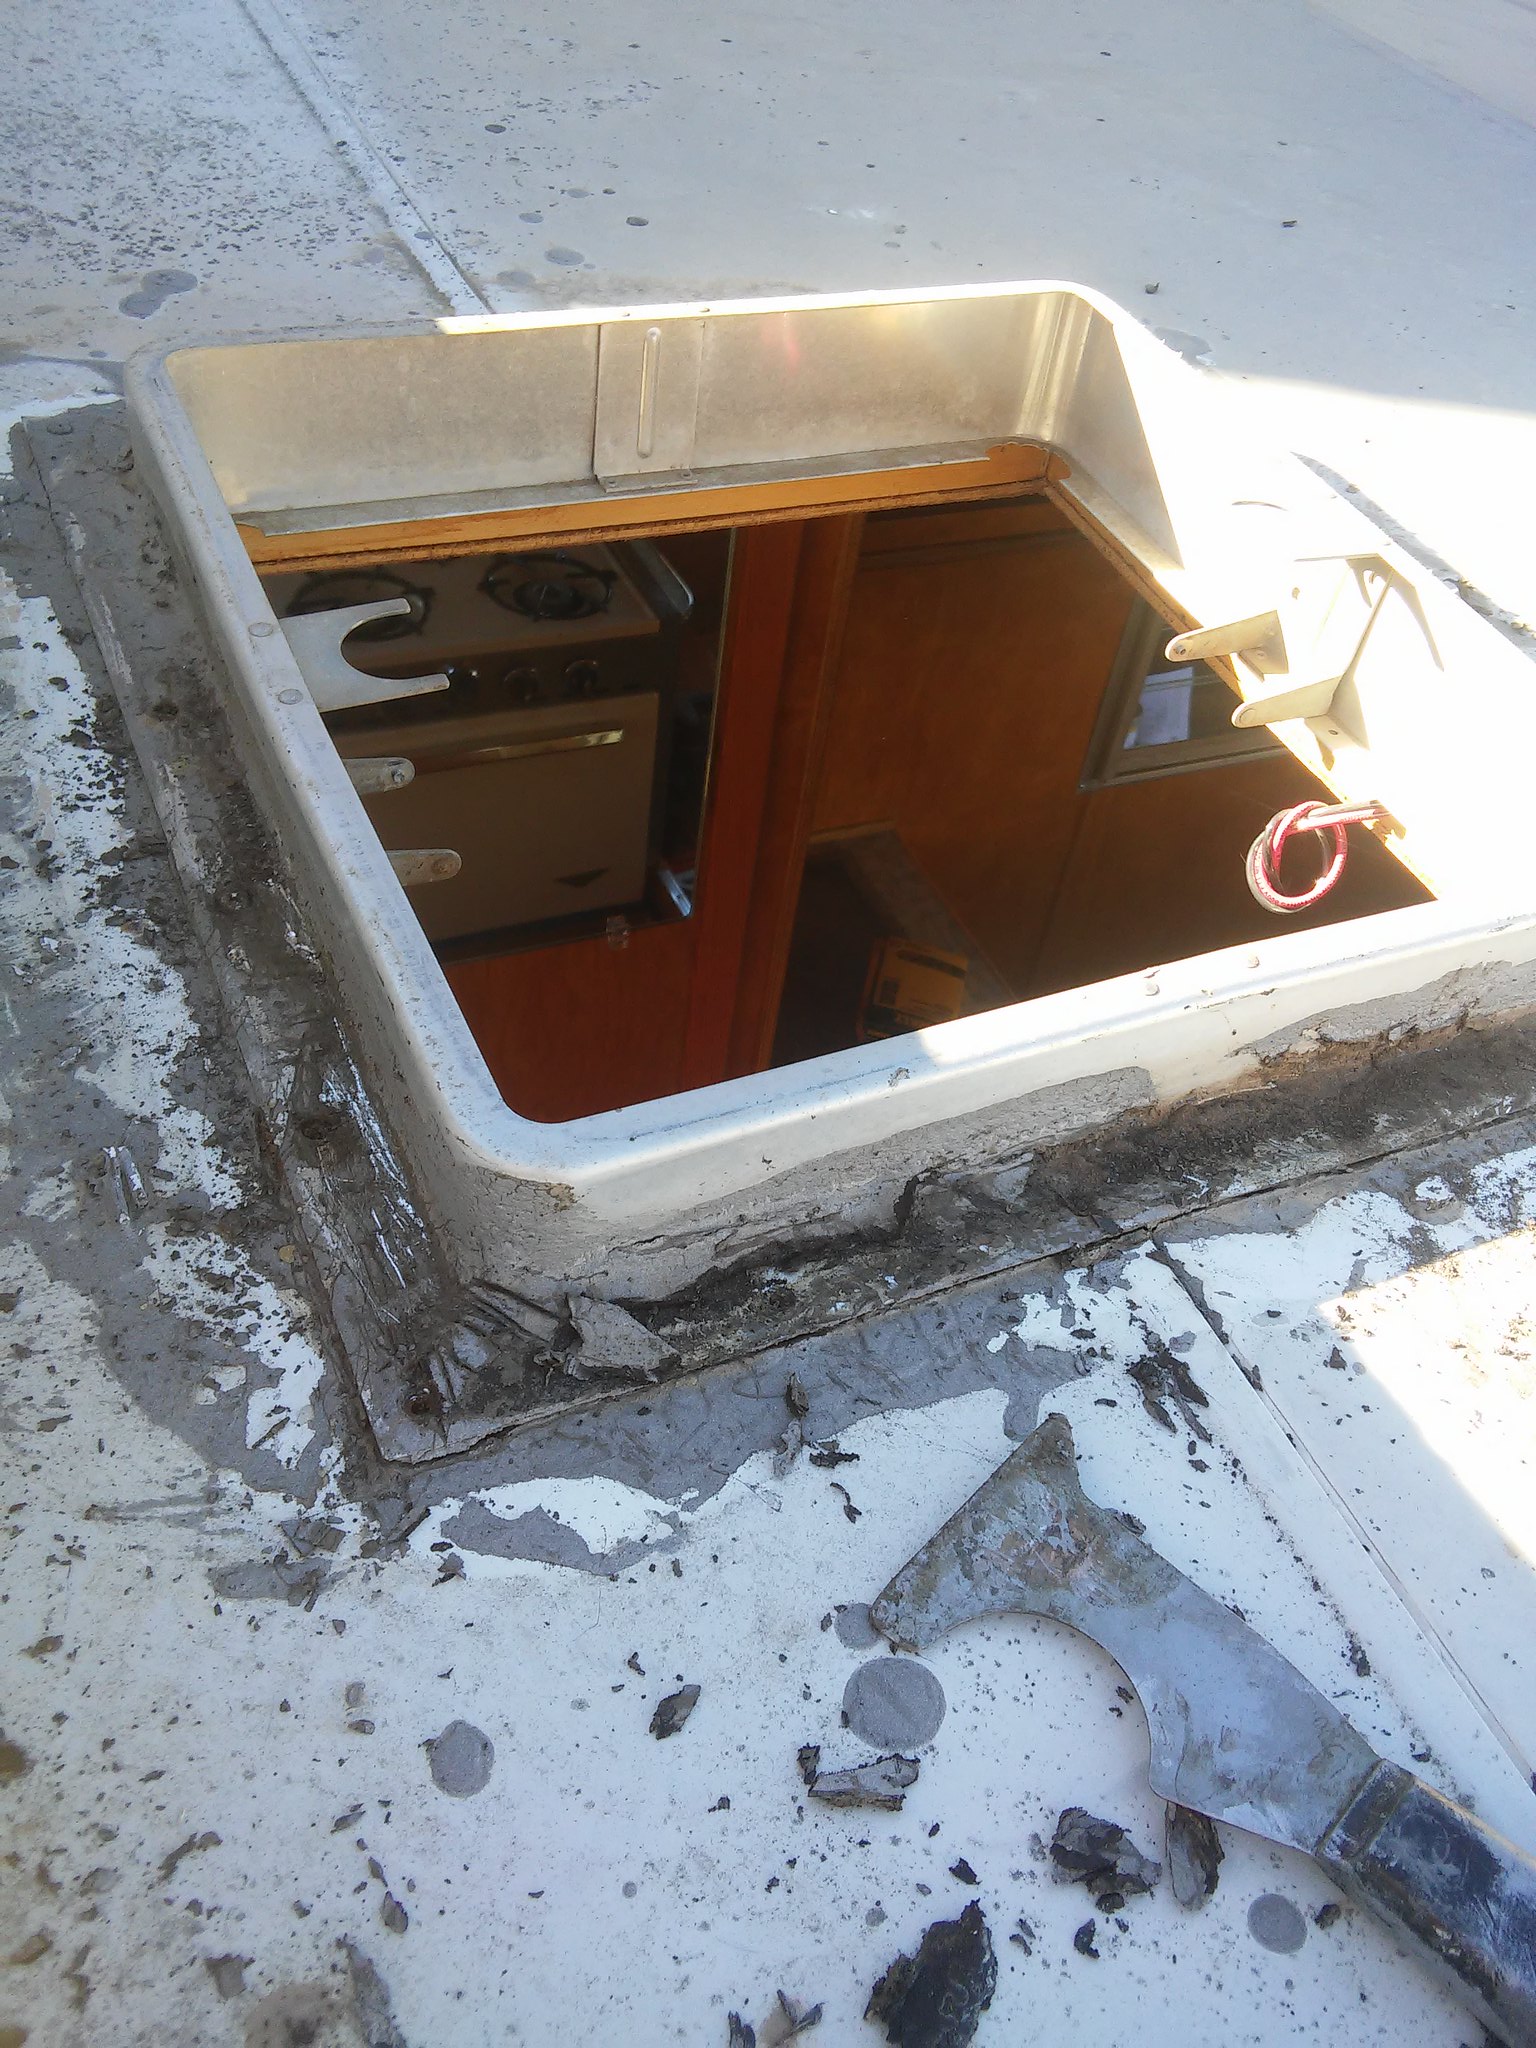 The wood around the vent was perfect. not a single sign of ever having a water issue.  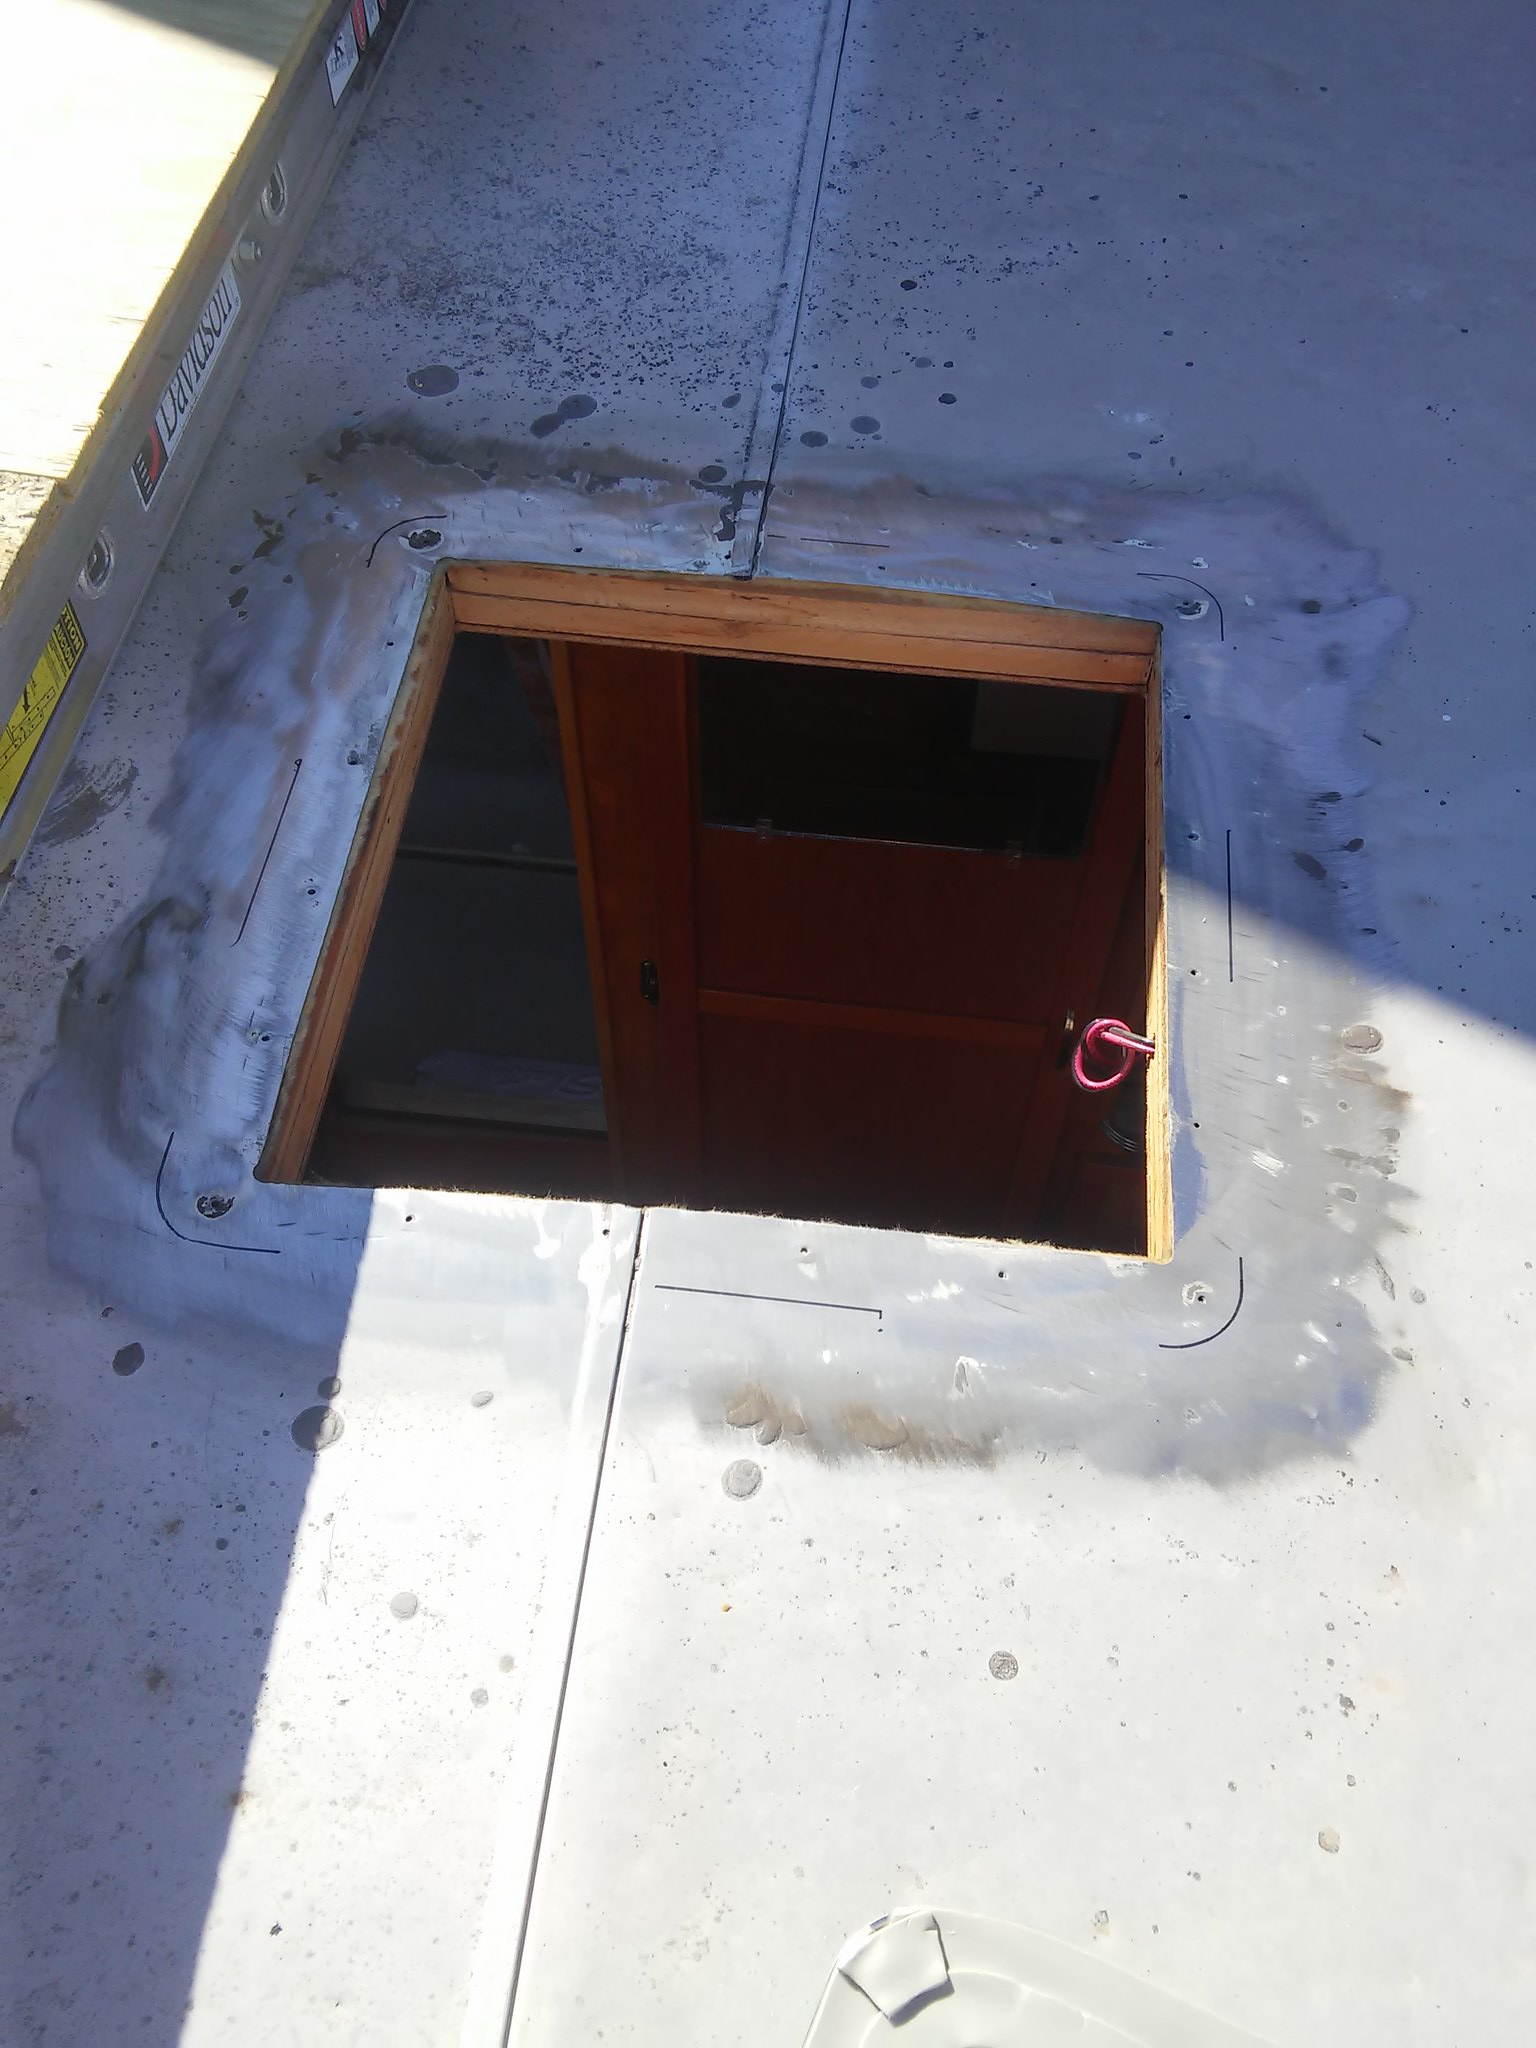 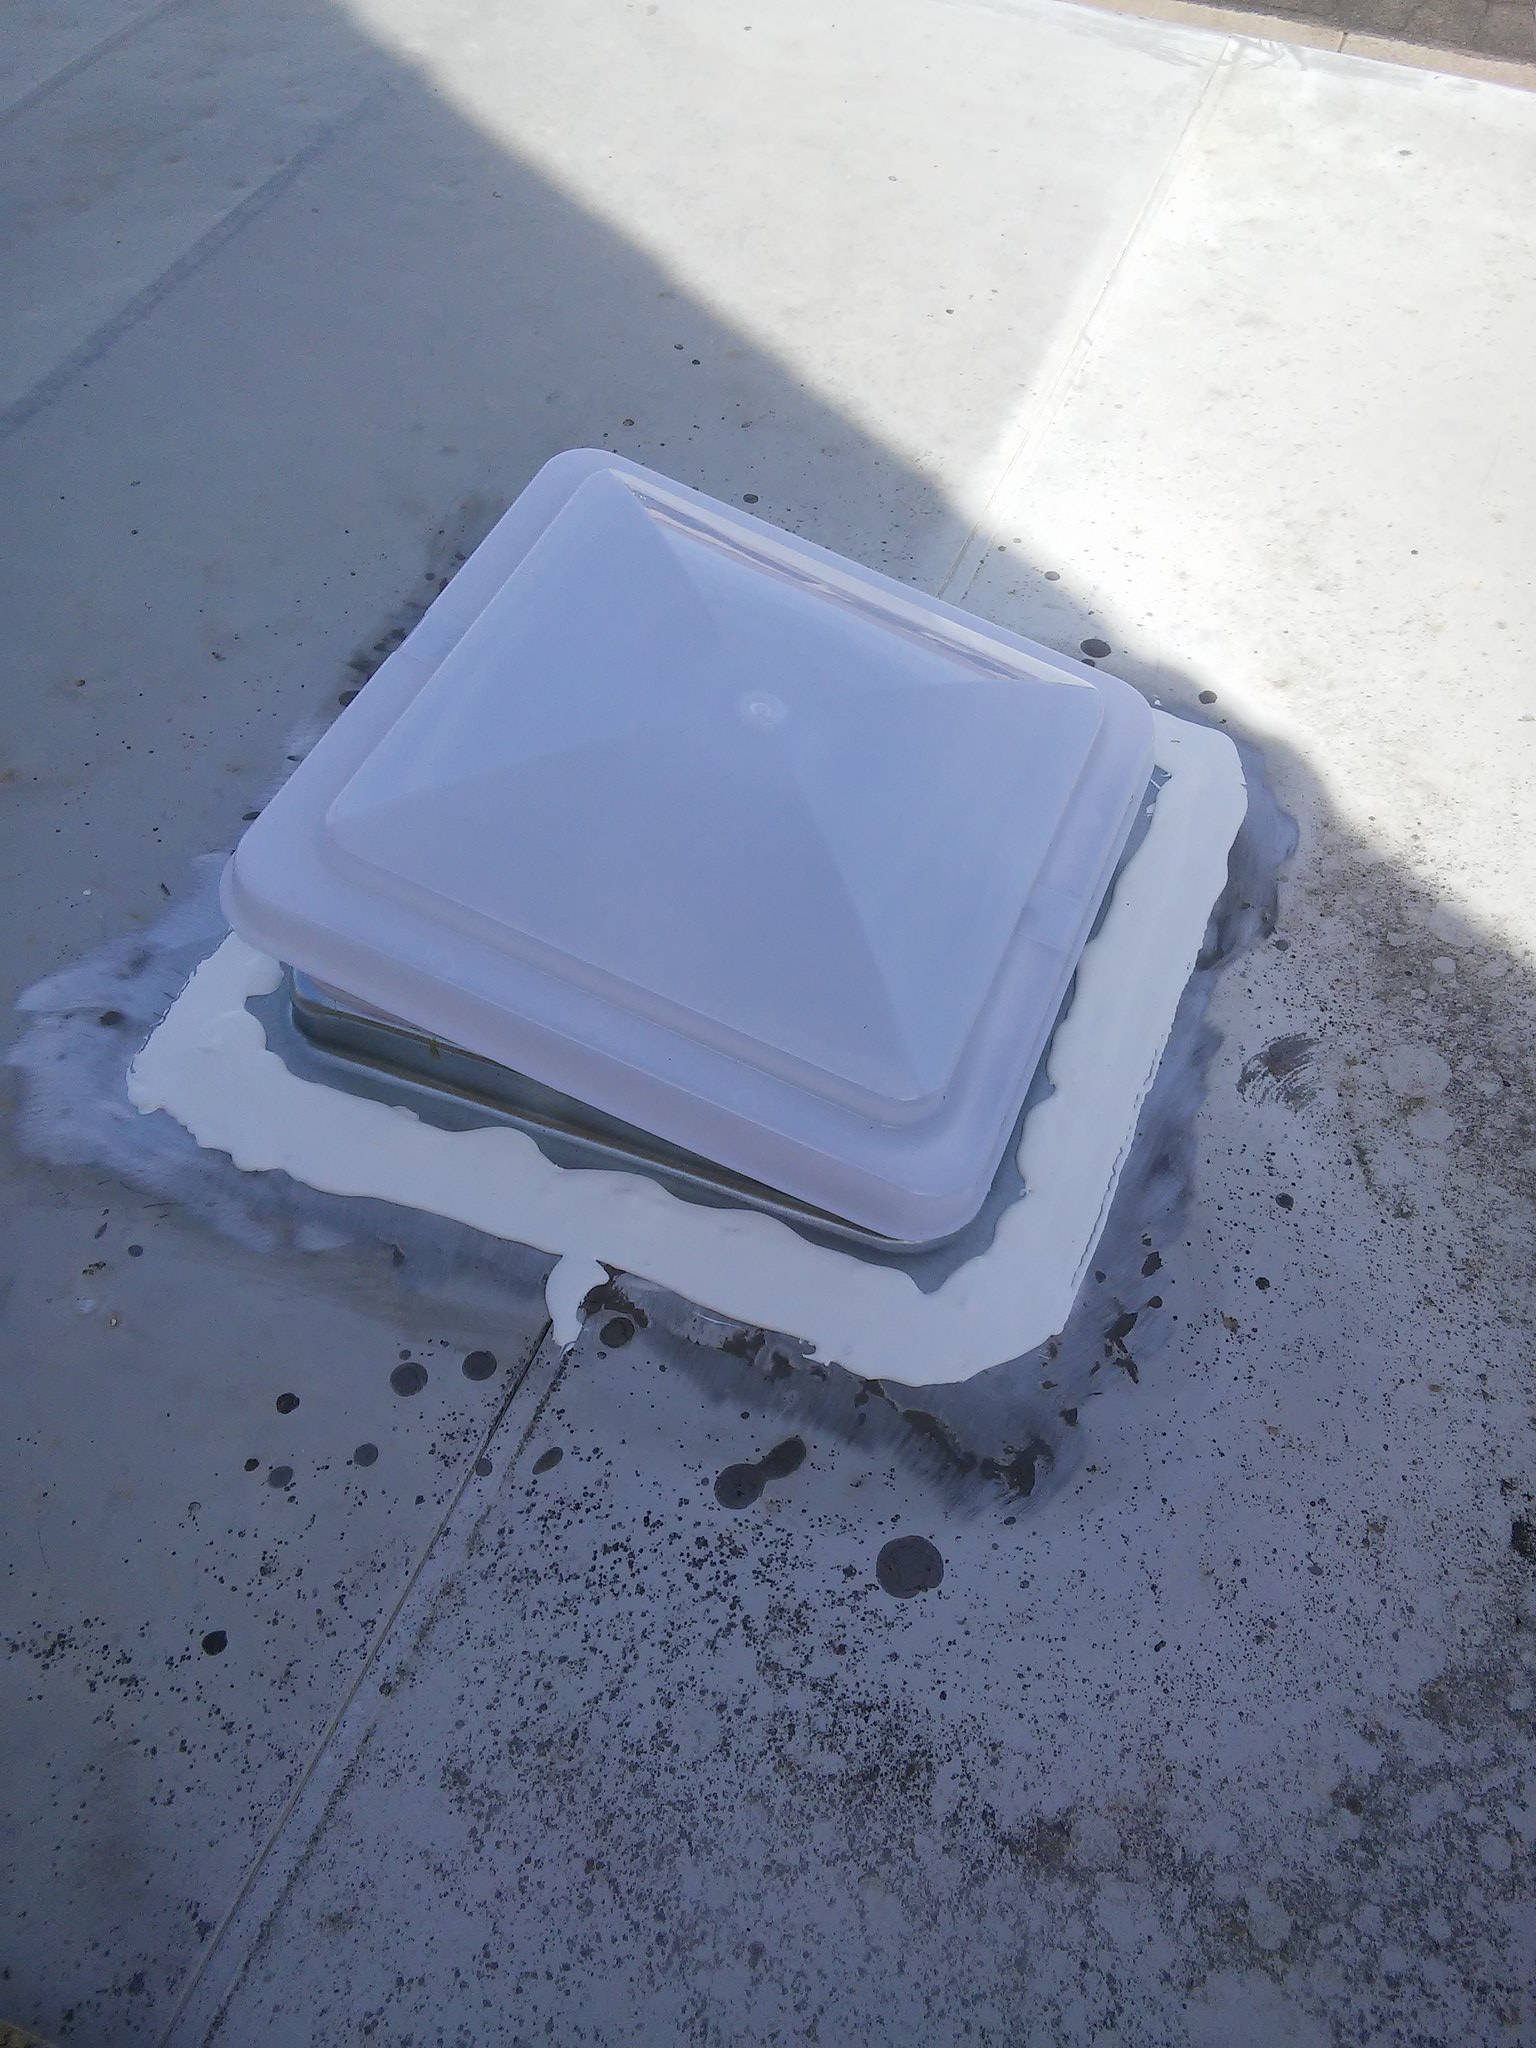 I know it's not a "Fantastic" but hopefully it'll make a difference in being able to move a little air as needed...  Saturday Part - 2 I was able to also rebuild the front rock-guard as well. Lots of drilling out of old rivets. Again with everything painted with gray latex by the PO. I'm very happy with how well this came out. BEFORE- 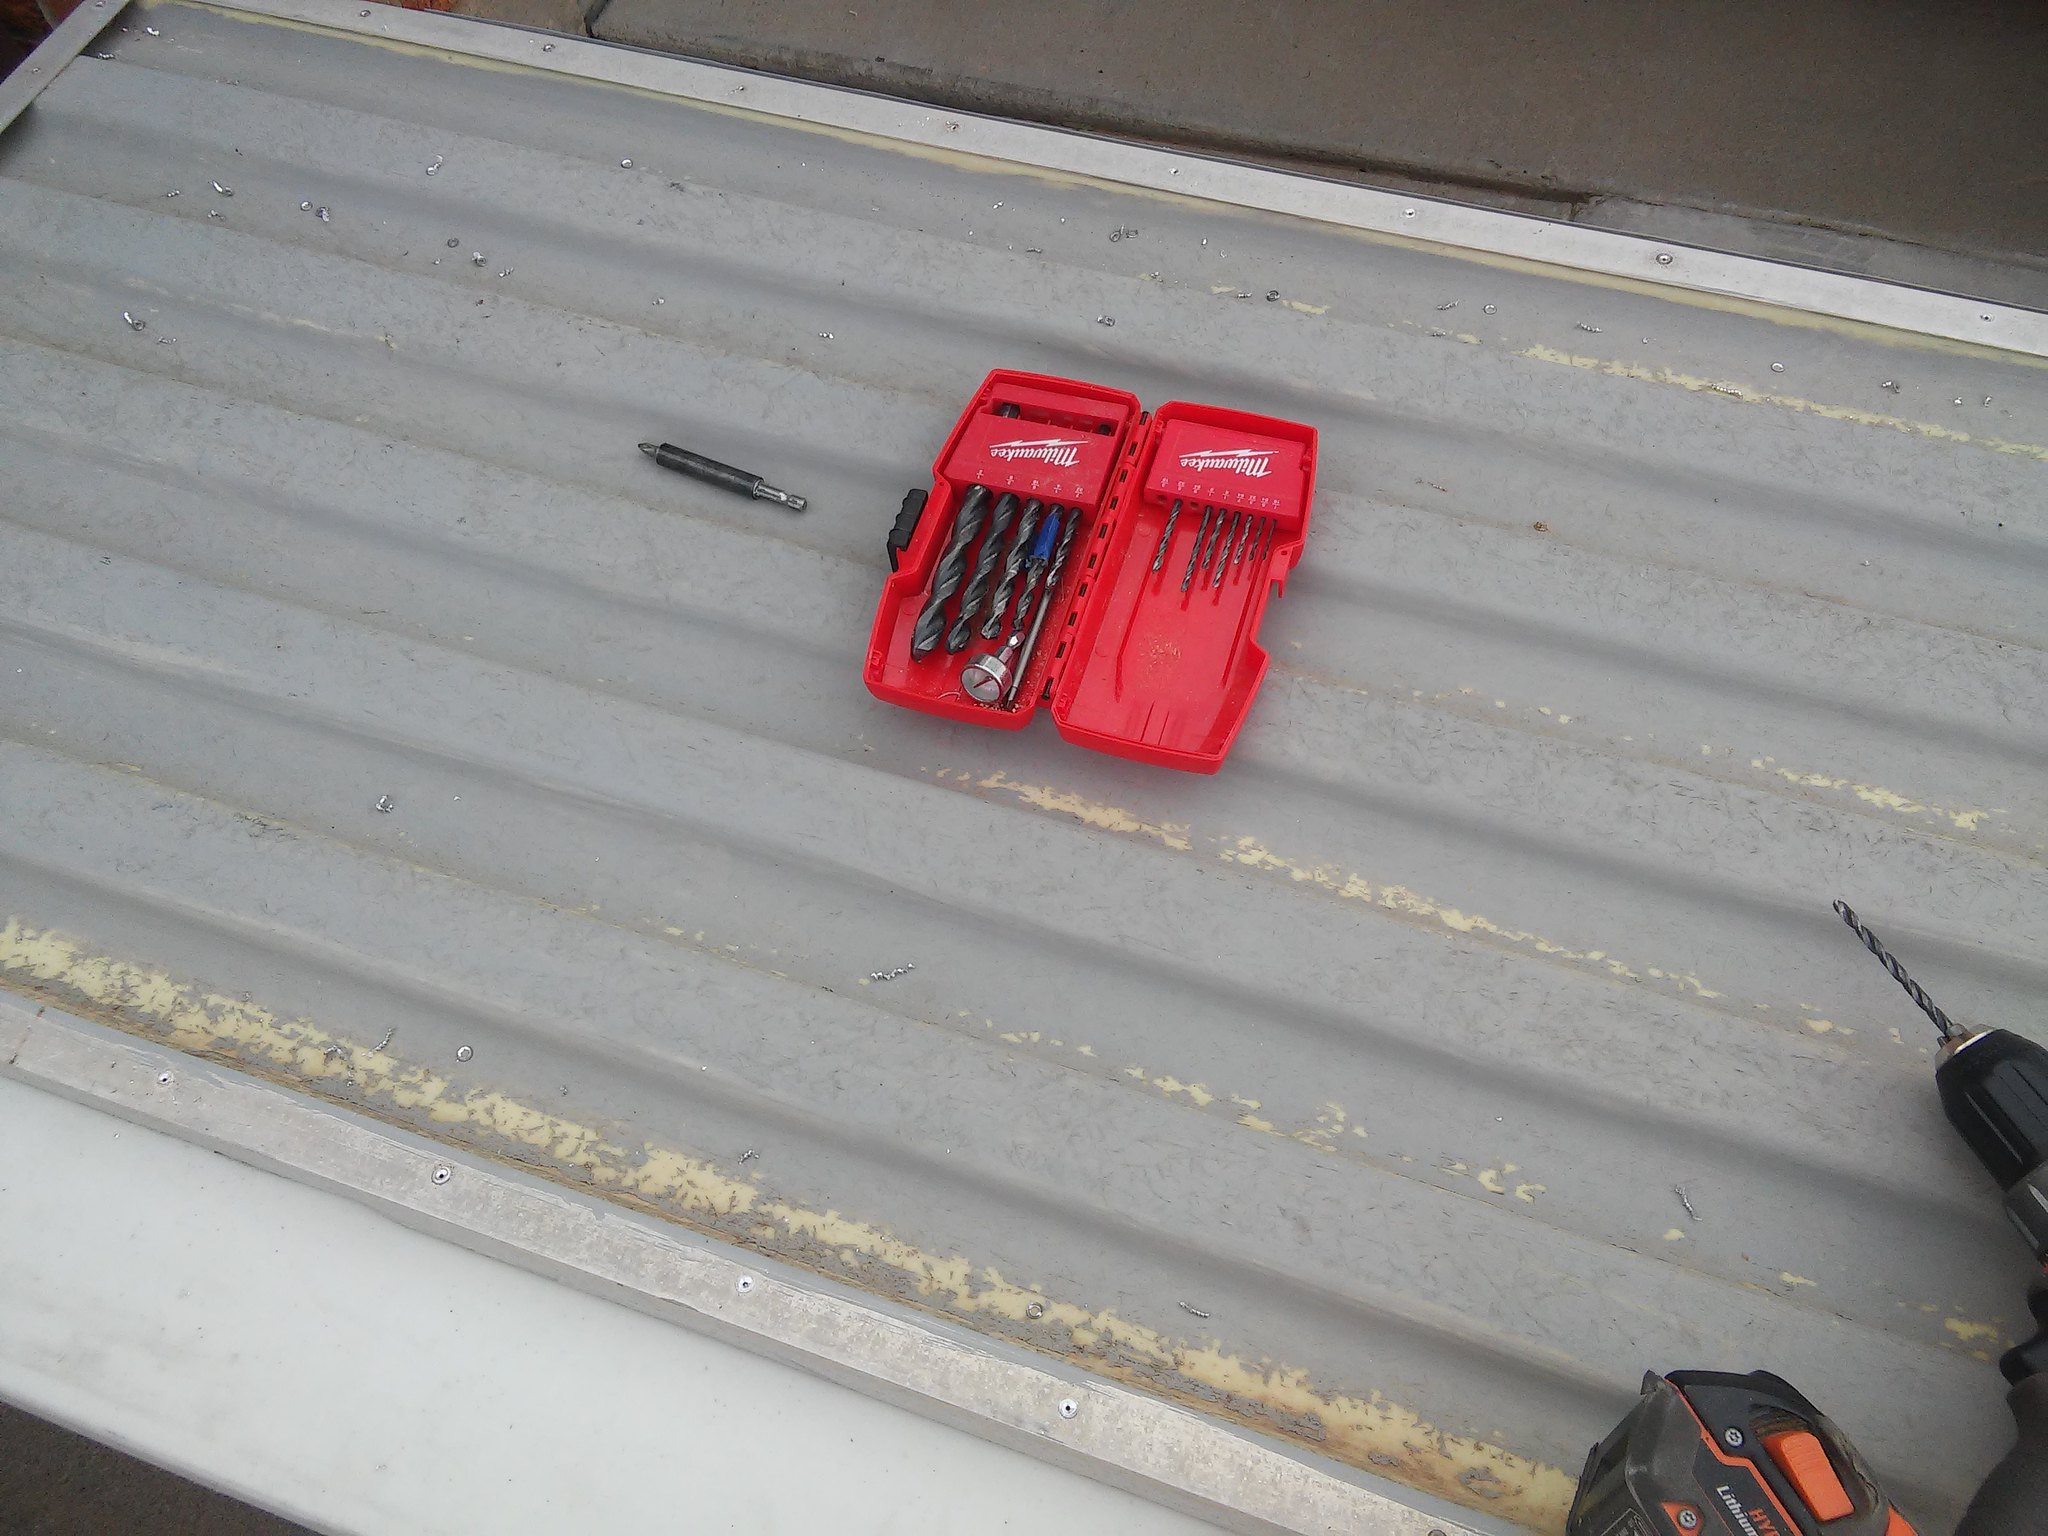 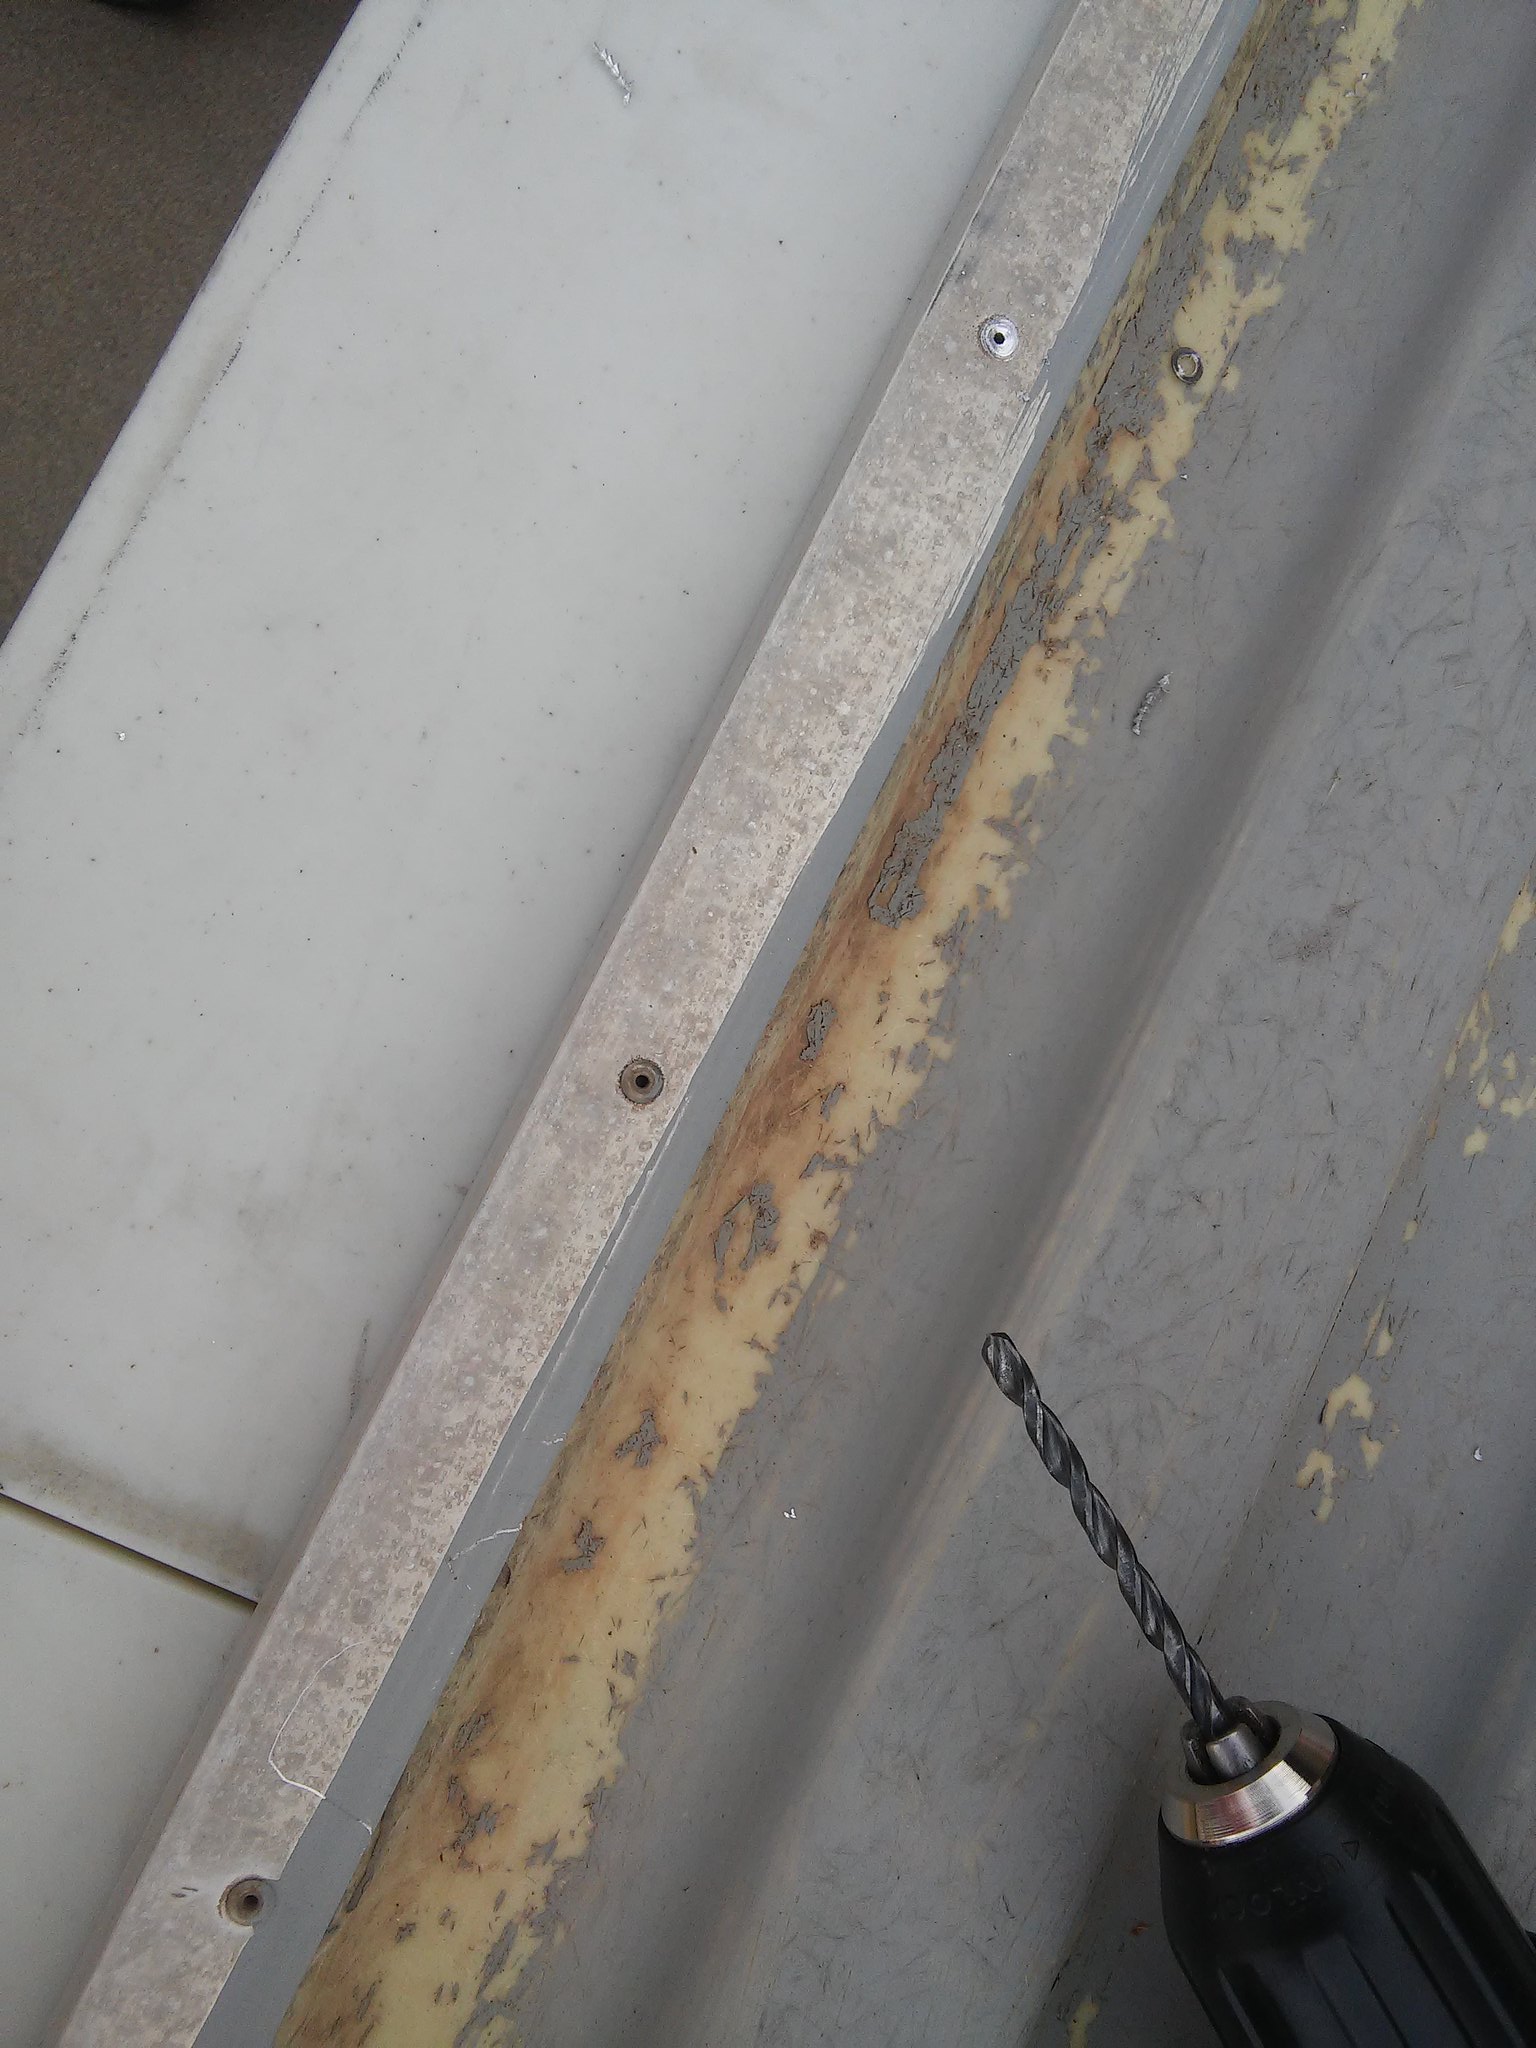 and AFTER- 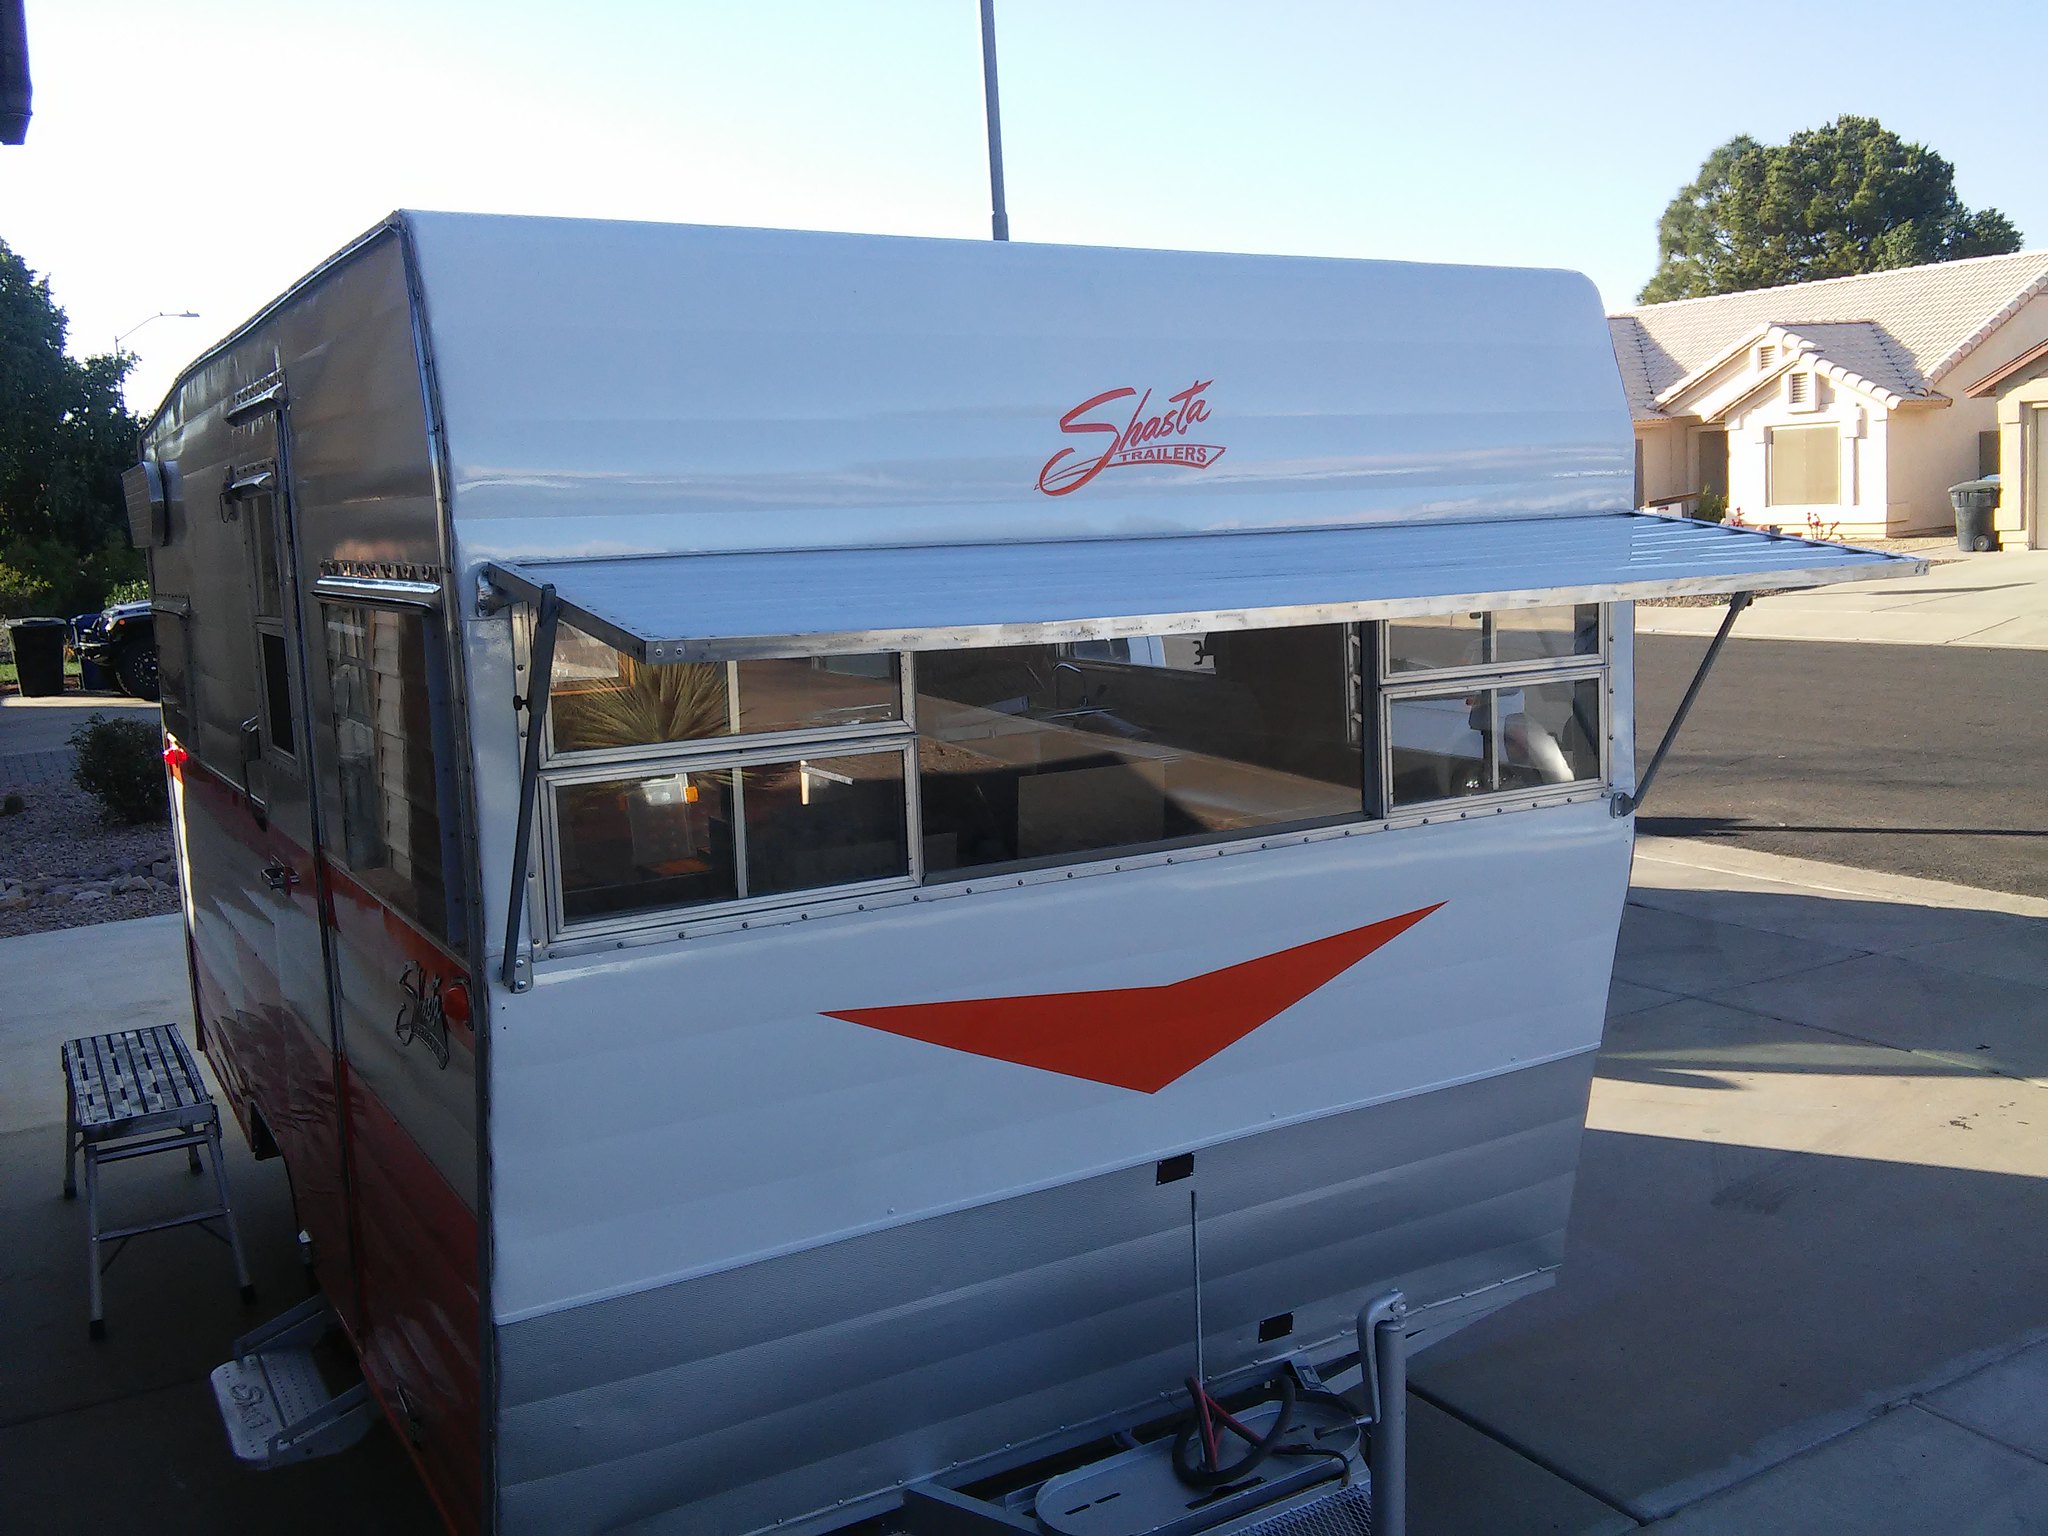 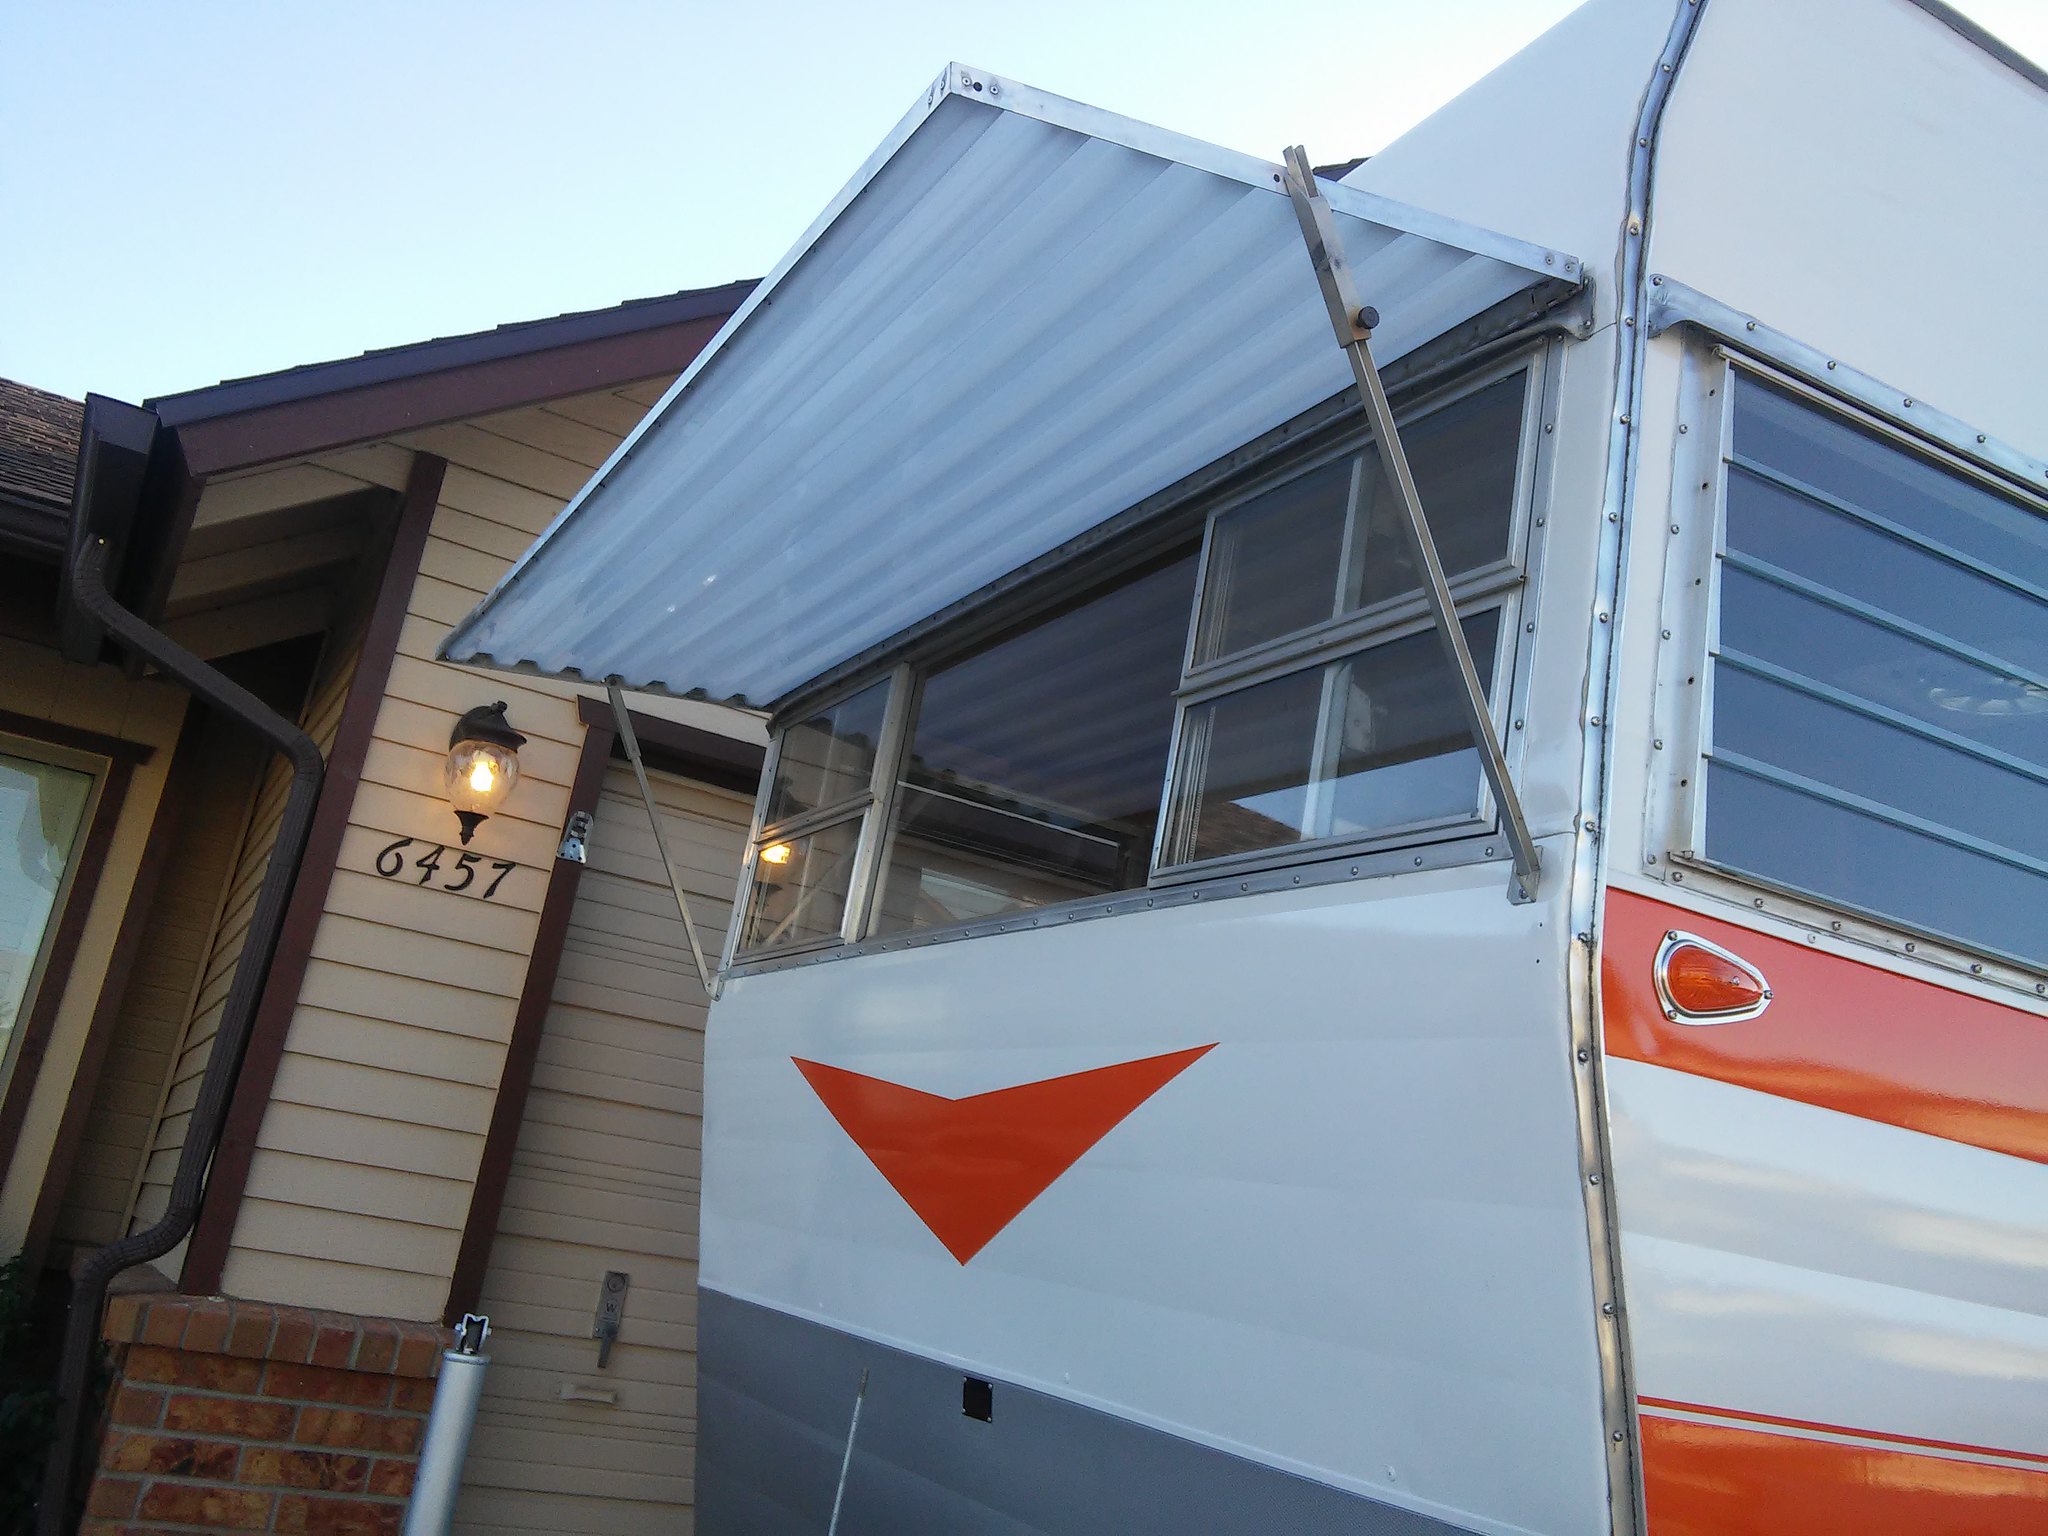 |
|
strange1
Active Member
Posts: 159
Likes: 103
1965 Shasta Airflyte
Currently Offline
|
Post by strange1 on Feb 11, 2018 21:10:04 GMT -8
I have upgraded the electrical to a 30 amp service. I ran 110V to an outlet under the dinette seat on the street side. There I installed a 12V converter to drop the voltage. I will also have a 12V battery and can switch back and forth depending on if I'm plugged in to 110V or not. Here are some pictures of the electric. 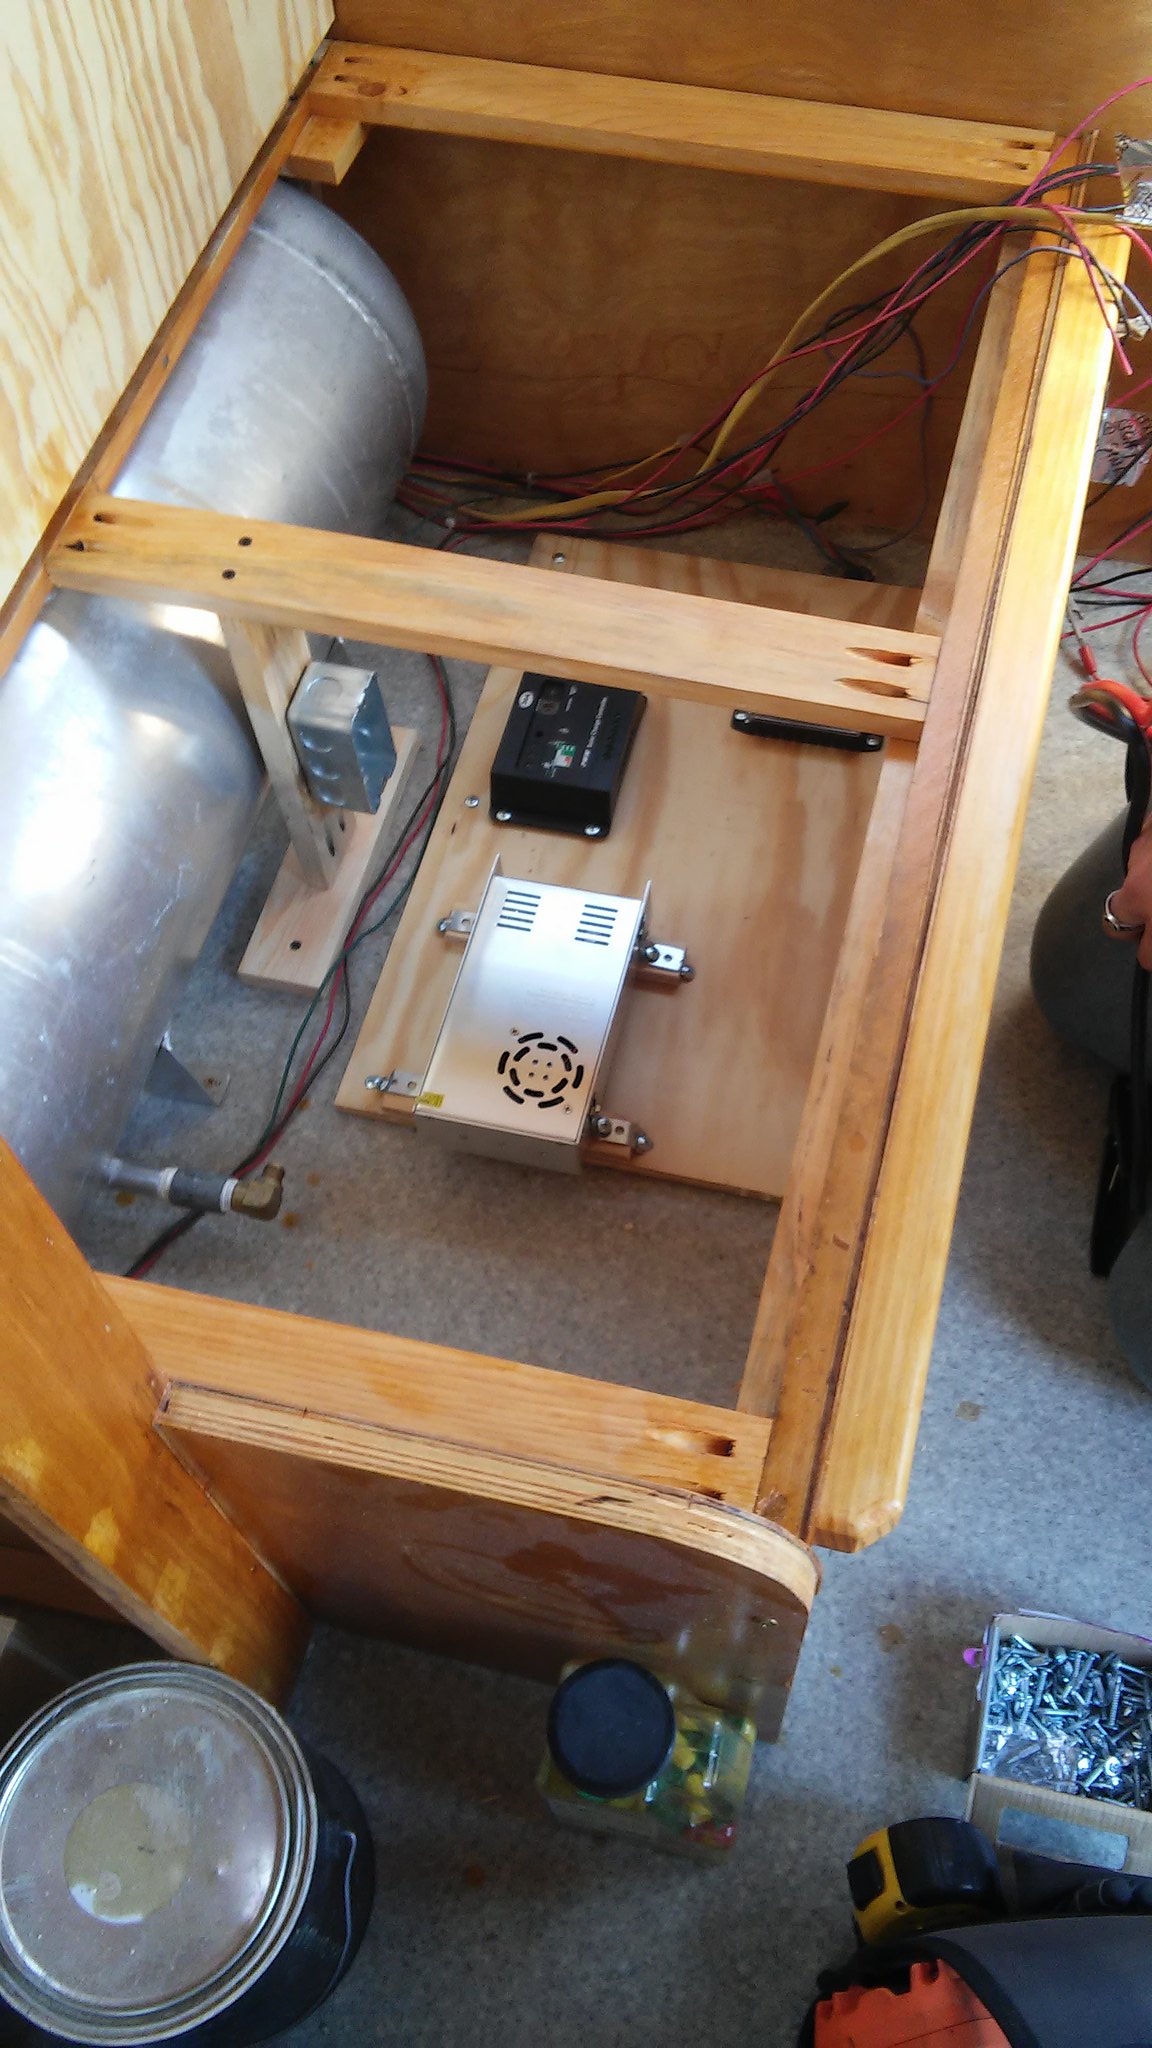 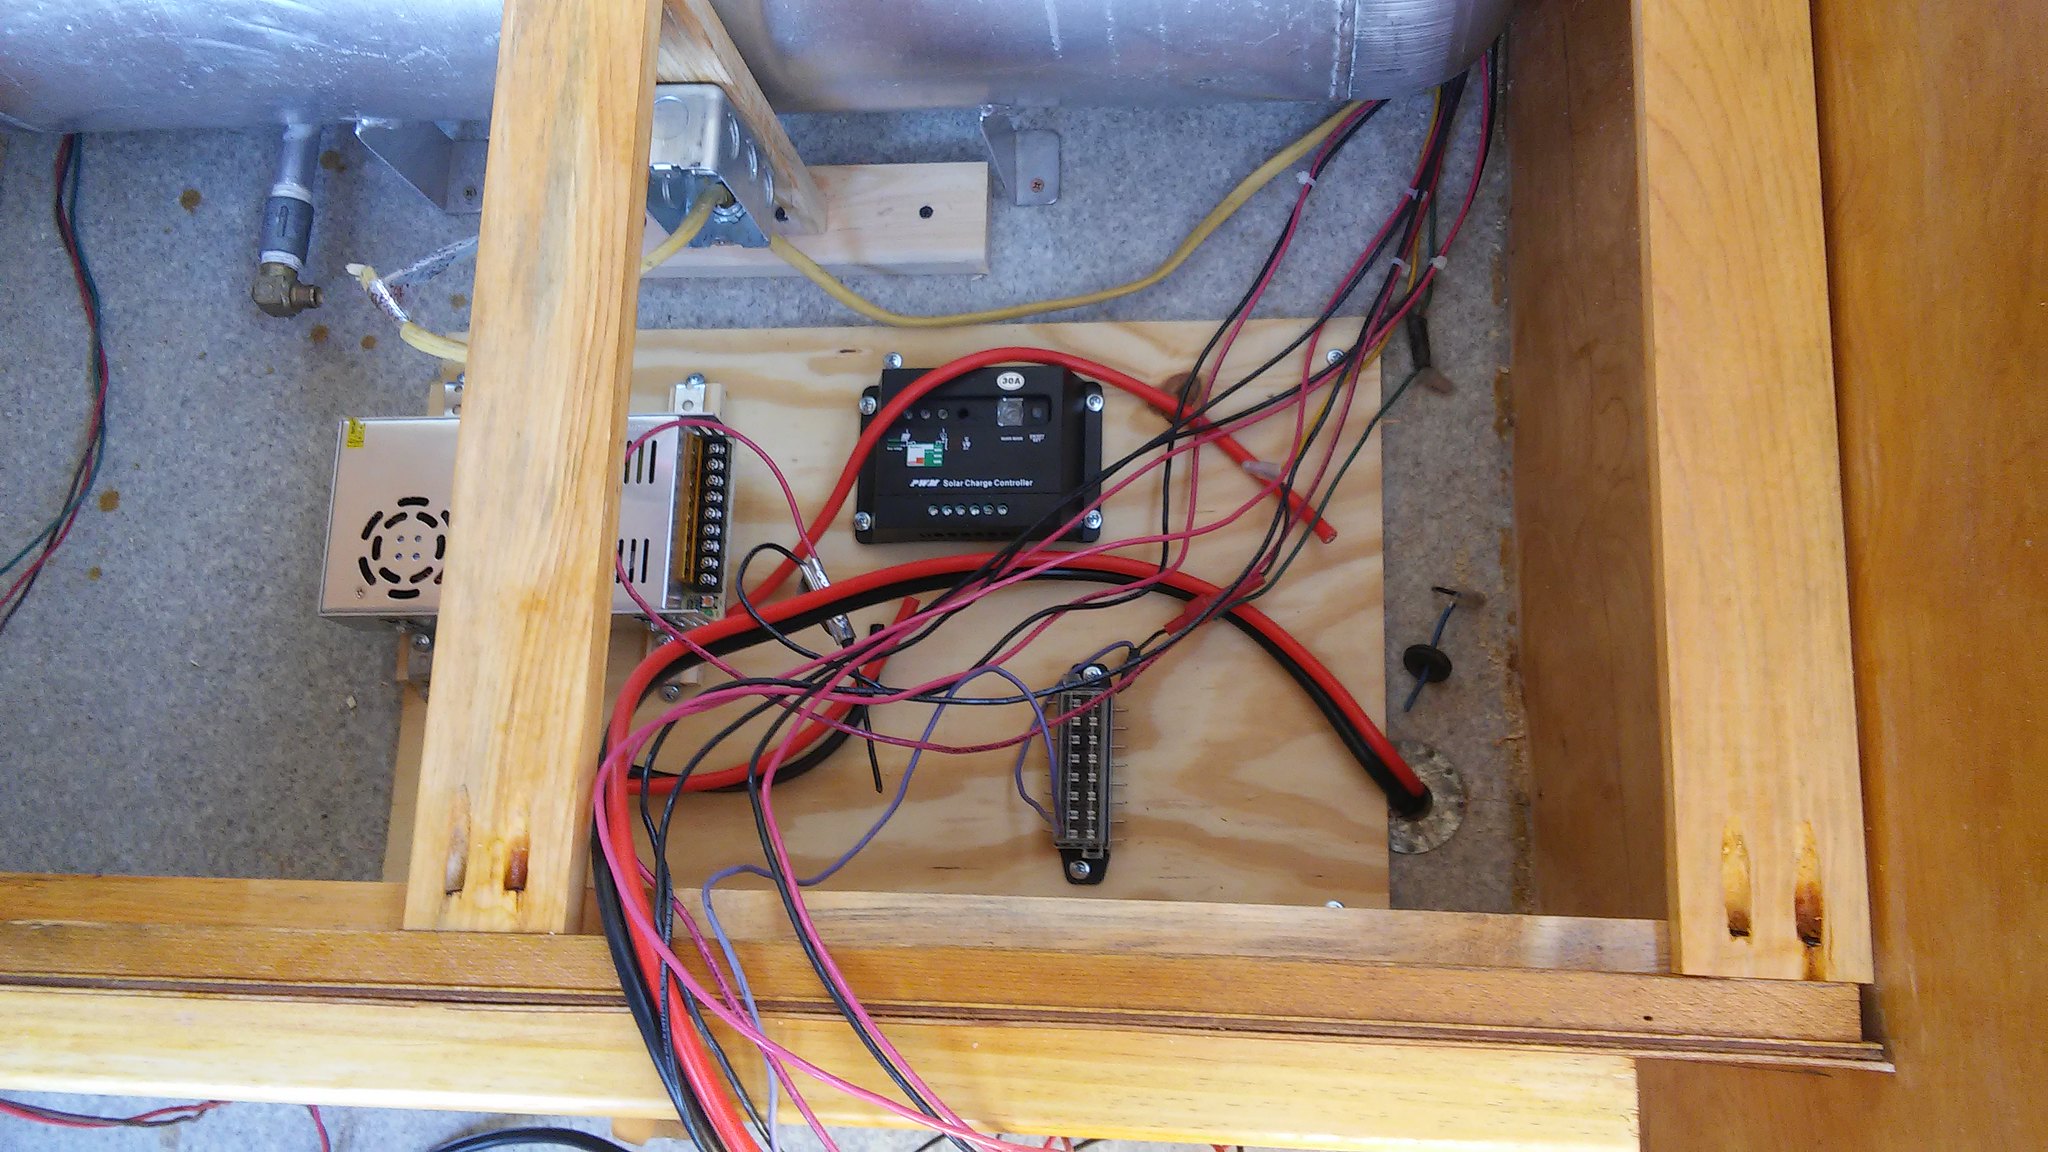 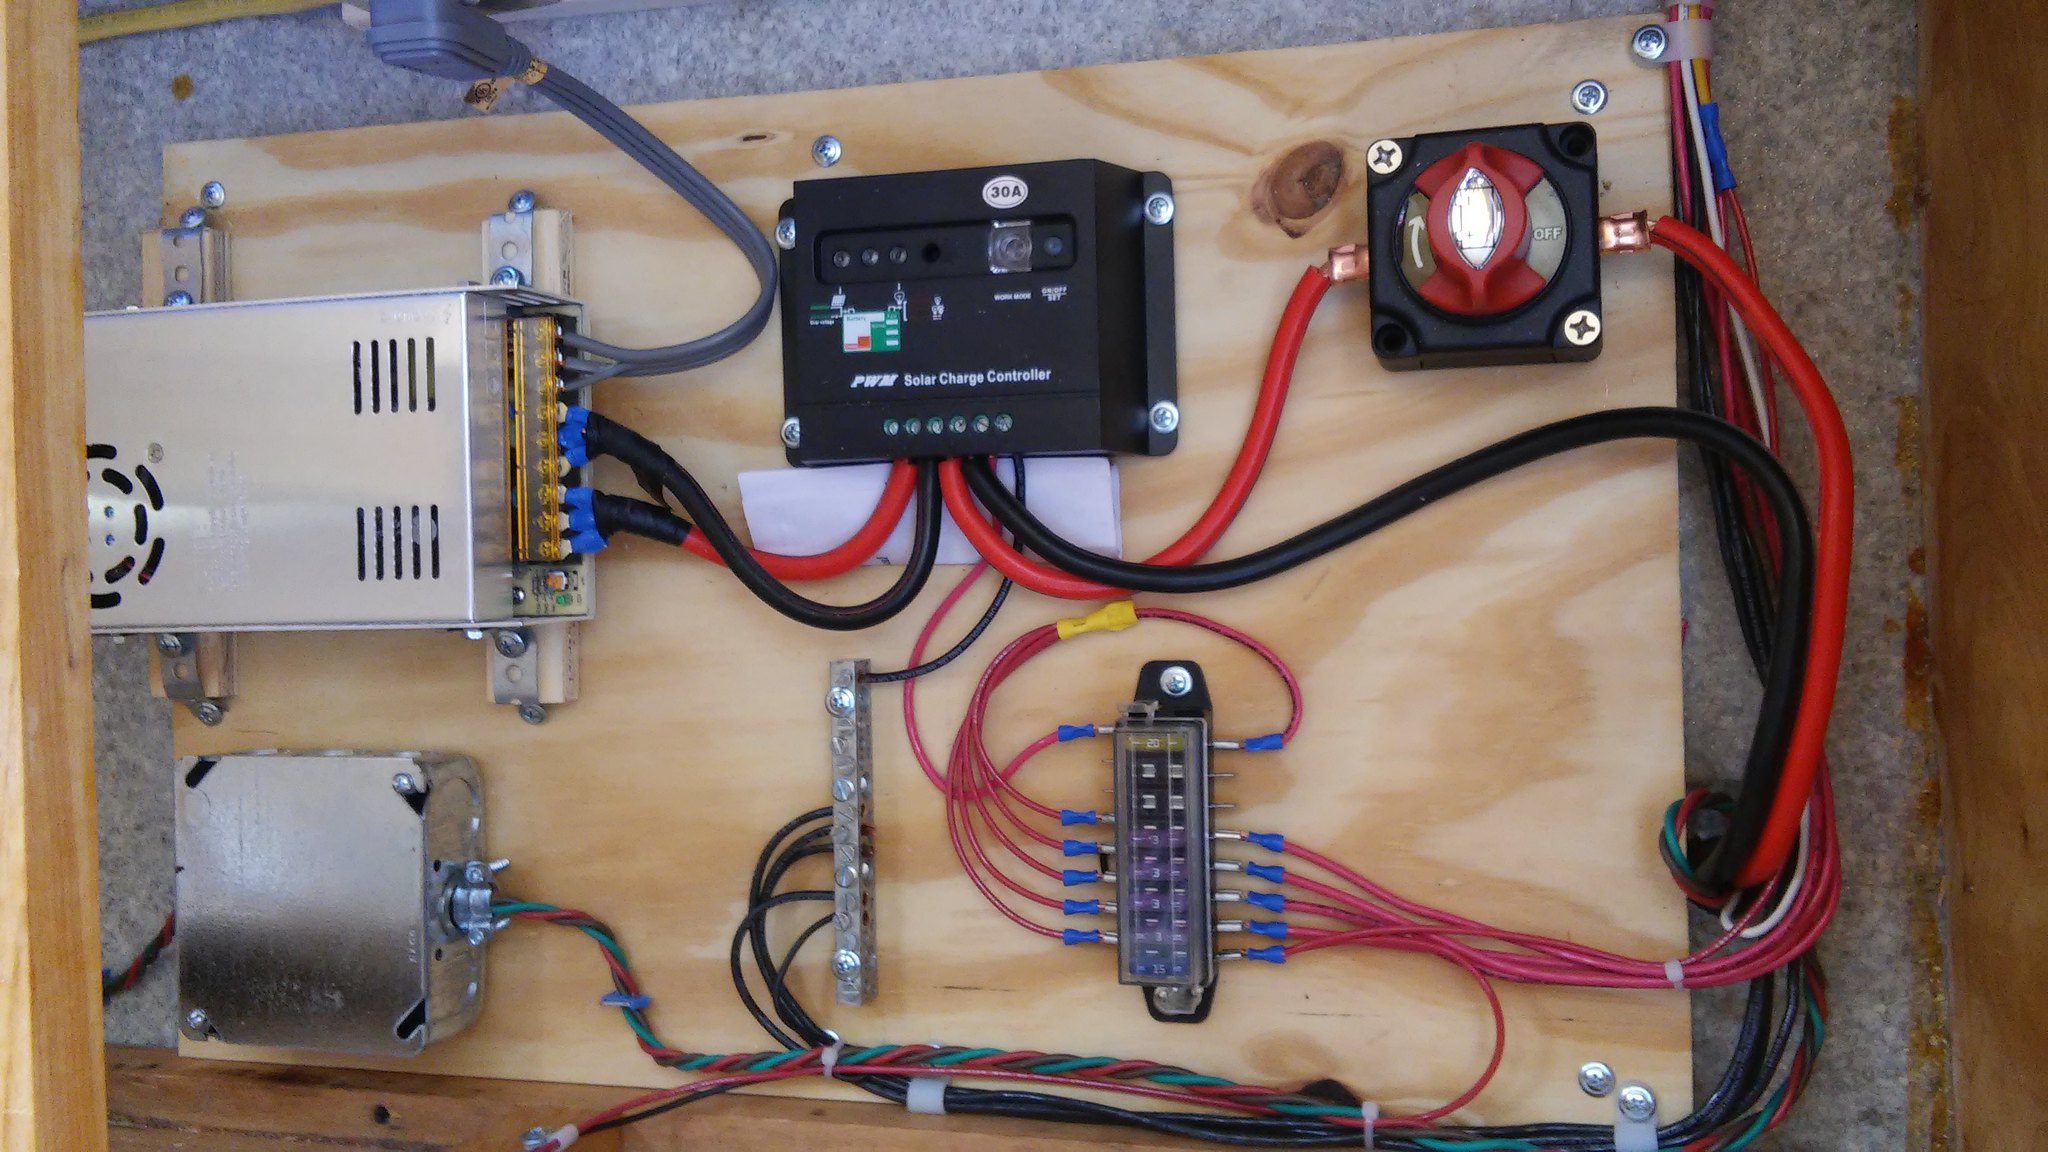 Here is a close up or the converter I purchased off of Amazon... 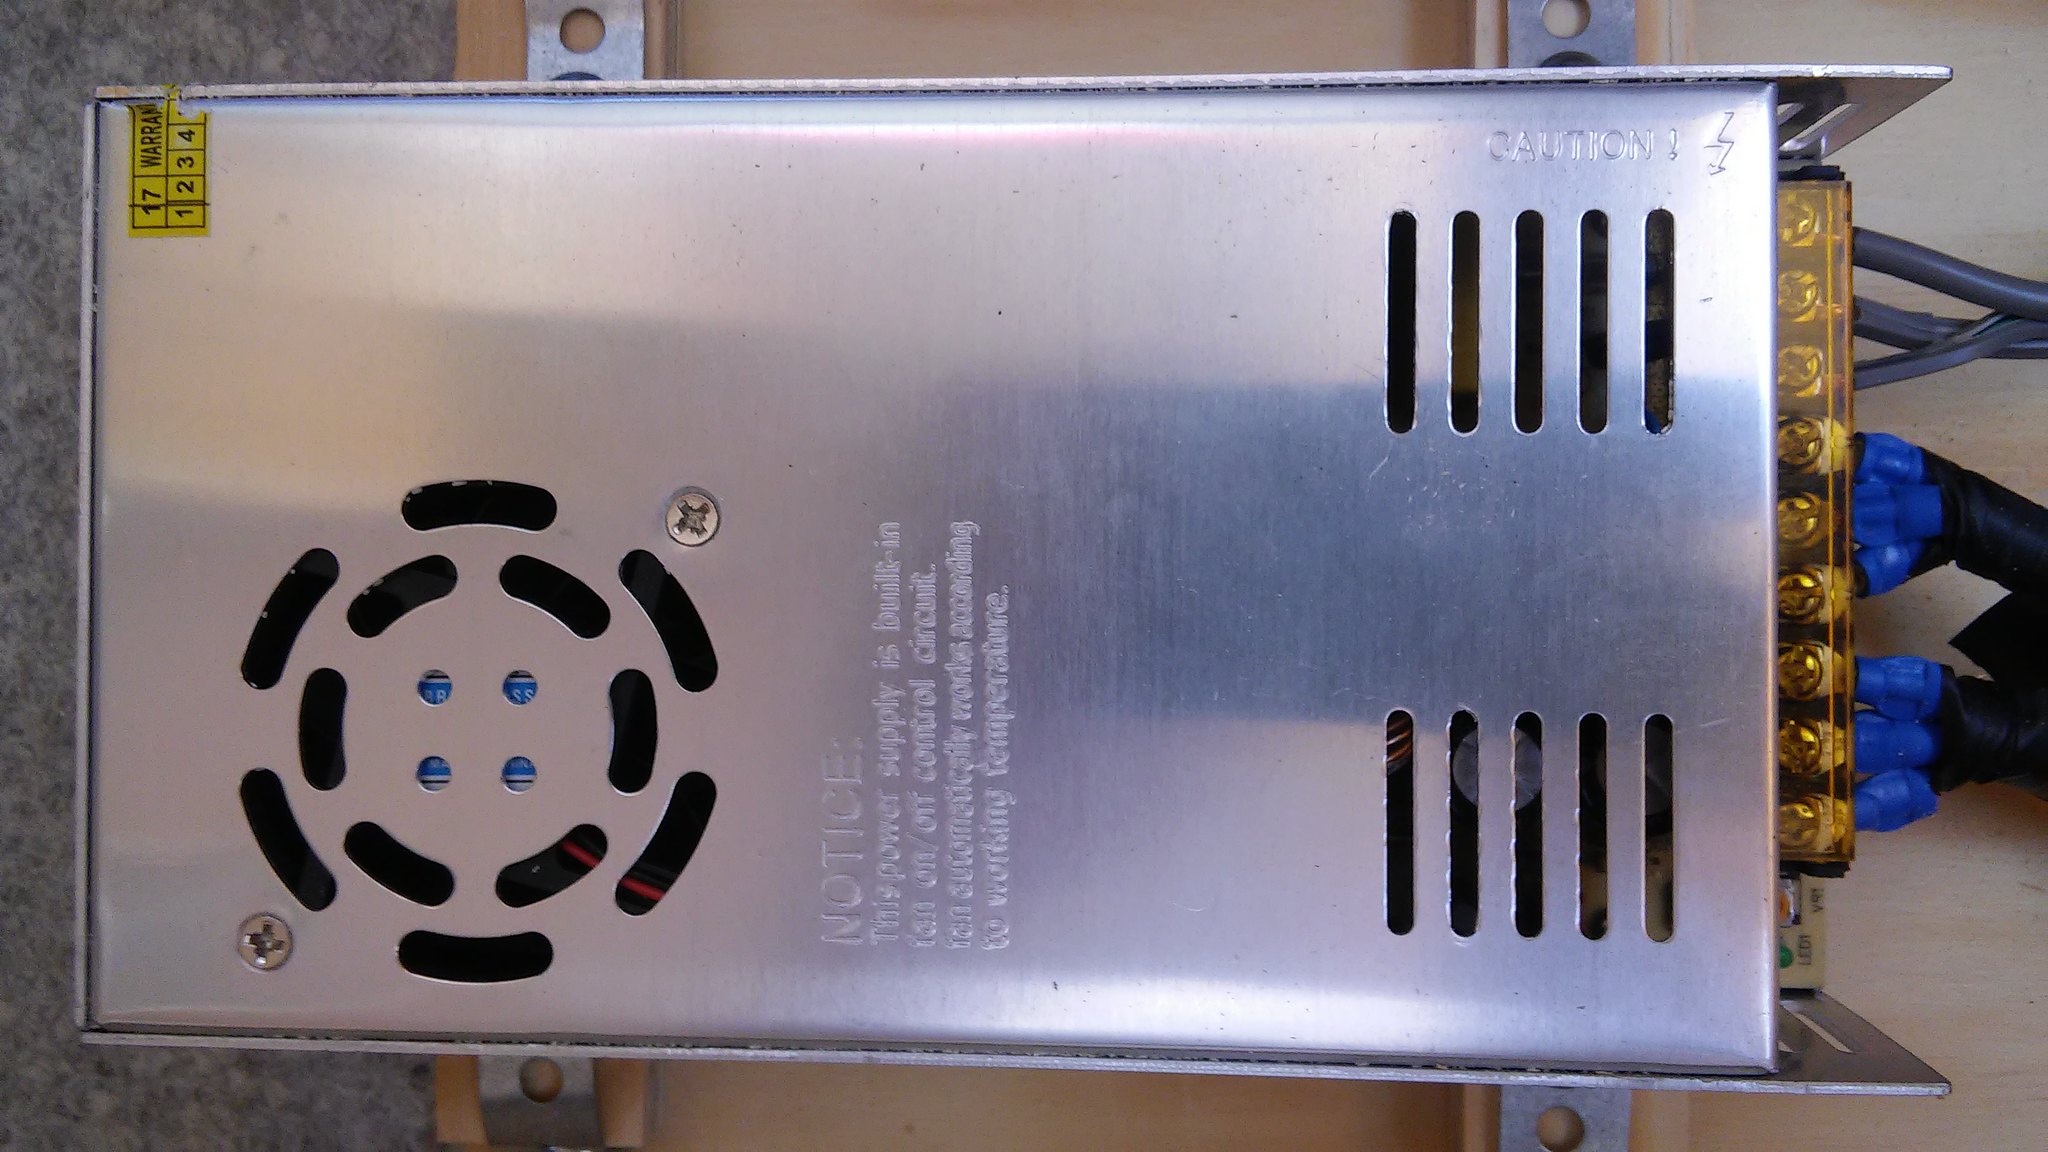 Here is a link - www.amazon.com/gp/product/B01IMOS20A/ref=oh_aui_detailpage_o08_s00?ie=UTF8&psc=1It helps that one of my sons is a low voltage contractor...he came and helped me wire up everything. I just got the parts and pieces he told me to get. Hope this helps. |
|
strange1
Active Member
Posts: 159
Likes: 103
1965 Shasta Airflyte
Currently Offline
|
Post by strange1 on Feb 11, 2018 11:16:01 GMT -8
It is the original aluminum water tank...I debated switching it out...but it was really clean so I decided to keep it. I just rinsed it out with soap and water. Like I said it was very clean and had no scum or build up anywhere. I don't know if I'll drink from it? We'll hook up to city water when we can and probably take along our favorite bottled water. But I did hook it to the pump faucet at the sink. Probably use for cleaning etc.
|
|
strange1
Active Member
Posts: 159
Likes: 103
1965 Shasta Airflyte
Currently Offline
|
Post by strange1 on Feb 9, 2018 9:18:37 GMT -8
I had (2) light fixtures from the original trailer I wanted to be able to re-use. They were a combo light with (1) 110V regular incandescent bulb and (1) smaller auto 12V (1076) bulb...multi-use. There was also a 110V outlet on one end of each fixture. Since I've converted all my lights to 12V I knew the 110V outlet would be worthless so I replaced one with a dual USB outlet so we could charge our phones, etc. Anyway here's a look at one of my little projects from this week. This is a BEFORE picture of one of the light fixtures in it's original location under the upper cabinet over the kitchen sink. 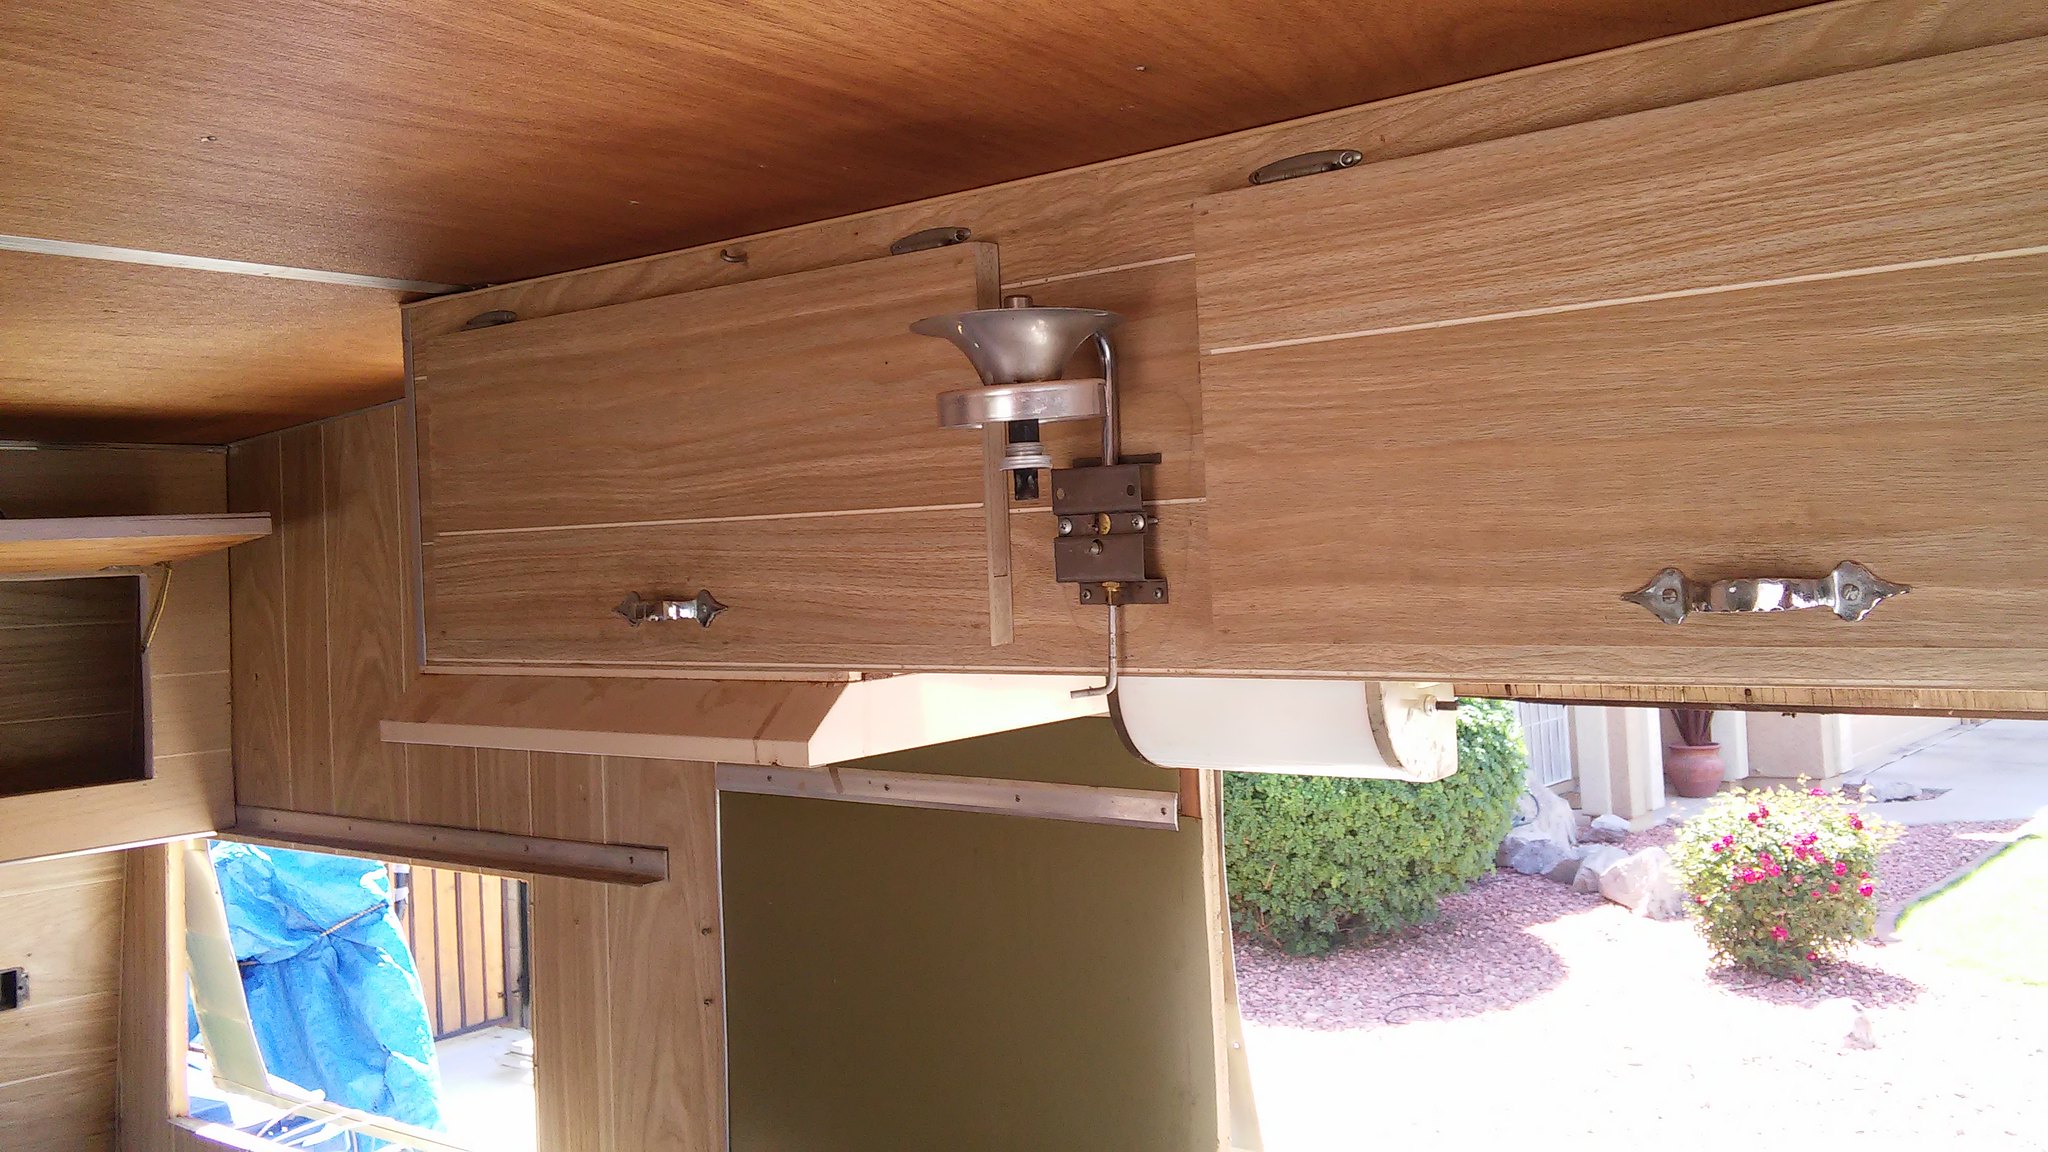 I purchased a dual port USB charger that fits in a cigarette lighter 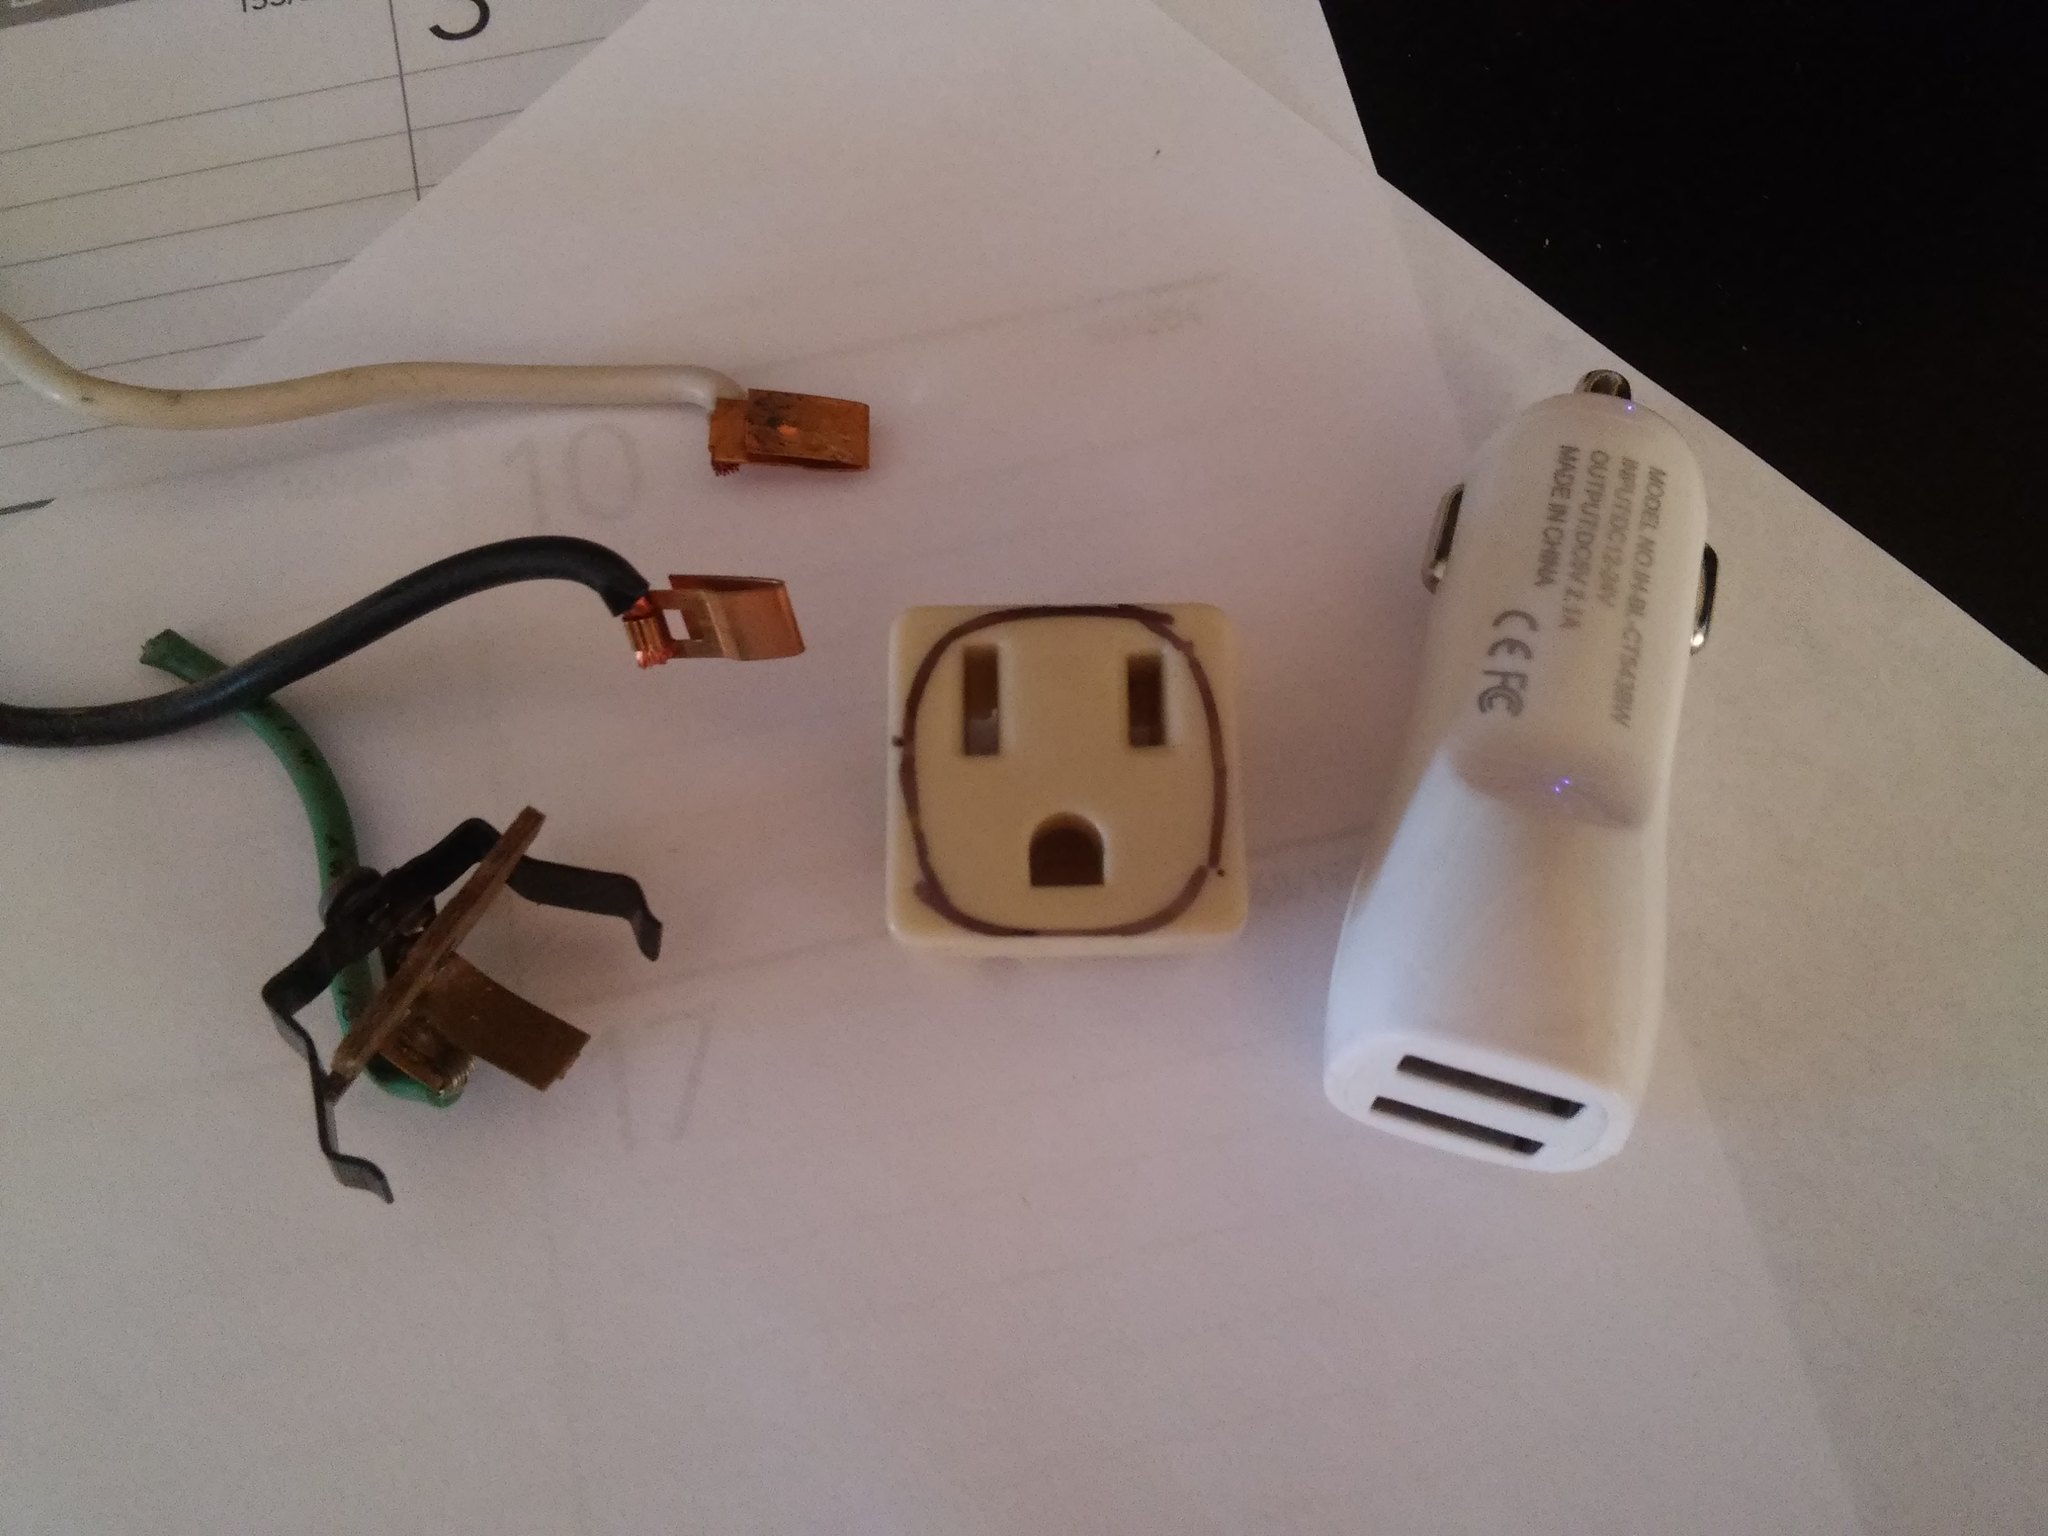 With my dremel tool I cannibalized the single plug socket to accept the charger. 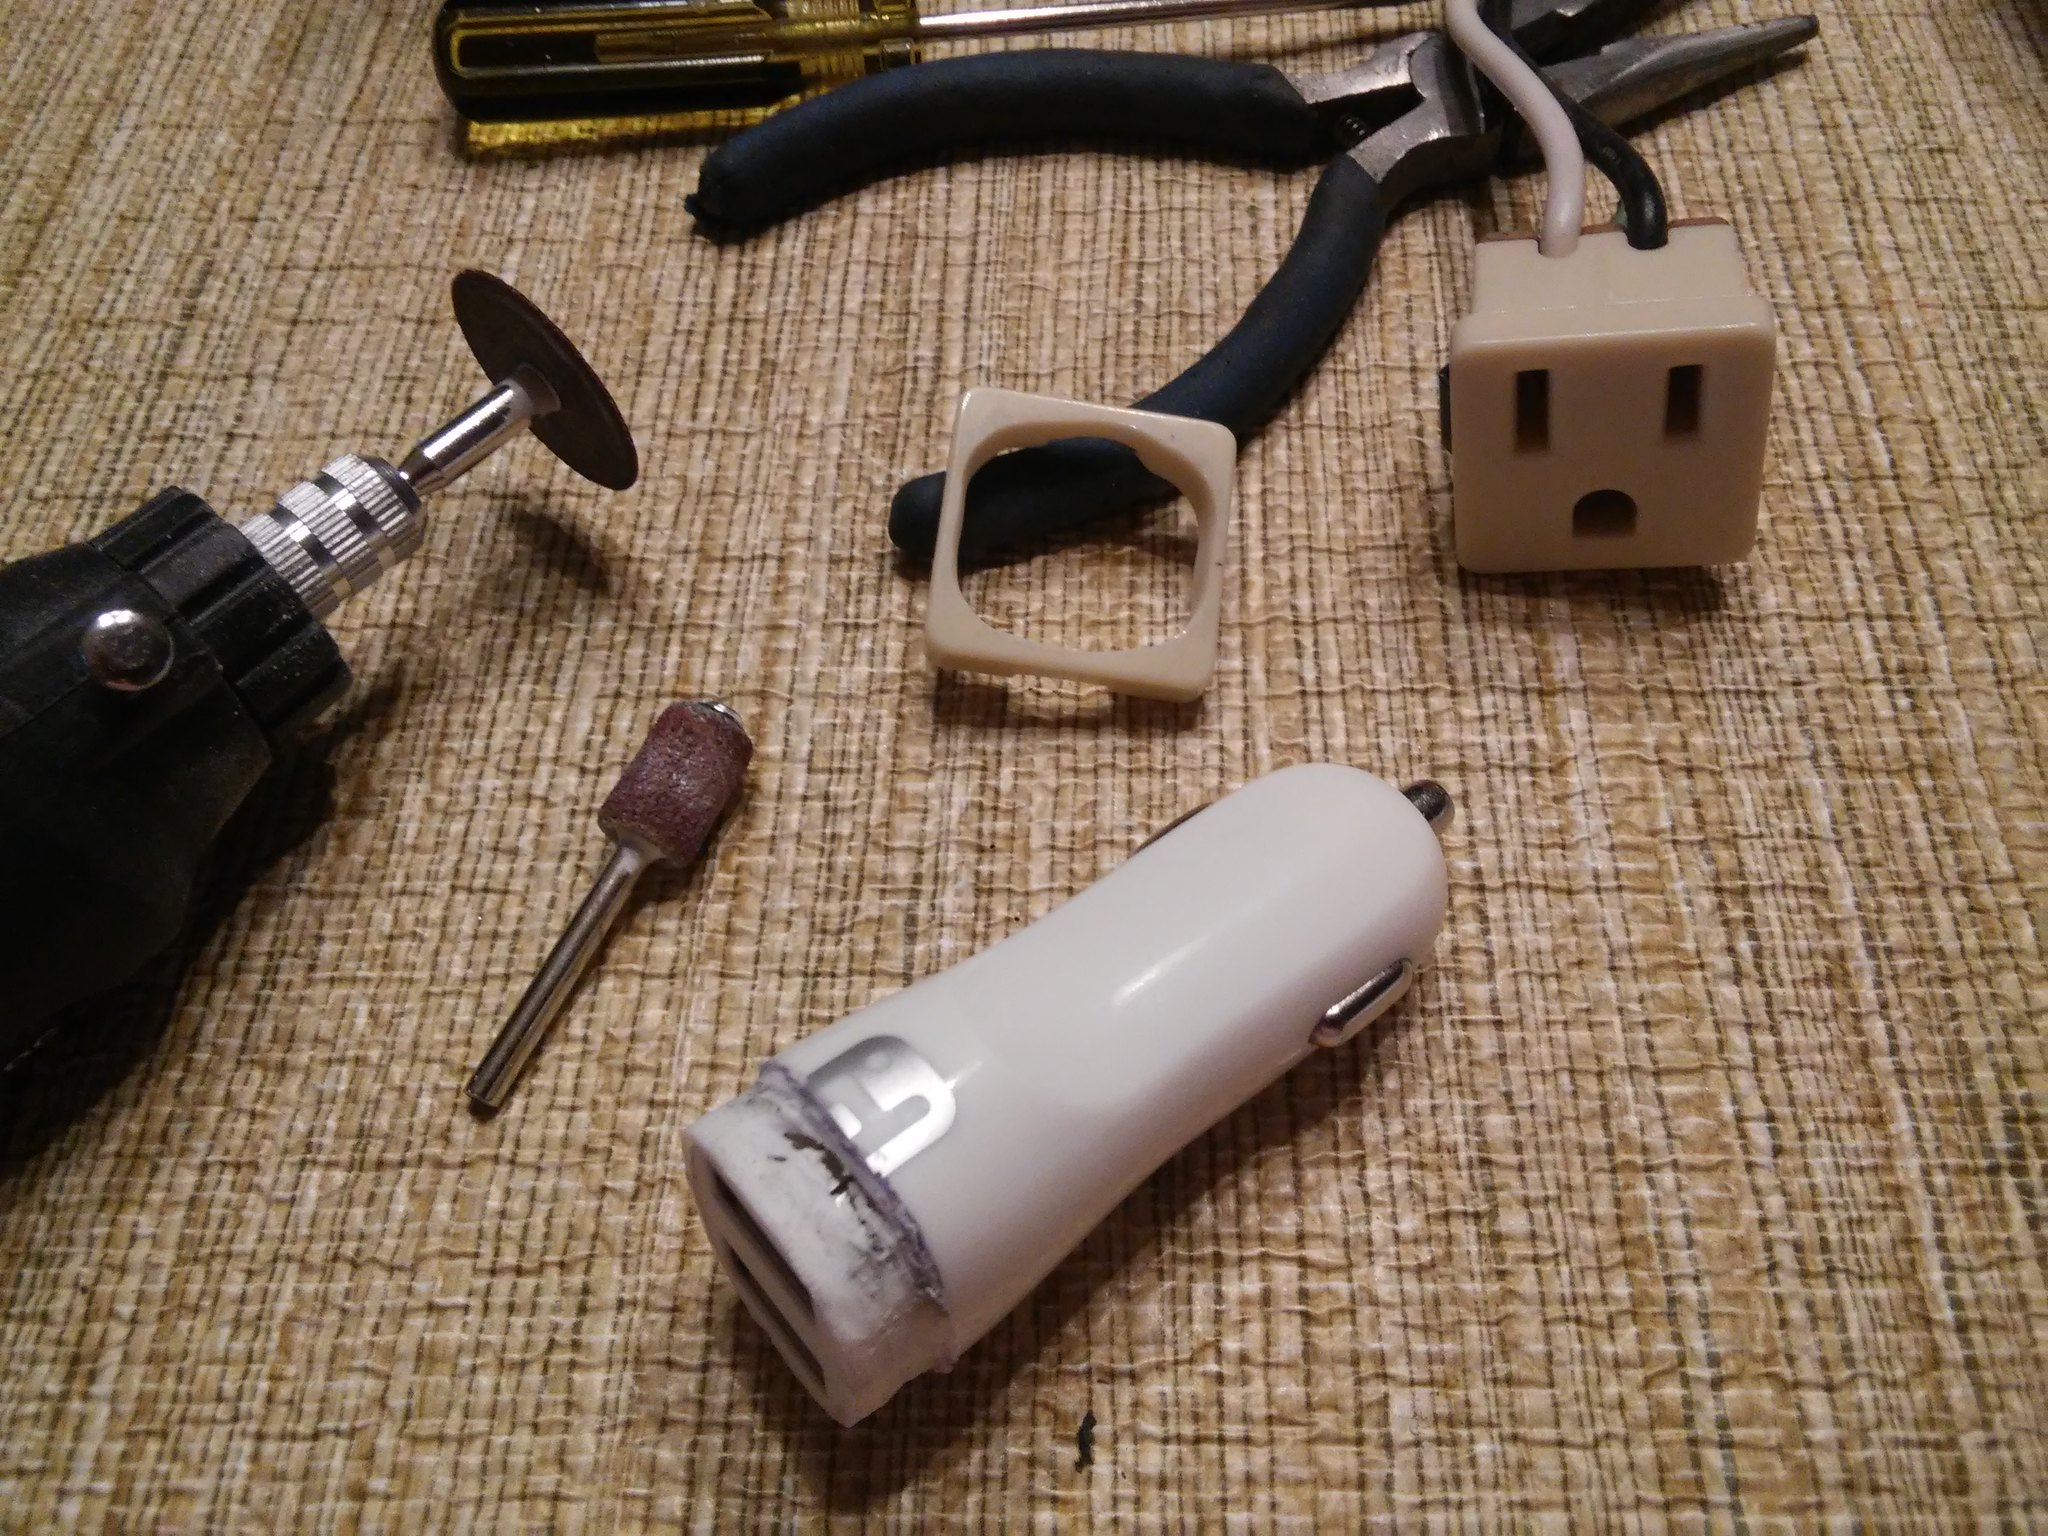 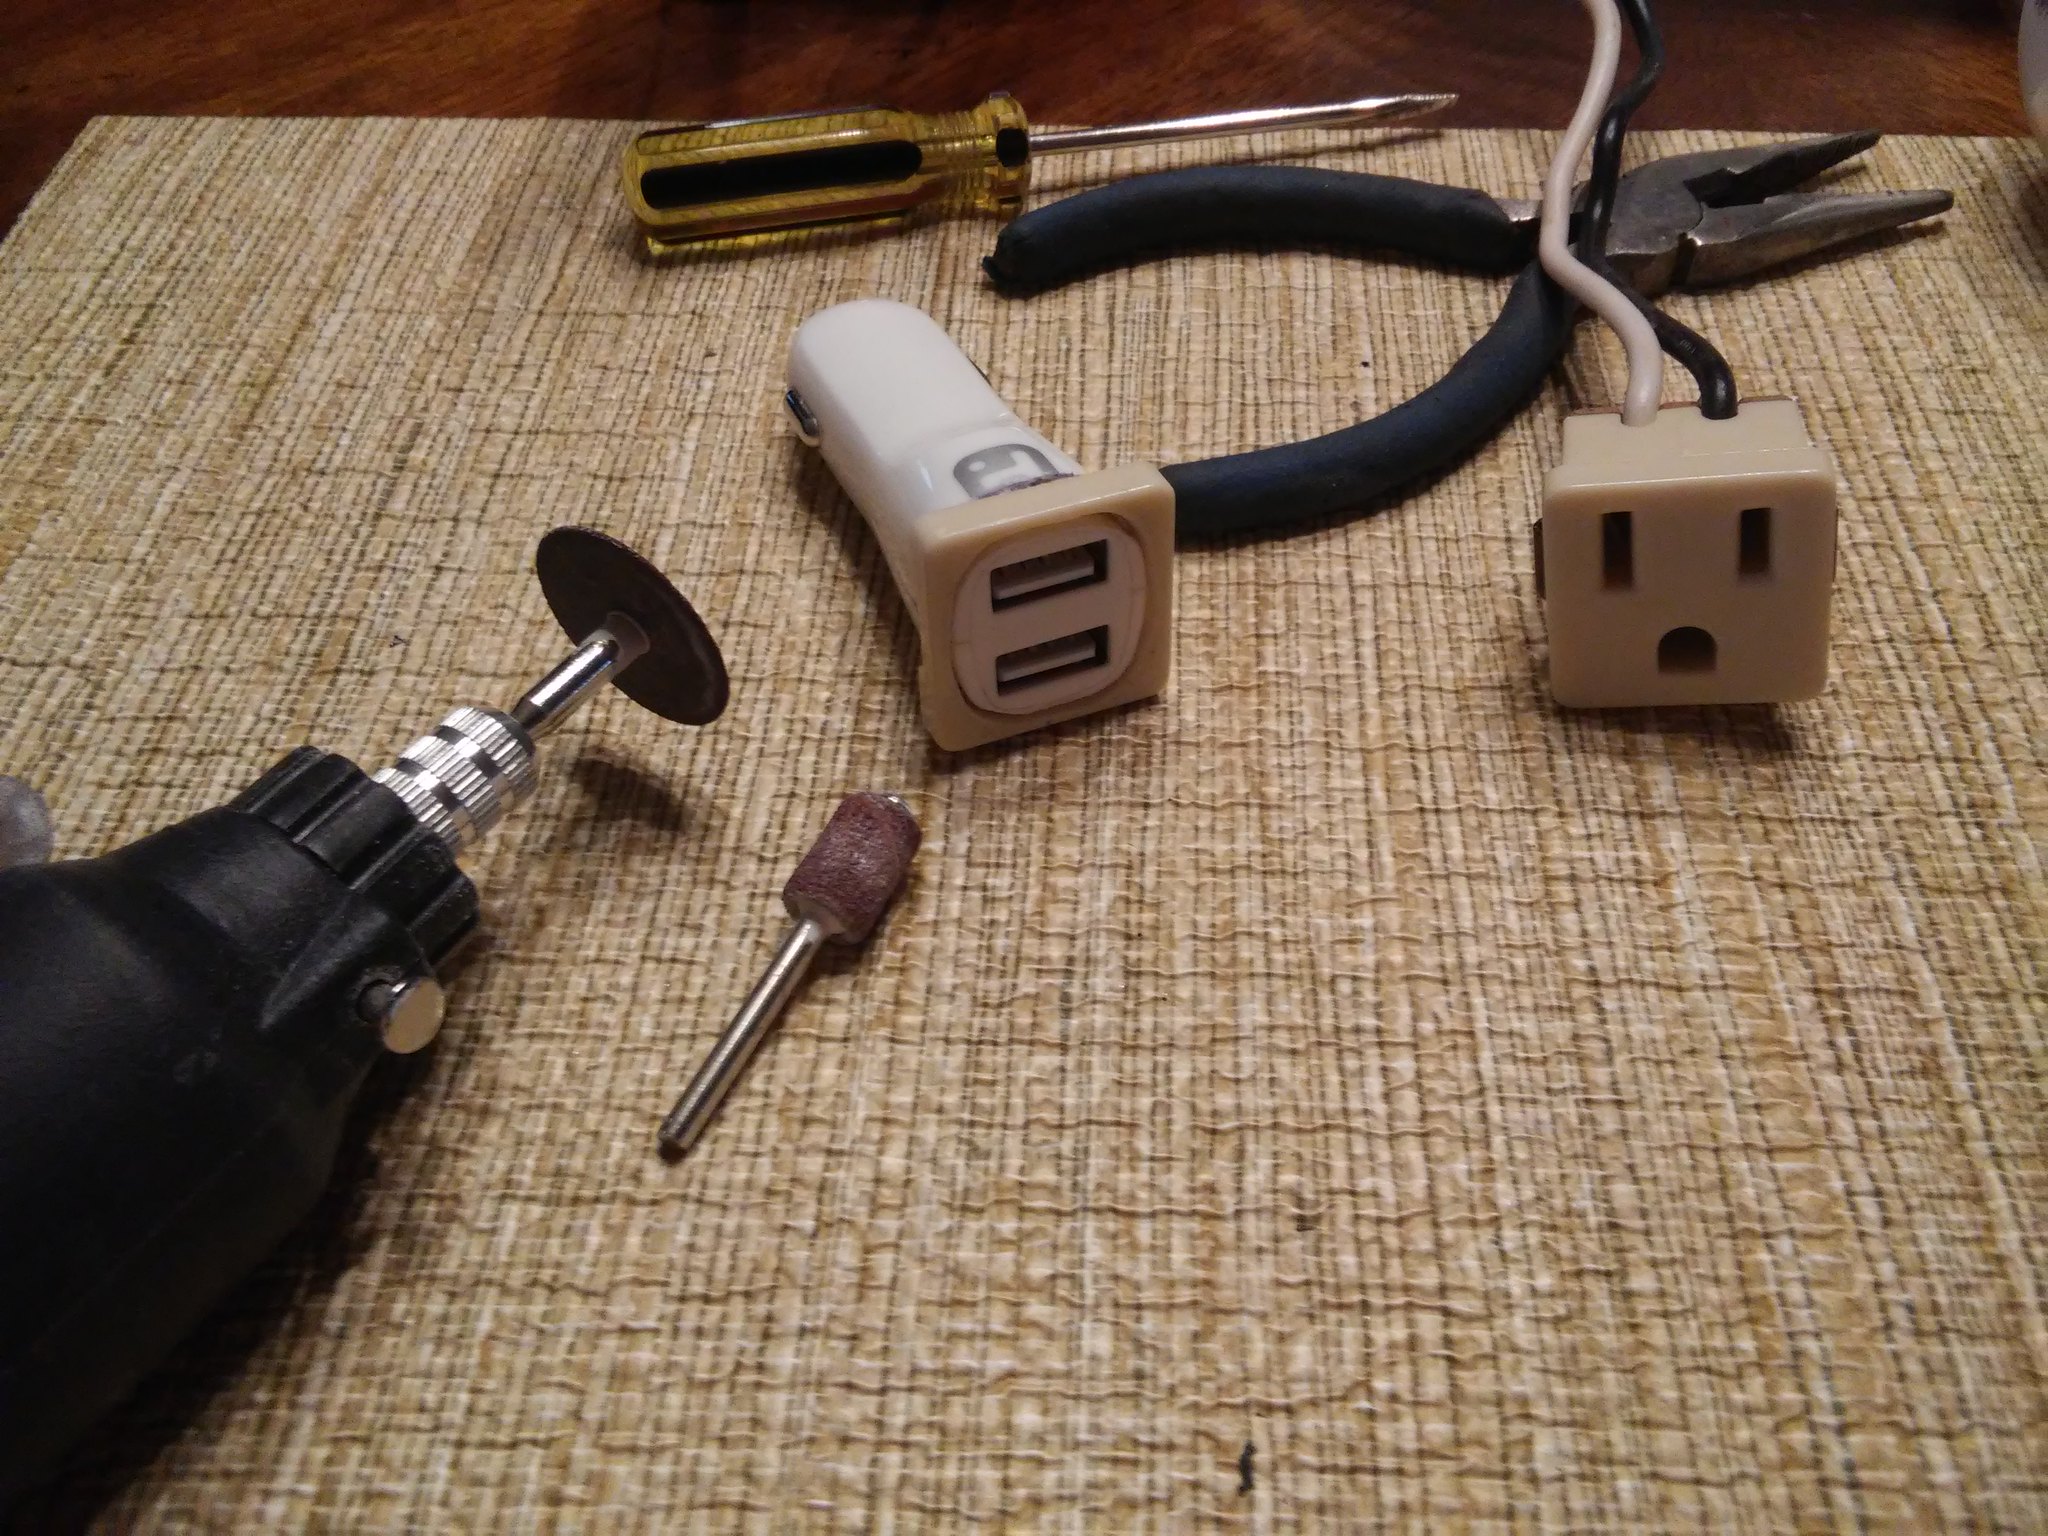 A little solder, heat shrink insulation & 5 min. epoxy... 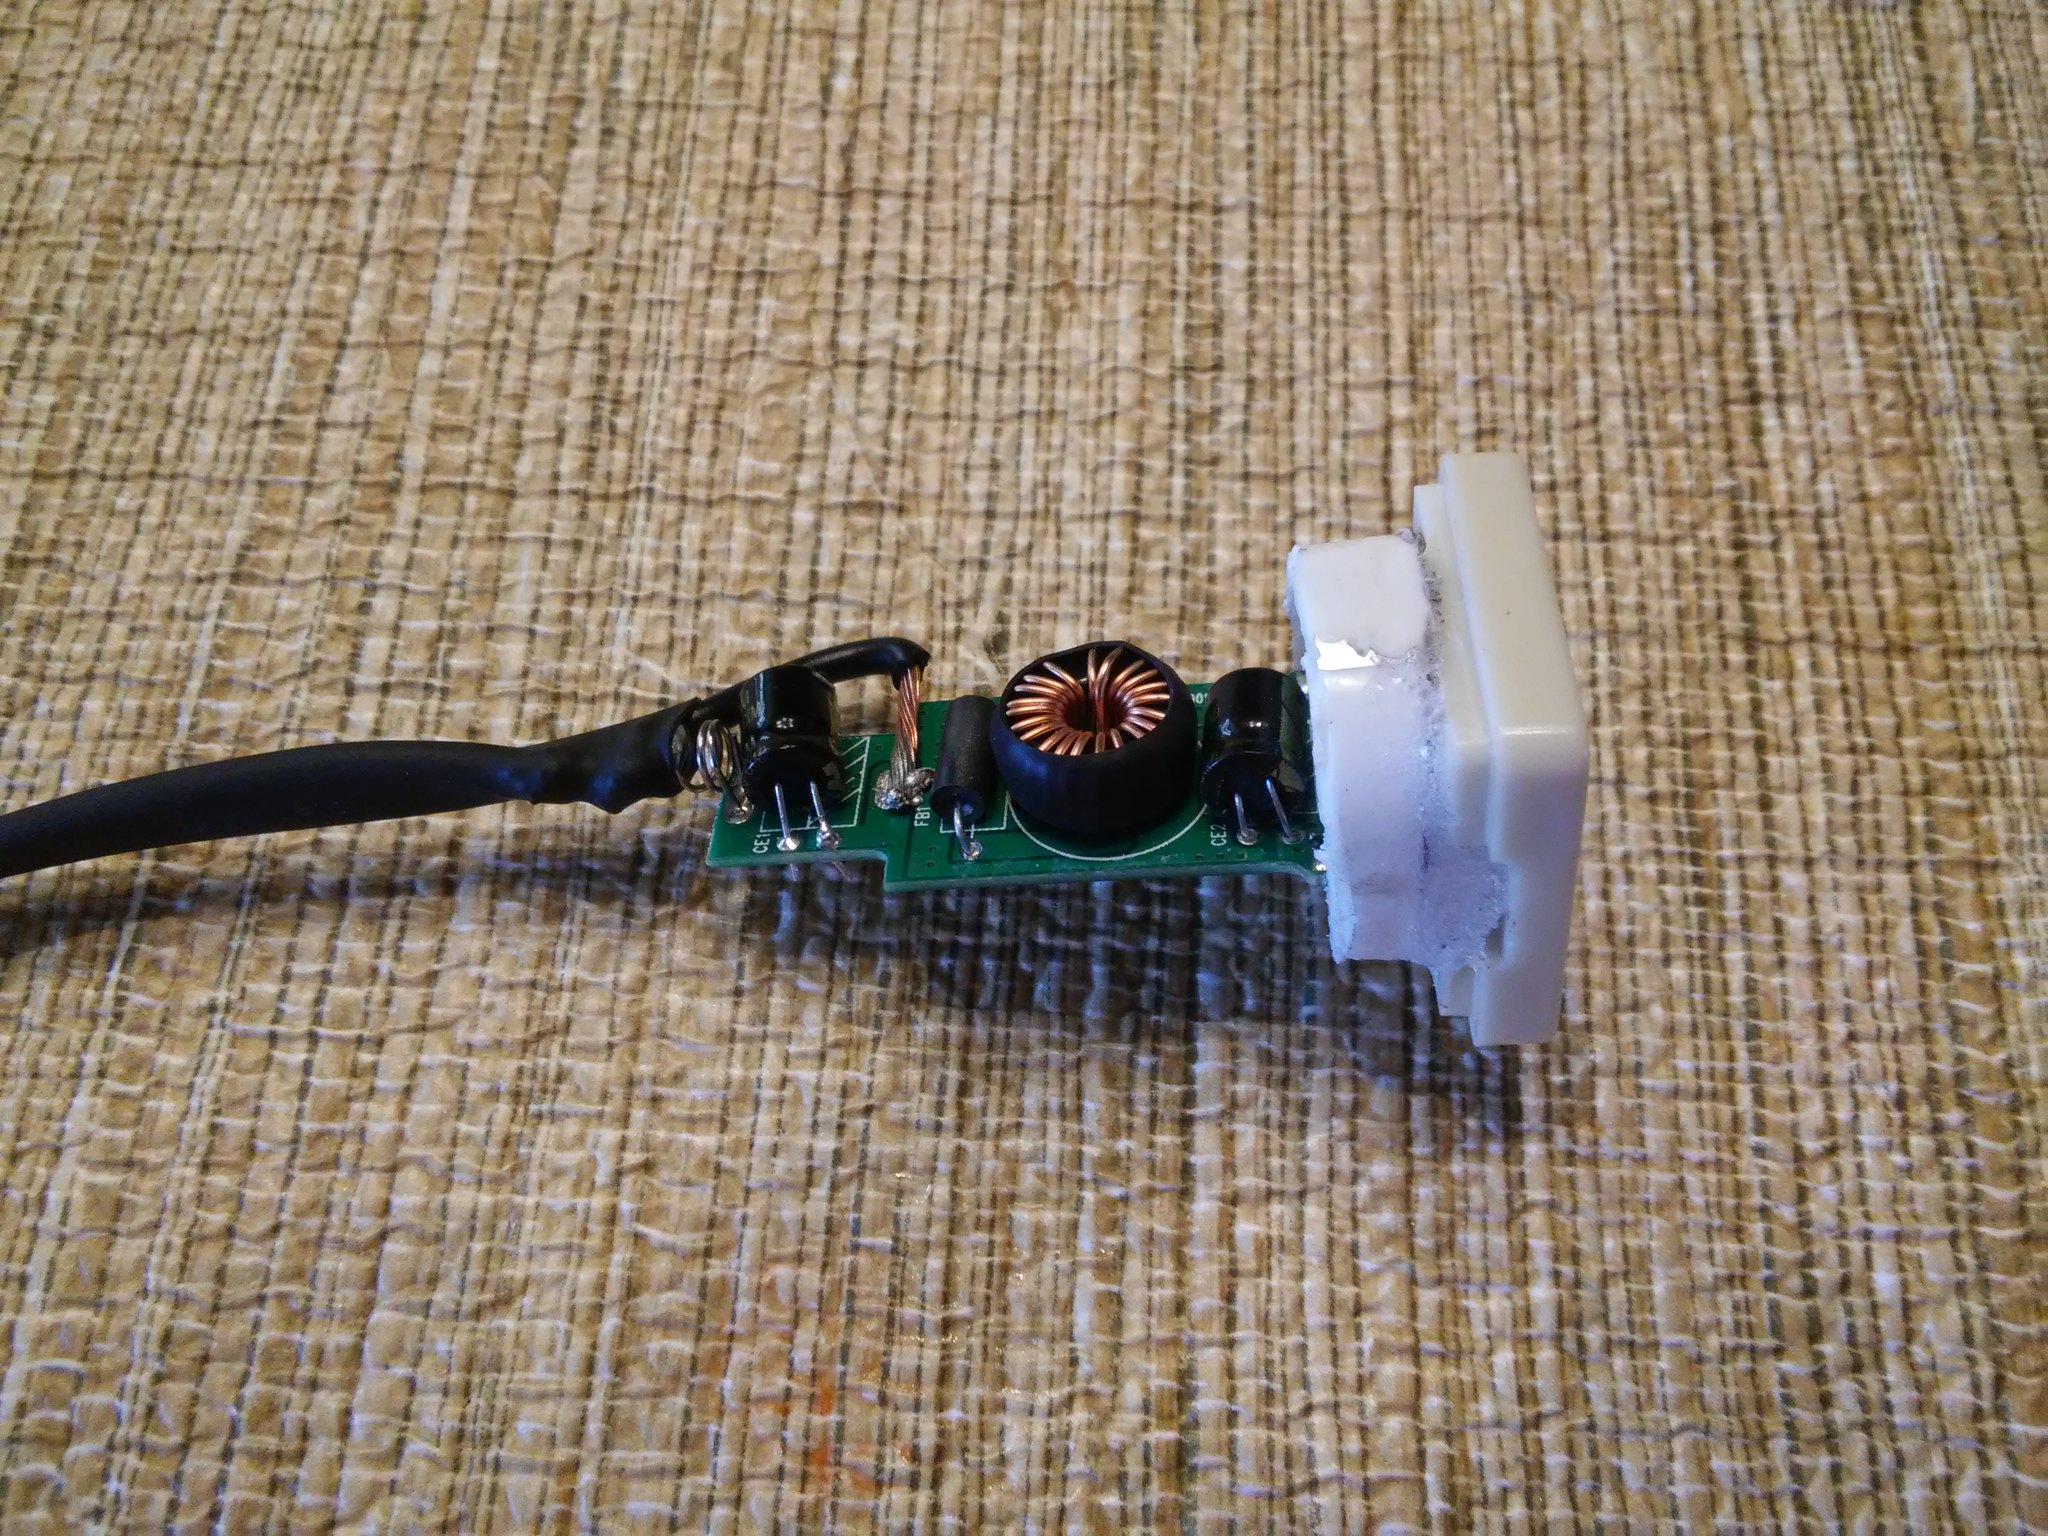 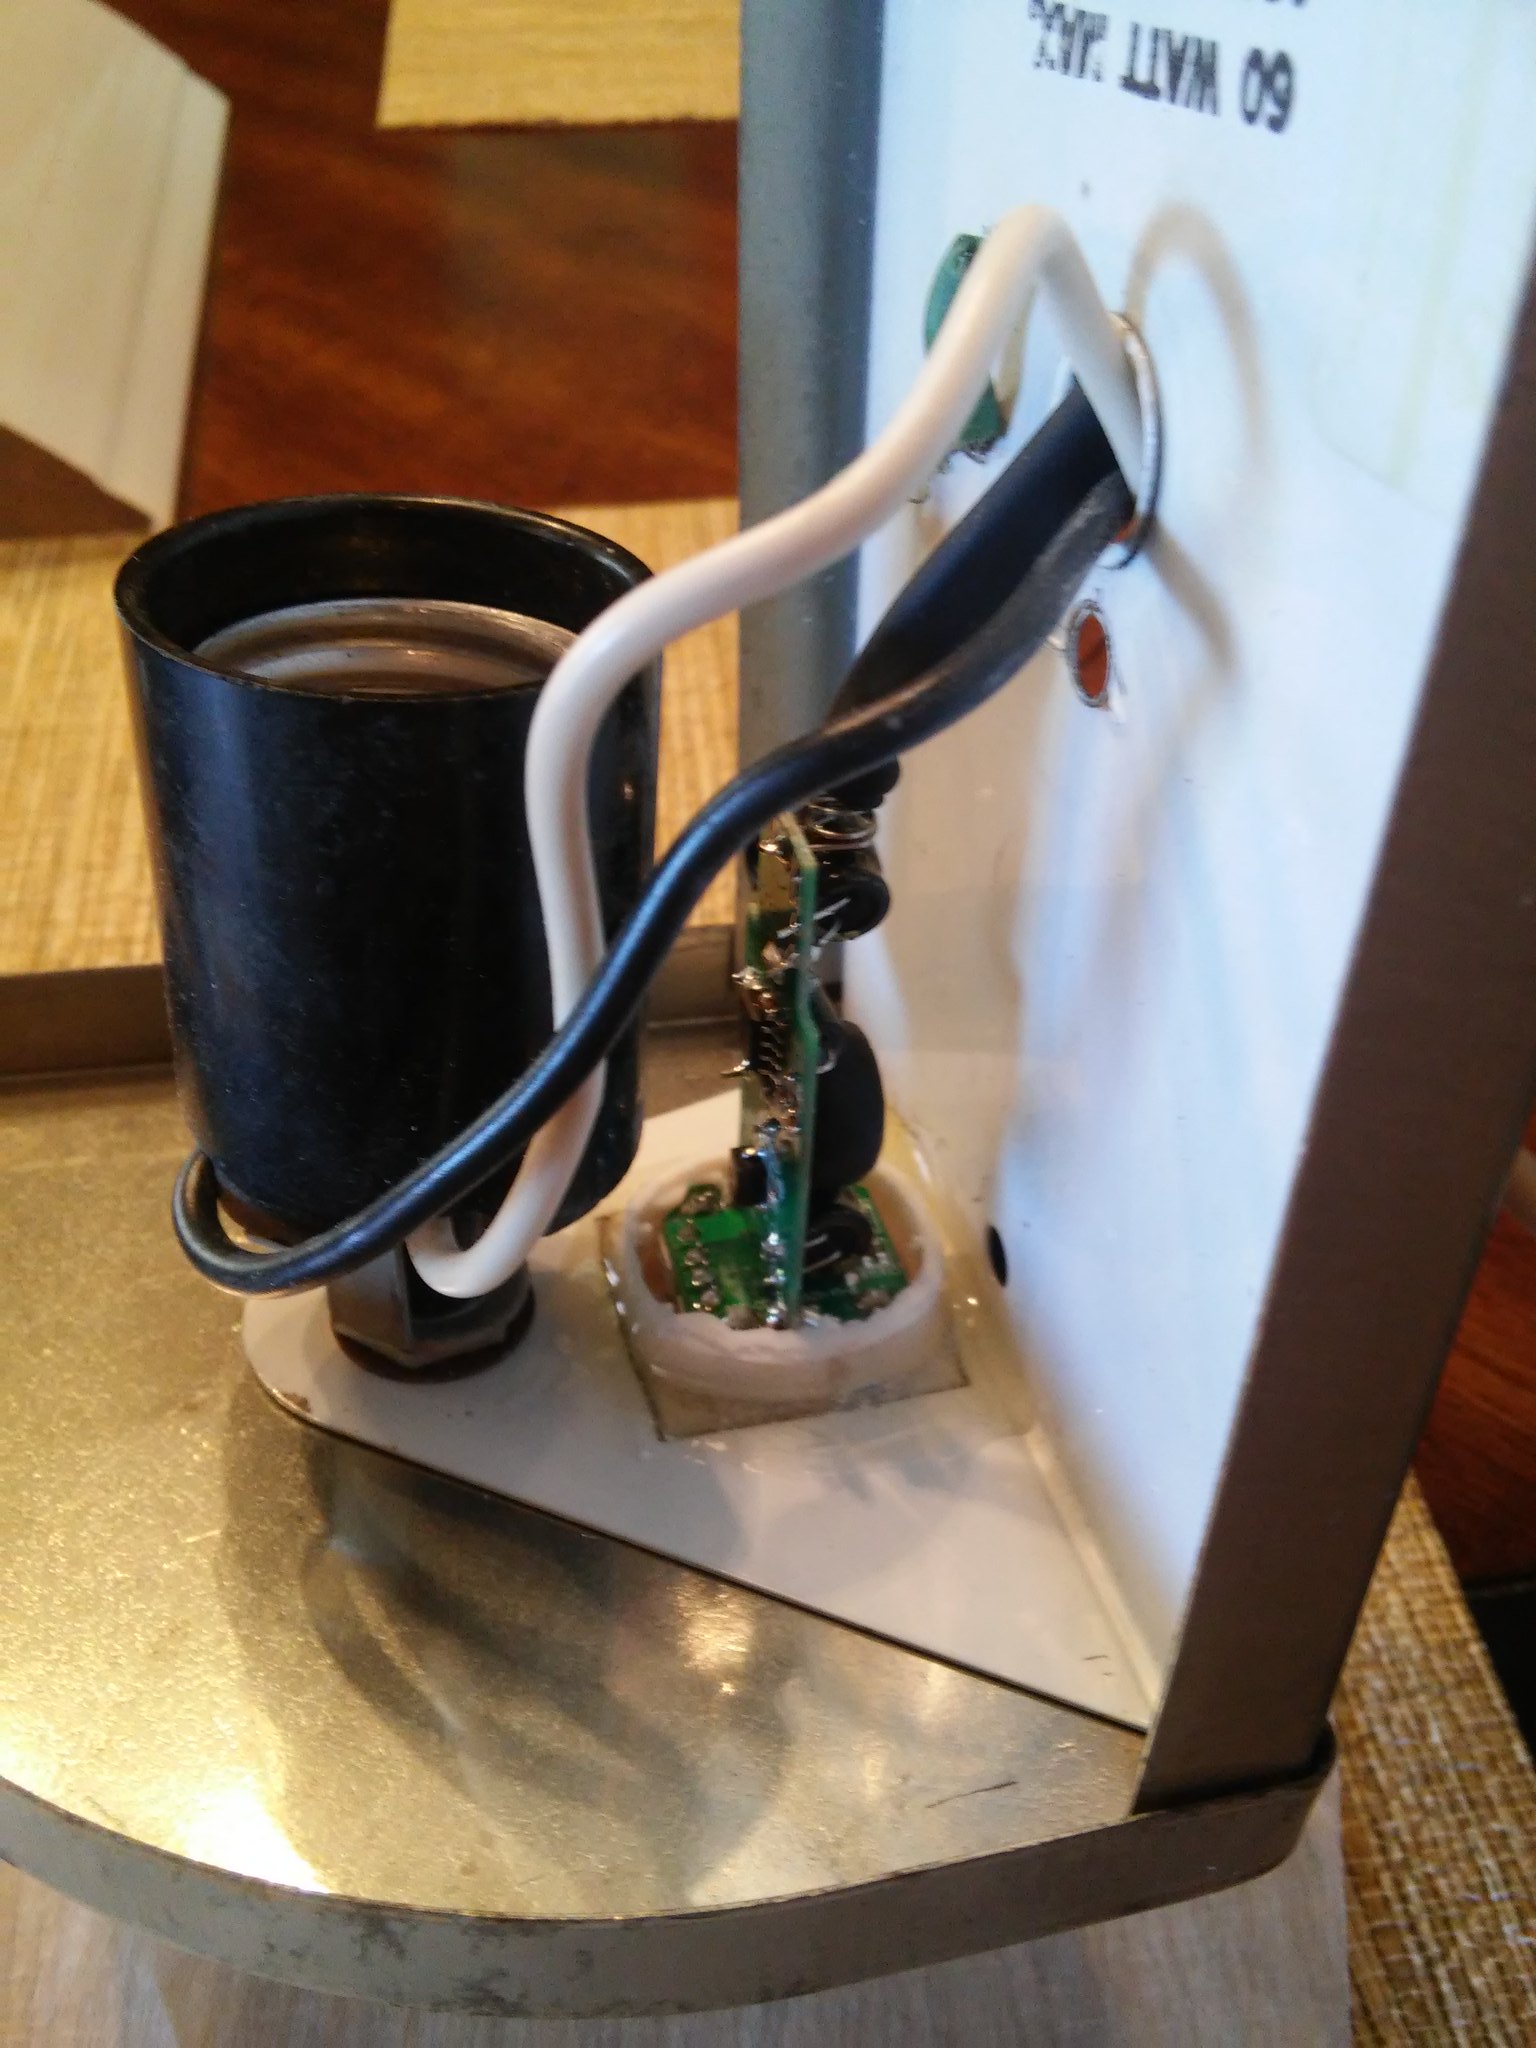 Not the prettiest...but it will work nicely! 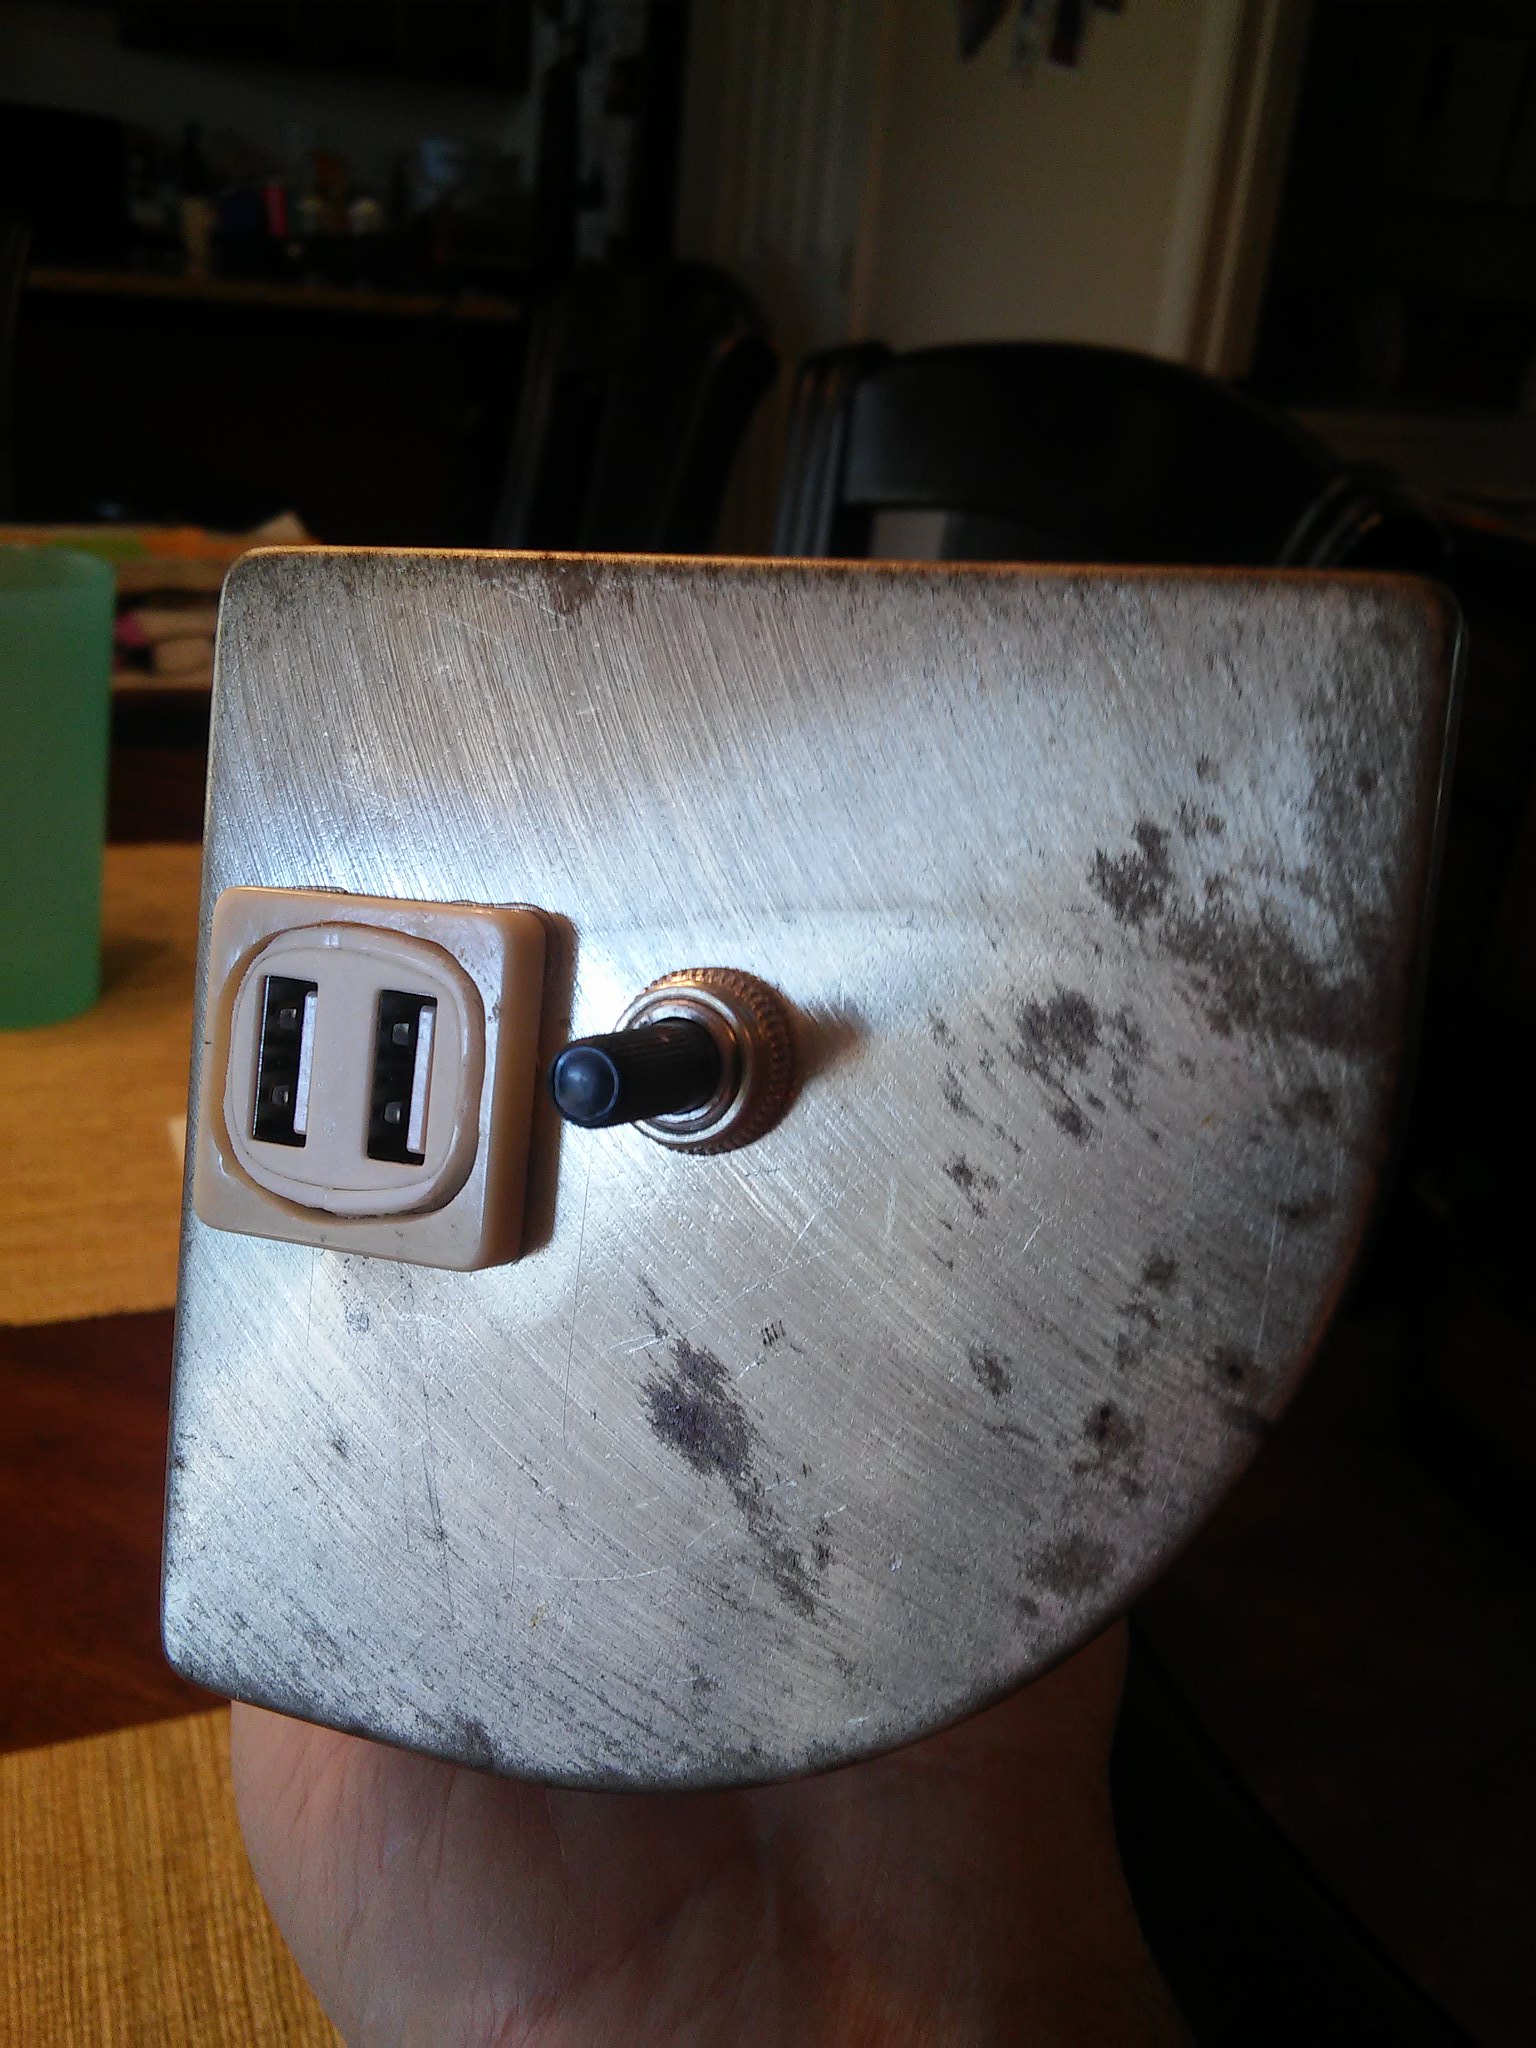 I bought a 6 pak of these LED 12V lights off of EBAY. I'll be using (2) for these fixtures & (1) for my converted porch light. They are a regular size bulb base (A19). Excited to see how they work and what their power consumption is like. 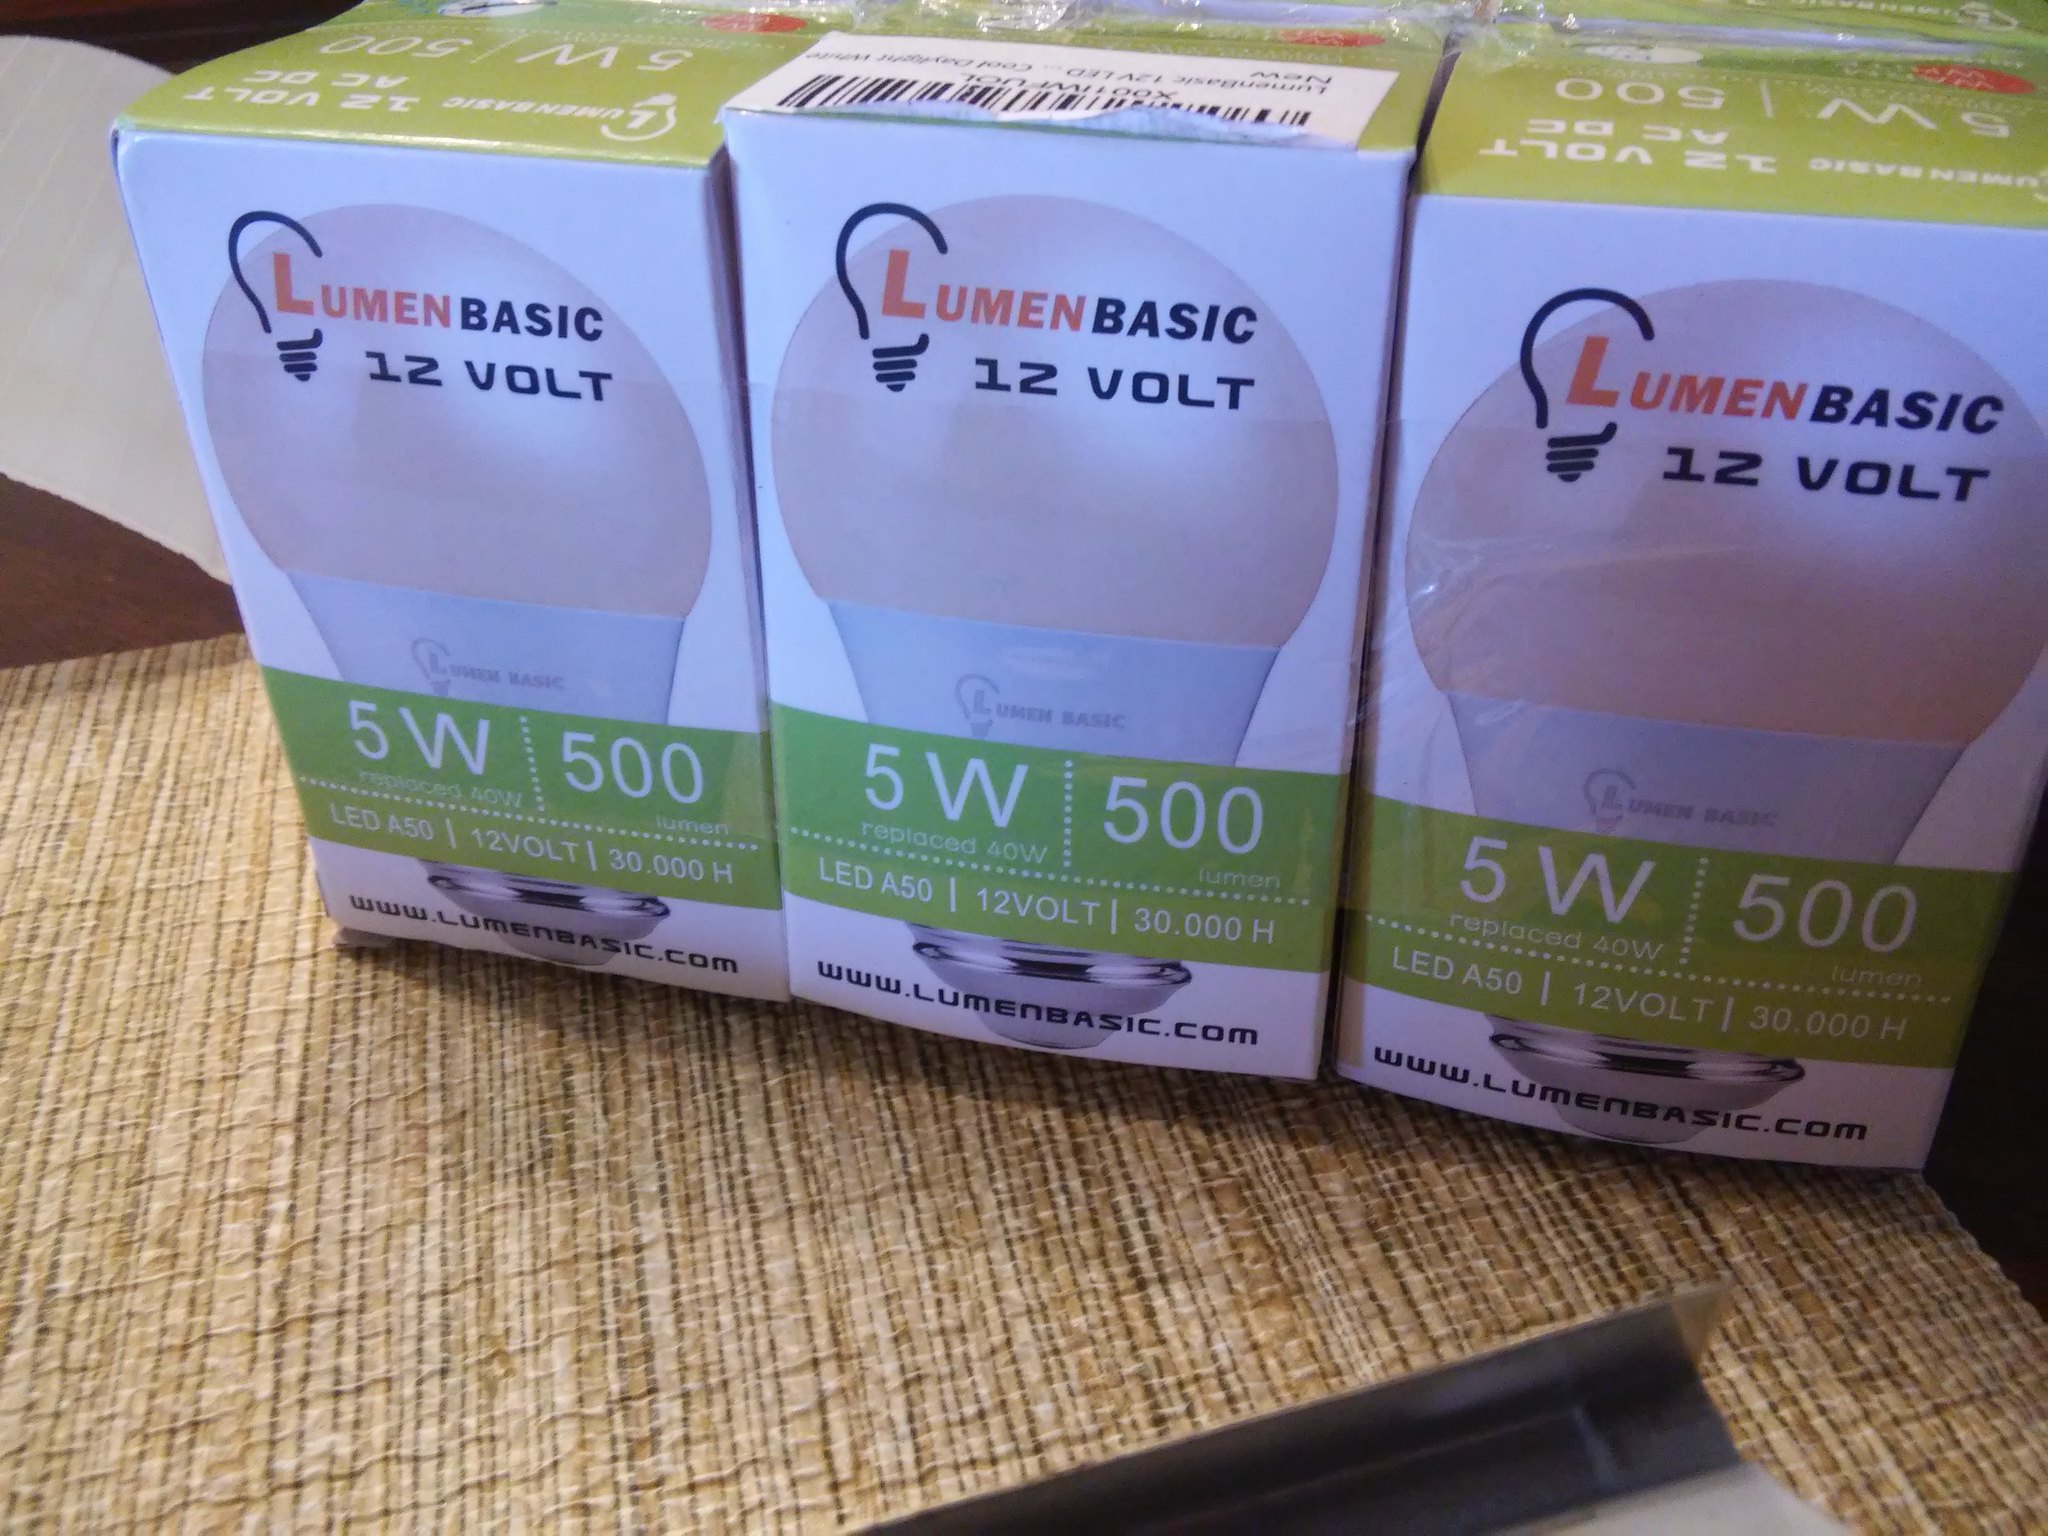 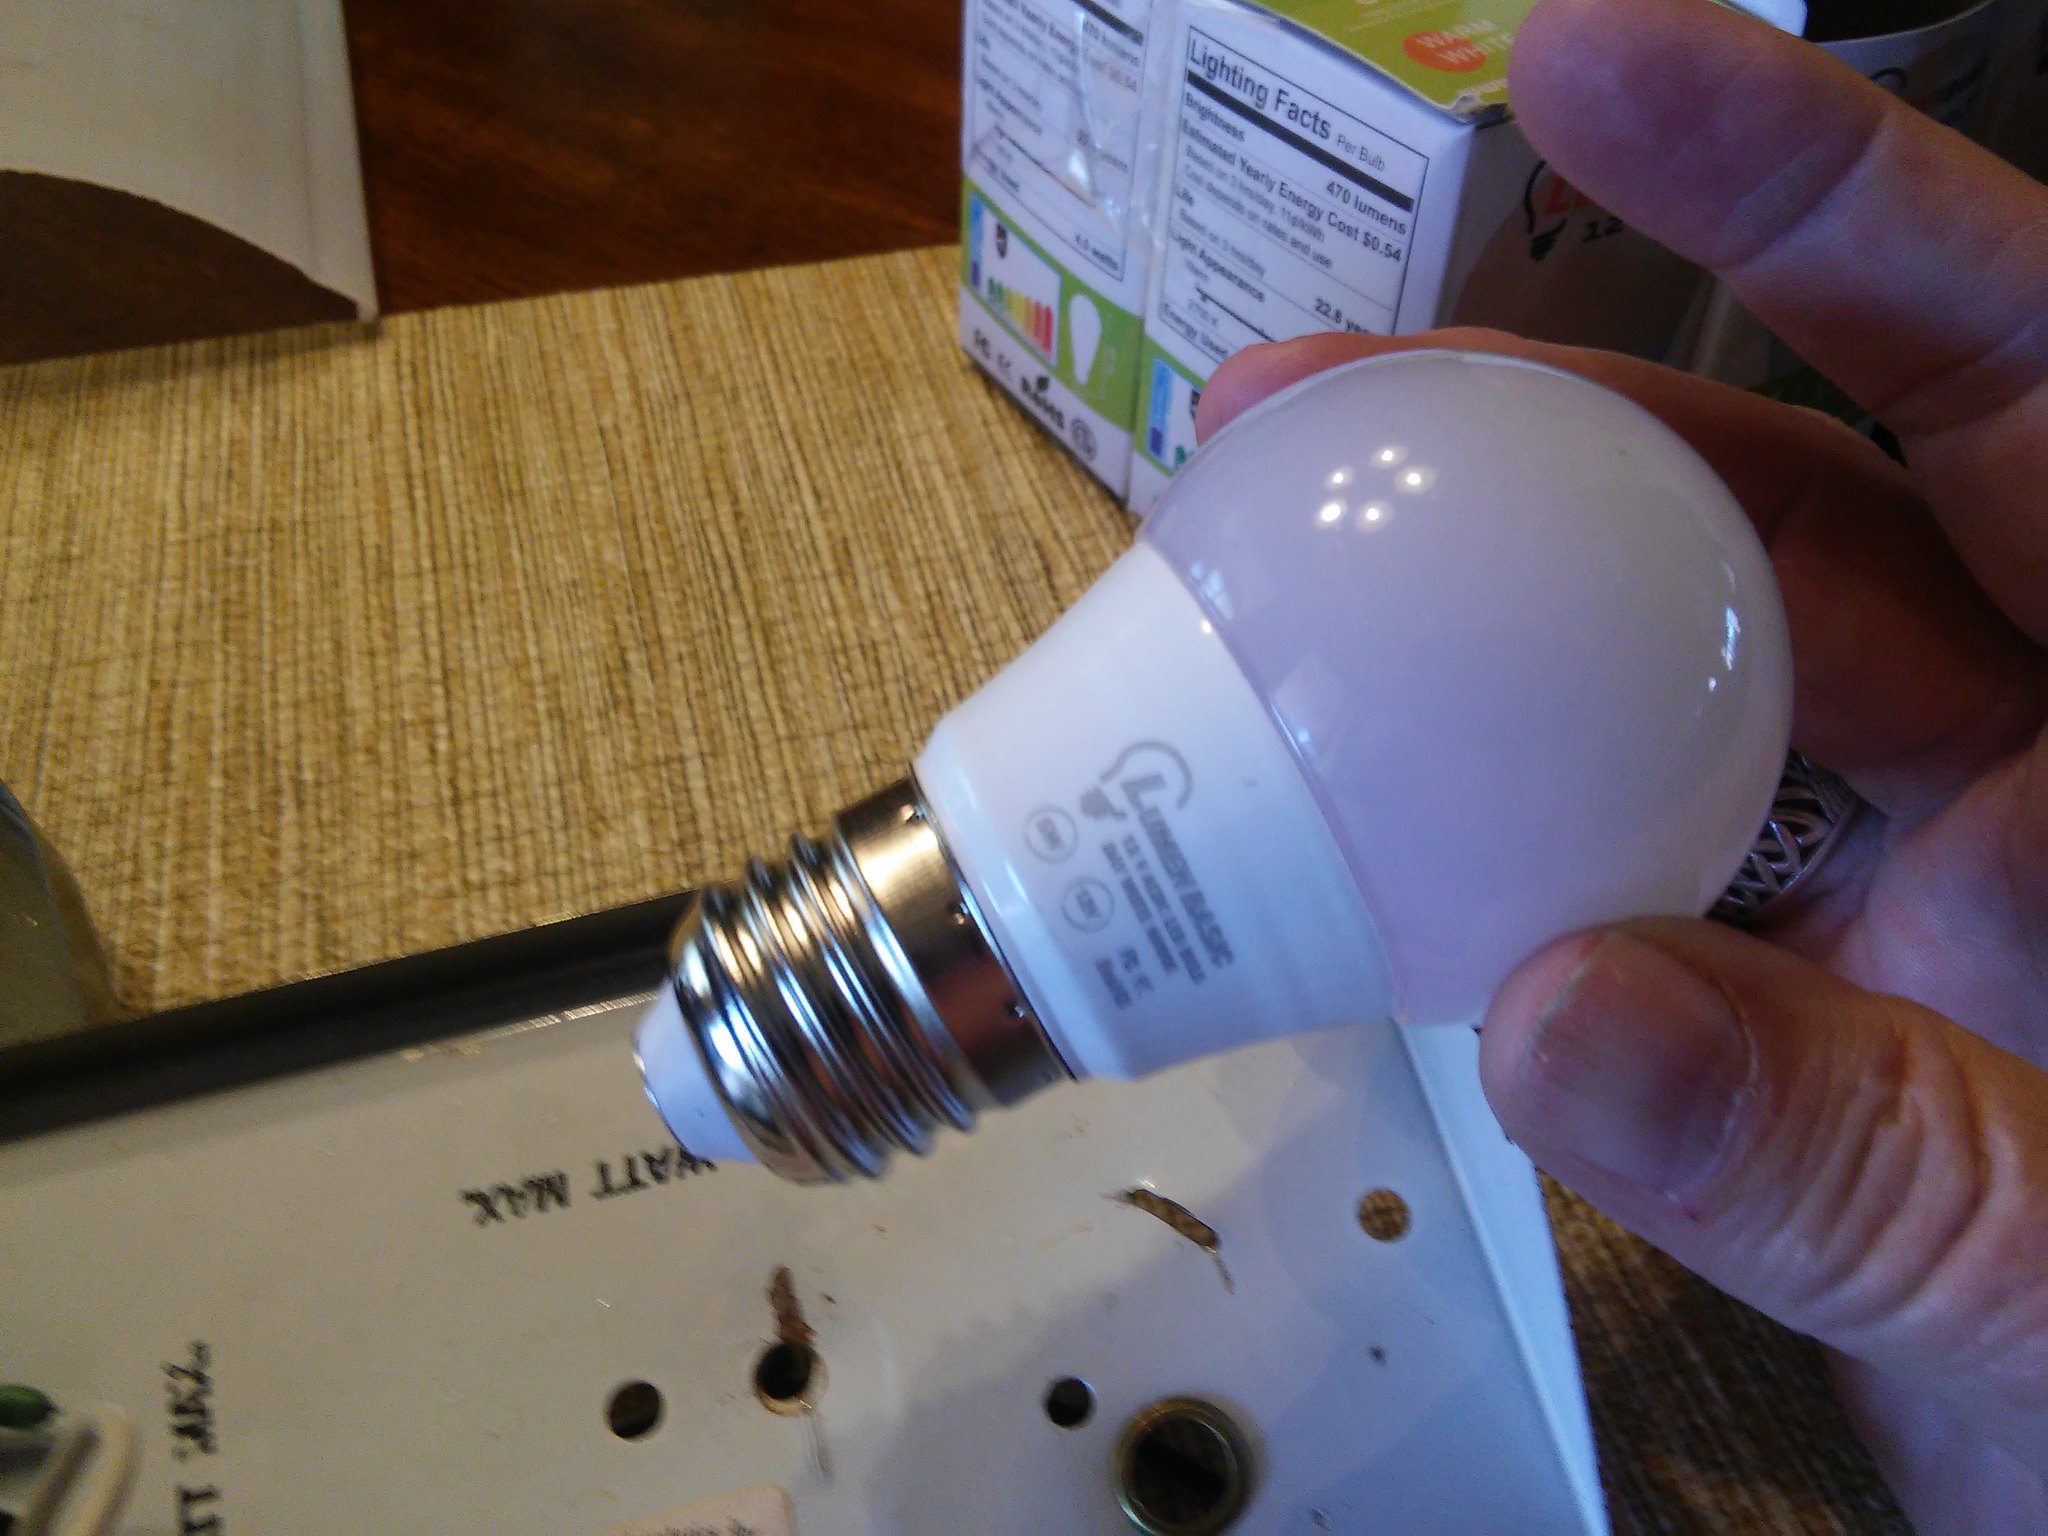 So here's what it looks like installed. Nothing I could do about the patina. I tried steel wool, it did nothing. I thought about painting...but in the end decided I liked the look. 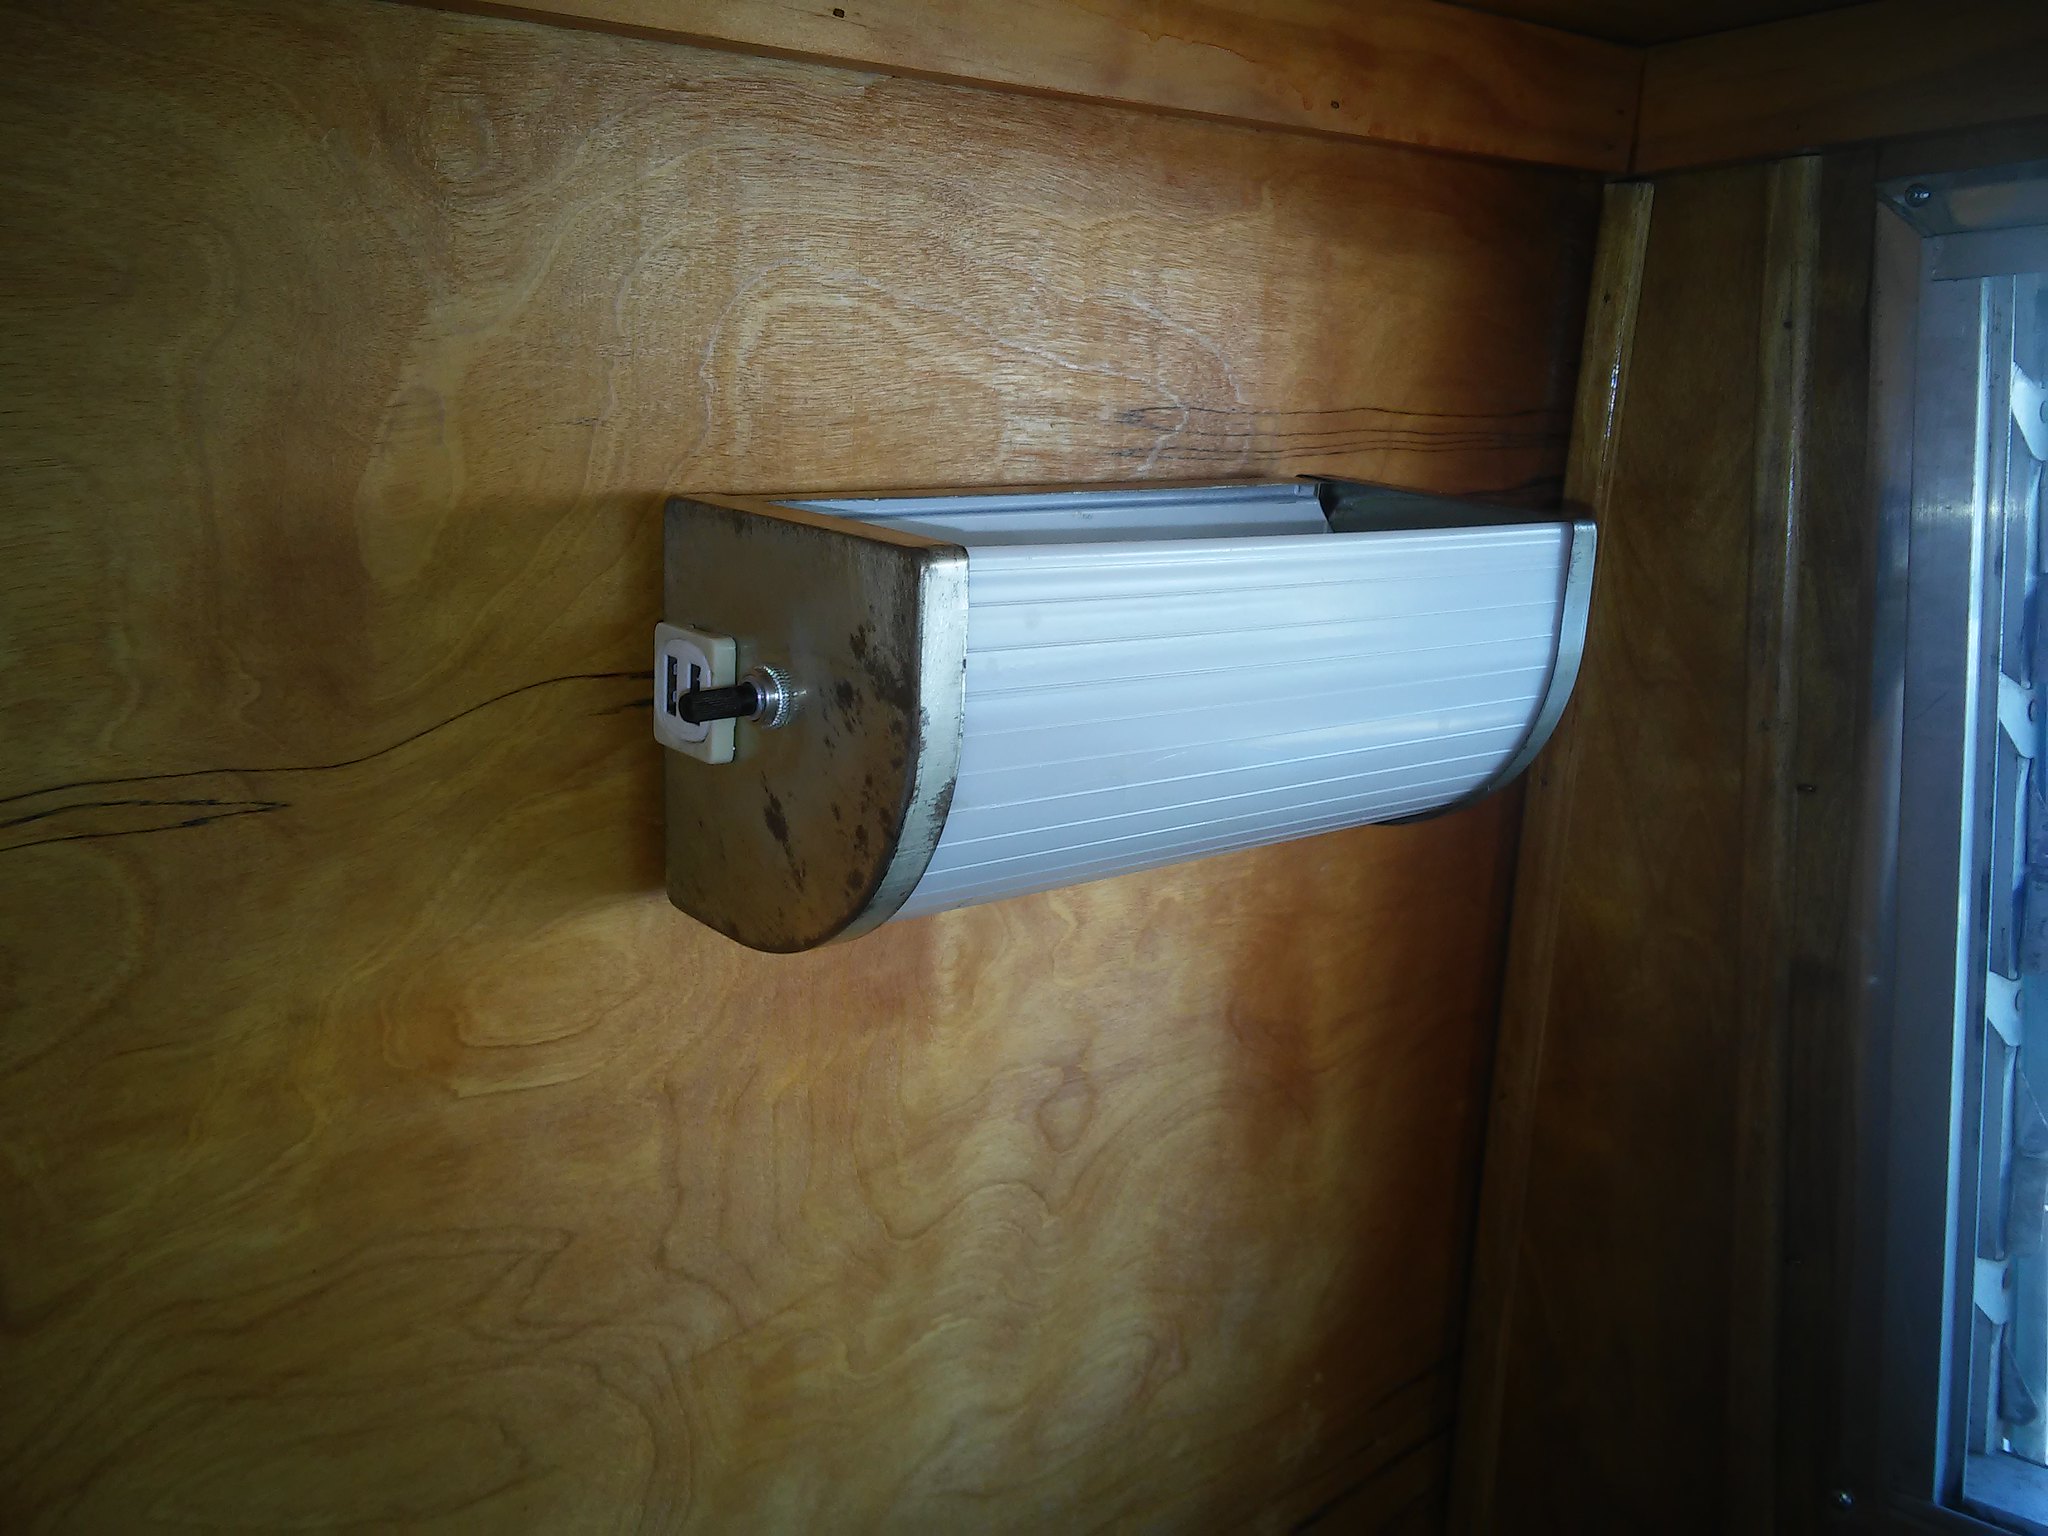 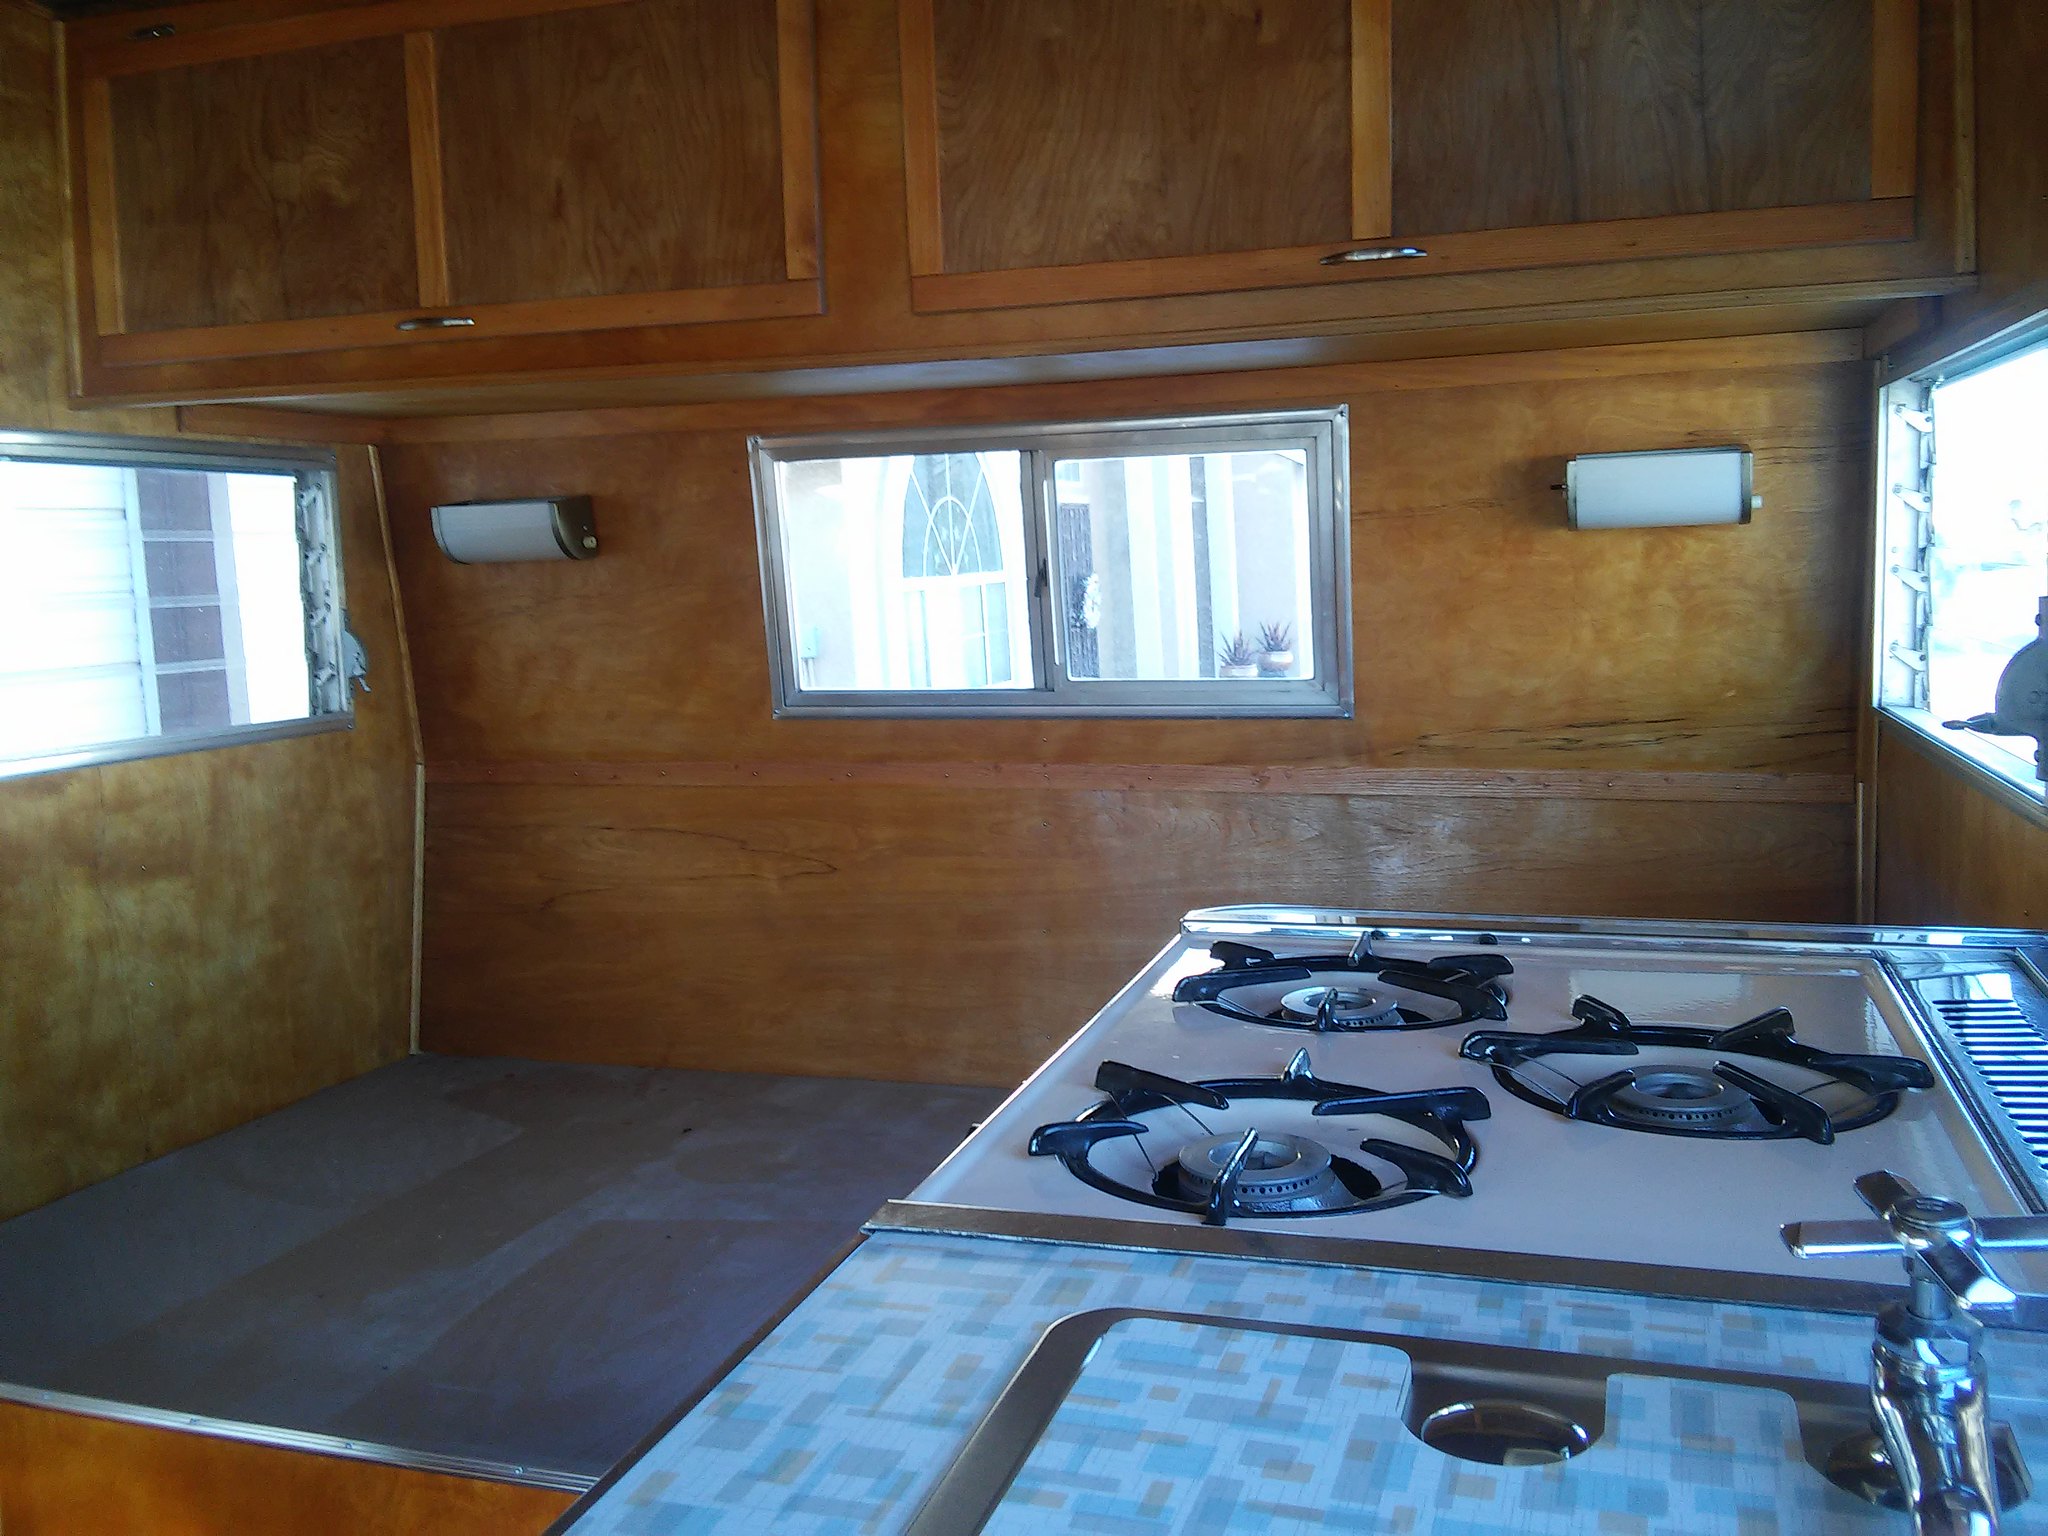 Should provide good lighting and I'm glad I could use the original fixtures. |
|
strange1
Active Member
Posts: 159
Likes: 103
1965 Shasta Airflyte
Currently Offline
|
Post by strange1 on Feb 7, 2018 18:00:54 GMT -8
That's the street side bench seat for the dinette...gotta have access to my electronics & water tank. Here's a wider shot... 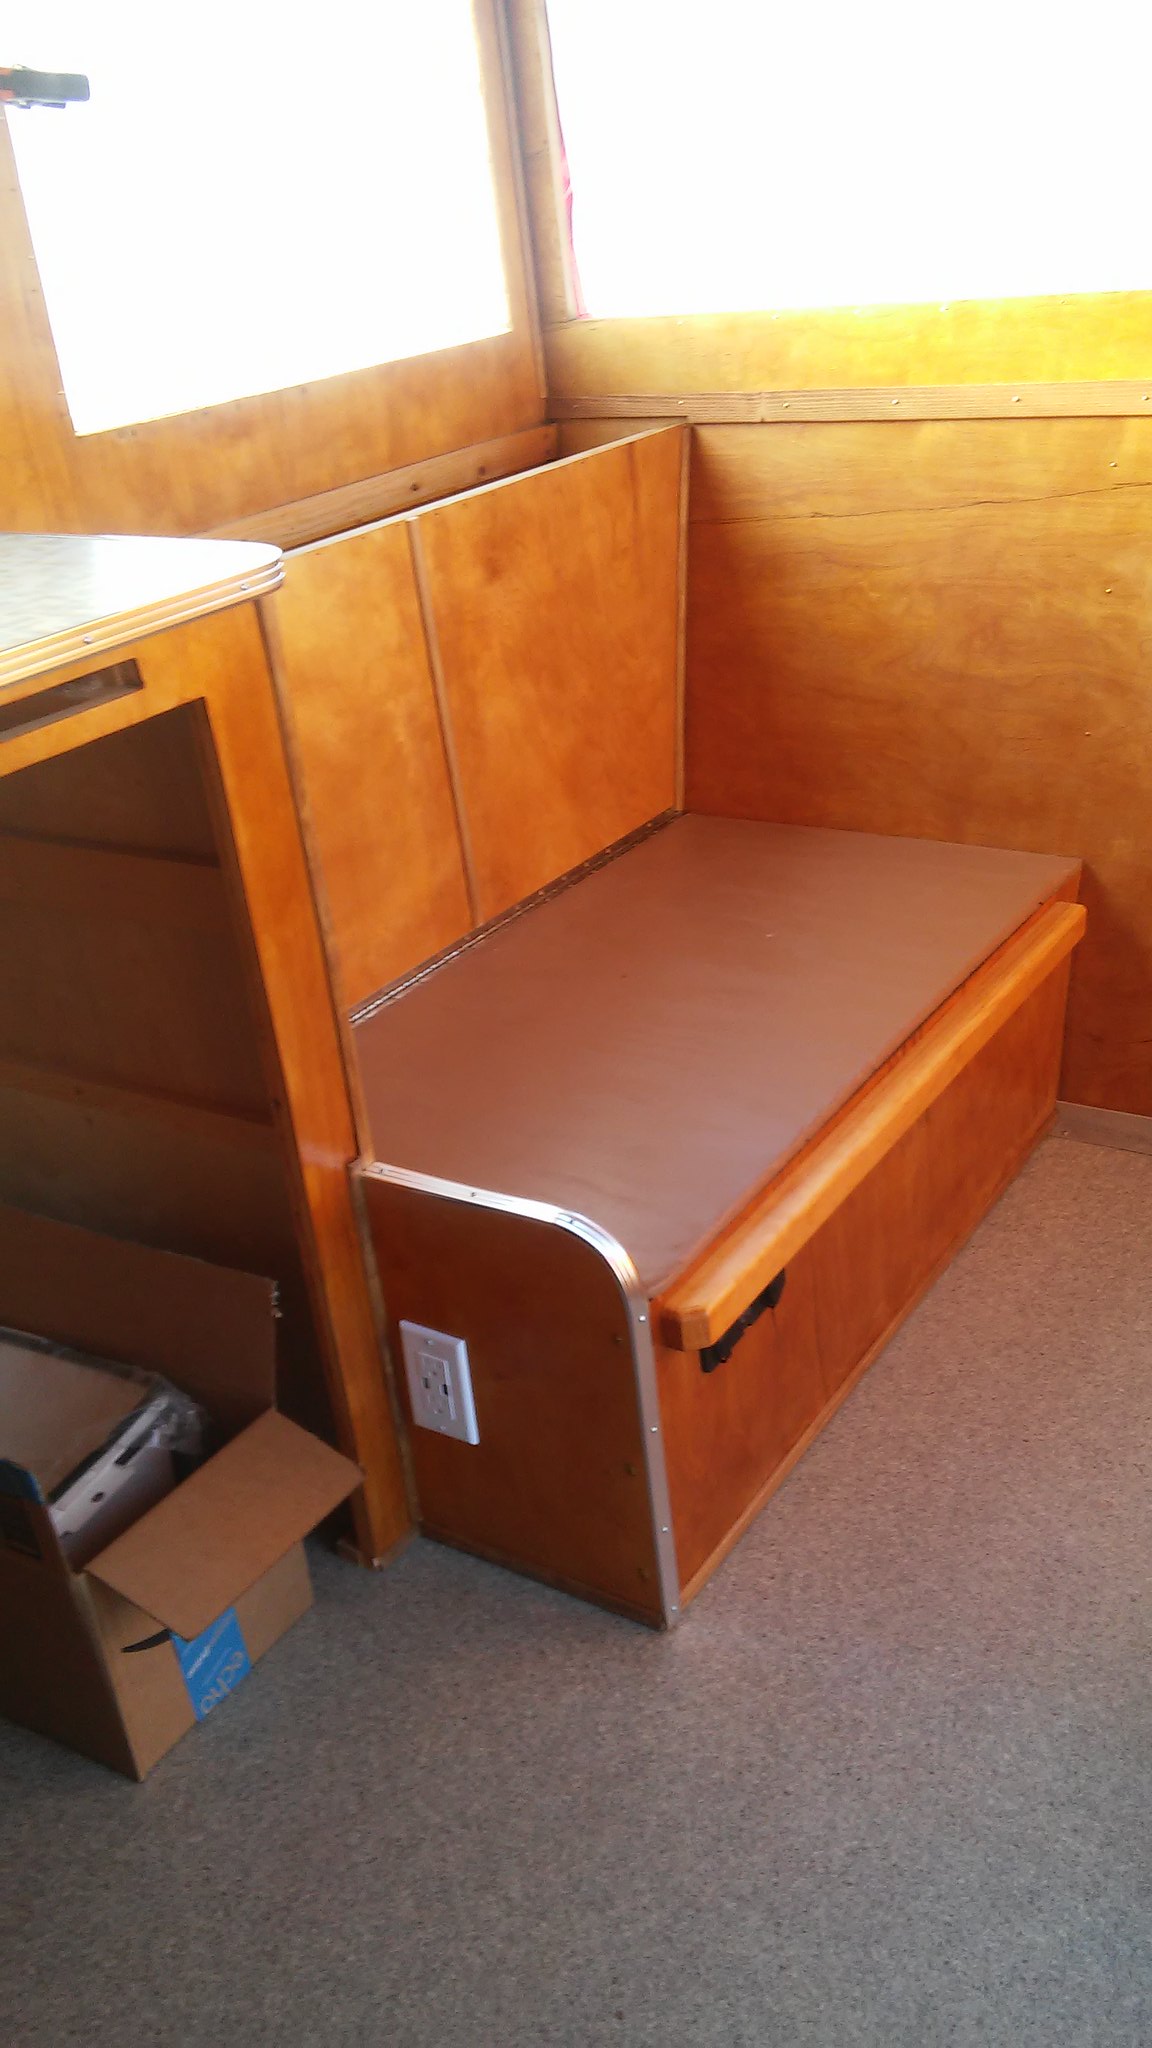 |
|
strange1
Active Member
Posts: 159
Likes: 103
1965 Shasta Airflyte
Currently Offline
|
Post by strange1 on Feb 7, 2018 13:46:50 GMT -8
Hey, I had this bookmarked for future reference and now the images are gone... Do you want to share the images again?
Thanks-
|
|


 and have a wonderful time on your maiden voyage in that pretty camper.