strange1
Active Member

Posts: 159 
Likes: 103
1965 Shasta Airflyte
Currently Offline
|
Post by strange1 on Oct 12, 2018 14:04:12 GMT -8
Our Shasta has the Bargman flush mount tail lights. I purchased new lenses from VTS. We love the look.  |
|
strange1
Active Member
Posts: 159
Likes: 103
1965 Shasta Airflyte
Currently Offline
|
Post by strange1 on Sept 6, 2018 14:58:15 GMT -8
|
|
strange1
Active Member
Posts: 159
Likes: 103
1965 Shasta Airflyte
Currently Offline
|
Post by strange1 on Sept 6, 2018 14:48:23 GMT -8
Welcome...that looks fun and exciting. At least when you're done you'll know it's done right...as long as it's done right.  |
|
strange1
Active Member
Posts: 159
Likes: 103
1965 Shasta Airflyte
Currently Offline
|
Post by strange1 on Aug 31, 2018 11:20:08 GMT -8
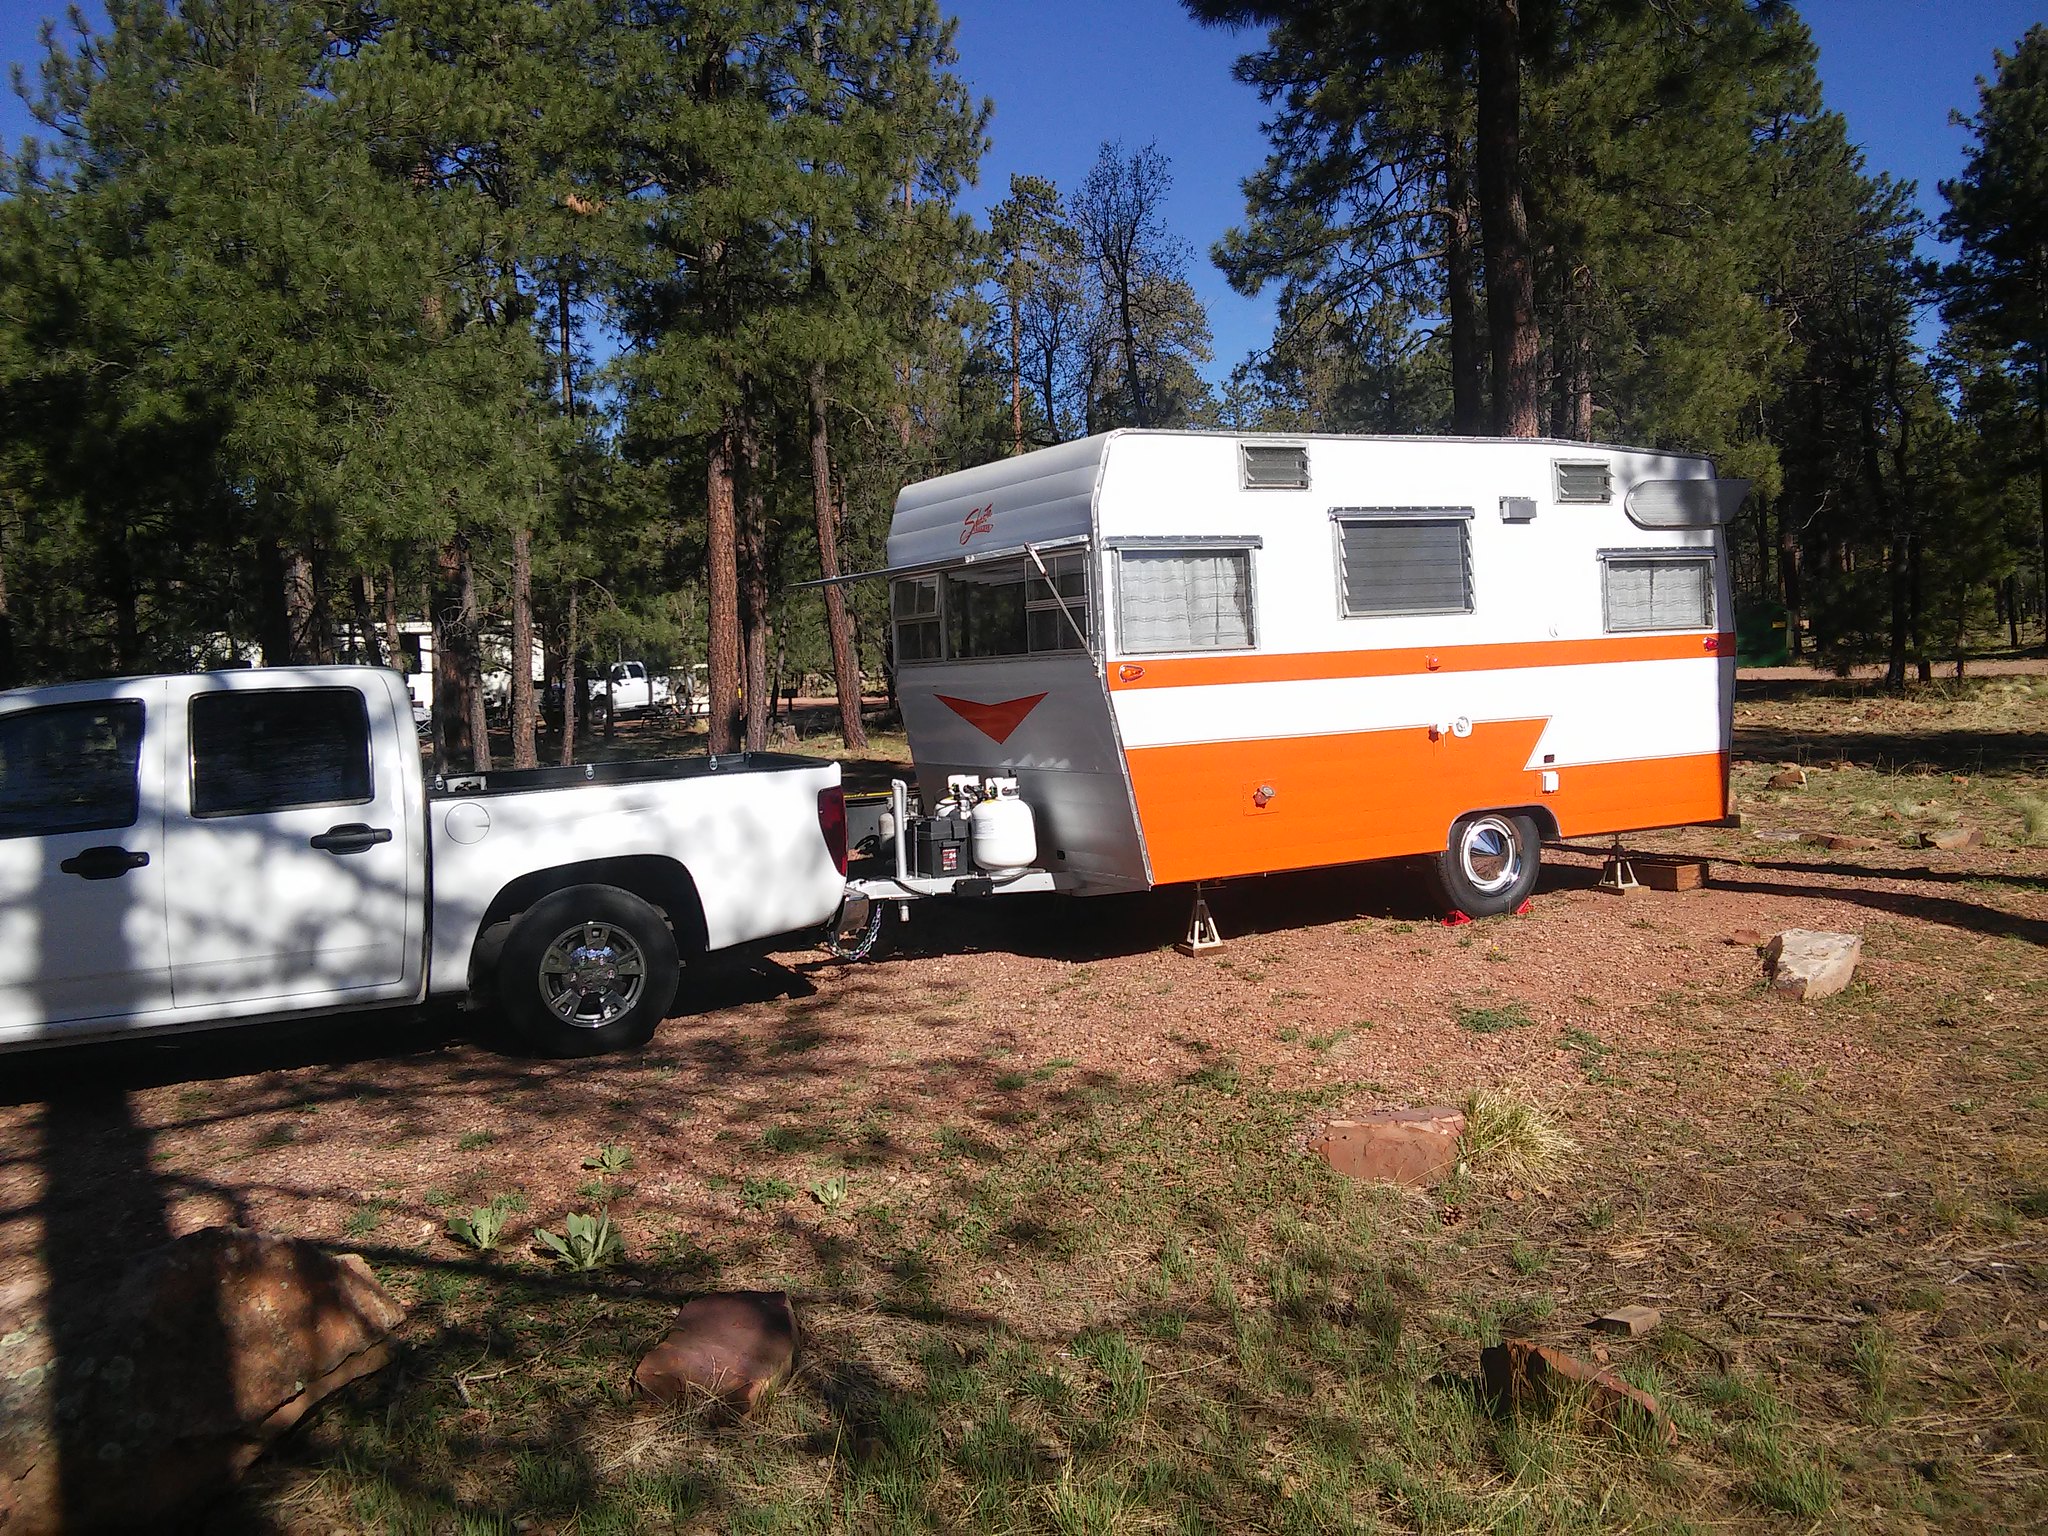
heck yea! I love the new chevys. Did you get your awning finished? No awning yet...We had to drop everything and have moved temporarily north to UT. My wife's folks are ailing and their health is a concern...so we've gone to take care of them in their old age (we believe in karma).  We've got some property with a large metal building / shop so I've put it in storage for the rest of the season...hopefully we'll get back to normal life next spring. Like I said change happens. |
|
strange1
Active Member
Posts: 159
Likes: 103
1965 Shasta Airflyte
Currently Offline
|
Post by strange1 on Aug 17, 2018 6:59:34 GMT -8
What a great build. After doing mine my son asked if I had a chance to build another would I rather do a restoration or build one from scratch...I'd say you did both at once. VERY nice job!  Two thumbs up! Happy camping! |
|
strange1
Active Member
Posts: 159
Likes: 103
1965 Shasta Airflyte
Currently Offline
|
Post by strange1 on Aug 16, 2018 20:45:25 GMT -8
|
|
strange1
Active Member
Posts: 159
Likes: 103
1965 Shasta Airflyte
Currently Offline
|
Post by strange1 on May 21, 2018 15:14:19 GMT -8
I have been looking at those awnings on Amazon...I think Ebay has a better price. I'm going to buy the orange stripe. Hopefully it'll look okay with my camper.  Thanks for the link. |
|
strange1
Active Member
Posts: 159
Likes: 103
1965 Shasta Airflyte
Currently Offline
|
Post by strange1 on May 21, 2018 7:36:29 GMT -8
Next I need to figure out an awning. I'm a real penny pincher...so I'll be looking for the most economical way to go. I'll keep you posted as I go through the process.
|
|
strange1
Active Member
Posts: 159
Likes: 103
1965 Shasta Airflyte
Currently Offline
|
Post by strange1 on May 14, 2018 8:23:57 GMT -8
|
|
strange1
Active Member
Posts: 159
Likes: 103
1965 Shasta Airflyte
Currently Offline
|
Post by strange1 on May 10, 2018 17:11:51 GMT -8
Here is a picture of my brakes. I think all are very similar. The rusted spider-web before and the set I ordered off of Amazon. You see the part I circled in red? That is the adjuster. You'll need to turn that by hand prior to installing the drum. Adjust so that the shoes are just starting to make contact with the drum and then back off a couple clicks. Install your drum and from there the brakes can be adjusted from behind the dust plate through a slot that's provided in back. Again you'll need to adjust until you feel the wheel start to grab and then back off just a little. It's hard to know if yours are self adjusting? But I'm also a VW guy and am used to crawling under my car to adjust brakes. Hope this helps. 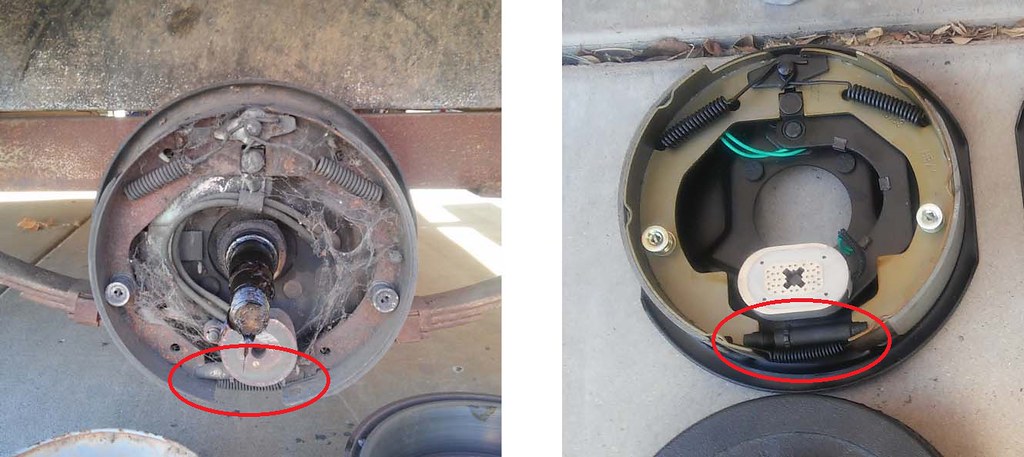 I came across a good video on youtube. Not me...but it explains it pretty well. www.youtube.com/watch?v=A5c1hcqDStI |
|
strange1
Active Member
Posts: 159
Likes: 103
1965 Shasta Airflyte
Currently Offline
|
Post by strange1 on May 10, 2018 8:14:14 GMT -8
|
|
strange1
Active Member
Posts: 159
Likes: 103
1965 Shasta Airflyte
Currently Offline
|
Post by strange1 on May 7, 2018 12:49:05 GMT -8
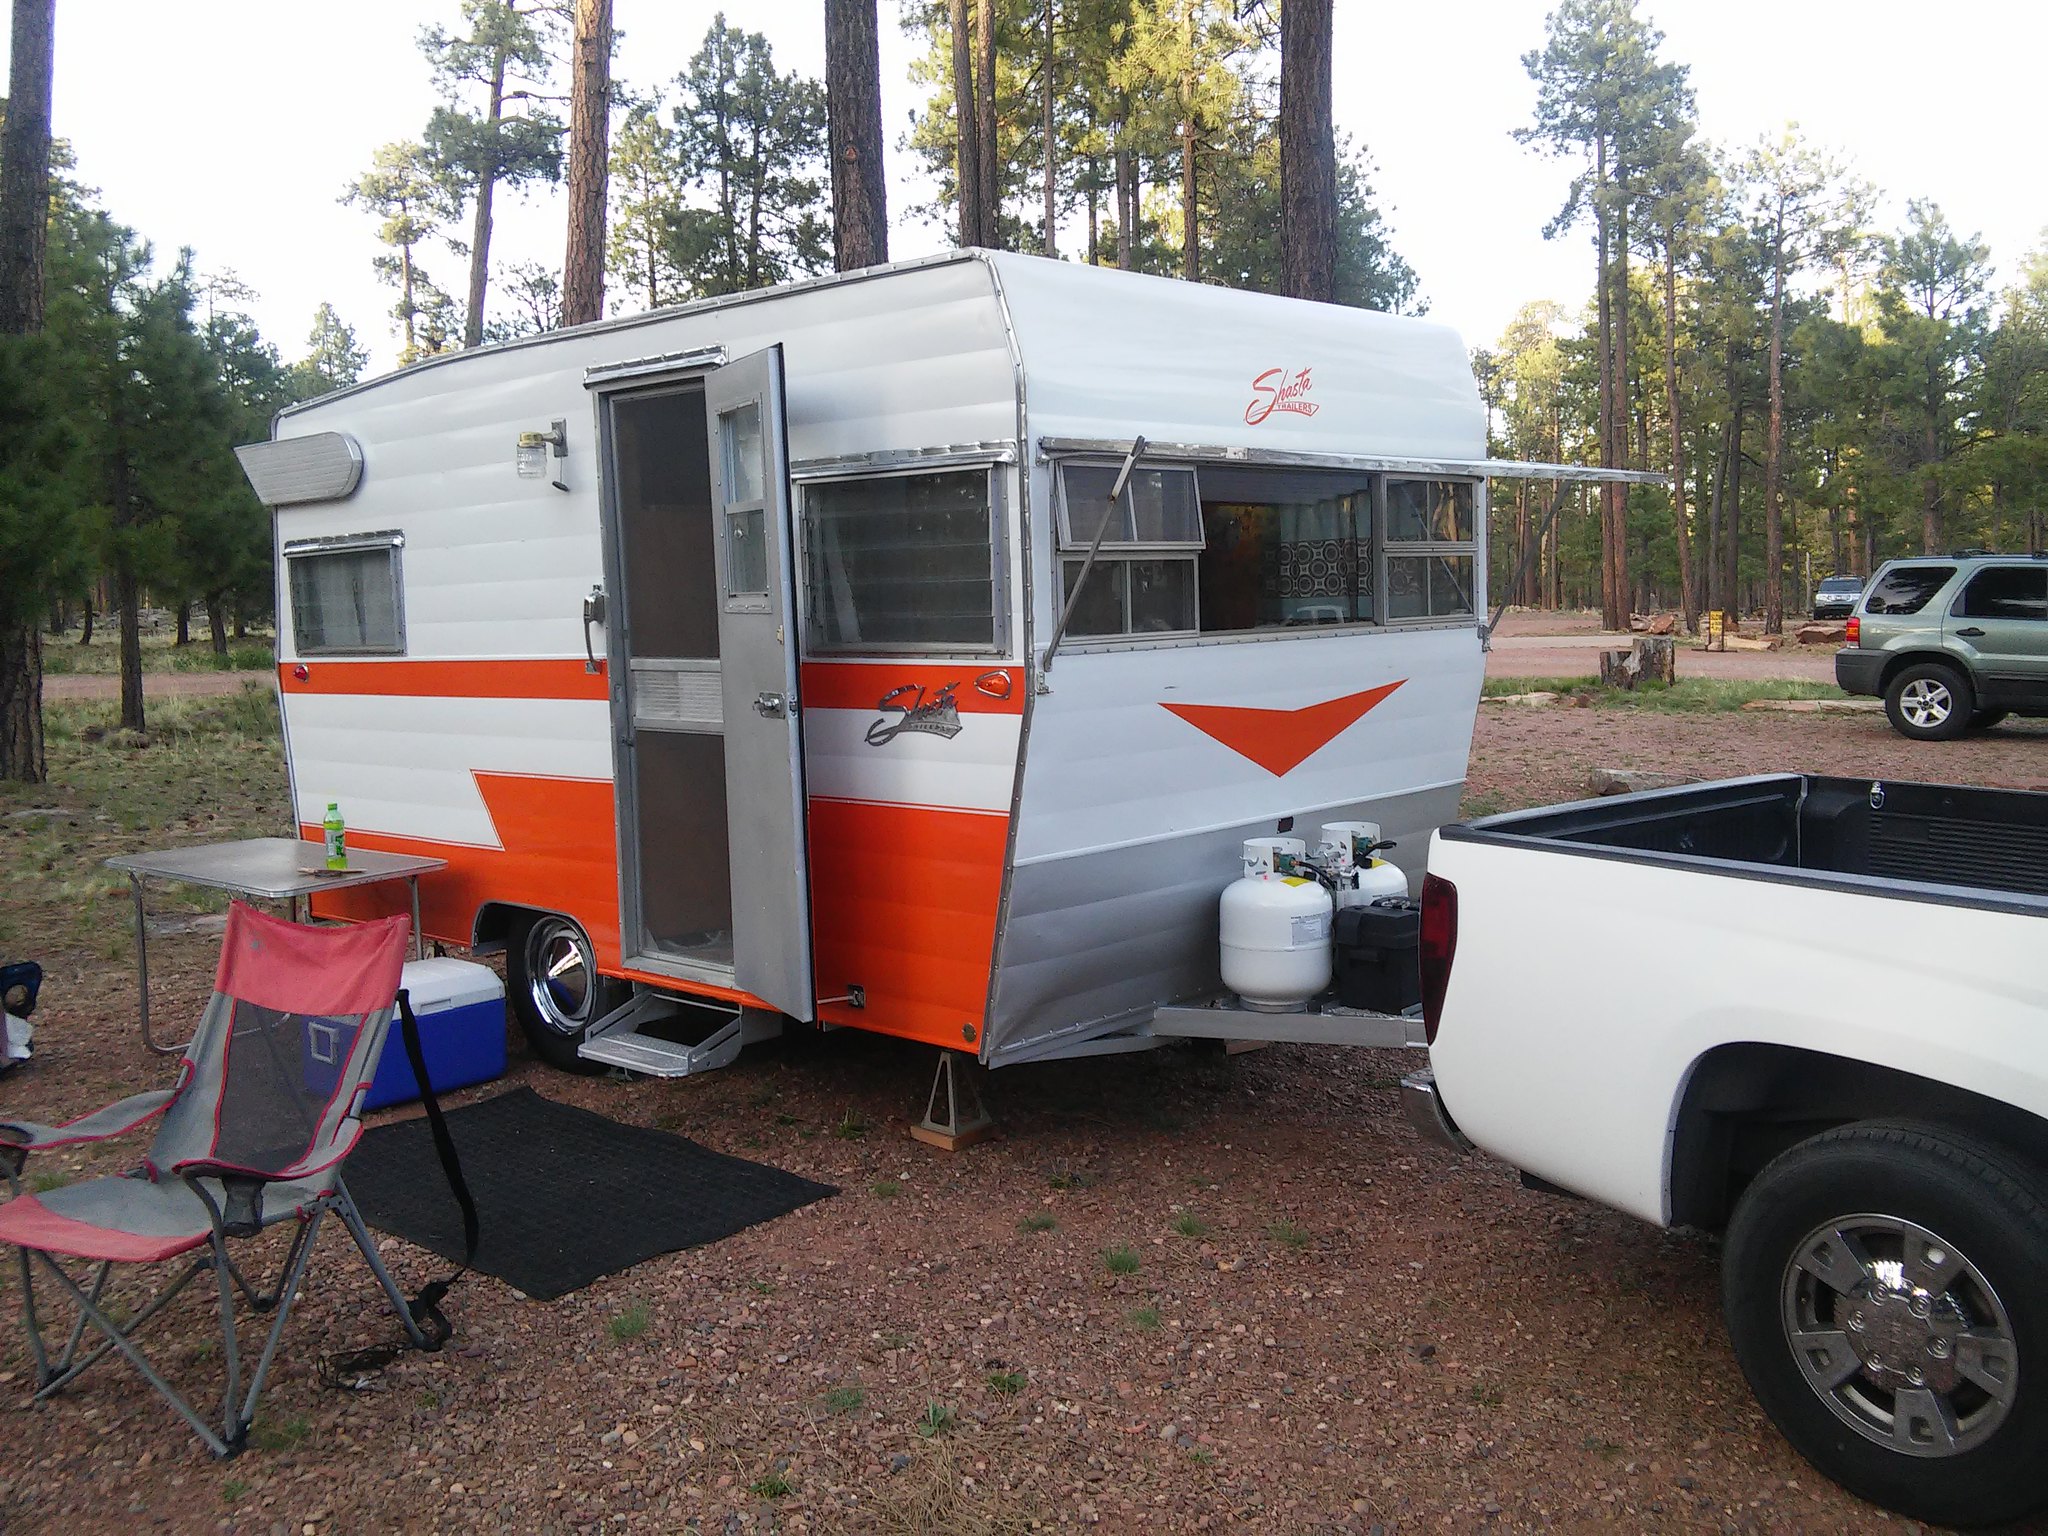
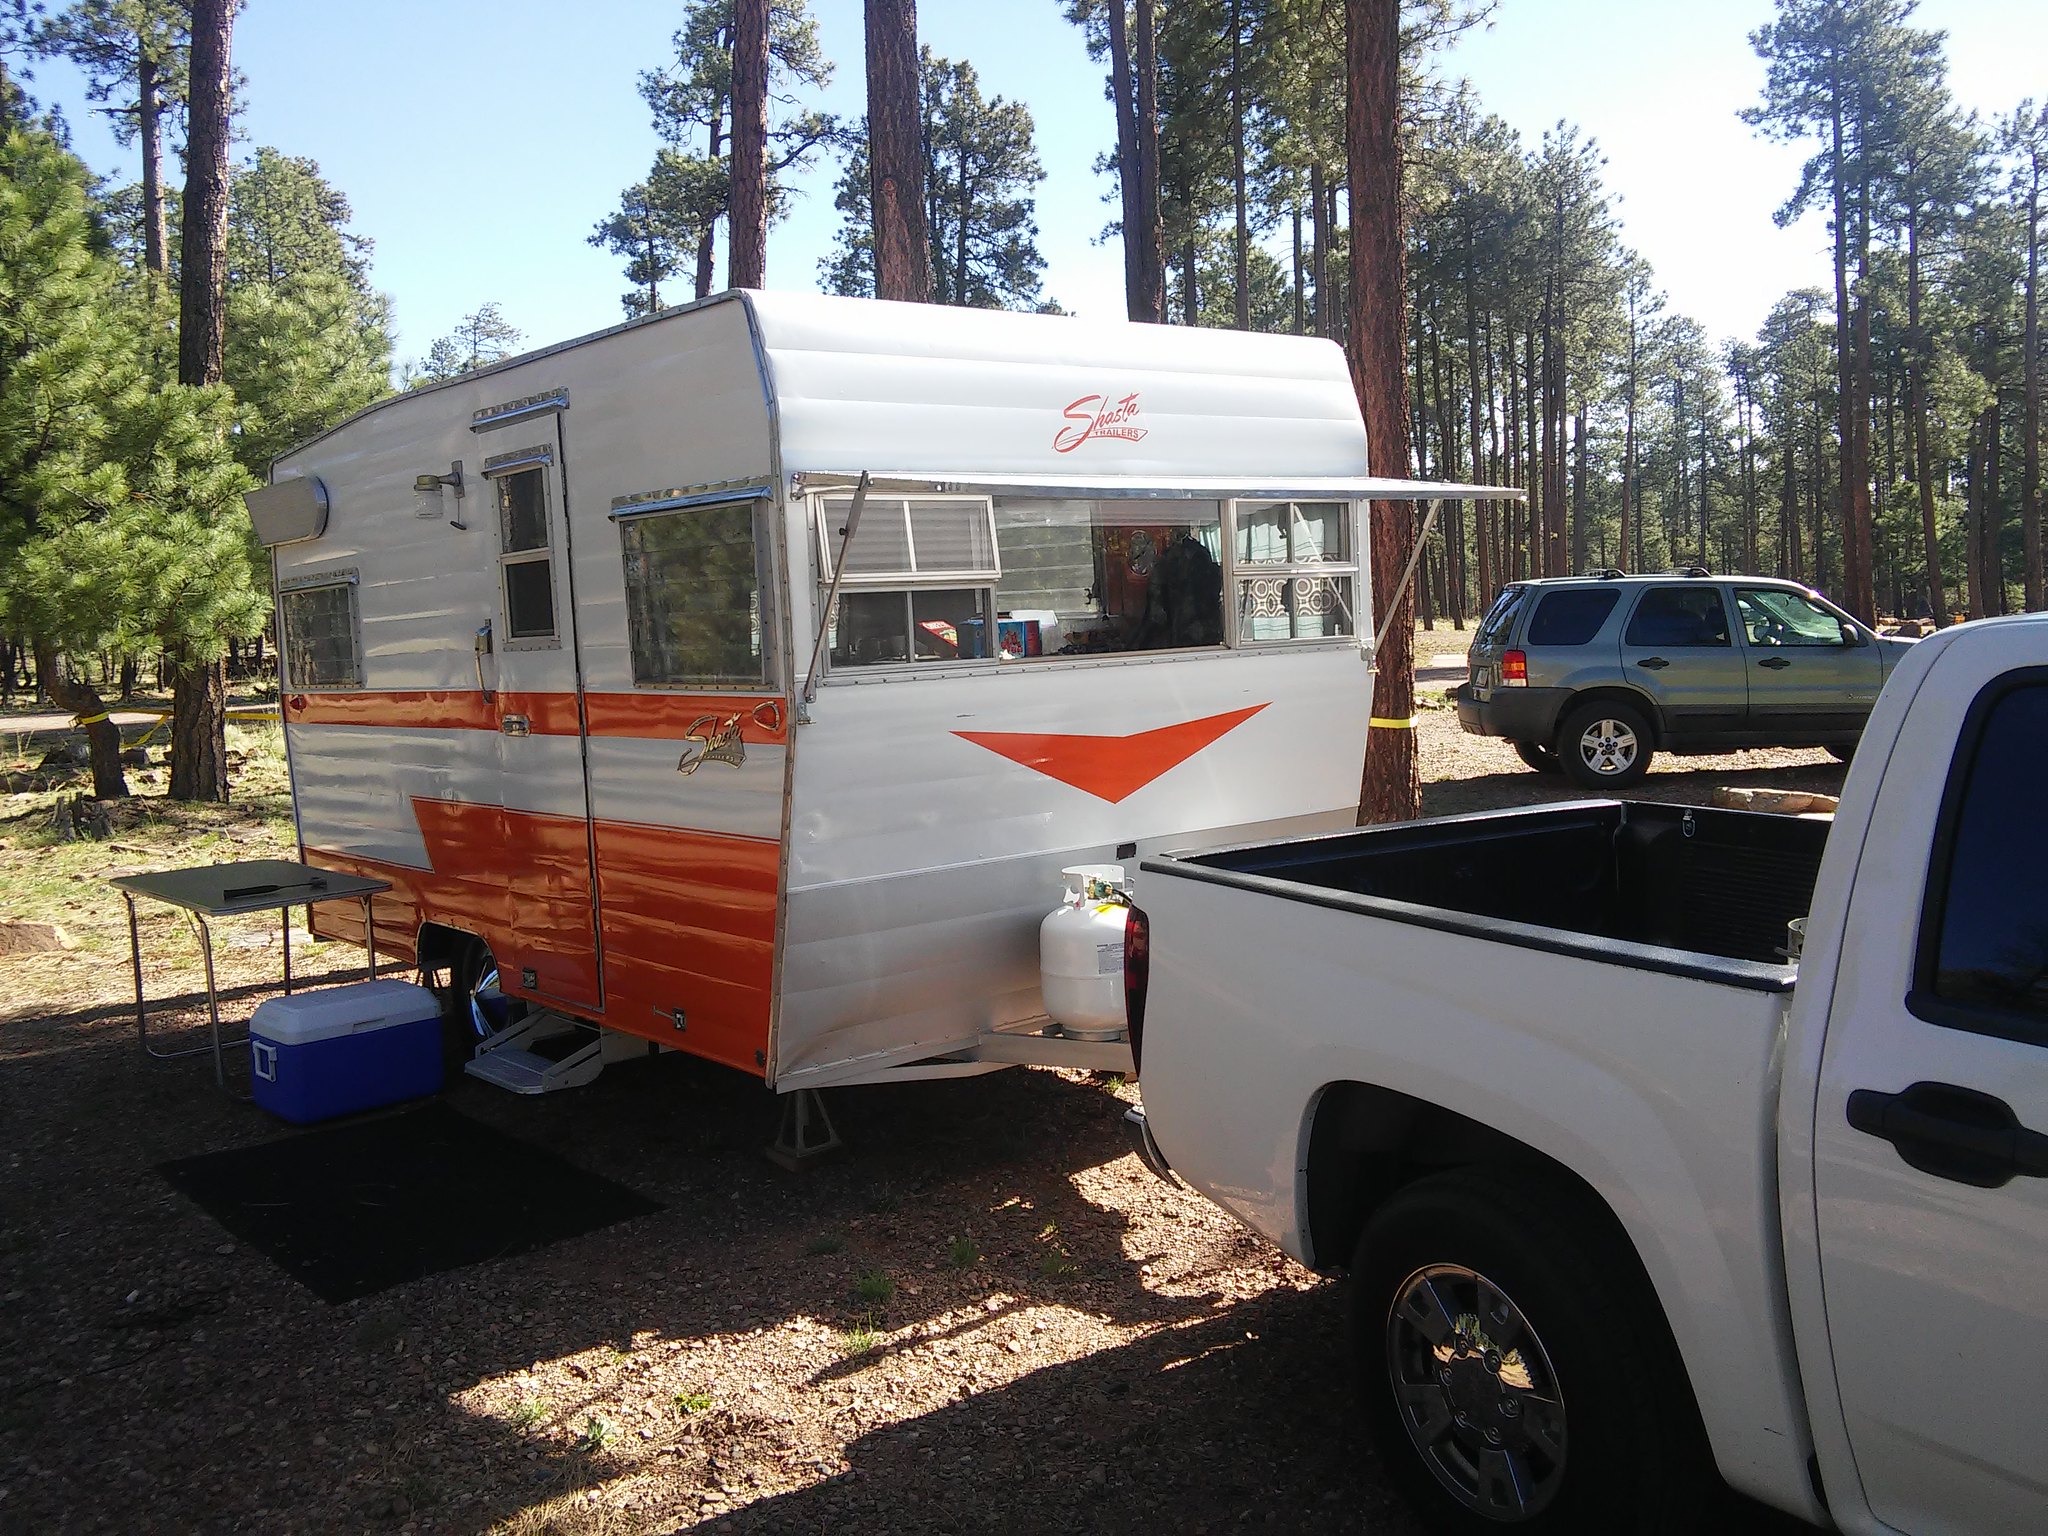
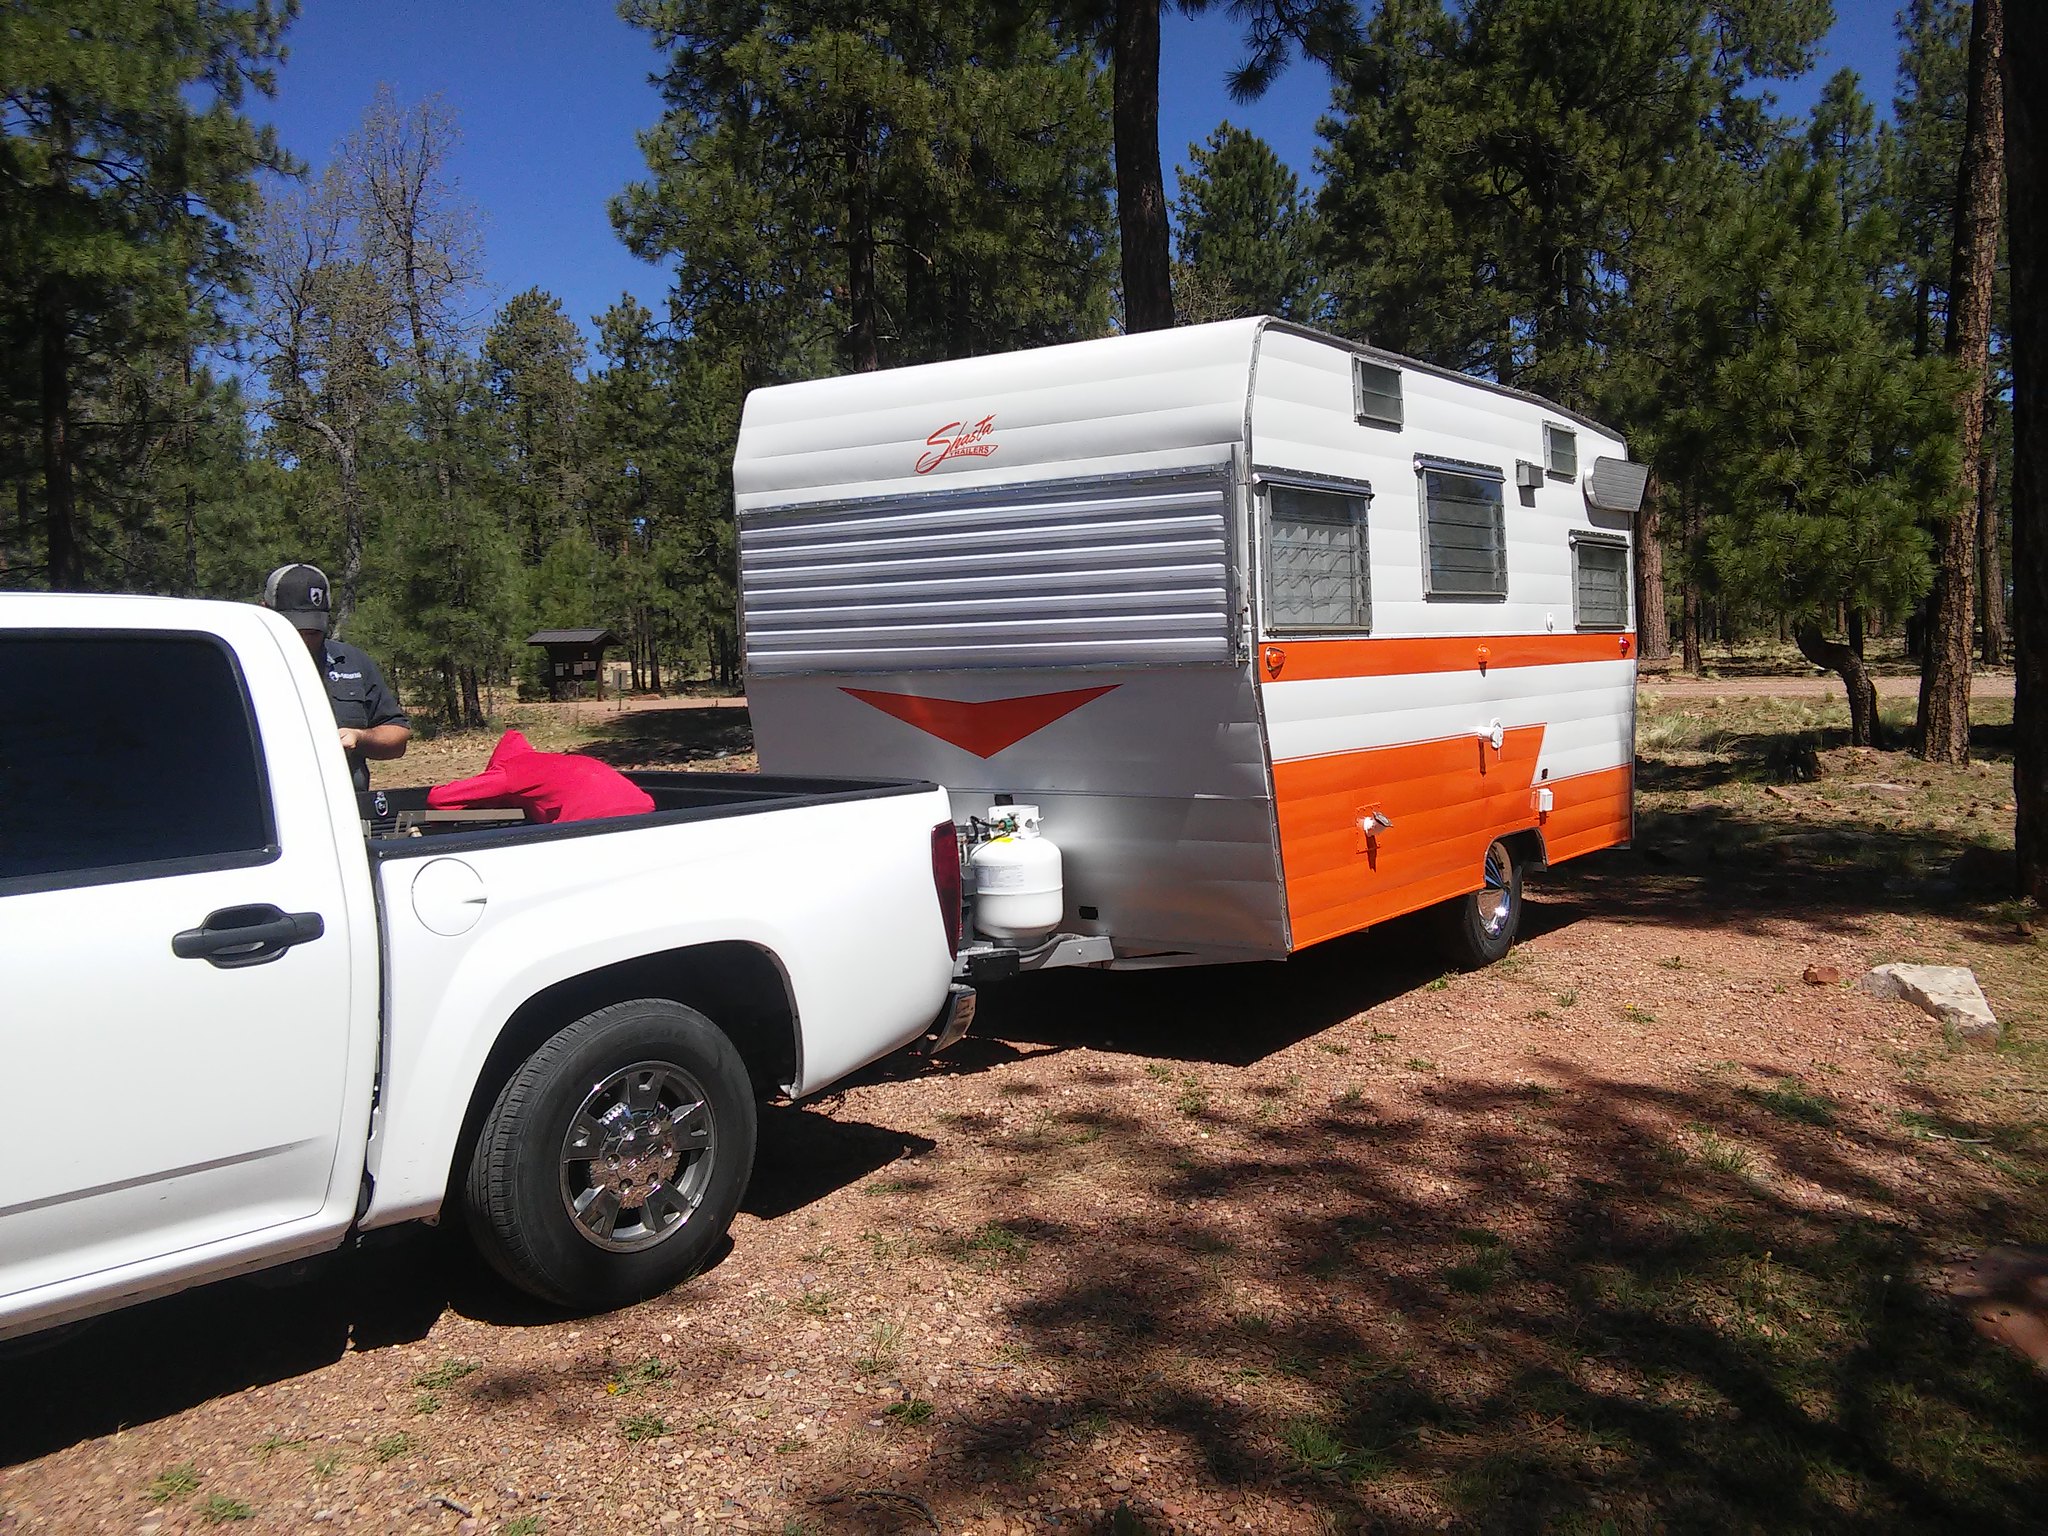
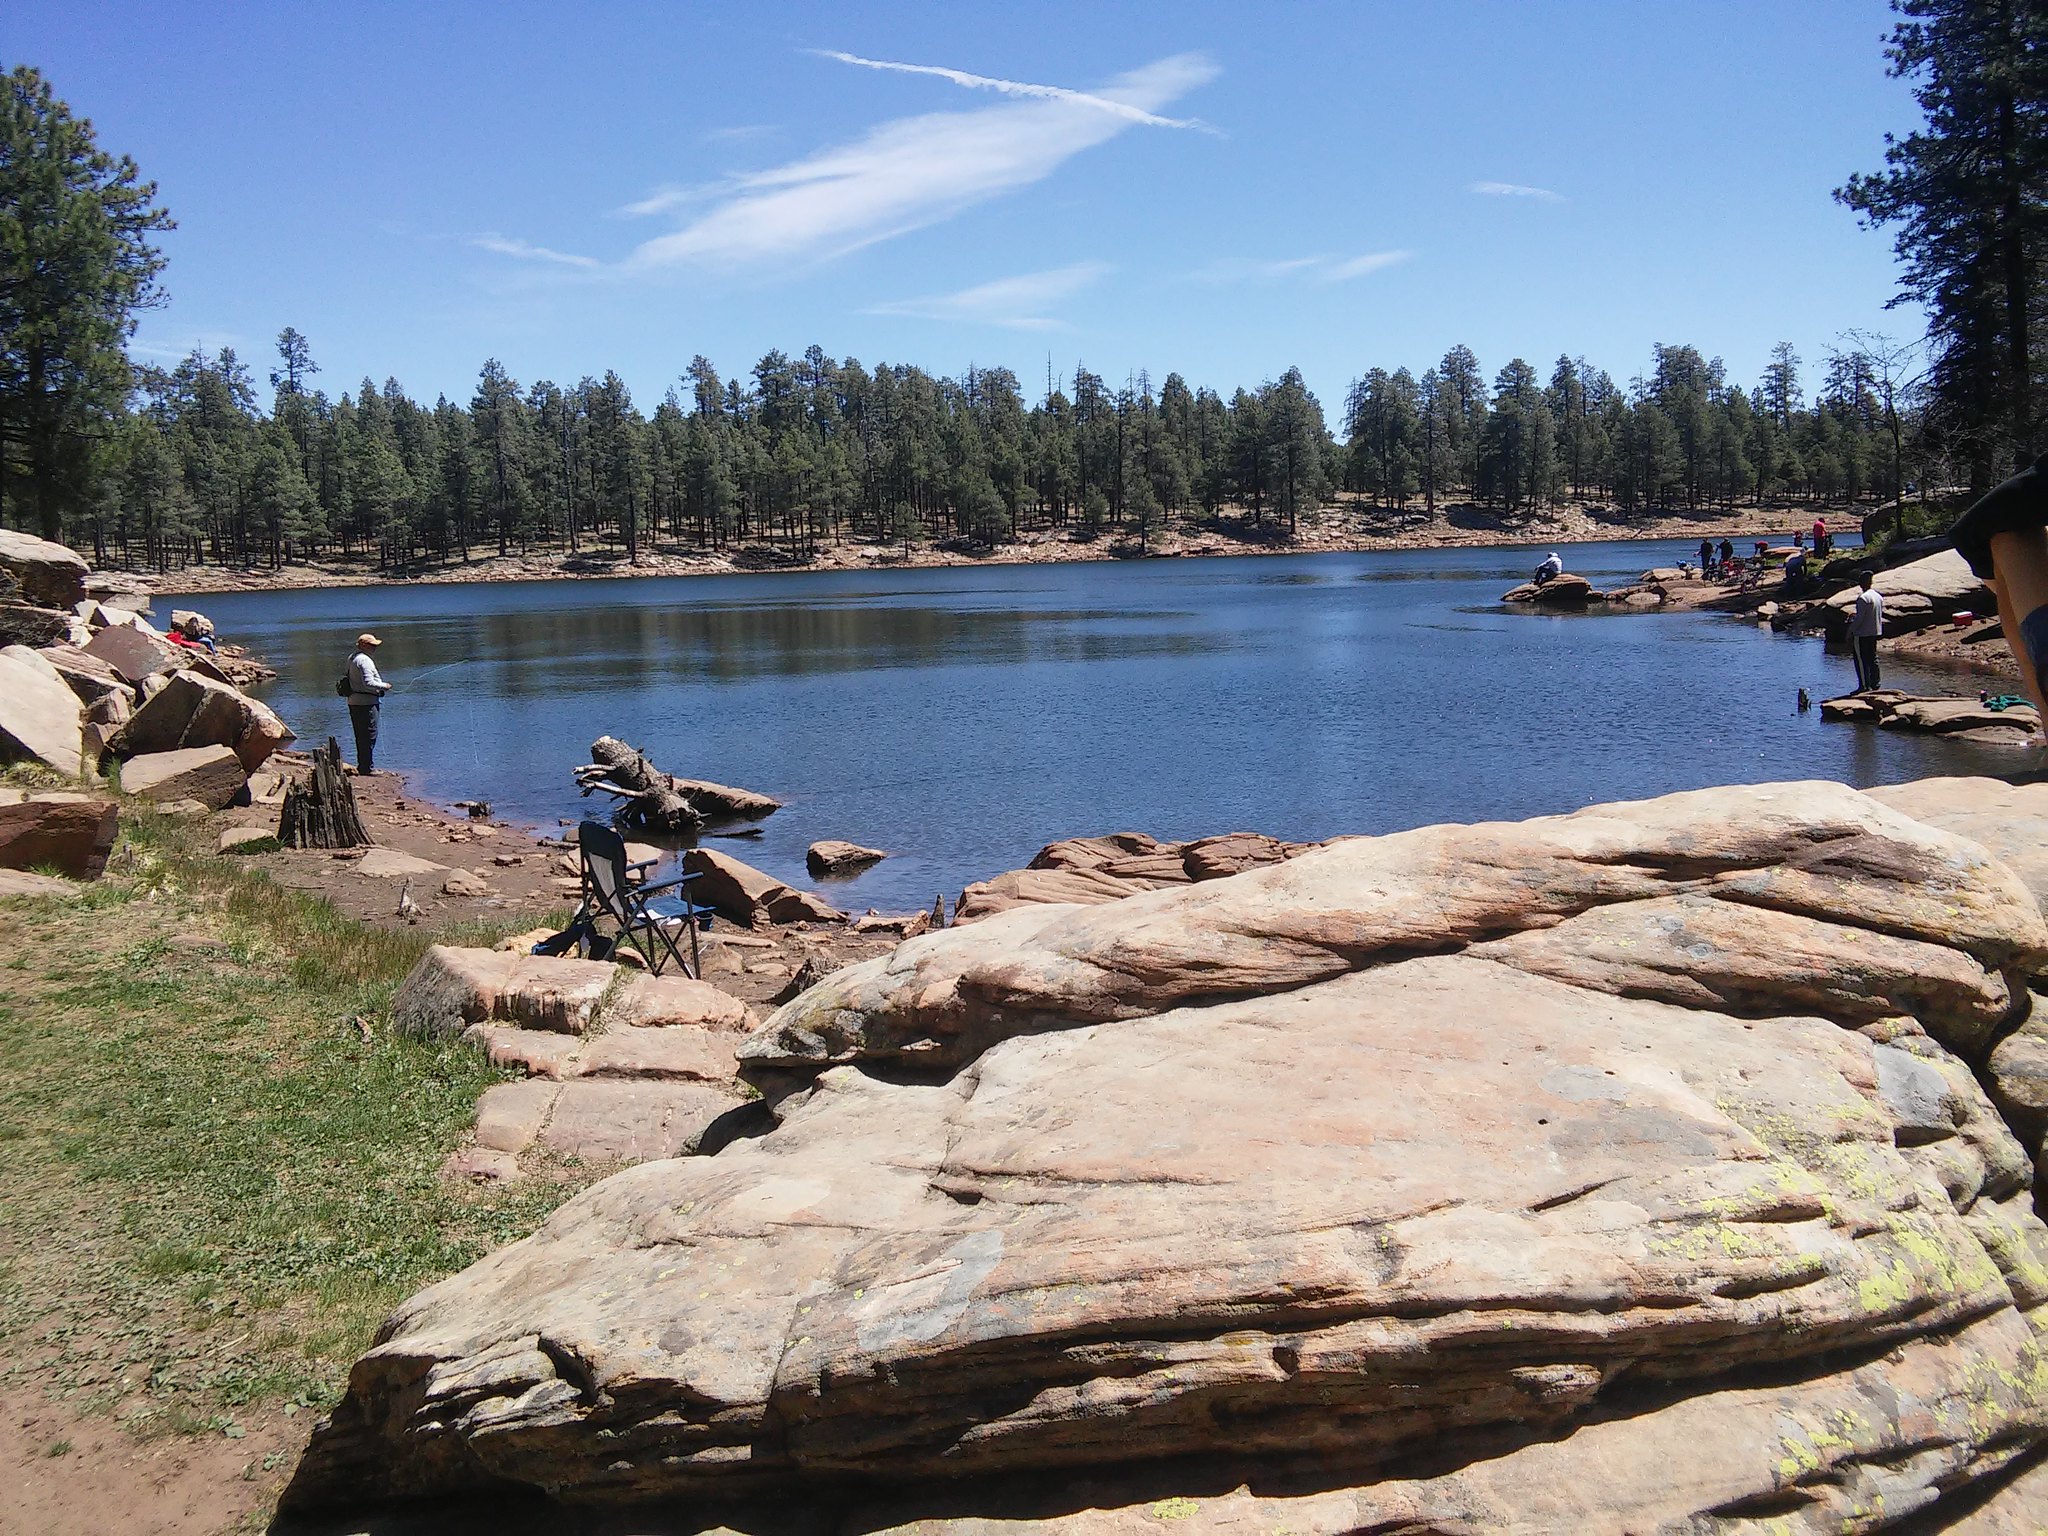
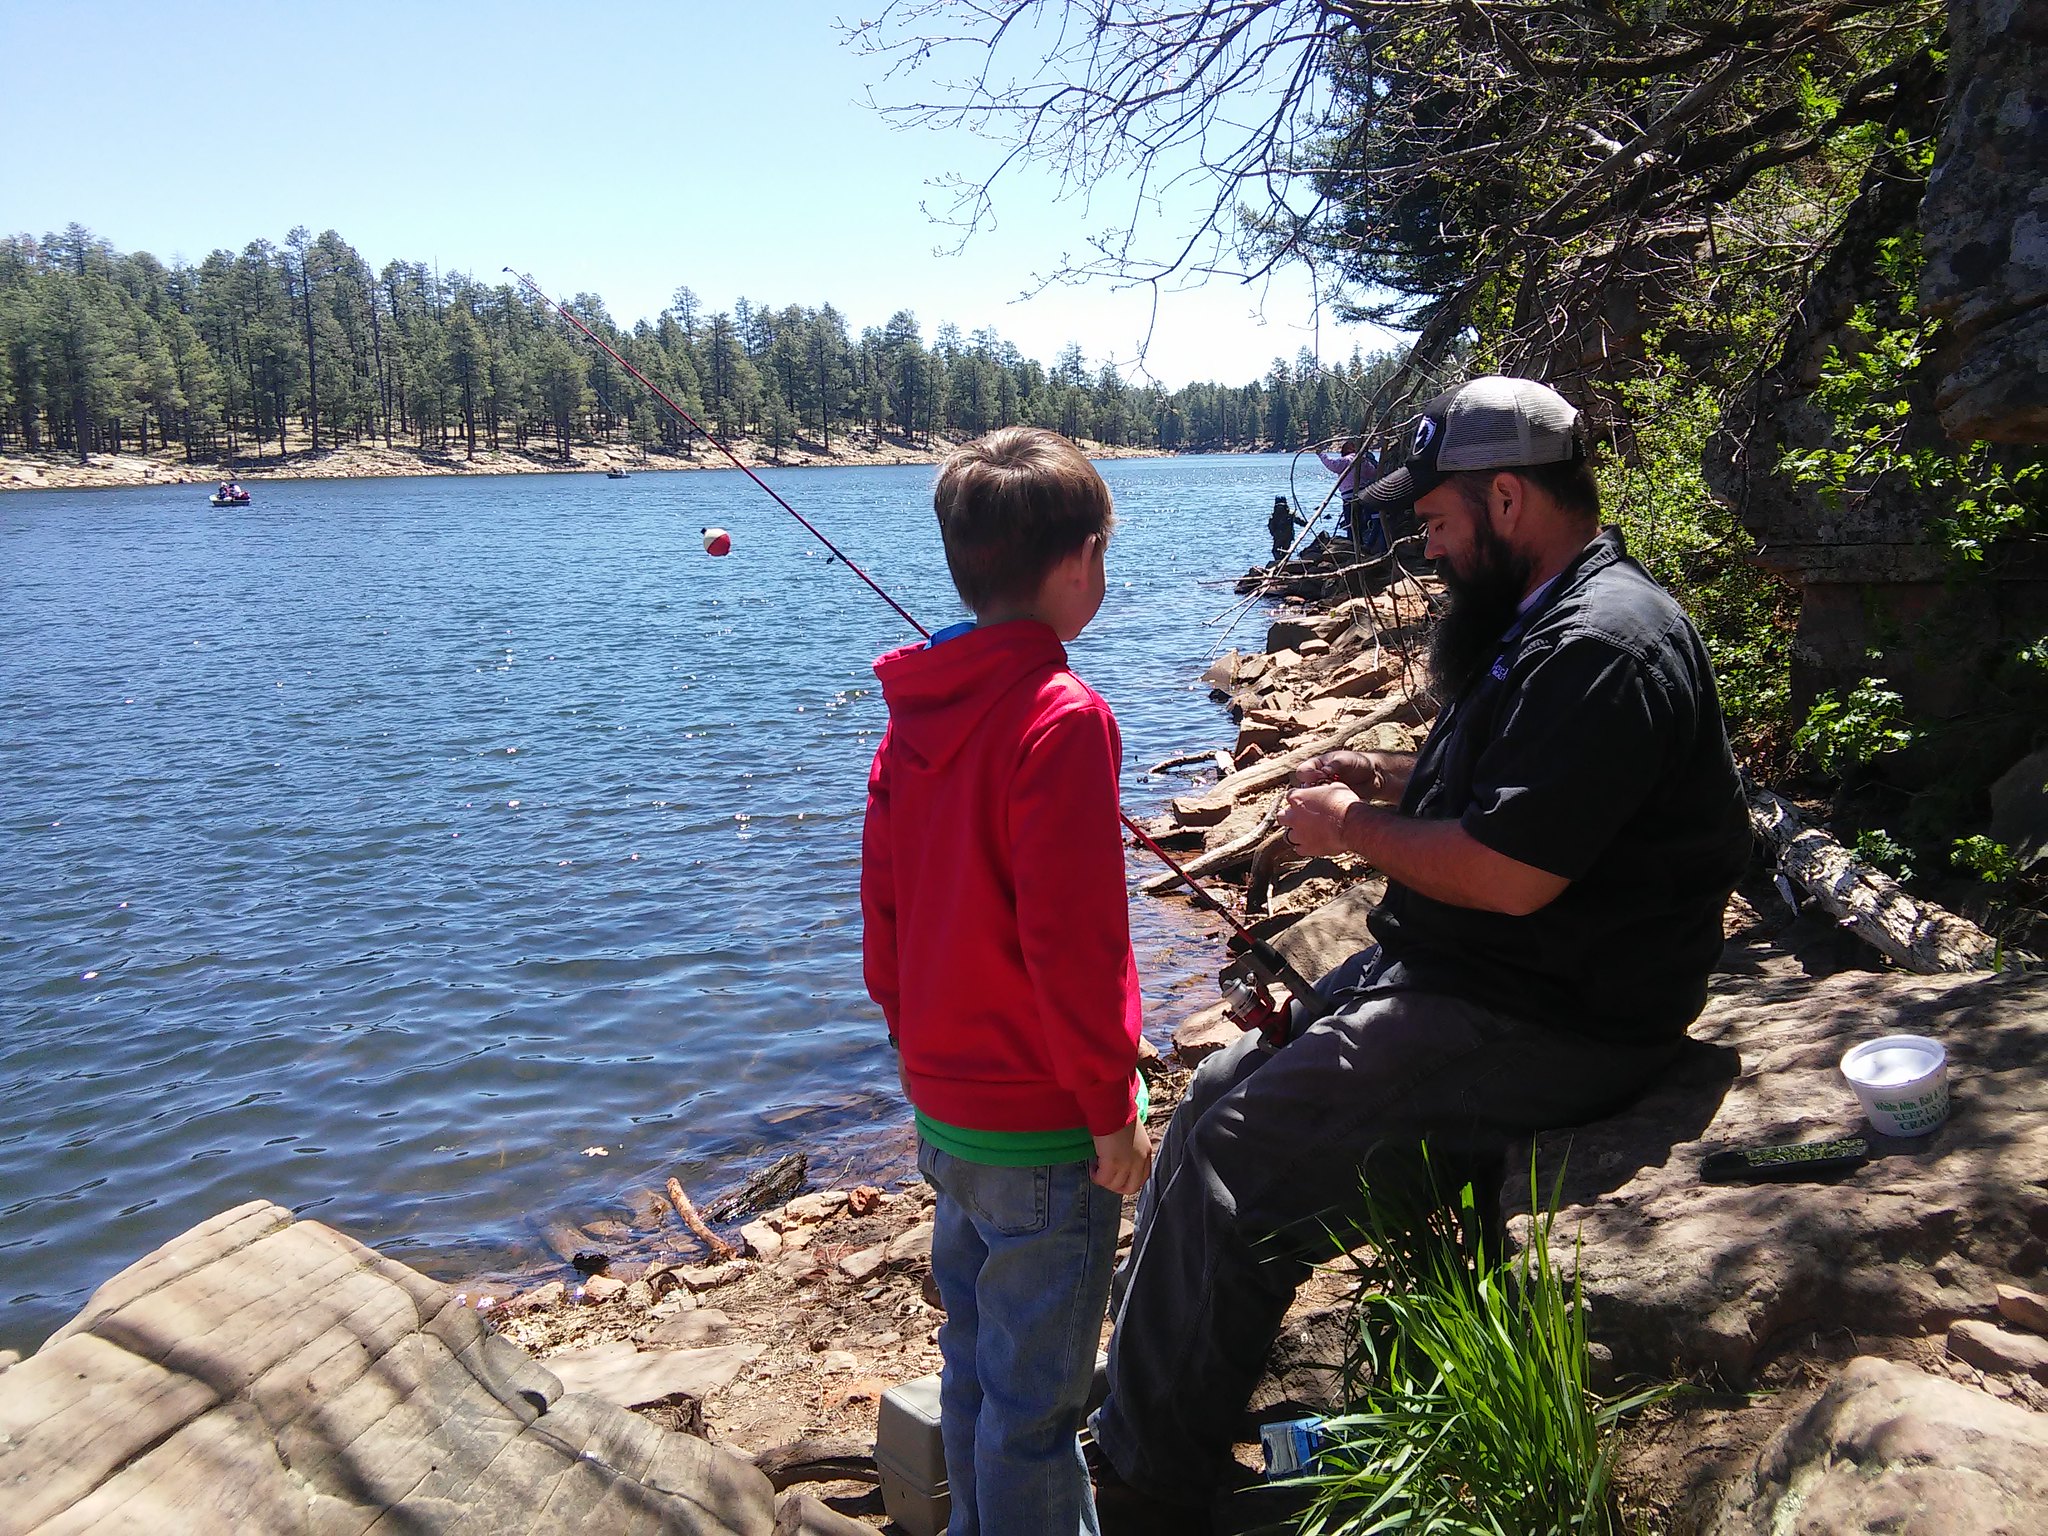
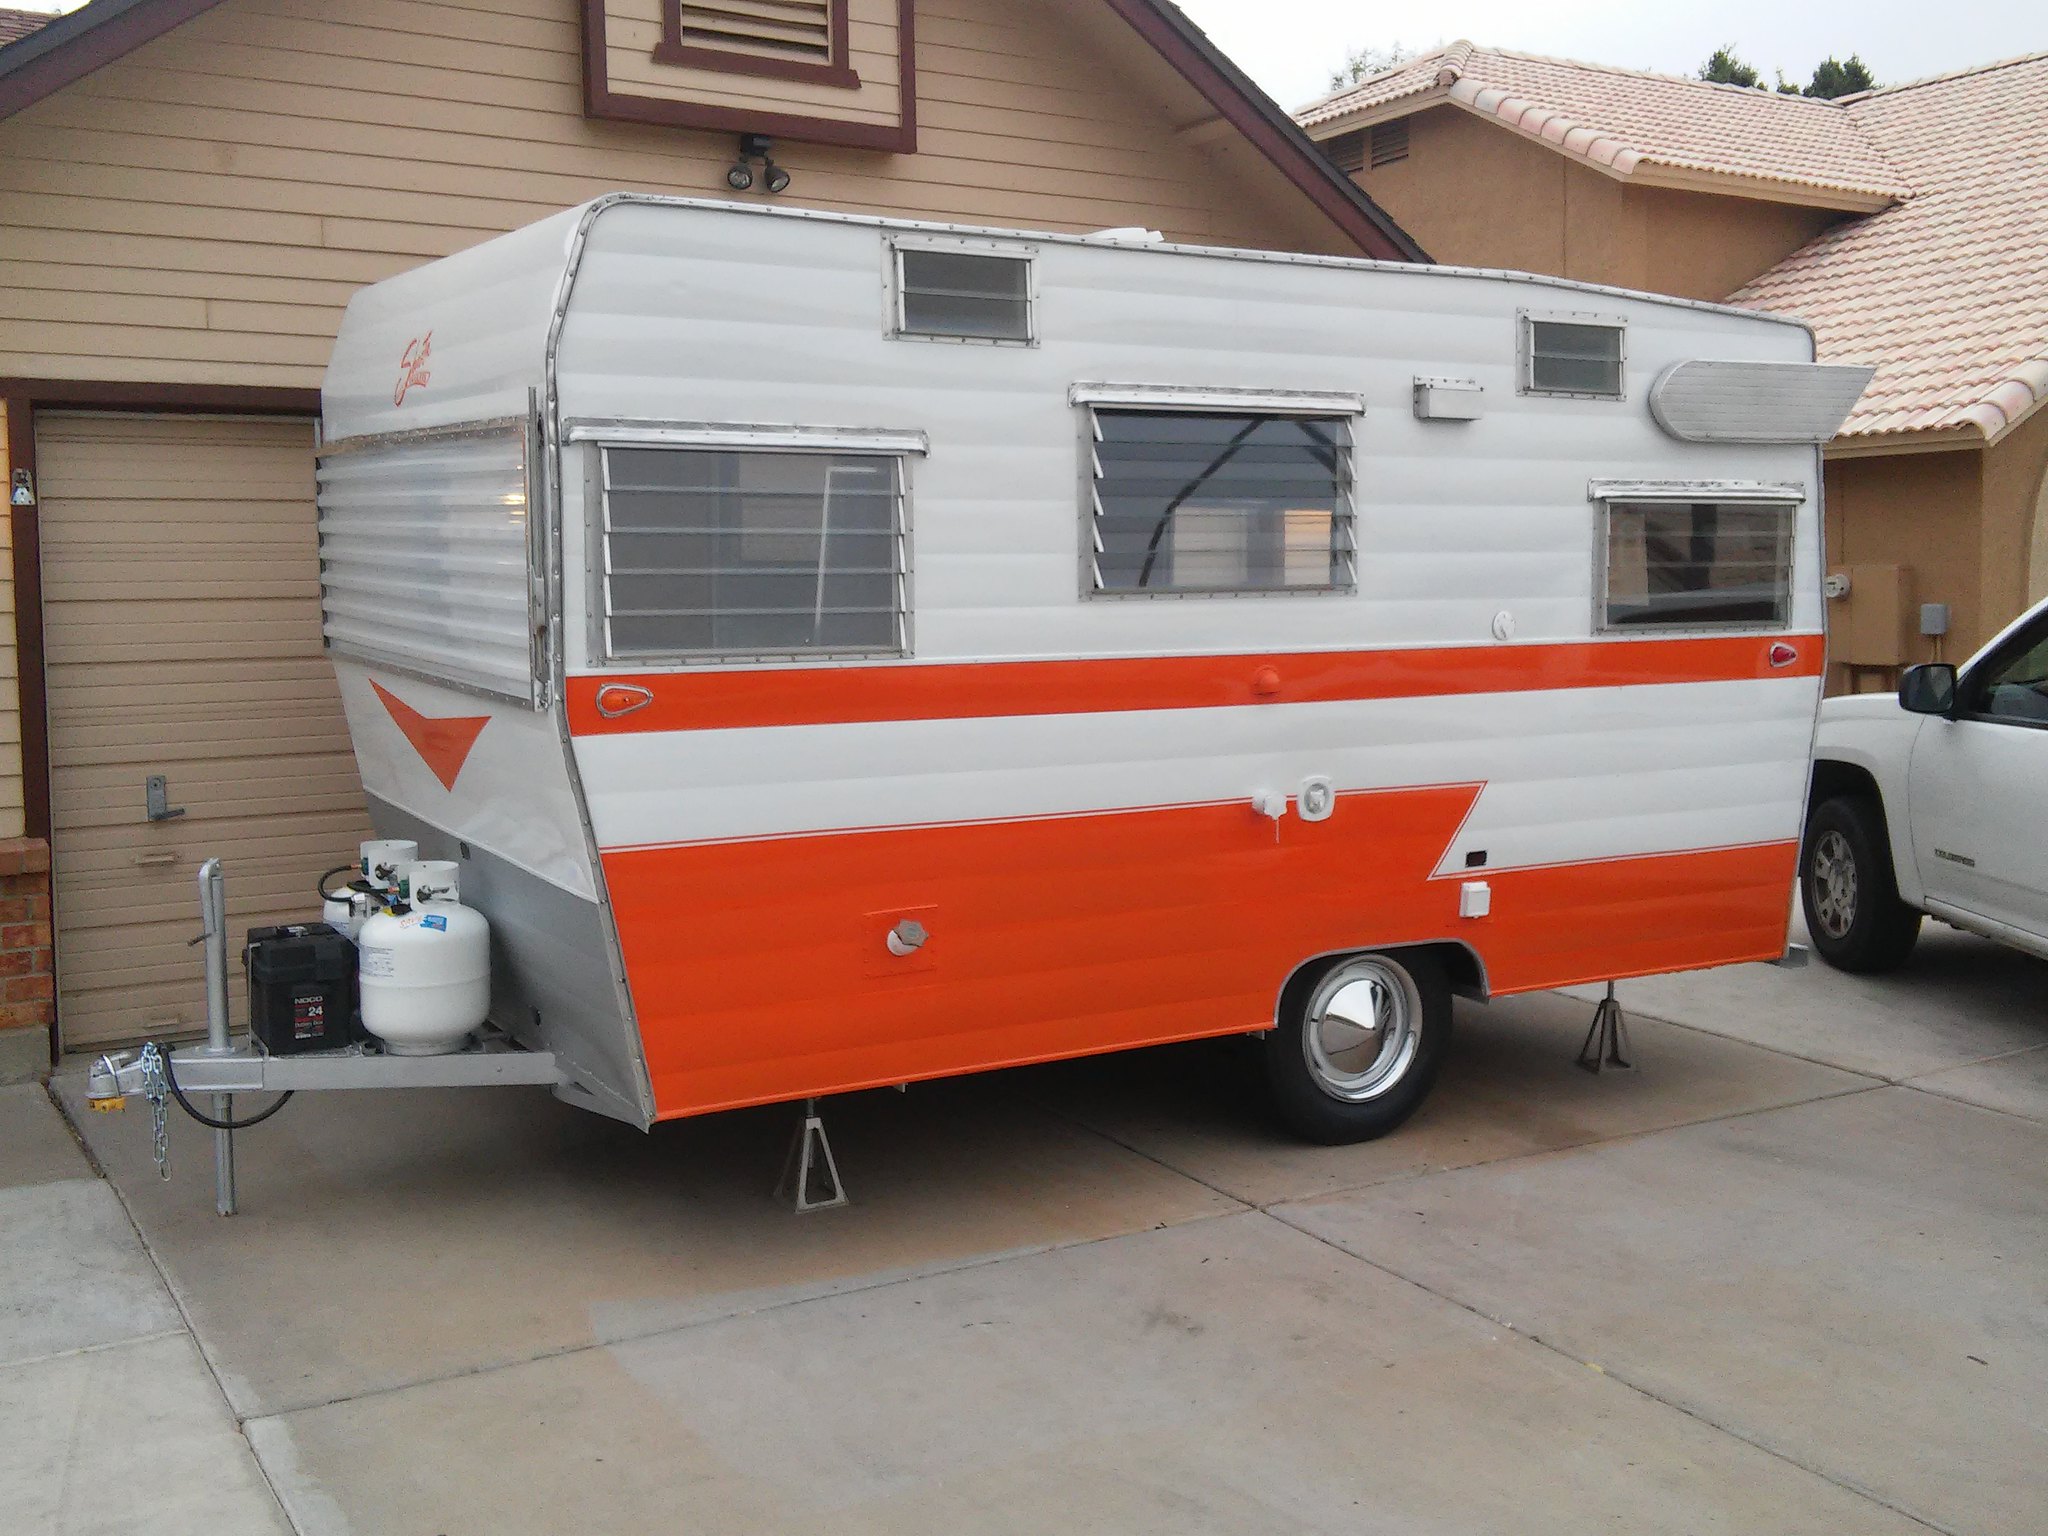
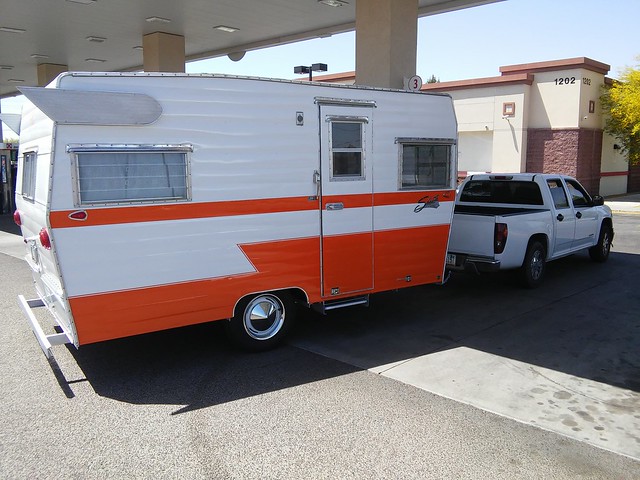
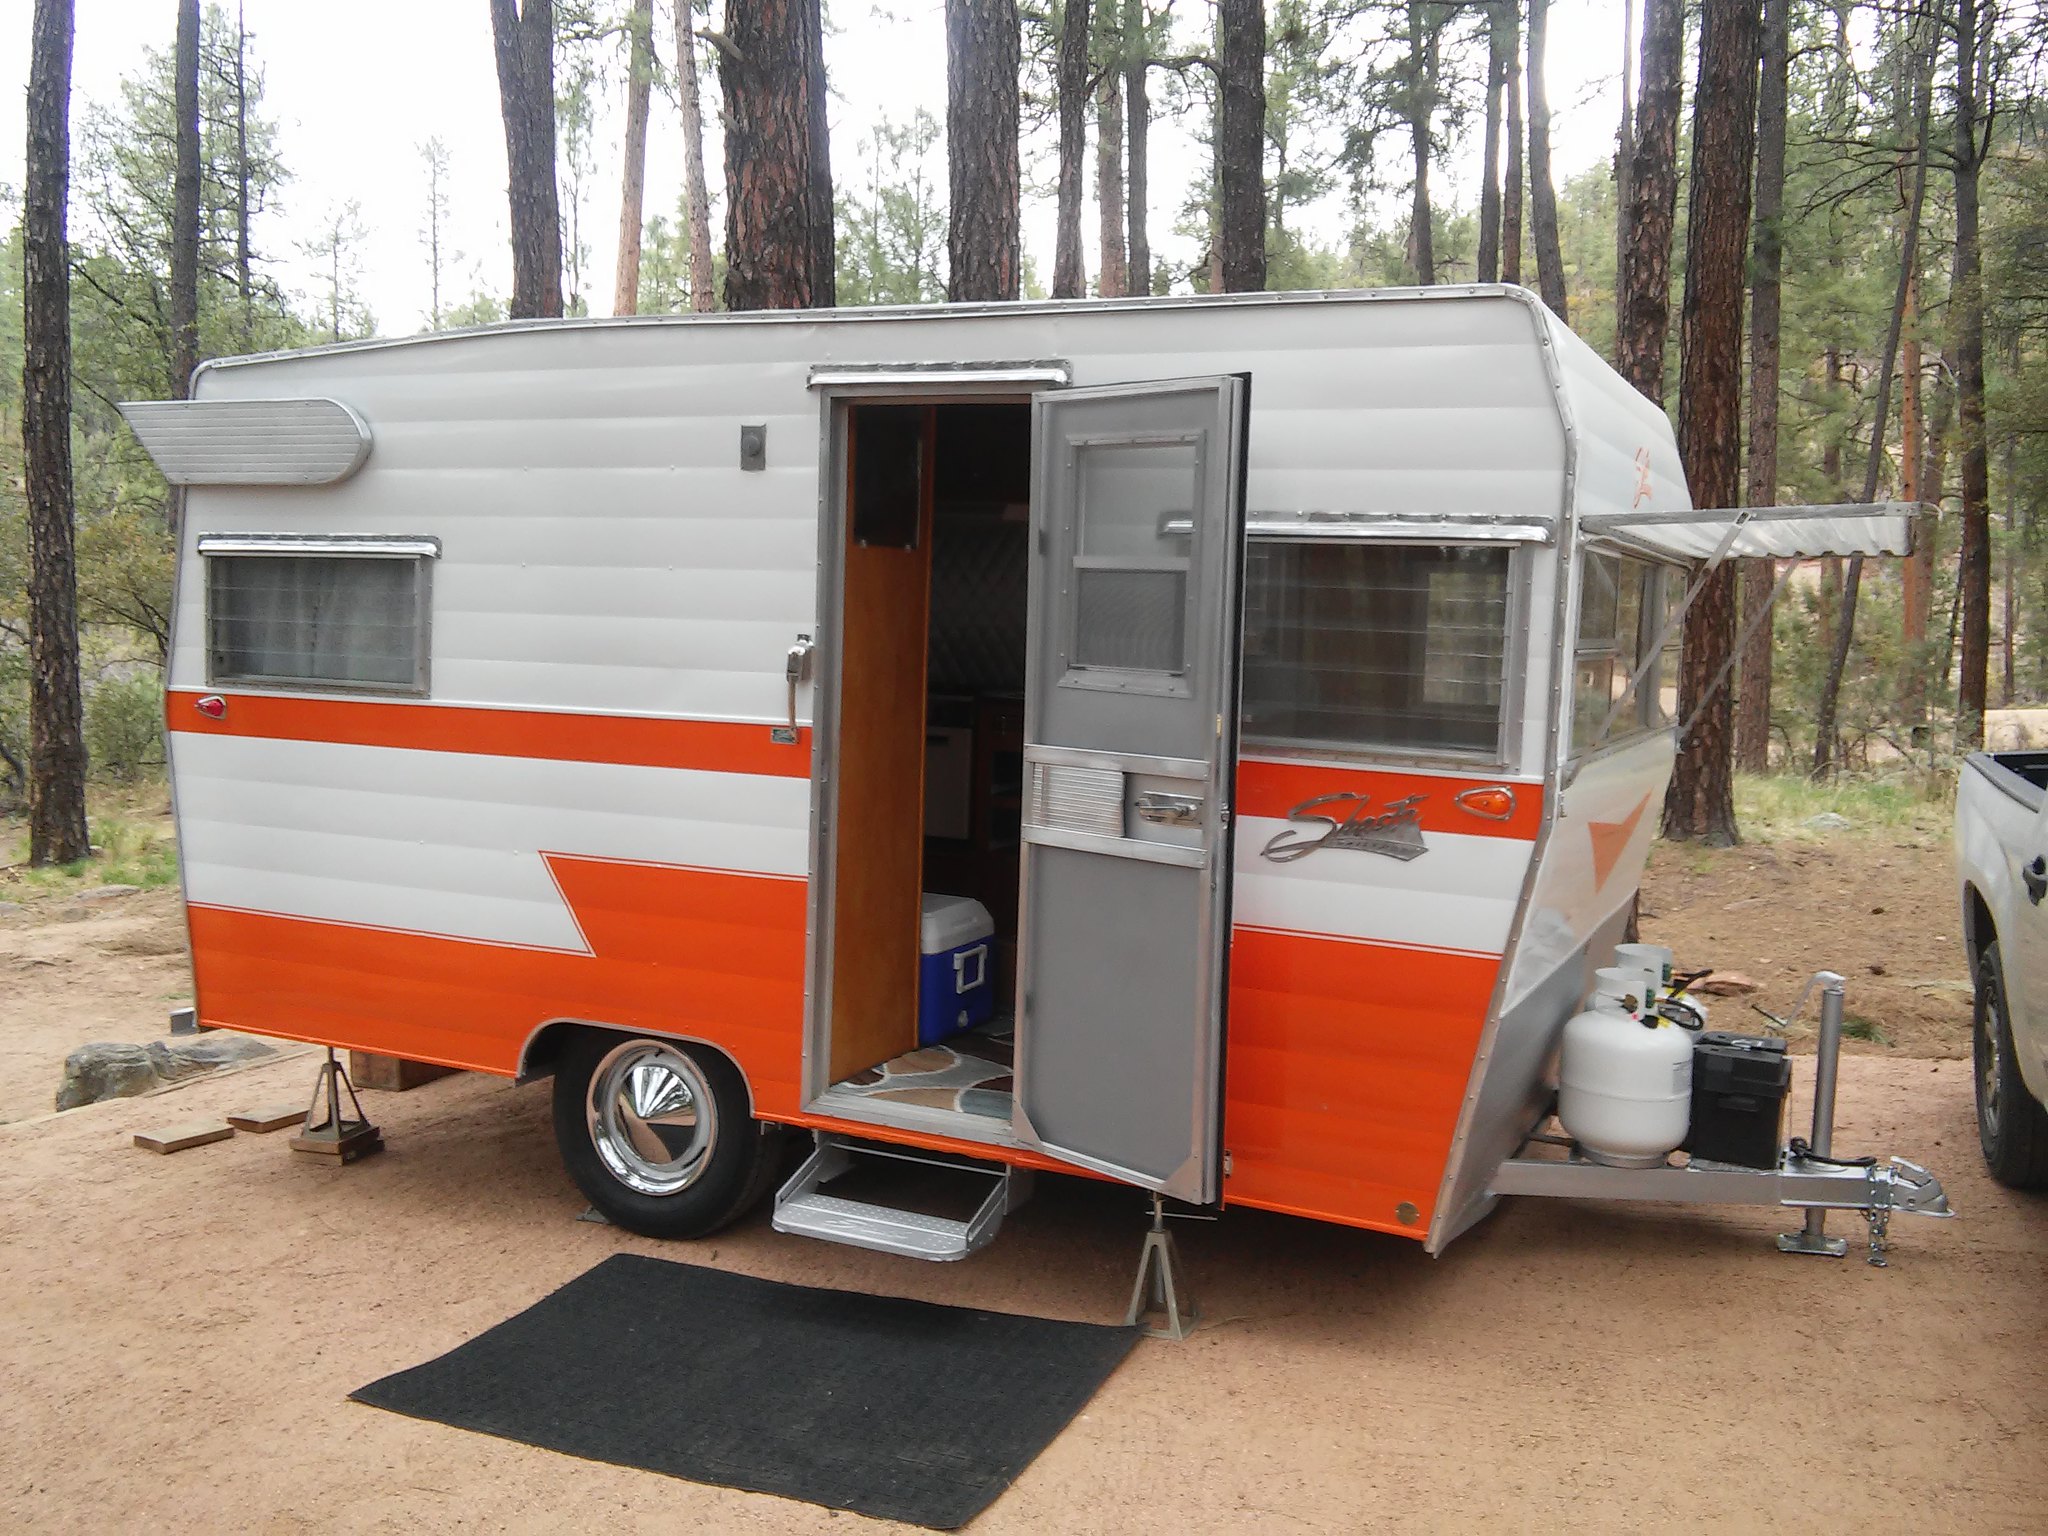
Nice to see a restore being used, as in cooked in. I have a feeling that a lot of these at the rallies are like show cars and never actually used. When we finally get to the point I can buy one our plans are use the heck out of it! Heck yeah...I didn't go through all this work just to build a "trailer queen". We are gonna use this and enjoy it by golly. I also enjoy restoring old VW's and the builds that get my respect are the ones driven and enjoyed. My 2¢ Thanks by the way. |
|
strange1
Active Member
Posts: 159
Likes: 103
1965 Shasta Airflyte
Currently Offline
|
Post by strange1 on May 7, 2018 11:30:01 GMT -8
I installed these push / pull type catches for all my big cabinet and closet doors. Very convenient and really keeps things closed. An Ebay item. 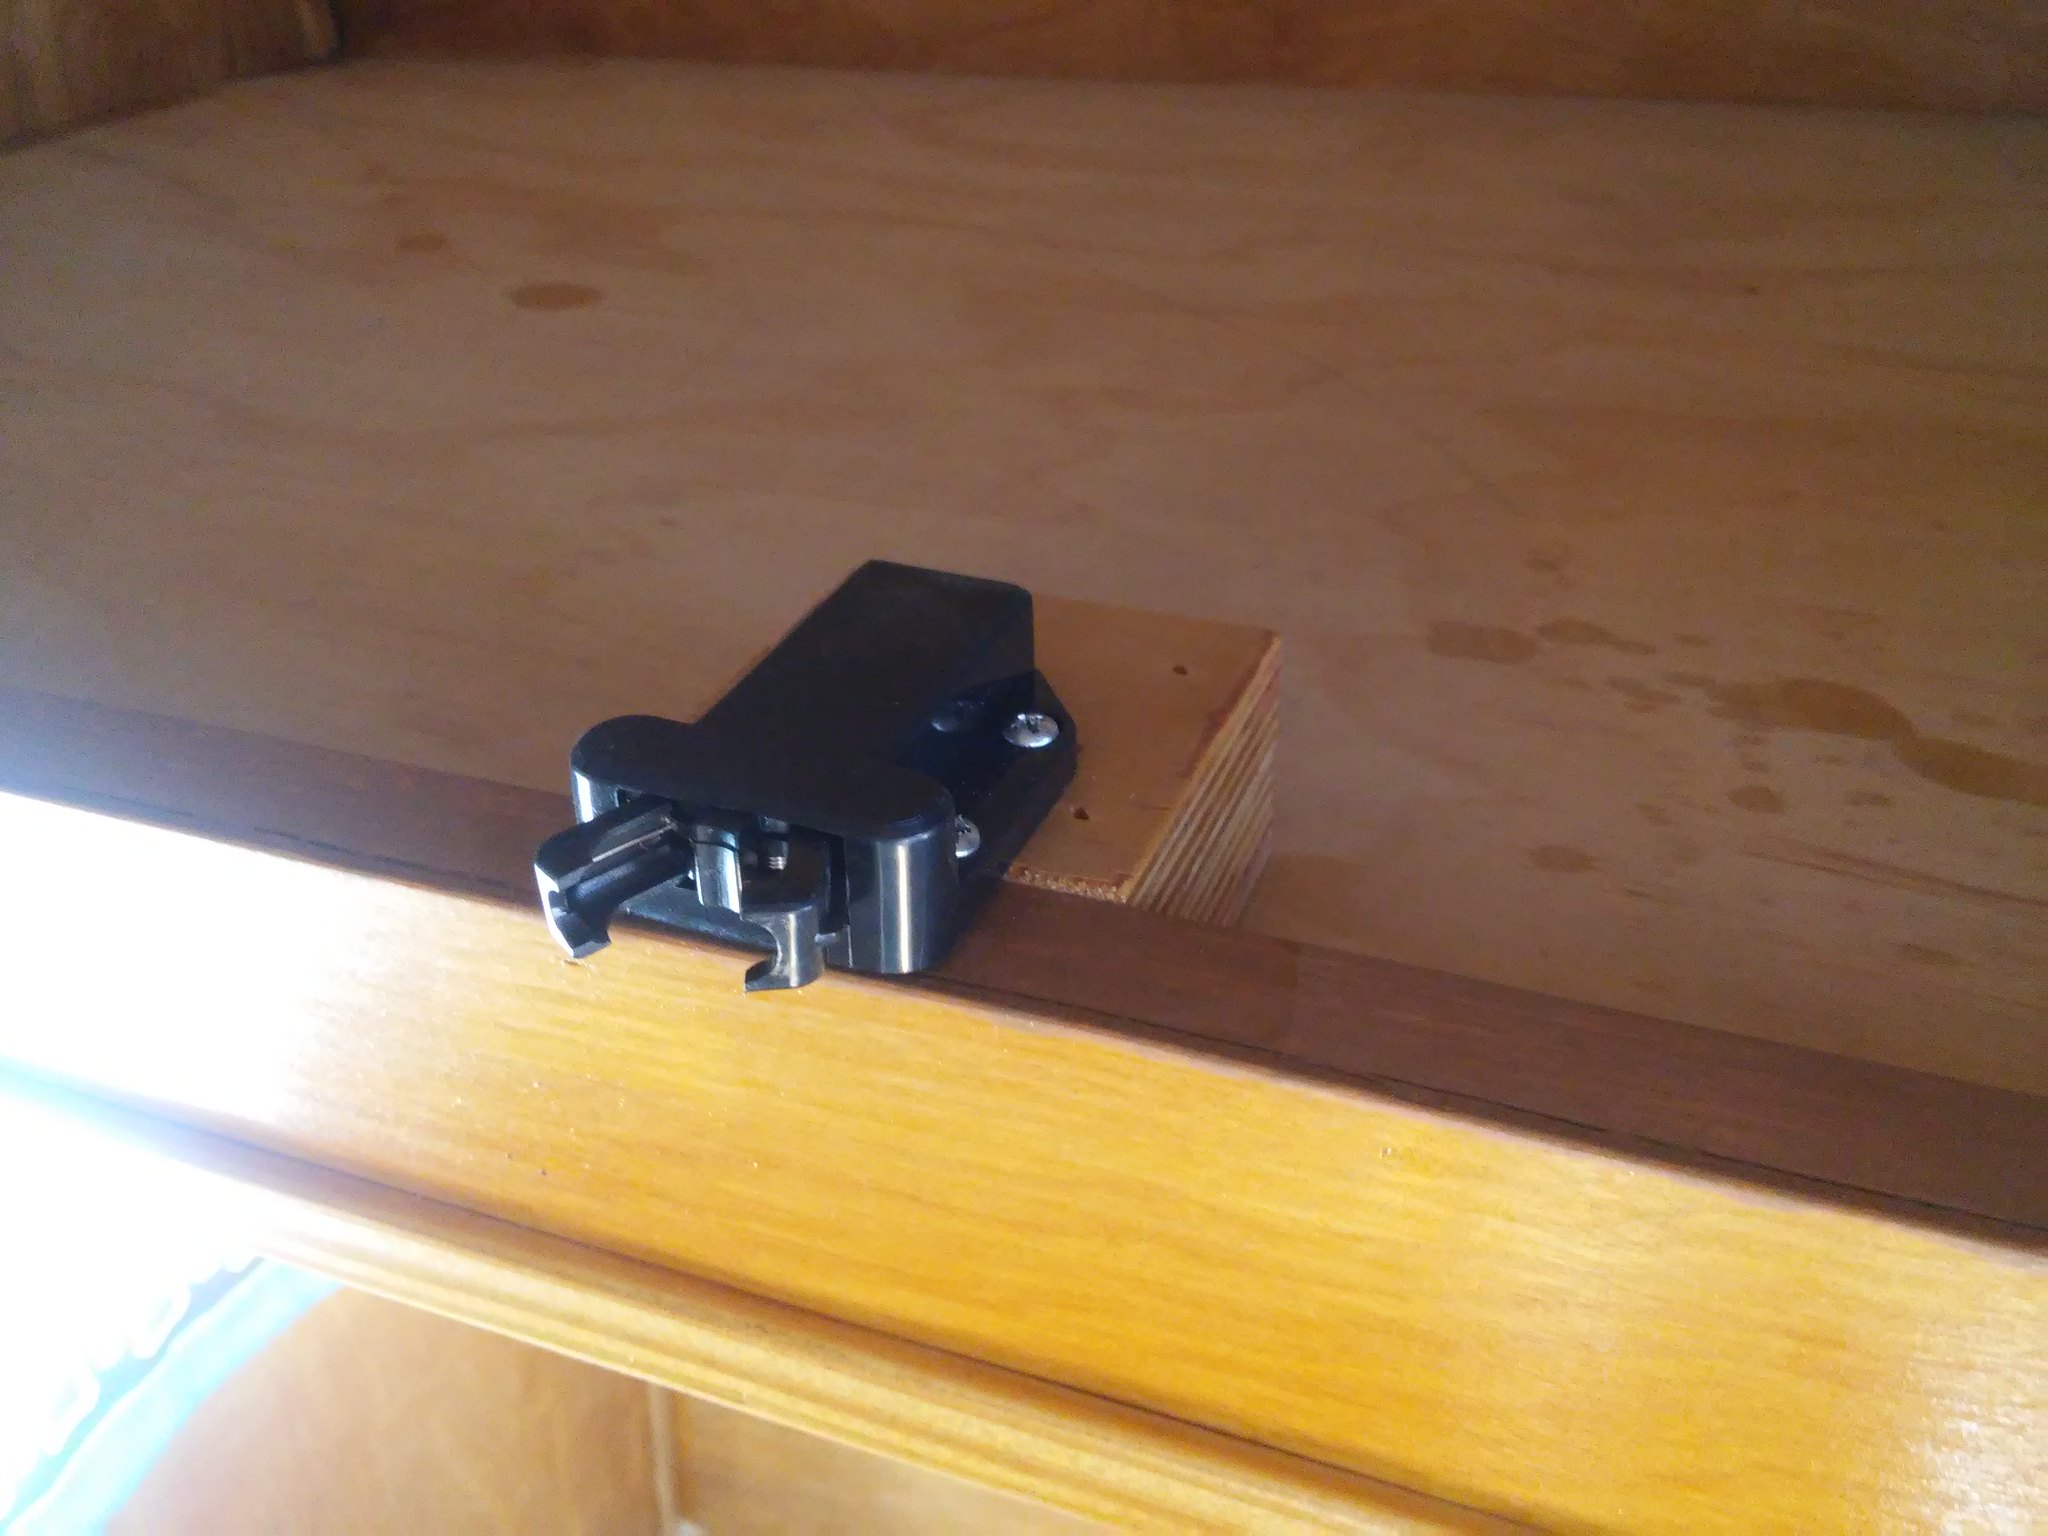 I also installed some "child-proof" catches in all the drawers. Hoping to keep the drawers from flying open while traveling. 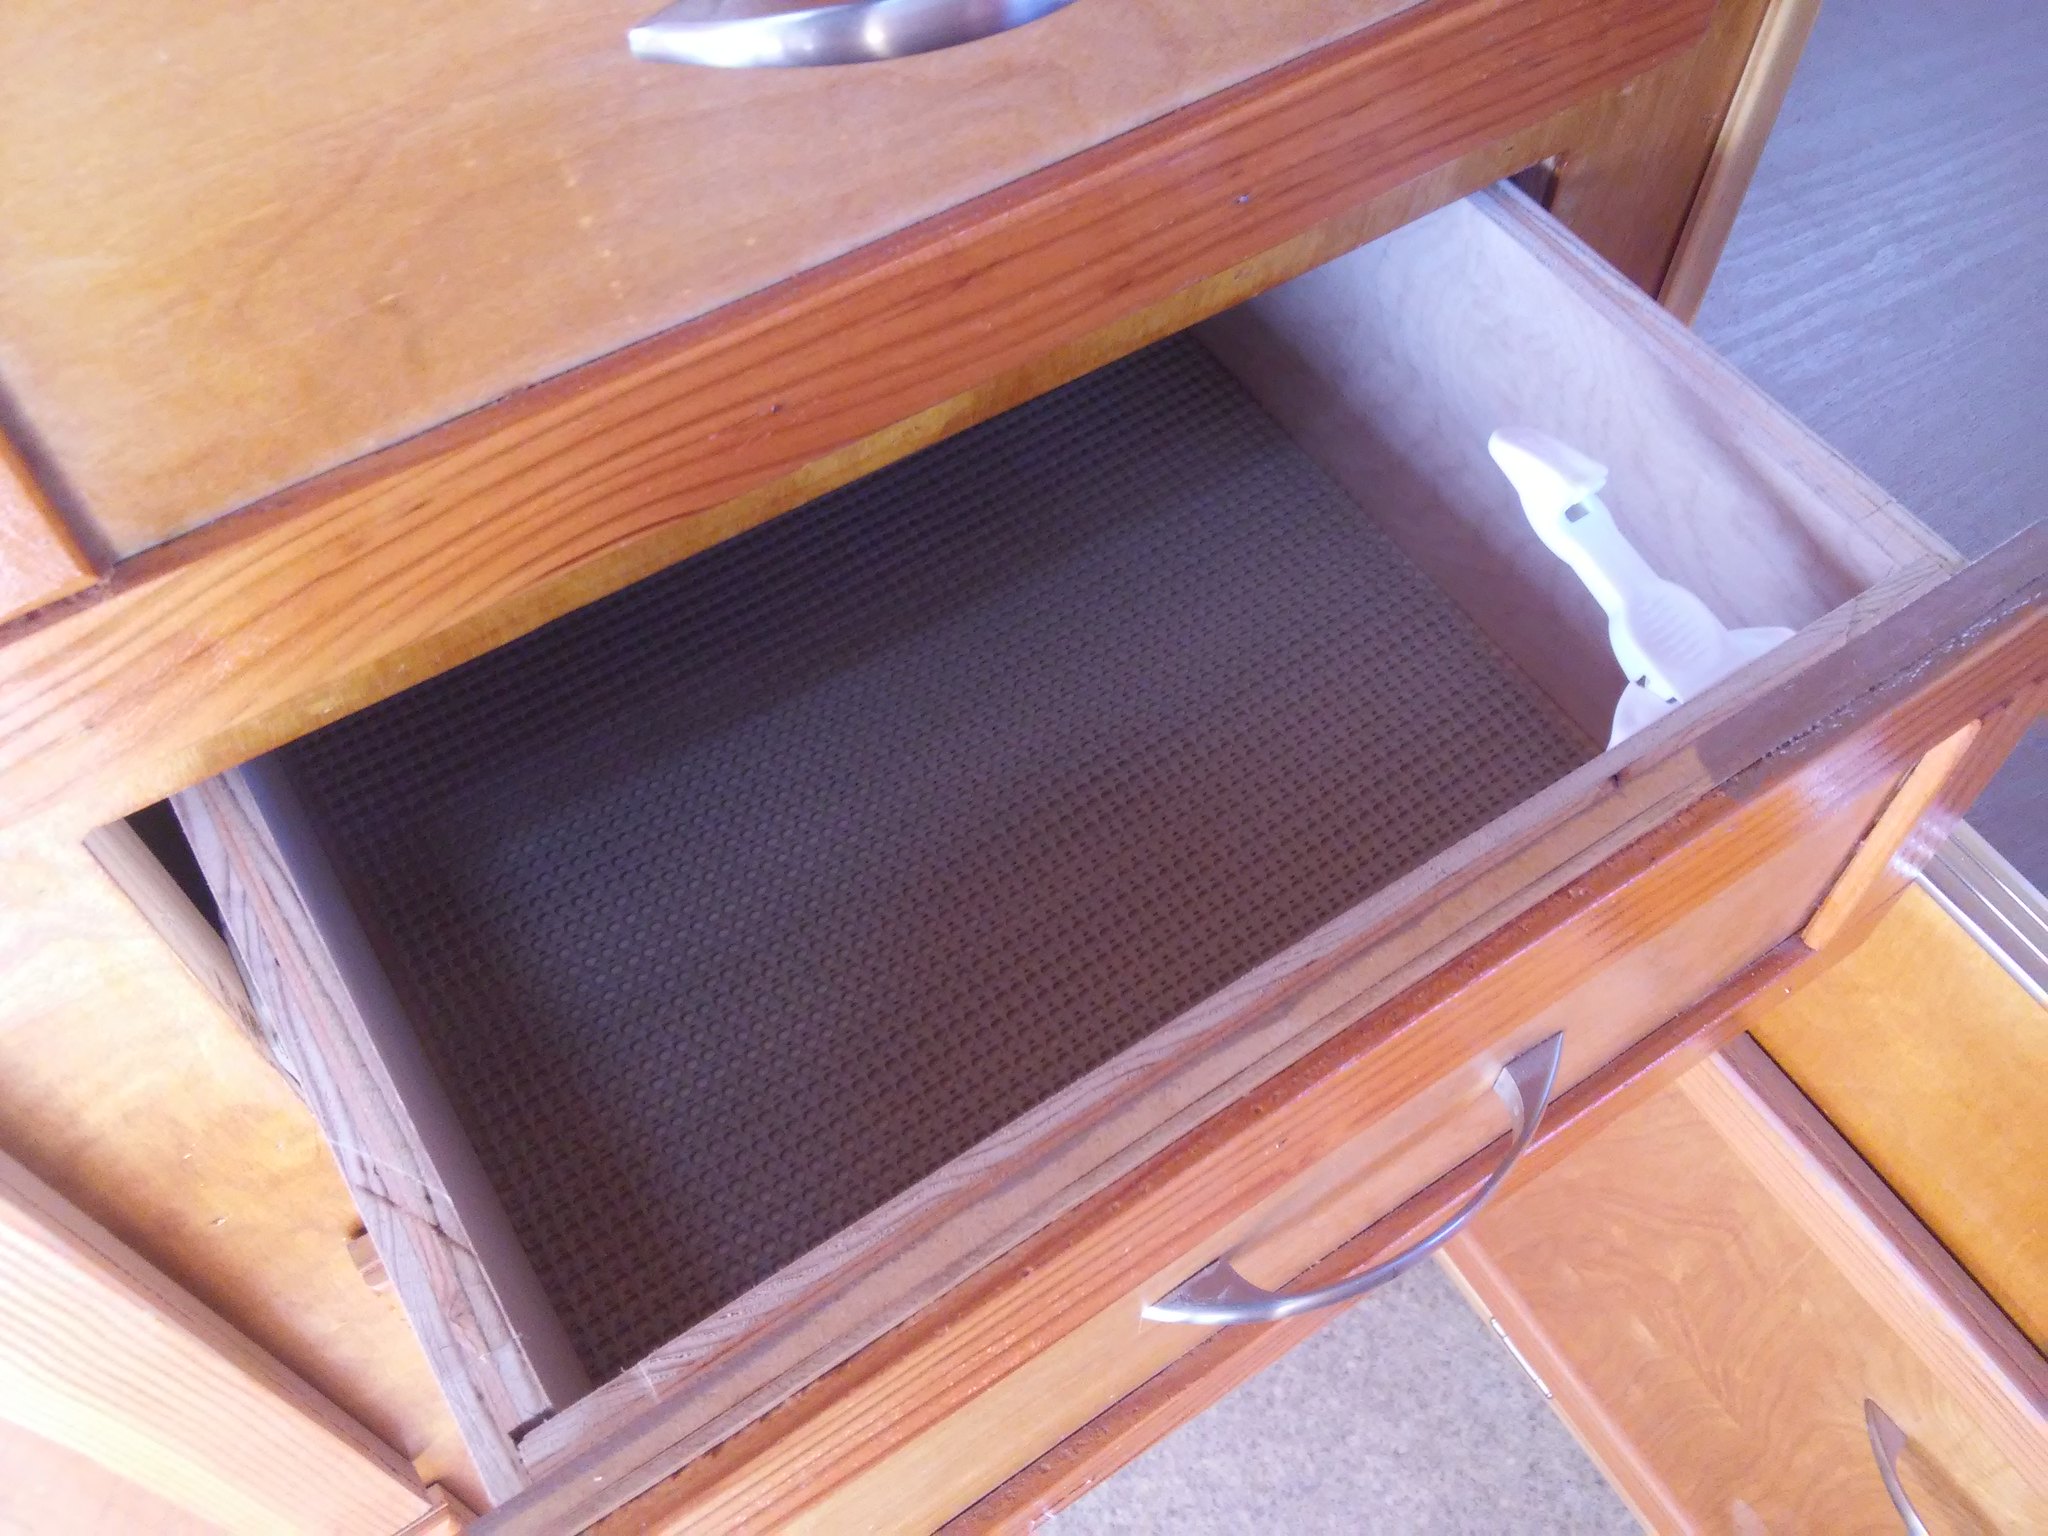 When latched they open about 3/4" is all. I just have to remember they're on as I tend to want to yank the drawer open.  I also came across this very good chart for checking your battery "State of Charge". I found this very useful and thought others might benefit.  Getting ready for another camping trip this coming weekend. I'll be sure to post pictures. |
|
strange1
Active Member
Posts: 159
Likes: 103
1965 Shasta Airflyte
Currently Offline
|
Post by strange1 on May 4, 2018 8:53:15 GMT -8
I built and installed a little spice rack. I am the accessorizer...love accessories! 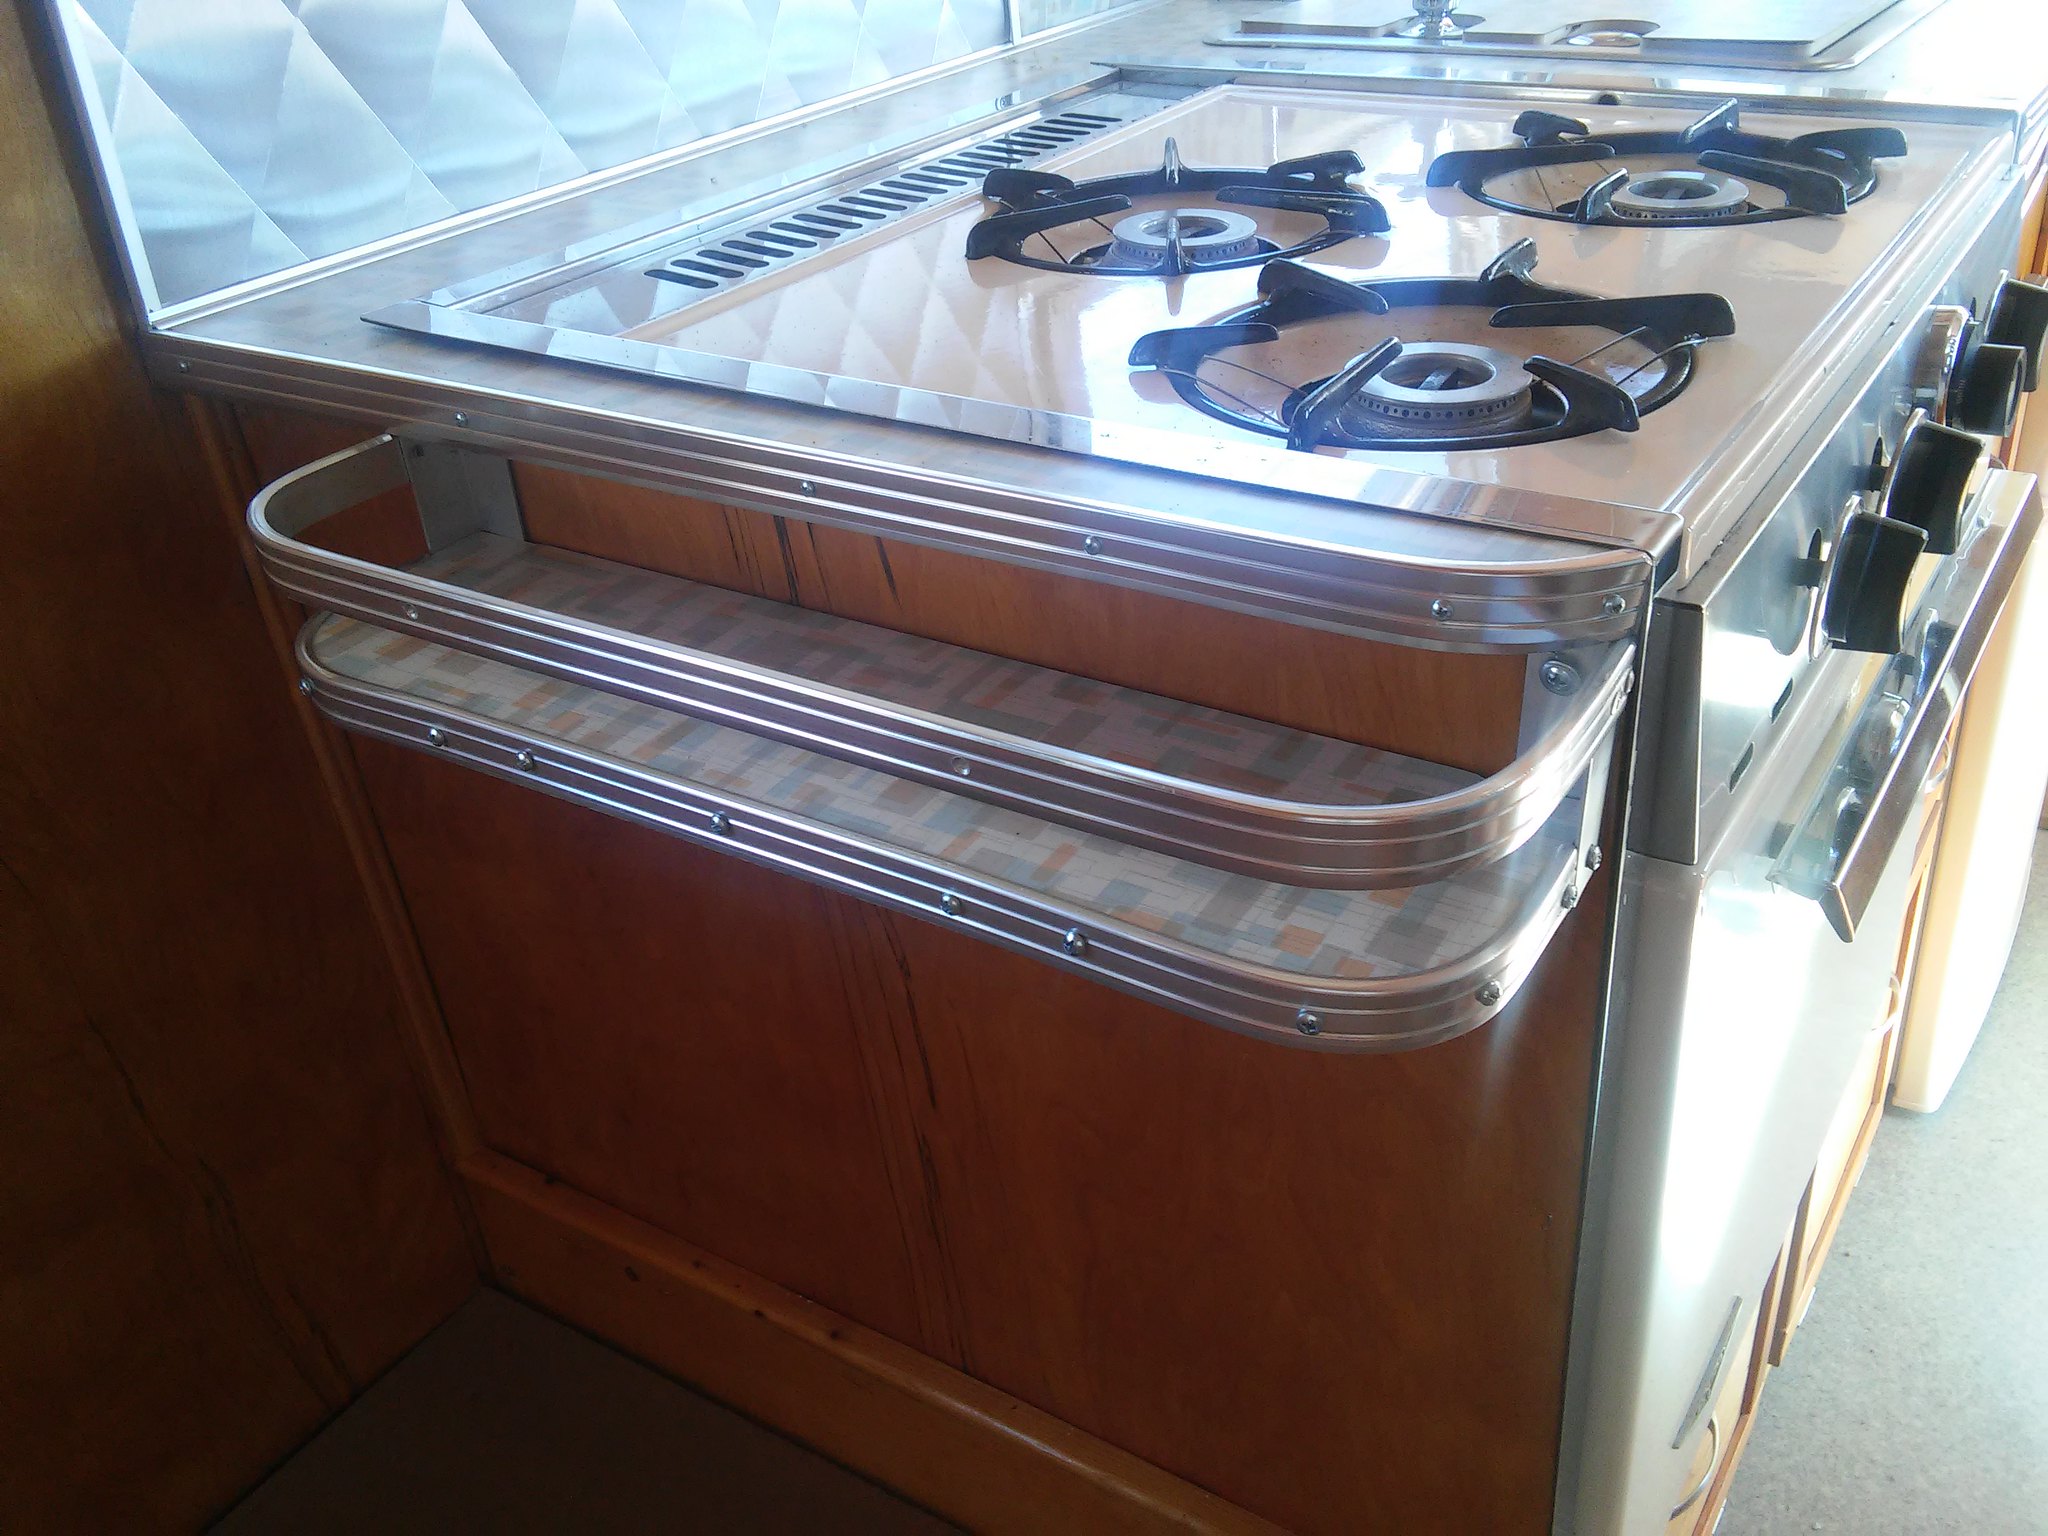 I've got a few other little doo-dads I've still got to get in before my next outing next weekend. It takes the first trip to figure what is still needed! I have purchased new gas lamp mantles. Let's see if they will burn brighter than the coleman ones I used first time out. I've also got a chrome retro paper towel holder to install, leveling bubbles, a very cool orange retro design wall clock and drawer latches. We hate having to take the drawers out while traveling. Hopefully these latches will keep them closed while in transit. Always something to tweek or do! |
|
strange1
Active Member
Posts: 159
Likes: 103
1965 Shasta Airflyte
Currently Offline
|
Post by strange1 on Apr 26, 2018 9:16:34 GMT -8
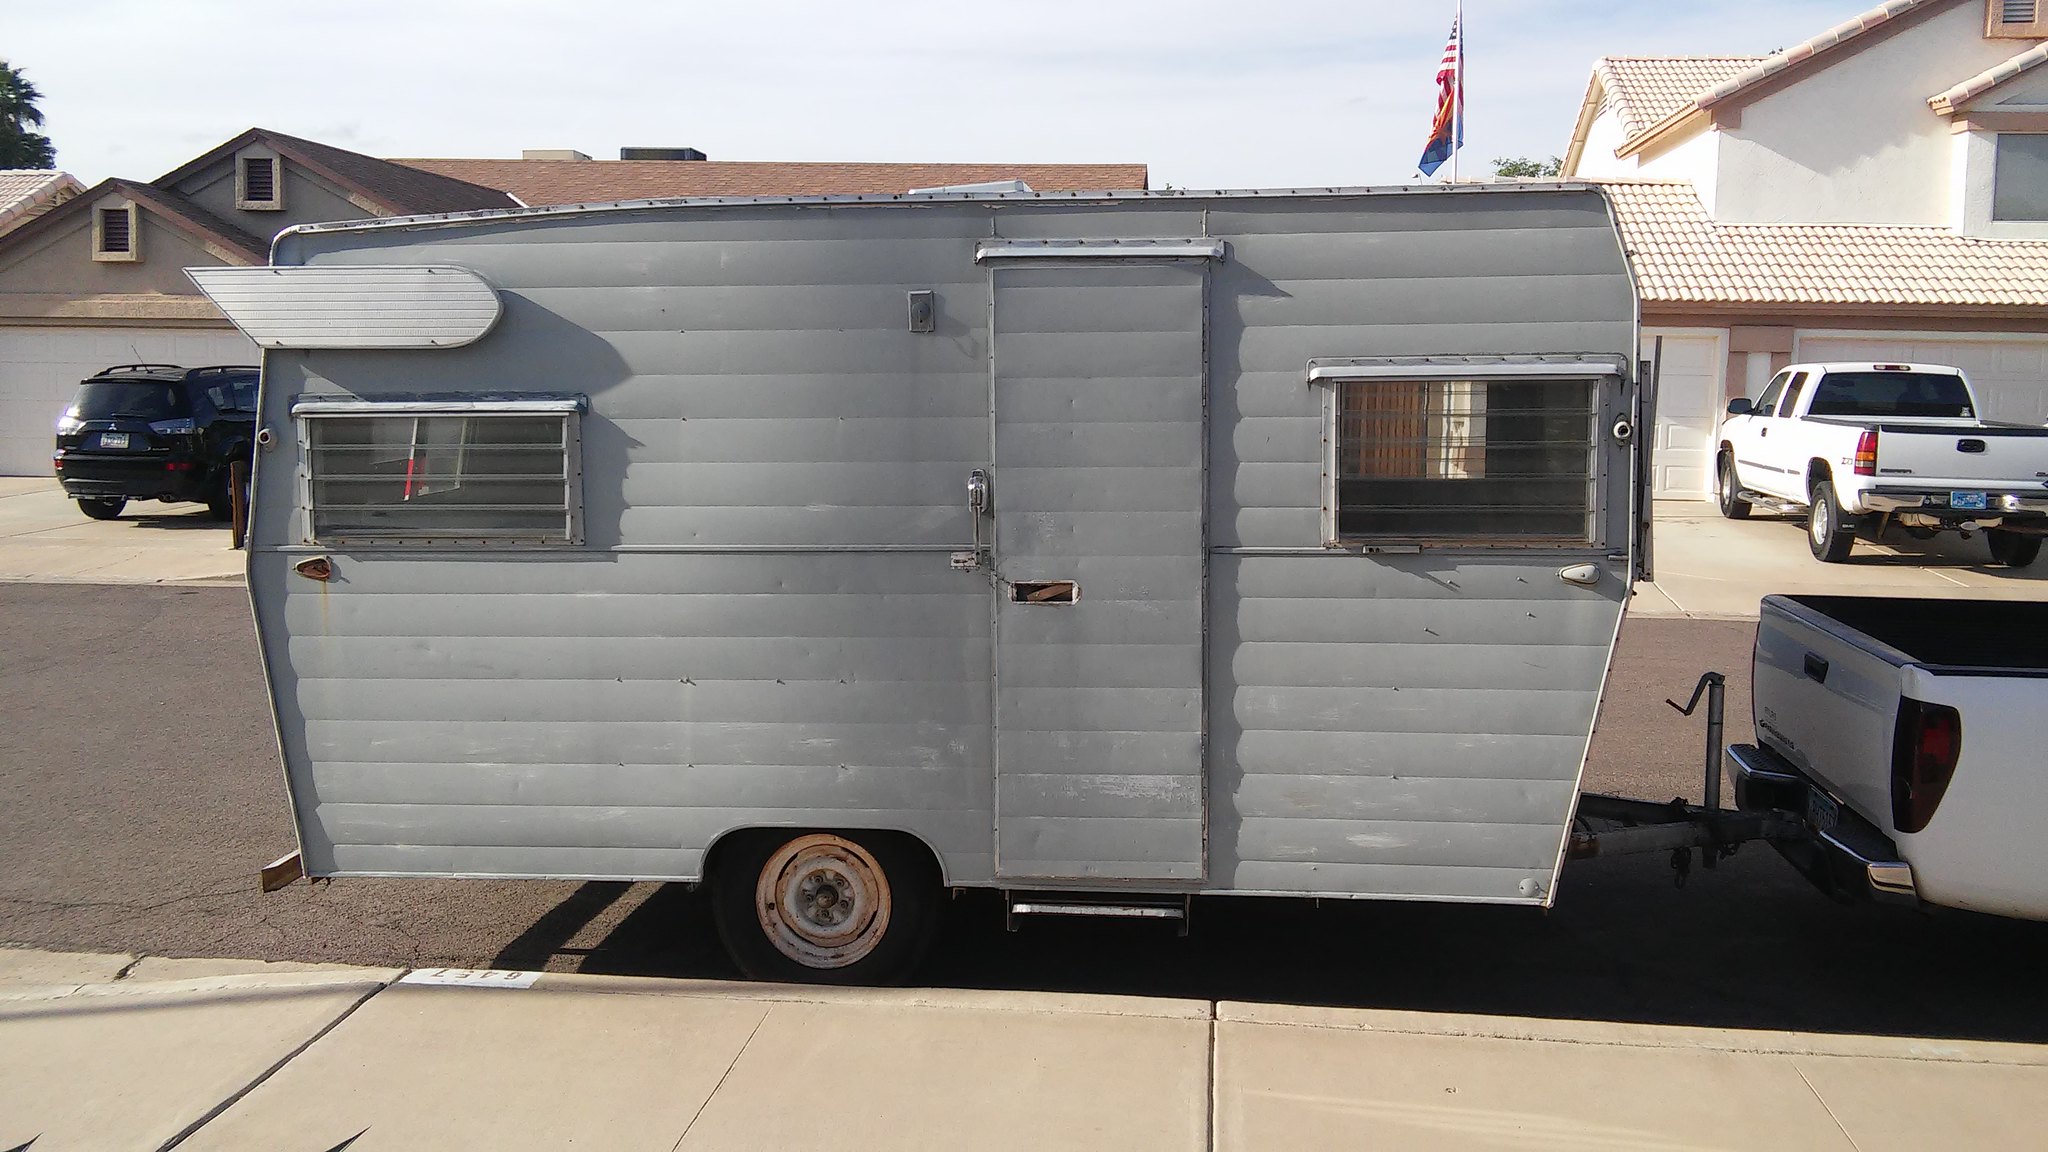
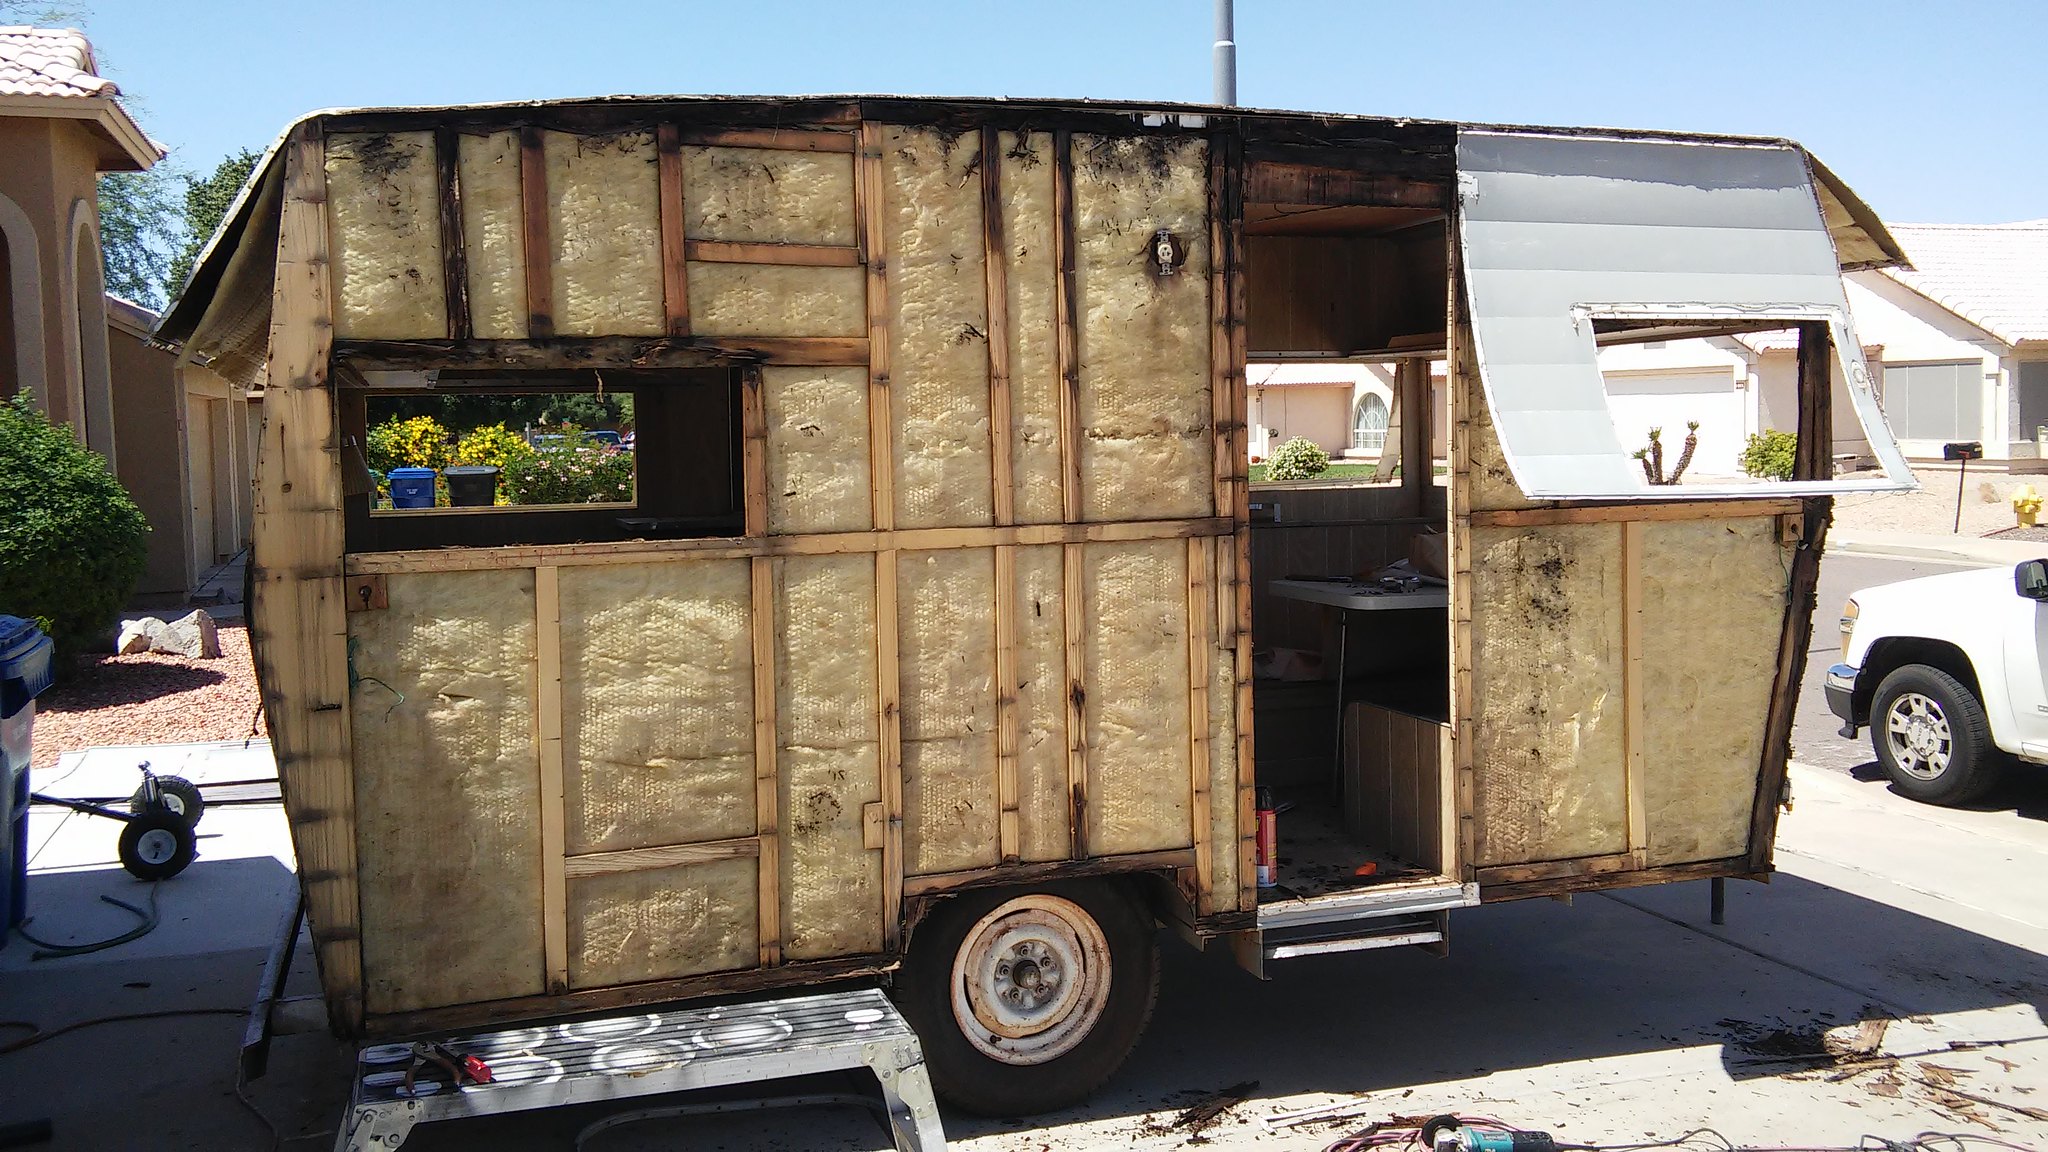
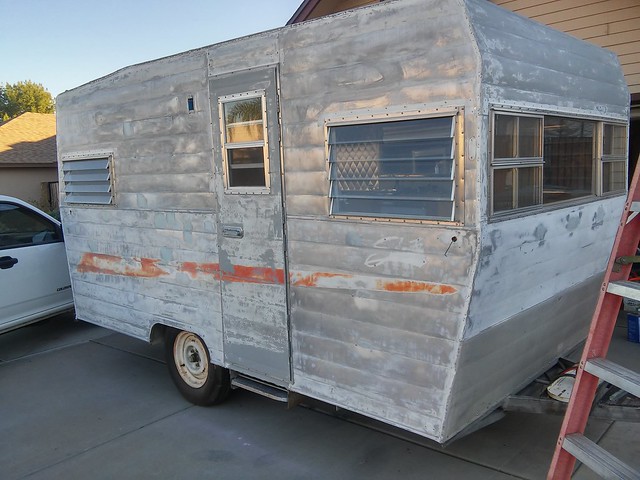
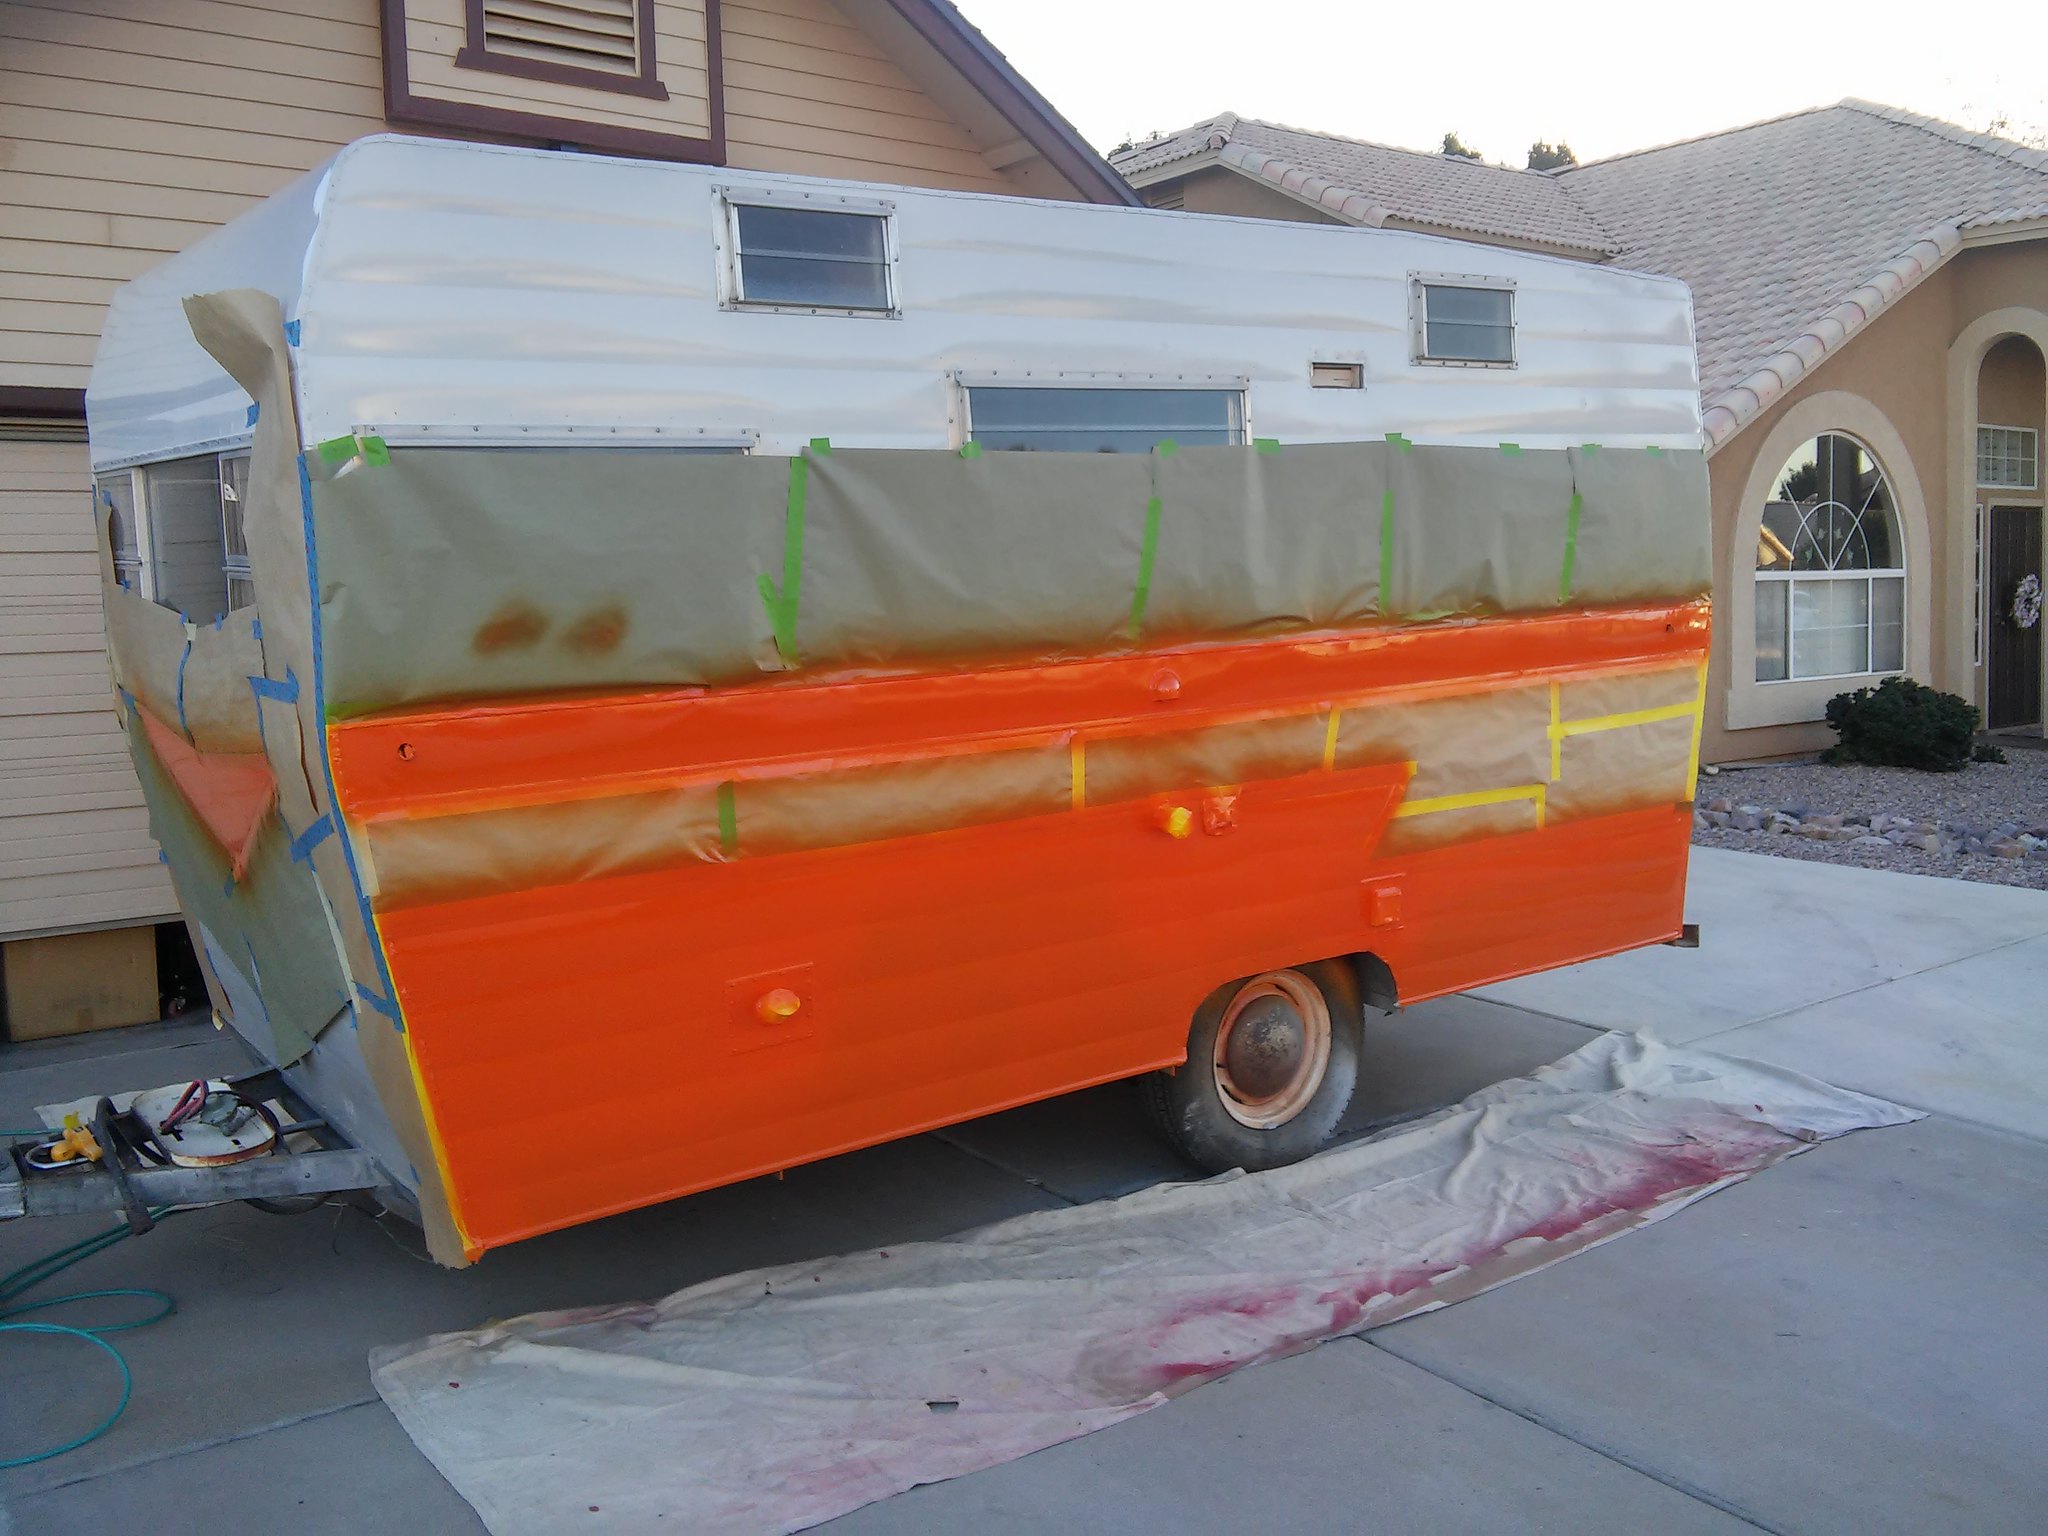
I agree with vikx. If you can rebuild your original door you'll be light years ahead. Mine was completely rotted (bottom 1/2) and I found the disassembly pretty straight forward using basic tools. I was able to remove the old wood and cardboard webbing / guts and replace with new wood and rigid foam insulation. Took the better part of one day. 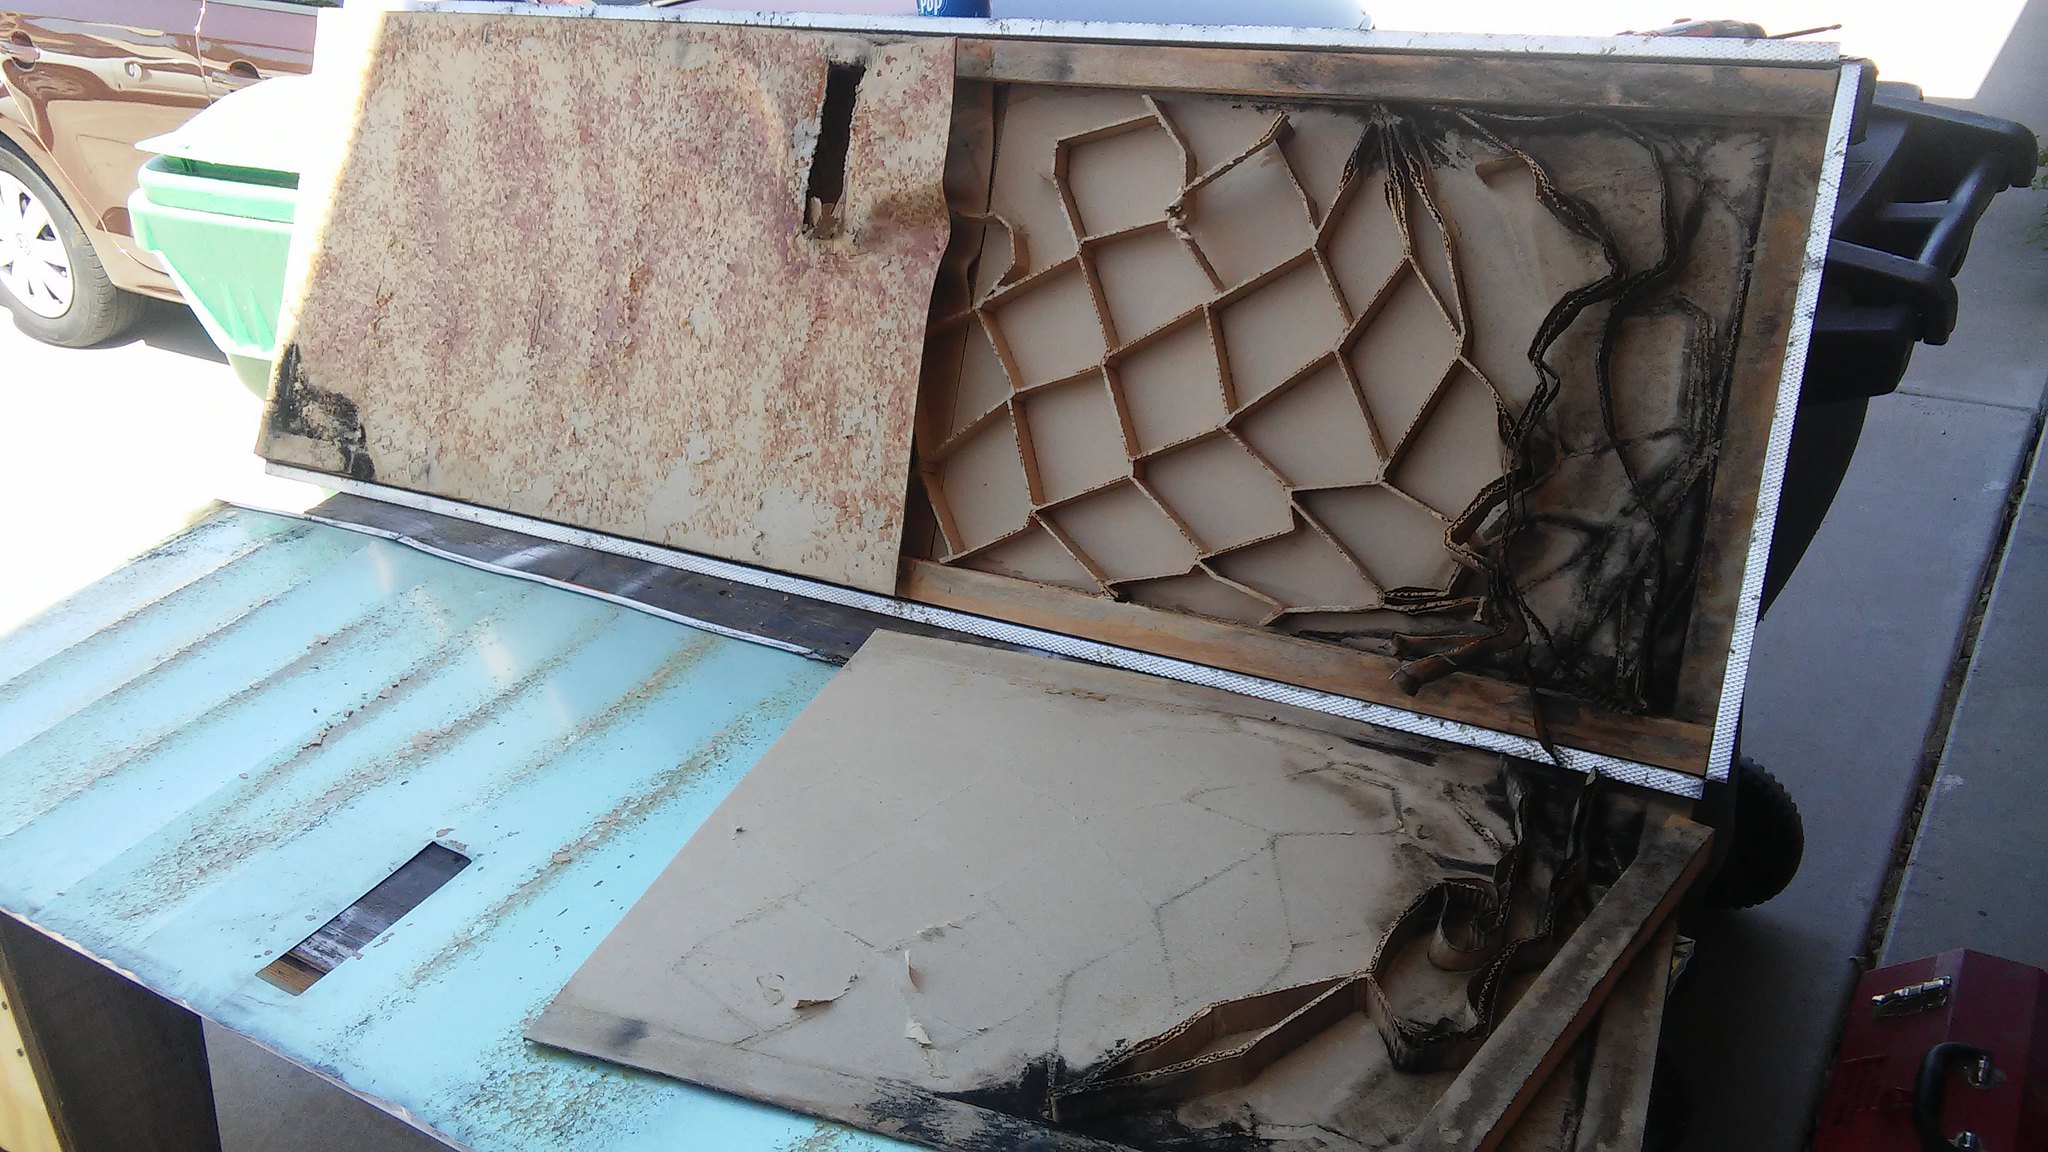 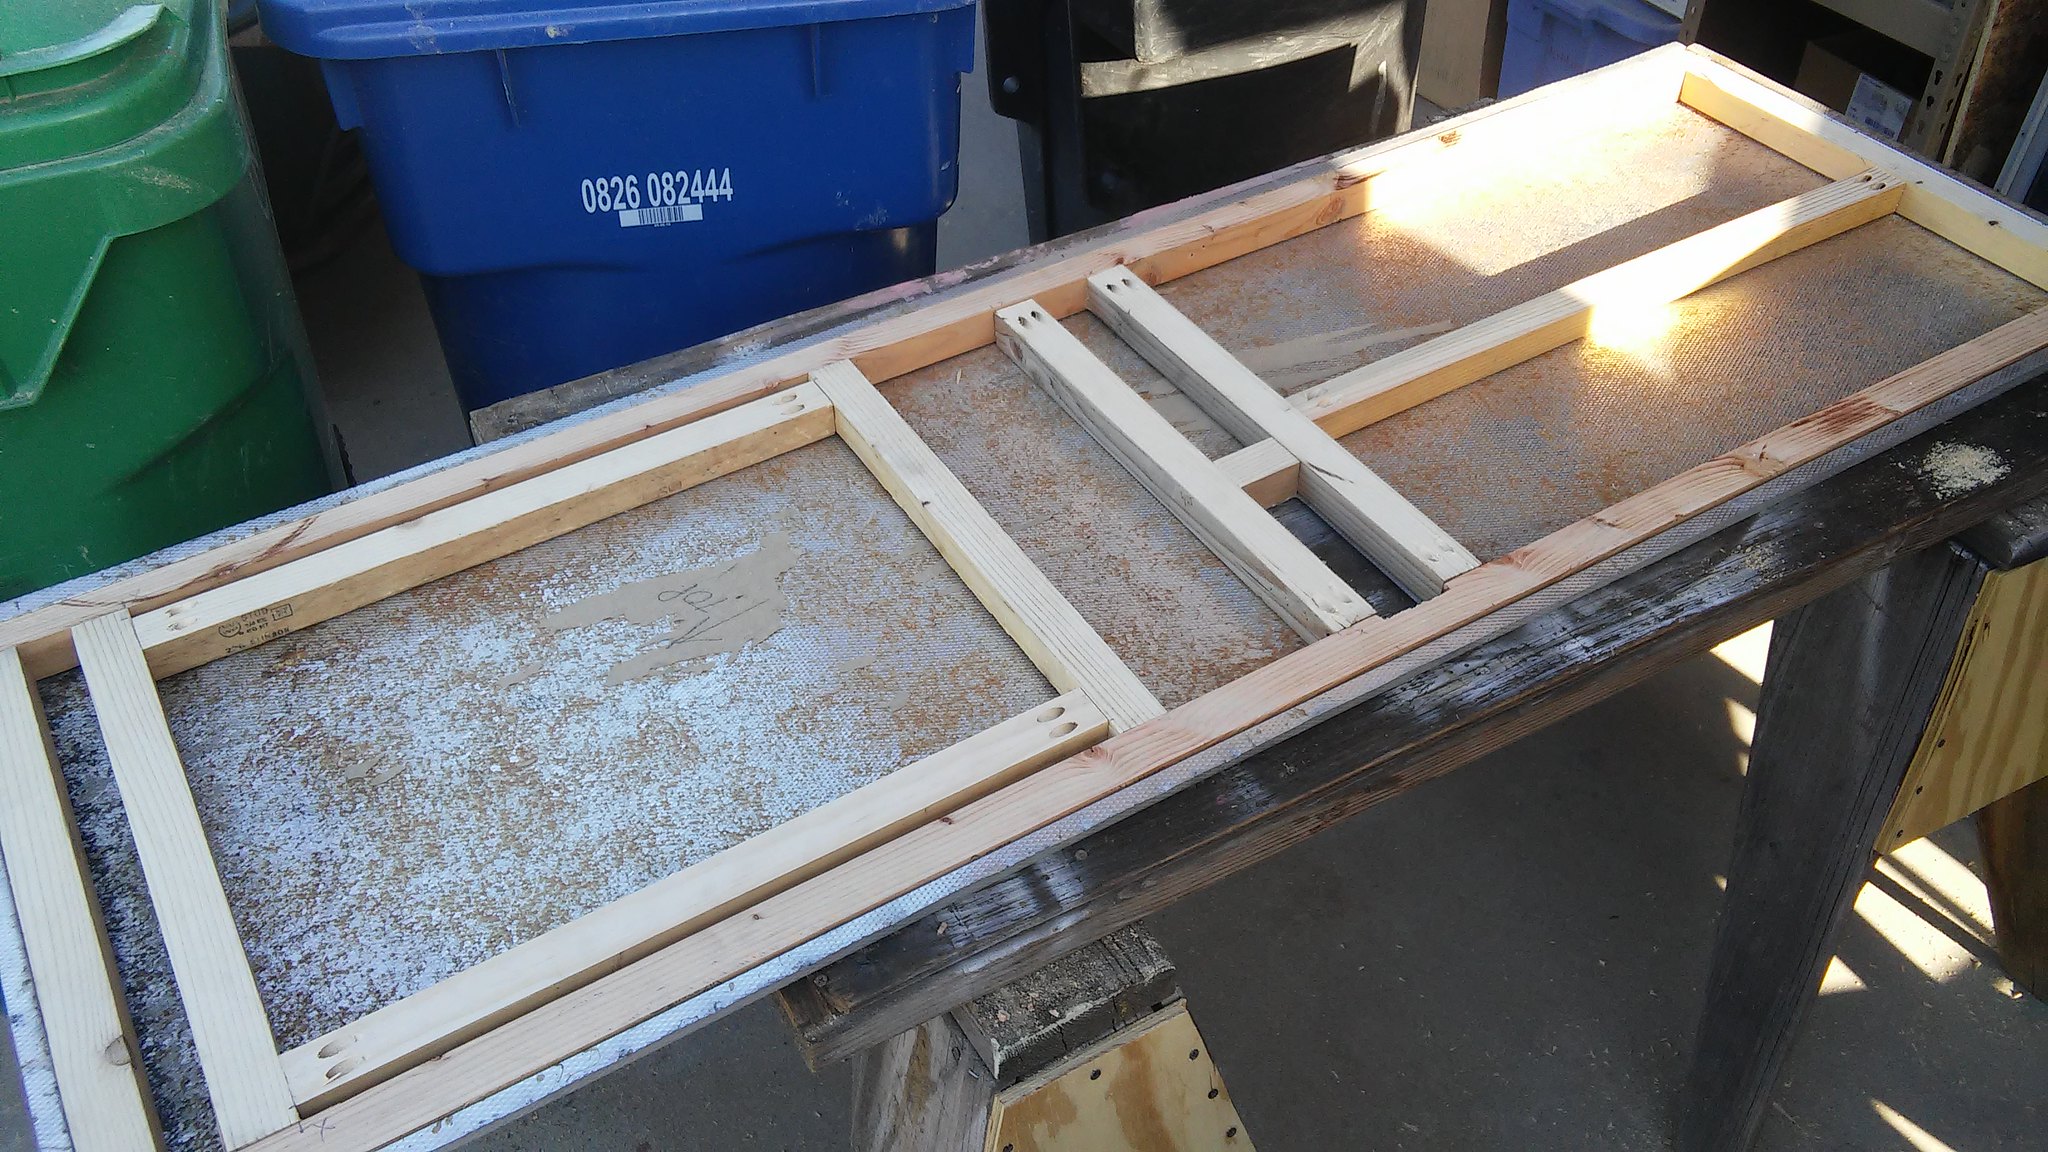 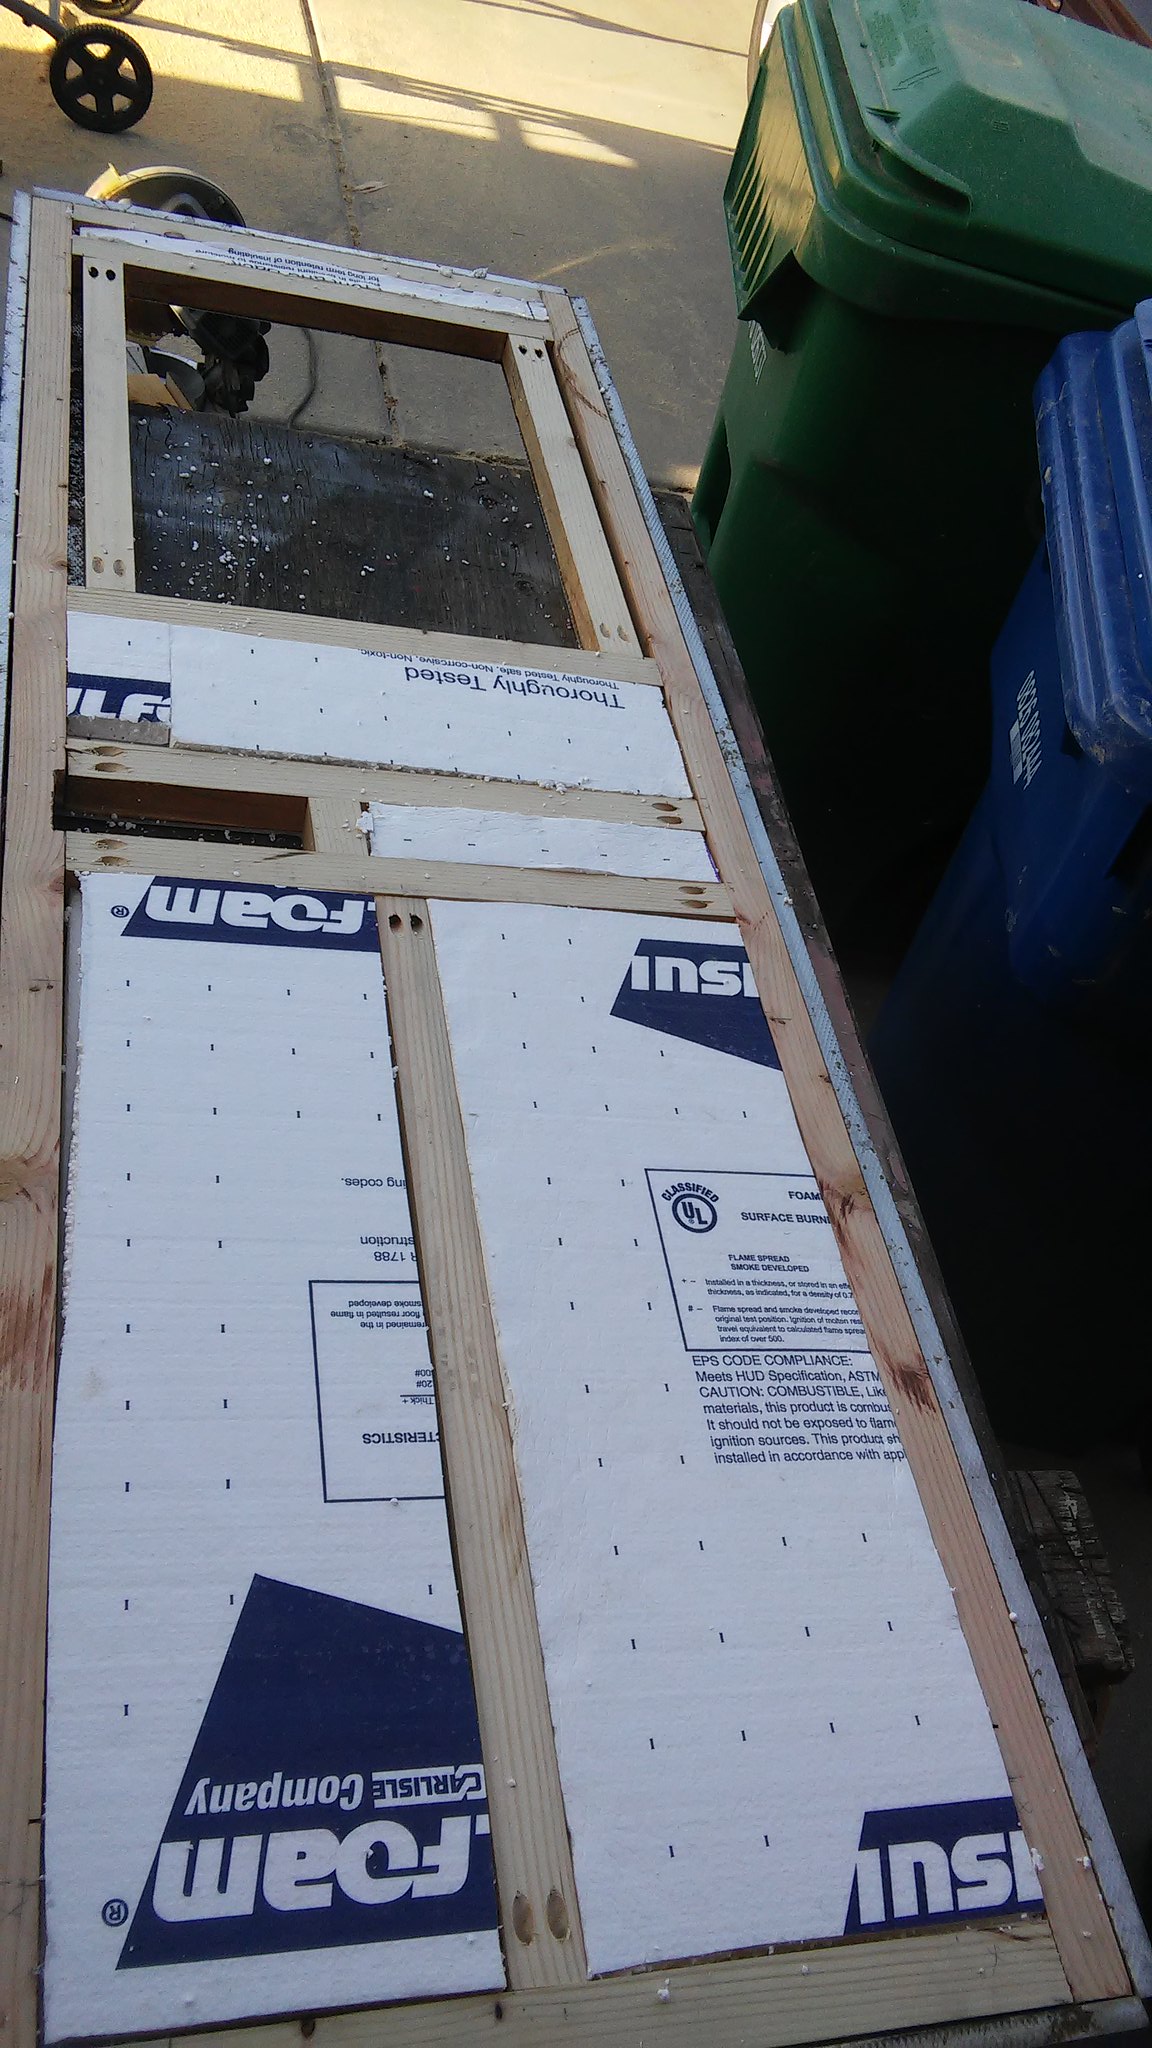 I'm sure my door is a little heaver because of the extra framing...but nothing like a steel door. Good luck. |
|