DaytonaGTS
Junior Member

Posts: 65 
Likes: 22
Currently Offline
|
Post by DaytonaGTS on Mar 23, 2018 12:14:23 GMT -8
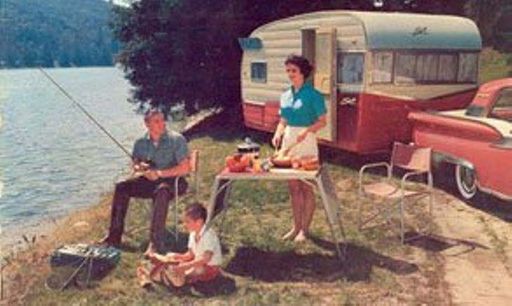
"Your Mission if you choose to accept it", Is to follow us on this journey. We are calling this "Mission Impossible" because we have less than 90 days to complete this project. Most have said we are crazy and even experienced vintage trailer restorers said there is no way. The one thing we have going for us is that we are doing a frame up rebuild and that is easier and quicker than doing it piece meal. The thread here in restorations and stories will be the most frequently updated post we will have but the Blog will be the most detailed by far. When we get it up I will add a link so it is easily found for those that are interested. You can get caught up with our introduction from an earlier post --> Intro and our journey to the '58 DeVilleThis is a walk around look at our 1958 Catolac DeVille Legionnaire vintage travel trailer just as we started our frame off restoration. We will be both posting updates here and on our Blog that we are currently setting up and putting together in our "free" time (there isn't much...lol) And I will be doing Vlog's as I can and posting them on my Youtube channel Ronnie's Record Room, you can subscribe to get notifications of my new updates if you like. Our restoration started about 2 weeks ago and we have done alot of work since then. We have removed almost all screws and nails from the exterior of the trailer. J drip rail is off, along with hours upon hours of scraping putty, caulk, silicone and other unidentified hard substances the PO's thought they would put into cracks and holes to try and get the leaks to stop. This is the first piece we removed after the many hours of removing sealer and screws. 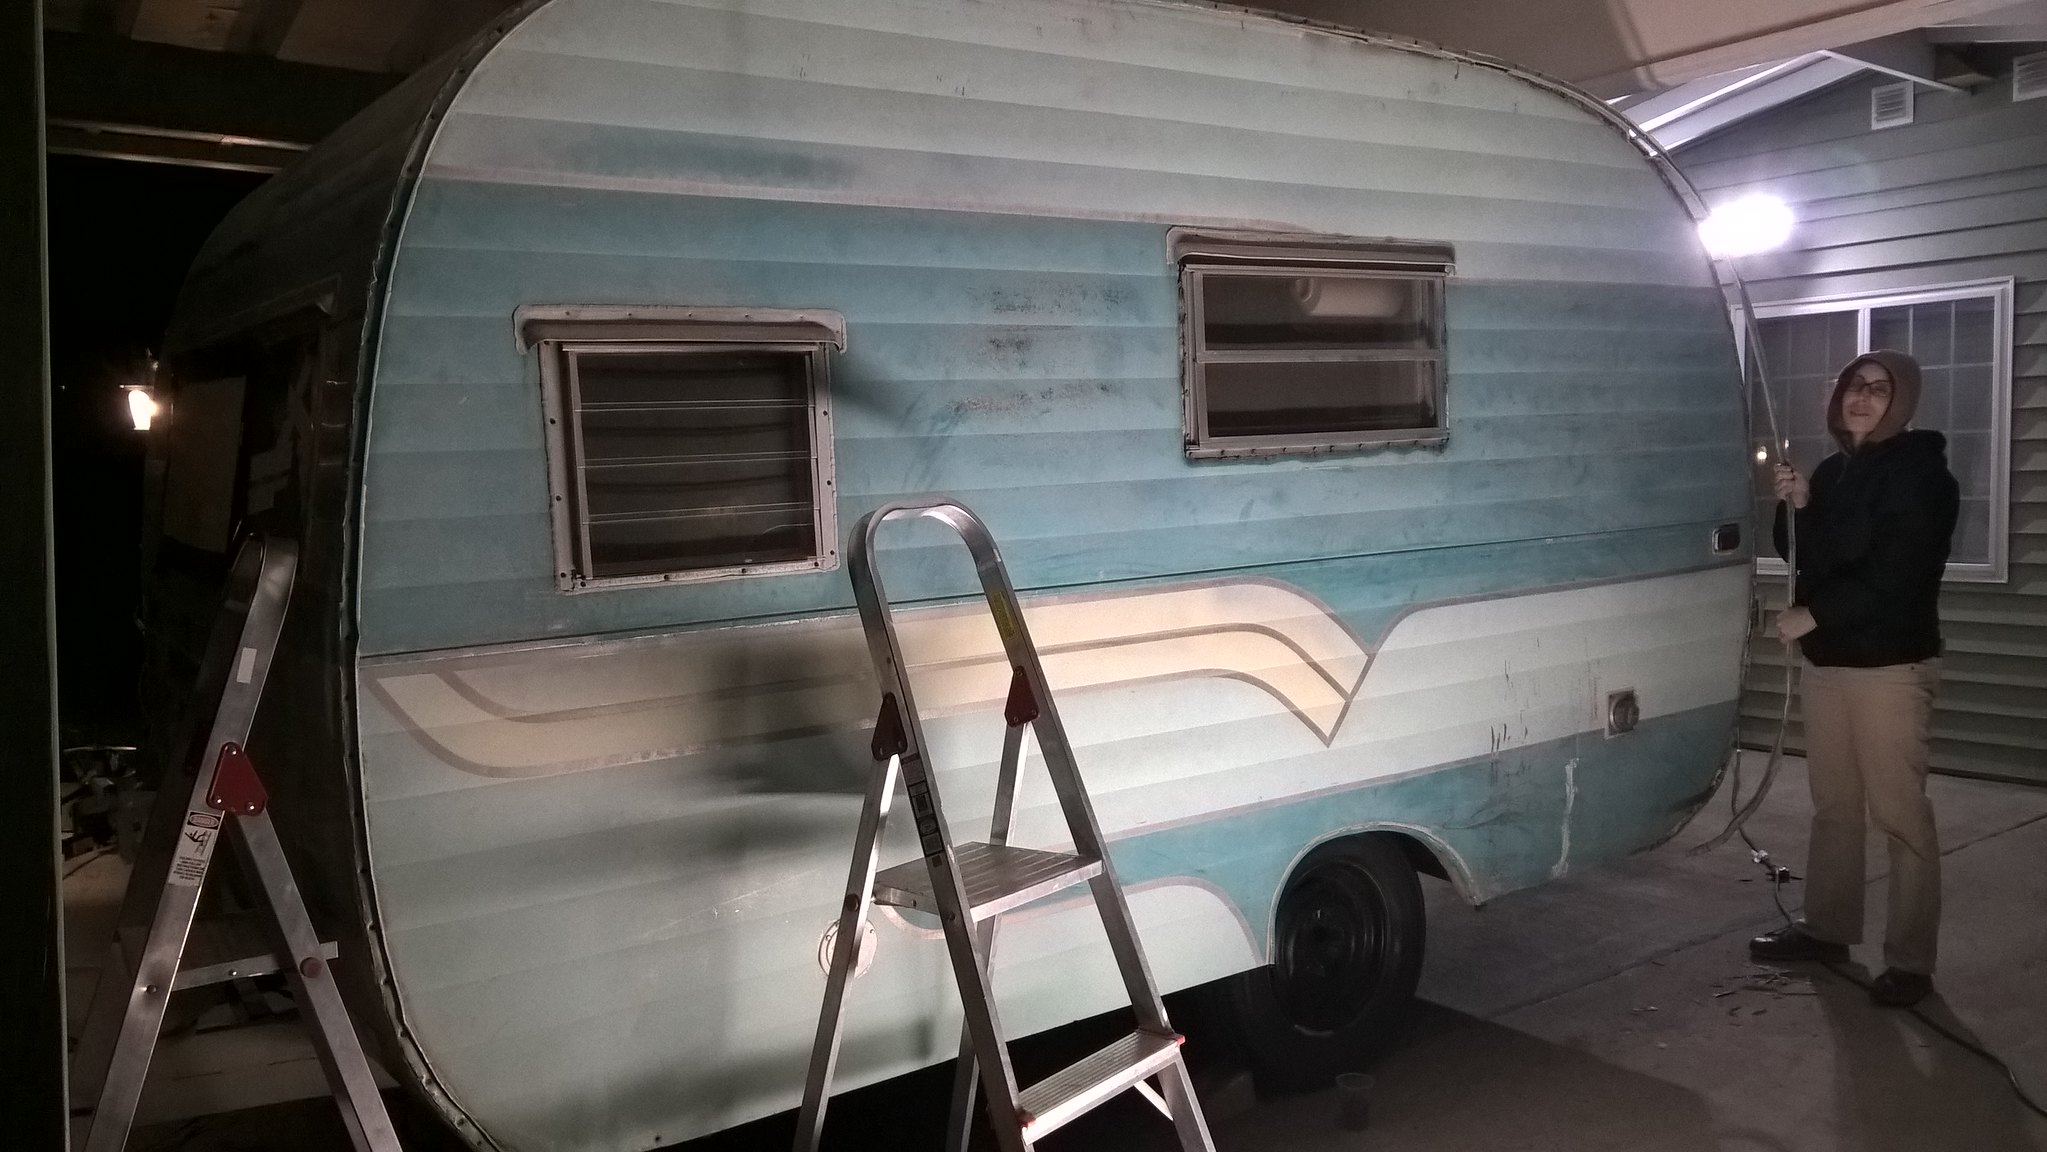 Can't wait to find out why this is here, too bad we will never know most all the stories that go along with the 60 years of history this old gent has! 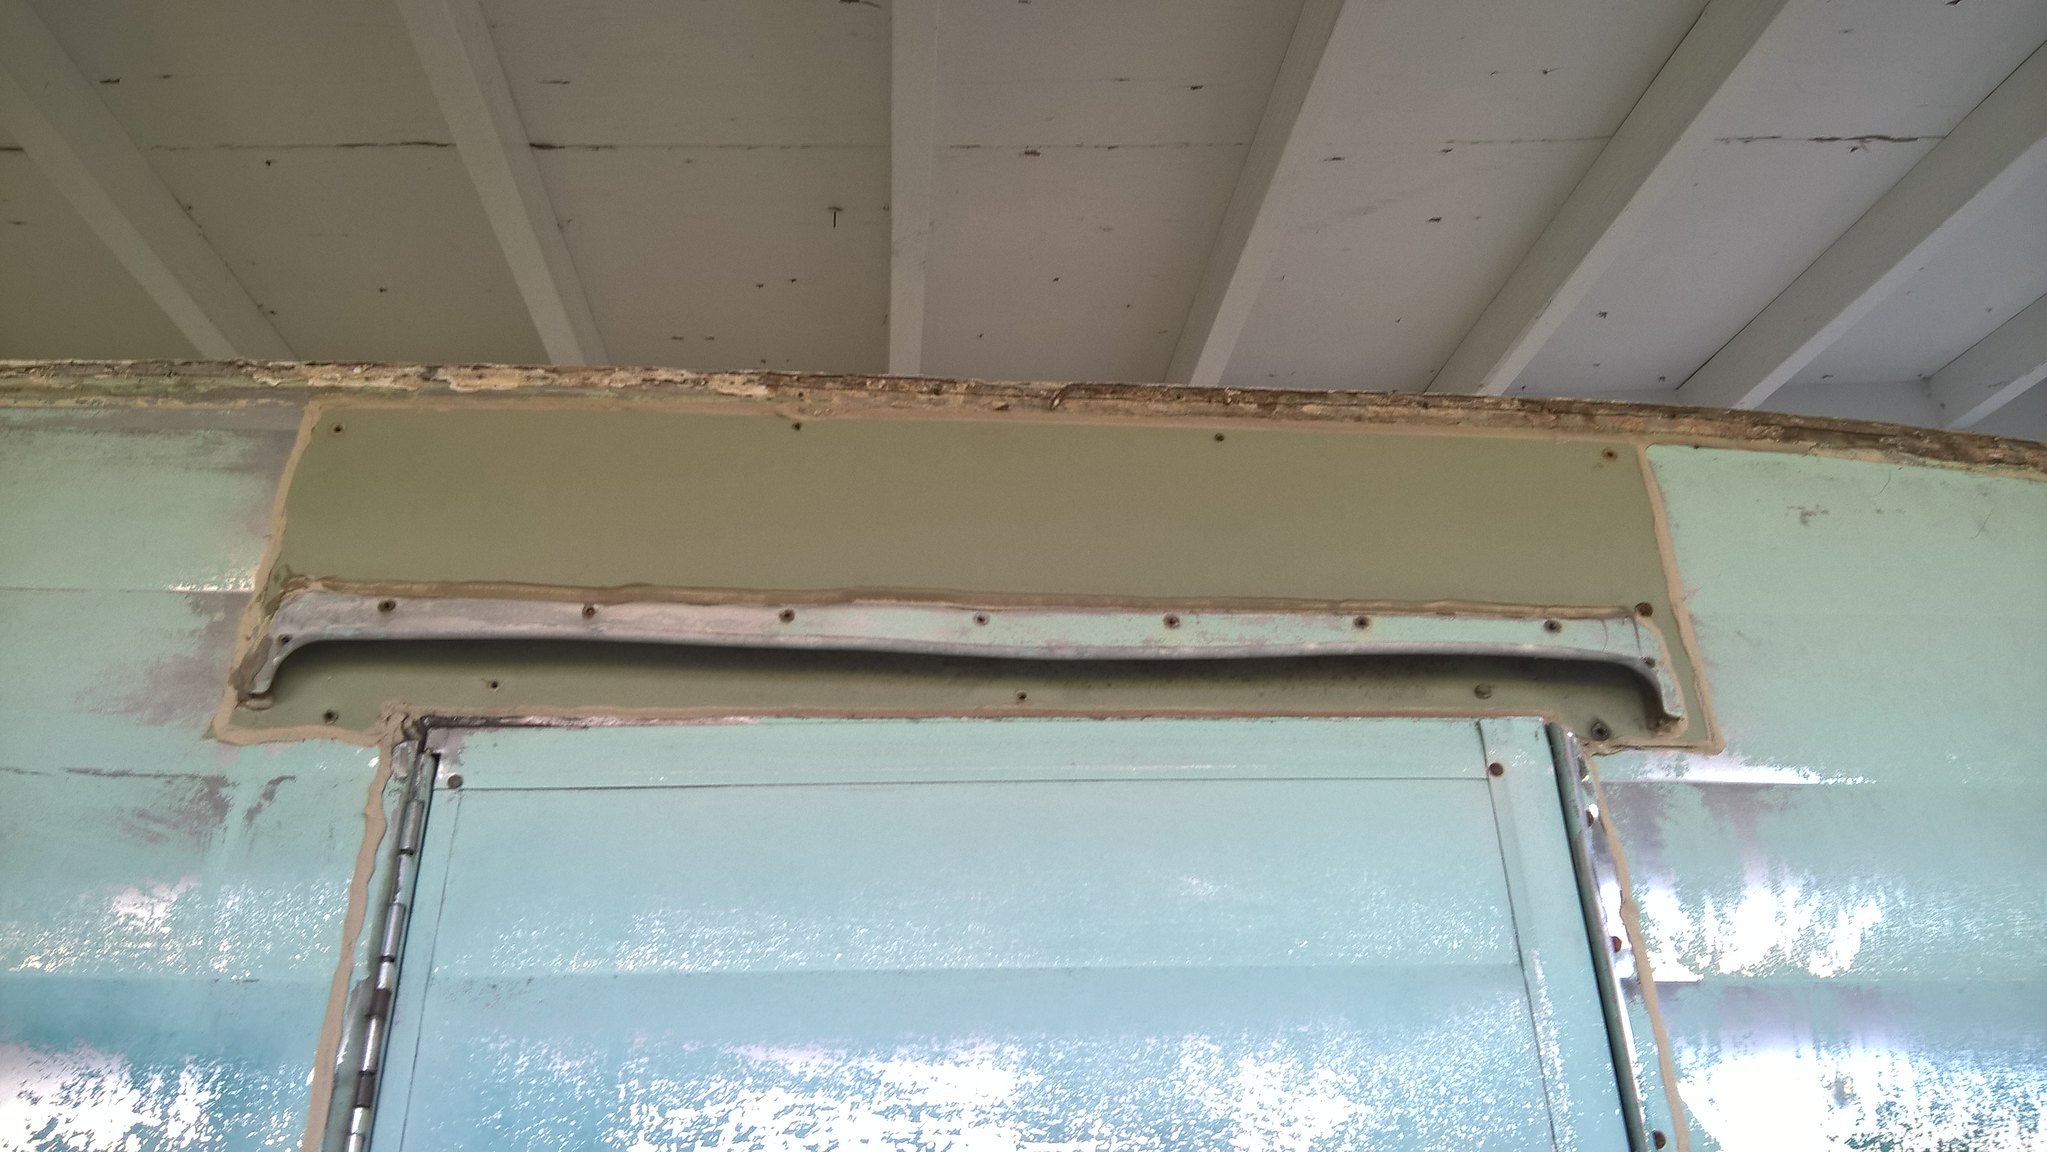 After removing the tail lights, you could see that the frame was pretty hacked up. 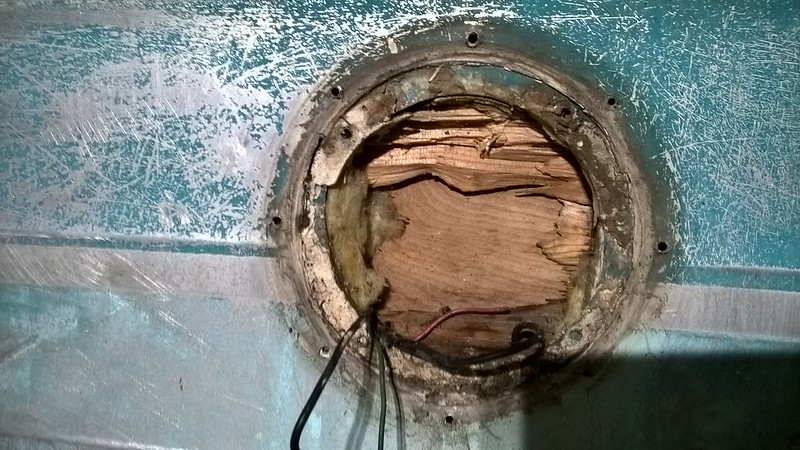 How many holes does it take to hold a side marker? I can see the round marks of what I believe to be from the original marker lights, but those are long gone. I may just replace these with some LED tear drops. 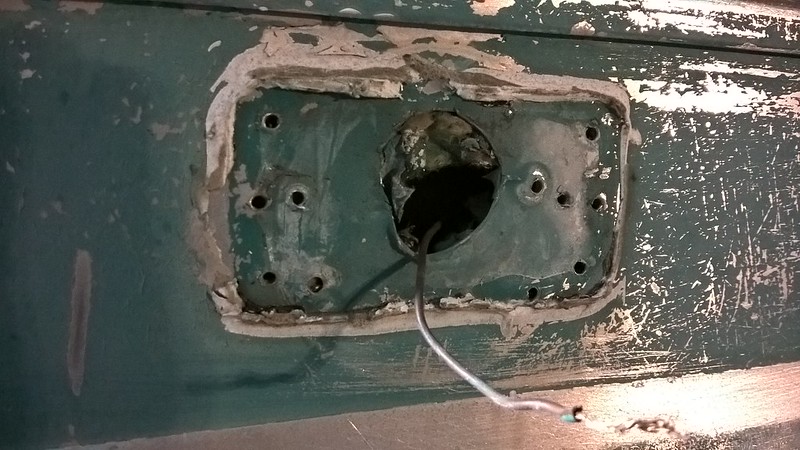 The back window was a real bear to remove, for one it wasn't the original and it was pretty wedged into the hole. We had to use a couple prybars to coax it out. Notice how much longer an eyebrow was put on than was needed? 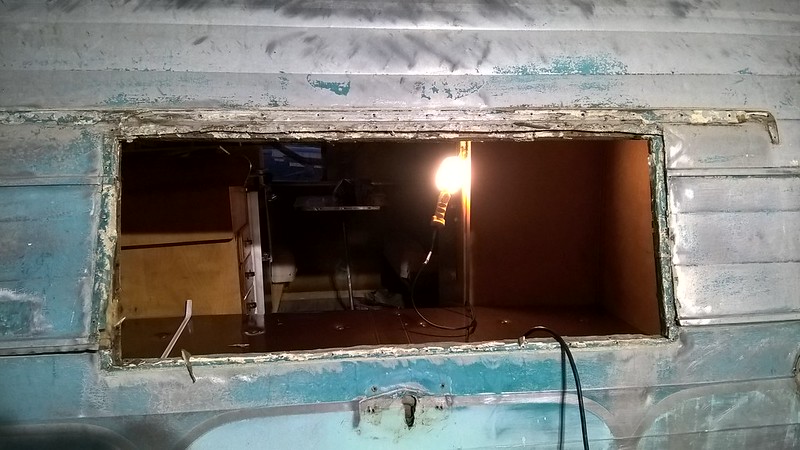 Our first piece of skin off!!! In all reality we could tell this had probably been off or at least peeled back before. A little worse for wear.  The boys helping clean up the trash! 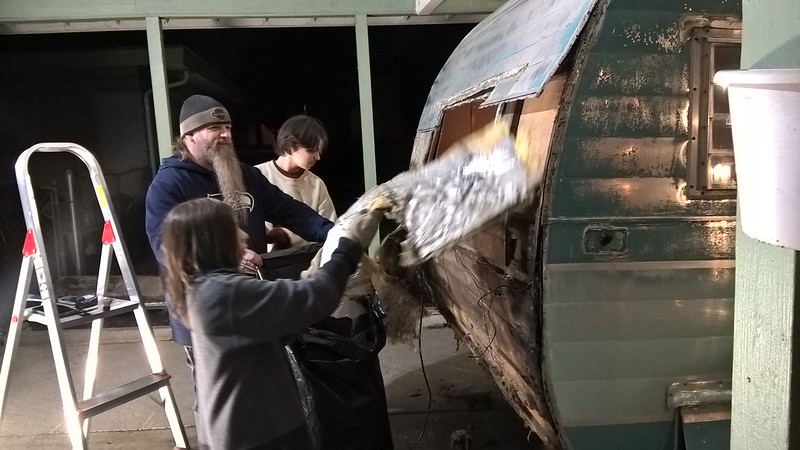 A nice little Wasp's nest we found!!! 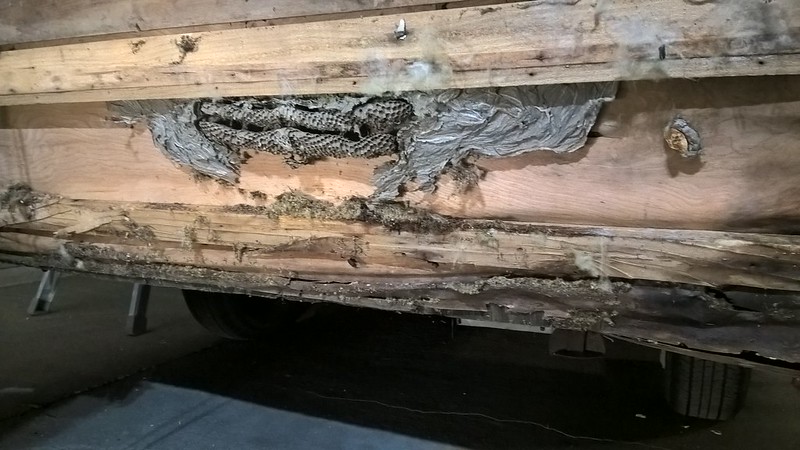 Our first real look at the damage that needs repaired, honestly this came as no surprise. 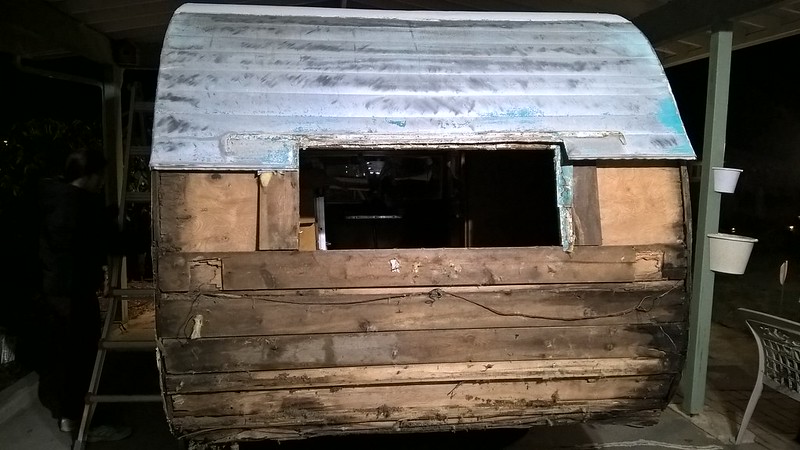  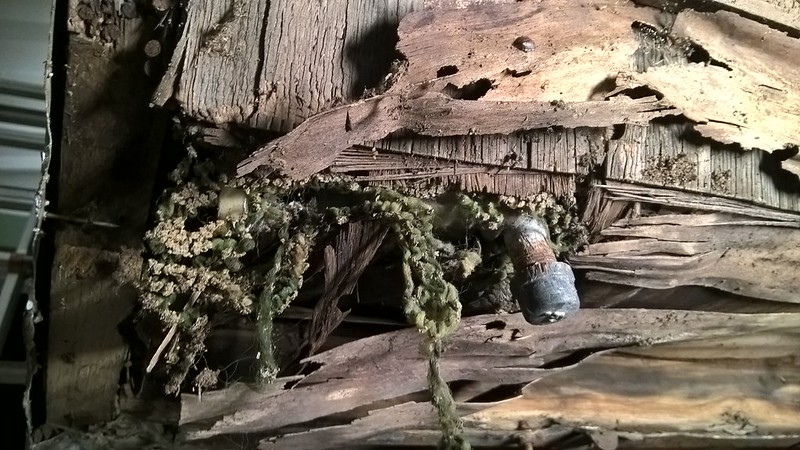 As of last night we have almost all windows with a couple screws holding them and same with the door. My two boys tag teamed the roof vent and finally got it out last night. Now the skins will start falling off tonight along with the windows doors and side skins. 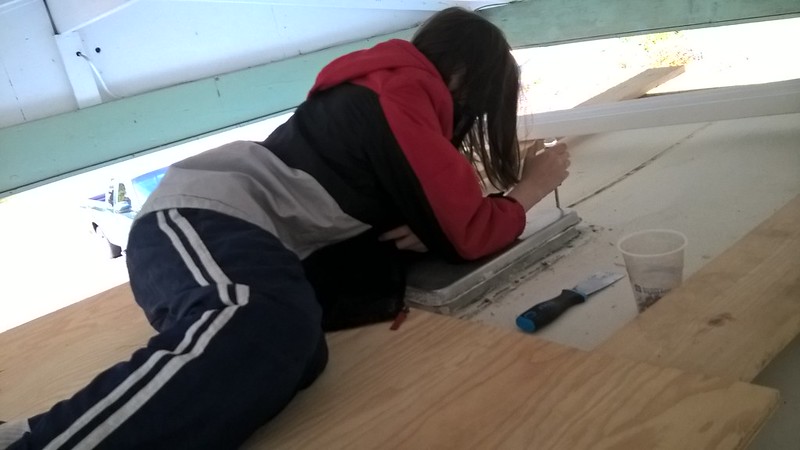 |
|
mobiltec
5K Member
 I make mistakes so you don't have to...
Posts: 9,822
Likes: 3,749
1954 Jewel In Progress...
Currently Offline
|
Post by mobiltec on Mar 23, 2018 12:48:20 GMT -8
That's some nice looking rot you have there. A frame off rebuild can be done in 90 days if you have the tools, the place and the time. Skills and knowing the order of build will help immensely.
|
|
DaytonaGTS
Junior Member
Posts: 65
Likes: 22
Currently Offline
|
Post by DaytonaGTS on Mar 23, 2018 13:00:22 GMT -8
That's some nice looking rot you have there. A frame off rebuild can be done in 90 days if you have the tools, the place and the time. Skills and knowing the order of build will help immensely. Yes it is, the rot is worse than yours was! Well I've had a good mentor so as long as he hasn't led me astray  Just decided two nights ago we are not going to spend any more time scraping silicone and sealers and trying to be uber carefull on the skins. Also the amount of repairs needed would take up a couple weeks in themselves. So I called Steve yesterday and he got back to me today with my final quote for all new skins and J rail. This will save us tons of time and effort. |
|
|
|
Post by vikx on Mar 23, 2018 19:44:54 GMT -8
I agree, it will go fast with two eager boys to help... Can't wait to see more.
|
|
nccamper
Administrator 
Posts: 7,744
Likes: 2,871
1962 Forester- 1956 Shasta
Currently Offline
|
Post by nccamper on Mar 23, 2018 19:46:29 GMT -8
It will be a great family project.
Enjoy!
|
|
silvertonguedevil
Member
1958 Shasta ~ 1959 Windsor
Posts: 47
Likes: 9
Currently Offline
|
Post by silvertonguedevil on Mar 23, 2018 20:58:01 GMT -8
I'll be watching! Good luck!
|
|
DaytonaGTS
Junior Member
Posts: 65
Likes: 22
Currently Offline
|
Post by DaytonaGTS on Mar 24, 2018 10:10:43 GMT -8
I agree, it will go fast with two eager boys to help... Can't wait to see more. Keeping their energy focused properly is the challenge! |
|
DaytonaGTS
Junior Member
Posts: 65
Likes: 22
Currently Offline
|
Post by DaytonaGTS on Mar 26, 2018 13:46:51 GMT -8
74 Days to go!We have now put 72 hrs. into the Deville build and we now have all the windows out, skin off and everything in between. I will be posting more pictures and explanations from the work we did over the weekend later tonight. Here is a vid of where we are as of last night. To start things off I thought I would add a couple pictures that my oldest took of my youngest while they were supposed to be working Goof balls!!! 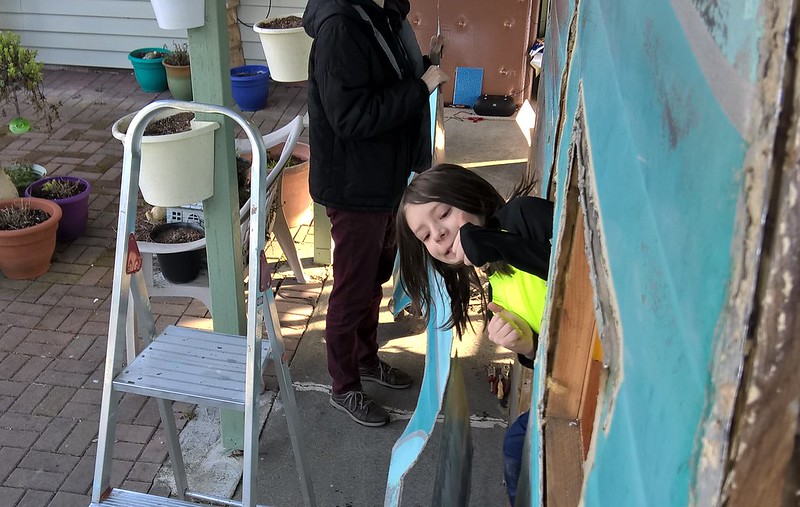 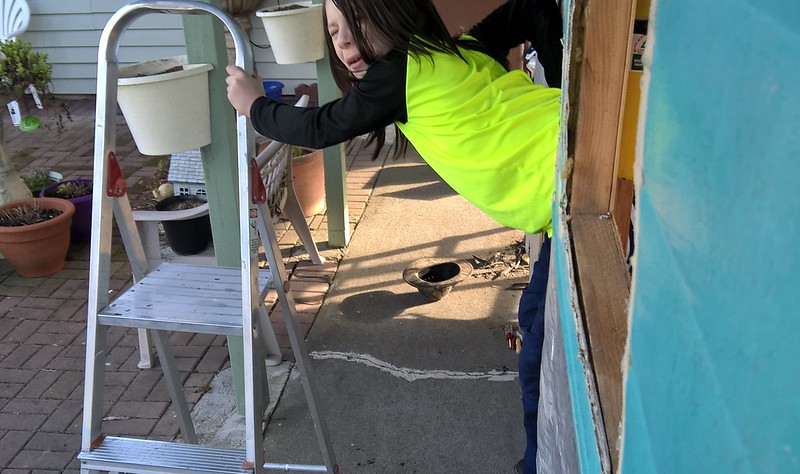 After quite a bit of work to get the door and sill out we were able to finally get the last two pieces of skin off. 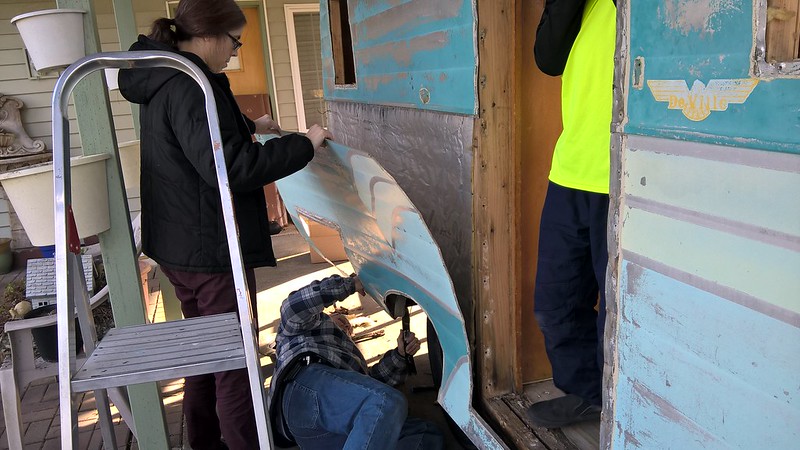 The last of the rot finally uncovered, I'm thinking about not replaceing the compartment door and just access under the bed from inside only. I fugure this is one less place for water and critters to be able to get in. 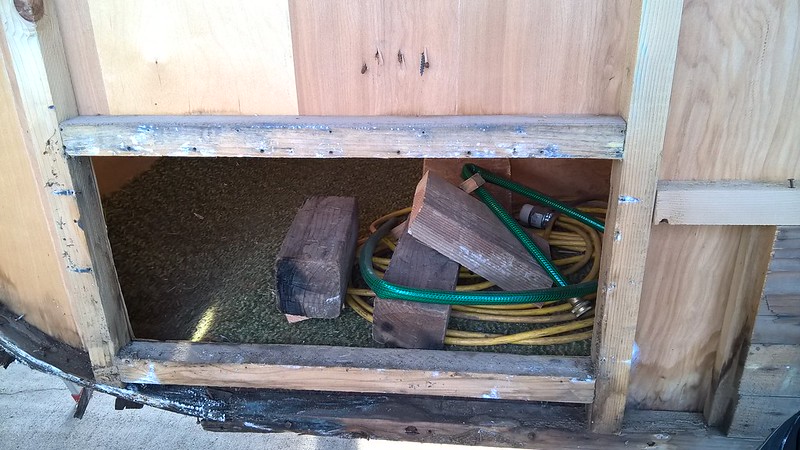 Both fender well areas ended up looking alot better than I originally thought, still not good enough to keep but atleast it is still there. 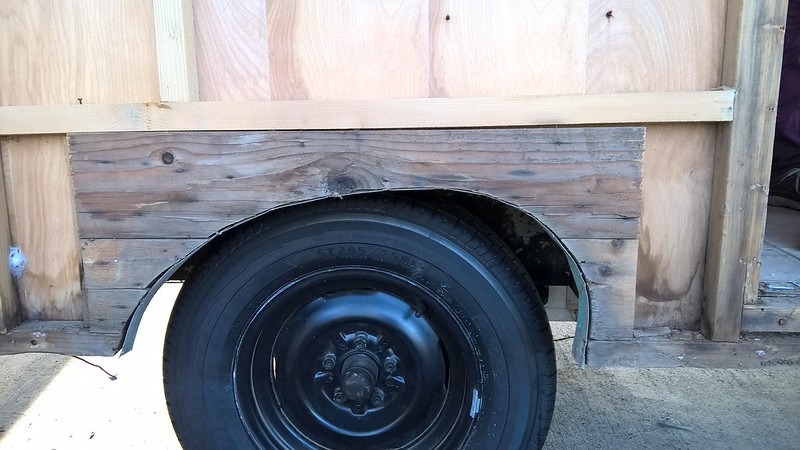 
|
|
mobiltec
5K Member
I make mistakes so you don't have to...
Posts: 9,822
Likes: 3,749
1954 Jewel In Progress...
Currently Offline
|
Post by mobiltec on Mar 26, 2018 16:55:05 GMT -8
Moving right along...
|
|
DaytonaGTS
Junior Member
Posts: 65
Likes: 22
Currently Offline
|
Post by DaytonaGTS on Mar 27, 2018 9:51:25 GMT -8
Here is the next batch of update pictures. Since I finally got all the skins off we were sure able to be able to discover all the issues, here I show off a few of them. I showed the compartment door side yesterday, today I show off the rear street side. Some time in the past there was some damage repair and the lower skirt was replaced with a chunk of pressure treated wood. This corner like the other side will have to be rebuilt. The water fill tube is what is sticking out of the wall, it leads to a pressure tank and the cap has a air valve on it to pressurize it up. Kink of a cool Idea but I will replace it with a new old school type tank. 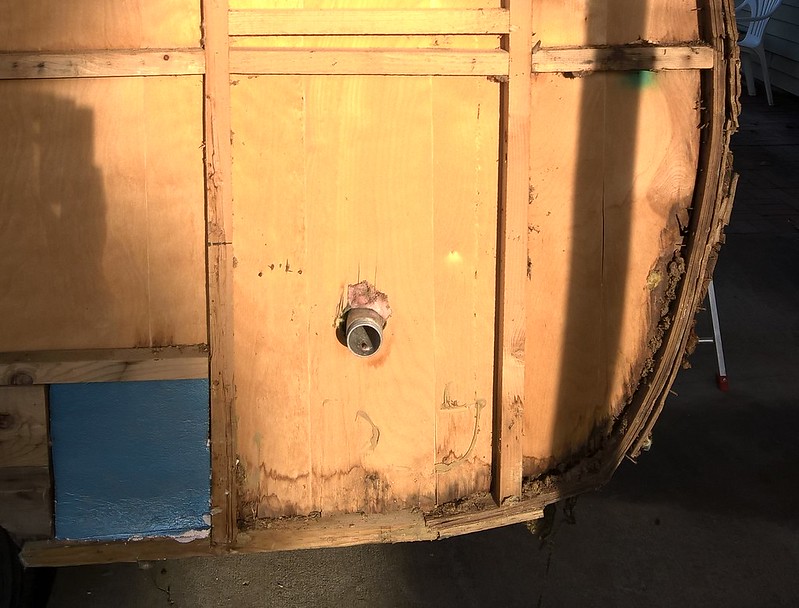 Looking at the front all needs replaced, basicly I will be buildng a whole new wrap because every piece has some damage on the edge. Sucks to have just a little area ruin the whole piece. If you can see the frame is drooping on both side and the street side has a break in it... more frame repairs to be done along with the tognue. 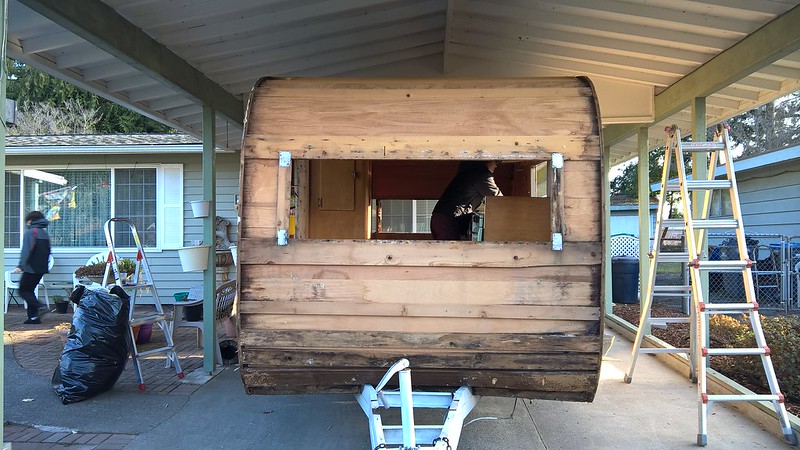 A shot that shows the framing and how the wiring was run. 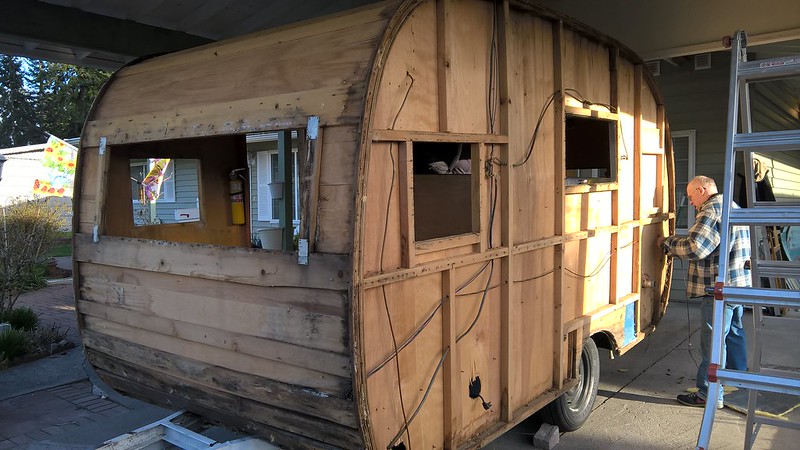 Looking at the sag in the roof. 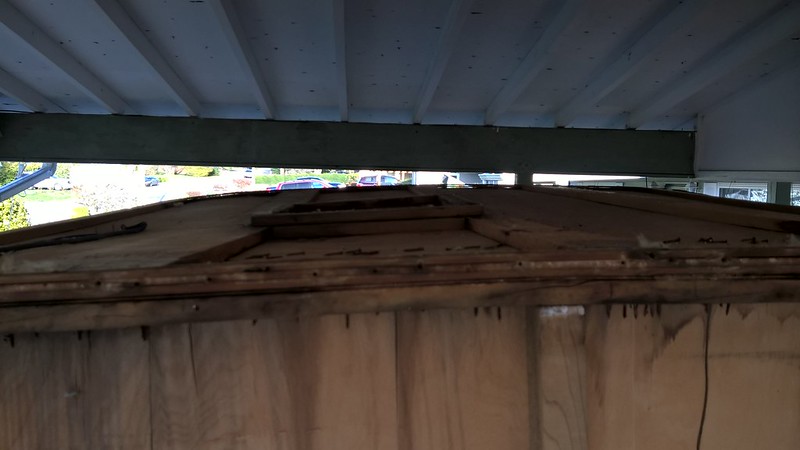 This is just some of the the nails and screws holding the kitchen upper cupboards on. These nails were put in half way and then bent over. The crews that that were put from the inside out were then bent over on the out side. A real pain in the butt to remove, Really slows things down. 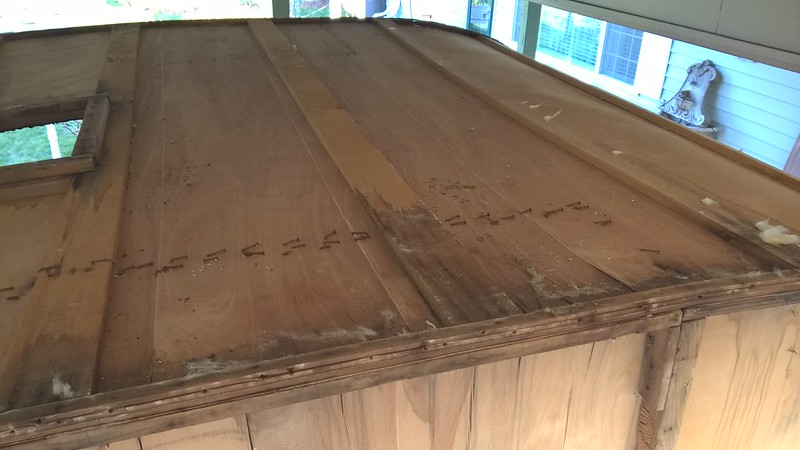 The vent opening and the wireing that went to the overhead light, lots of sag from no real support for the light.  A look at the framing from the curb side. 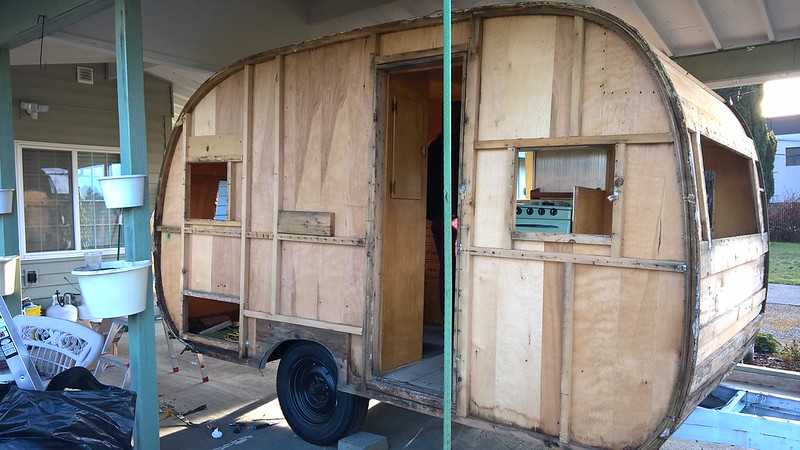 This is a shot of the fraim over the door, totally explains why the additional piece of siding over the door. It was to hide the crack that developed in the original siding. another broken frame piece to replace. 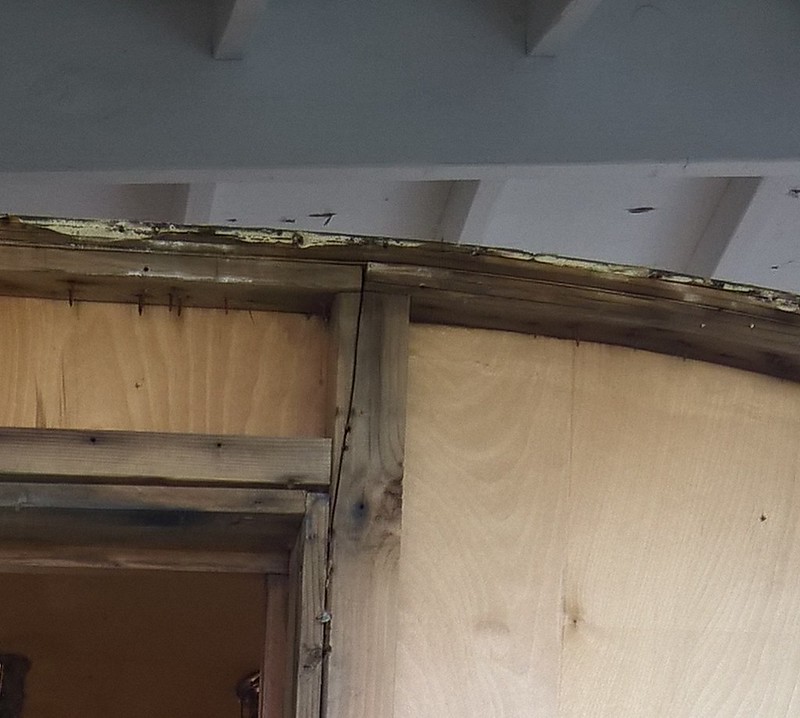 I found this shady piece of consruction on the street side. 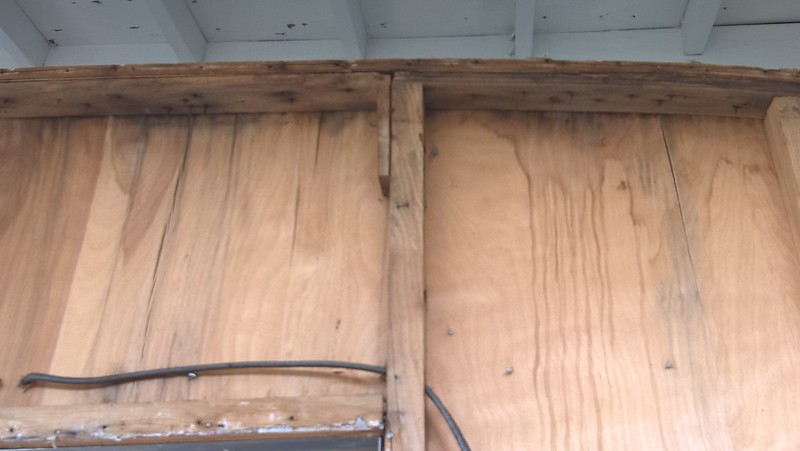 When they constructed the trailer the opening for the window was too wide, so a quick fix was to add a little piece of filler. 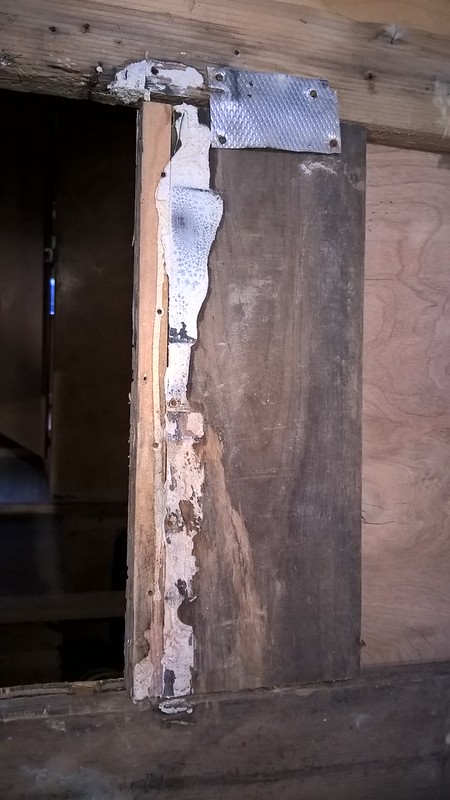 This shows after we removed the rear section showing the structure for the bed and you can see the pressure tank before I removed it. 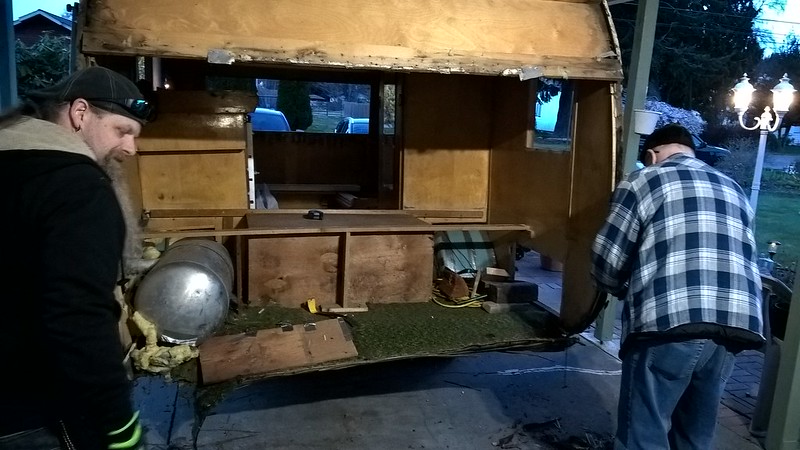 Final picture with the bed removed and room to move in and out easily. 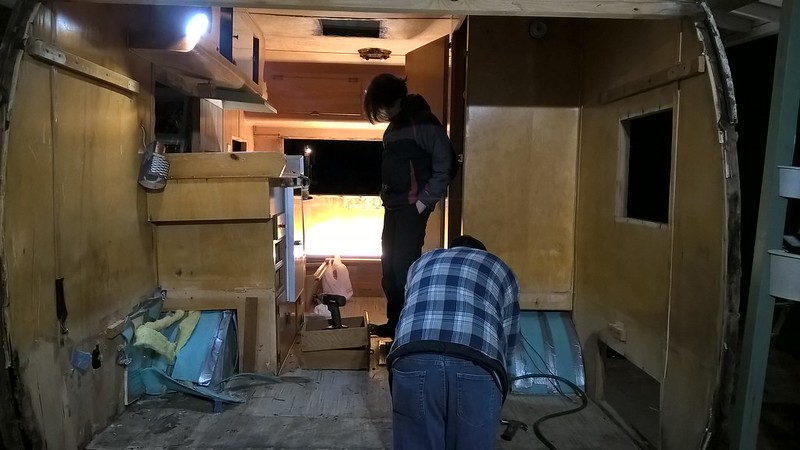 |
|
mobiltec
5K Member
I make mistakes so you don't have to...
Posts: 9,822
Likes: 3,749
1954 Jewel In Progress...
Currently Offline
|
Post by mobiltec on Mar 27, 2018 10:39:32 GMT -8
Just so you know...... Those bent over nails are not "holding up " the cabinet. They are there for sway bracing in that corner... What holds the cabinet up are the screws in the wall on the side.... This is just one part of the engineering of the structural integrity designed and built into the trailer using the cabinets. My earlier classes "Anatomy Of A Vintage Trailer" explains all of this.
When you go to rehang that cabinet you can use shorter nails and pound them in all the way. They must have run out of short nails that day.. (serious)...
|
|
tomamara
New Member
Posts: 5
Likes: 3
Currently Offline
|
Post by tomamara on Mar 28, 2018 14:17:58 GMT -8
Lookin good
|
|
DaytonaGTS
Junior Member
Posts: 65
Likes: 22
Currently Offline
|
Post by DaytonaGTS on Apr 4, 2018 13:44:38 GMT -8
65 Days to go!
Time for another update on our progress. A look at what a lot of the nails looked like when I pulled off the curbing, they looked fine at the head and the point sticking though the bottom of the boards but when you pulled then out they were very thin in the middle. Even though the wood looks fine I will need to replace most of the framing around the top of the walls due to what I have found and not trusting the nails that are left.  The only area that rodents got into, the hole at the right side of the wall is the hole they chewed to get in. 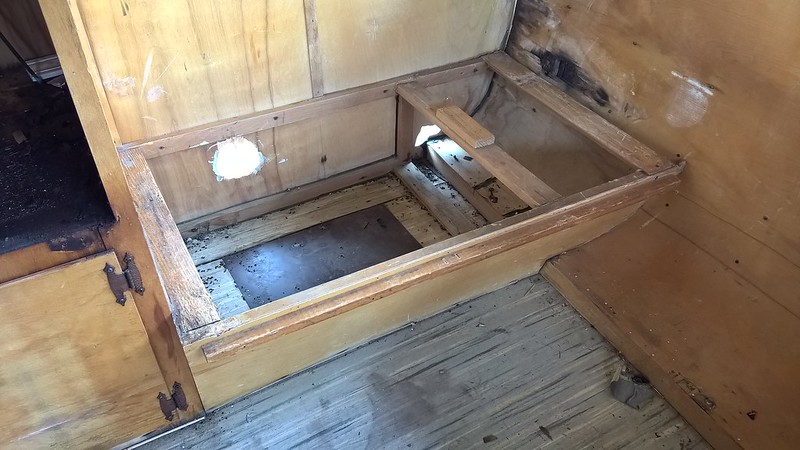 A door that the PO made in the end of one of the dinette benches, good idea but a little rough for me. I will do one that will look a little more original. 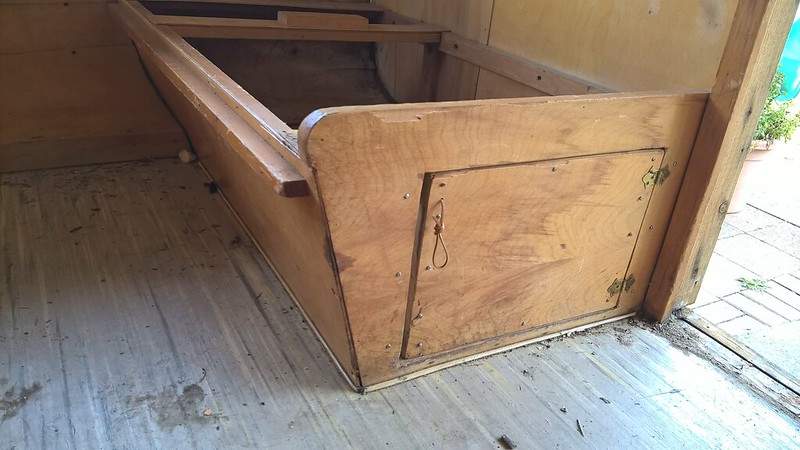 After we removed the ice box and stove. You can see there is a dent in the wheel well from where the icebox had been resting on it.  Under the stove was almost completely burnt though. It was also a little surprising that is was just an 1/8” panel supporting the stove. 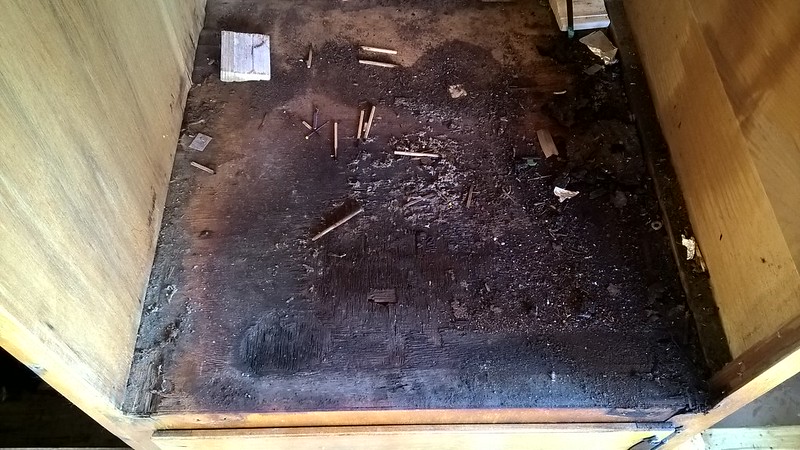 The rear of the kitchenette was almost 2 inches lower than the front. Some of it due to the wall having lost some support but the actual cabinet had nothing in the back except a couple screws in the wall to support all the weight. I have plans to add the framing of the kitchenette to help support the rear. 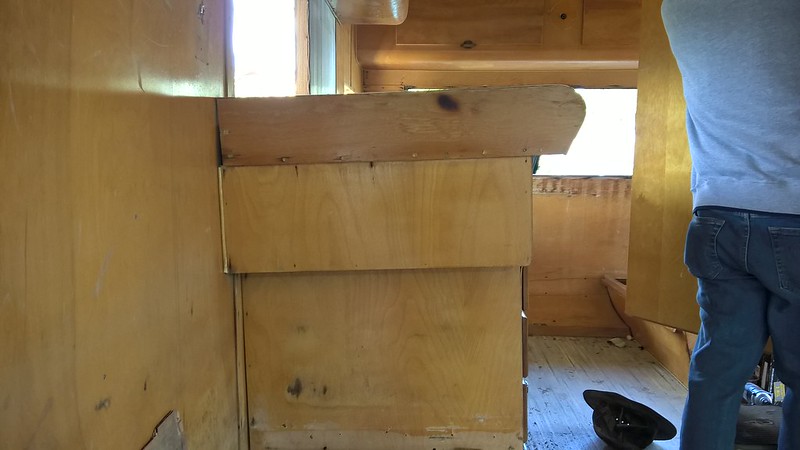 Starting to take off the stringers. 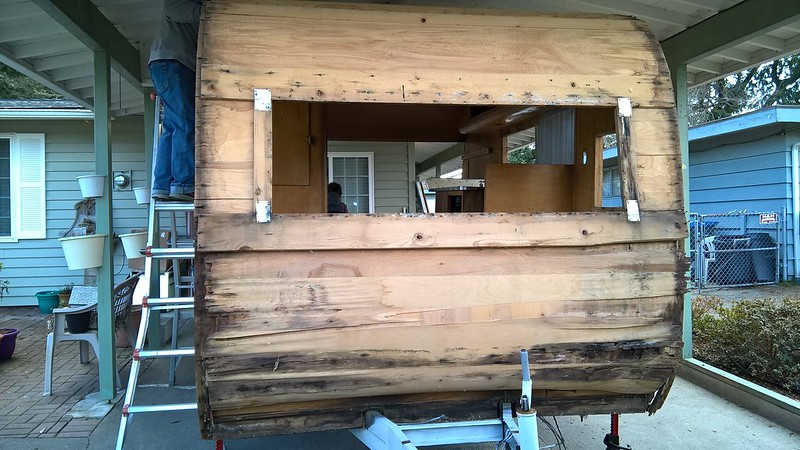 Front removed, leaving the front upper cabinet as we are taking the wrap off.  I'll be posting some more pictures of our progress a bit later.
|
|
mobiltec
5K Member
I make mistakes so you don't have to...
Posts: 9,822
Likes: 3,749
1954 Jewel In Progress...
Currently Offline
|
Post by mobiltec on Apr 4, 2018 17:45:26 GMT -8
Yep that's the wall sagging. All the trailers that have are built with the side walls attaching to the sides of the chassis experience this eventually. The wall sags and about the only thing holding it up IS the kitchen cabinet... Very normal occurrence. I see it in just about every trailer I work on.
|
|