


Using PPG Automotive paint-step by step
Mar 1, 2017 6:26:35 GMT -8
Ross, Teachndad, and 5 more like this
Post by nccamper on Mar 1, 2017 6:26:35 GMT -8
As requested I’m starting a new thread on my paint project with detailed equipment and step-by-step photos. This is only my third paint job so I’m not an expert. Consider this a backyard painter tutorial.
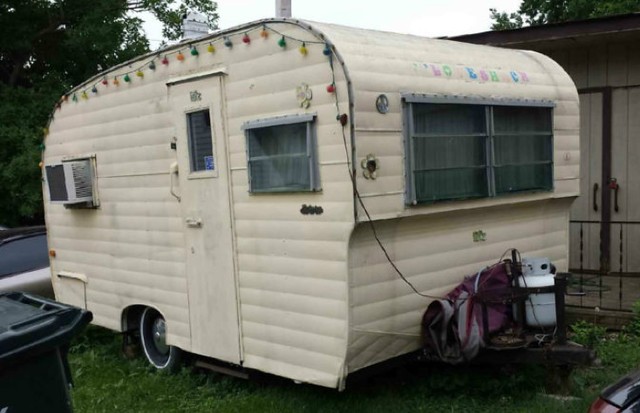
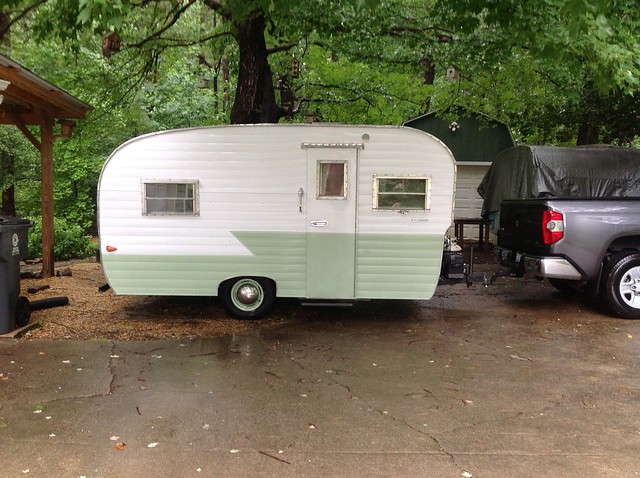
The day we bought it:
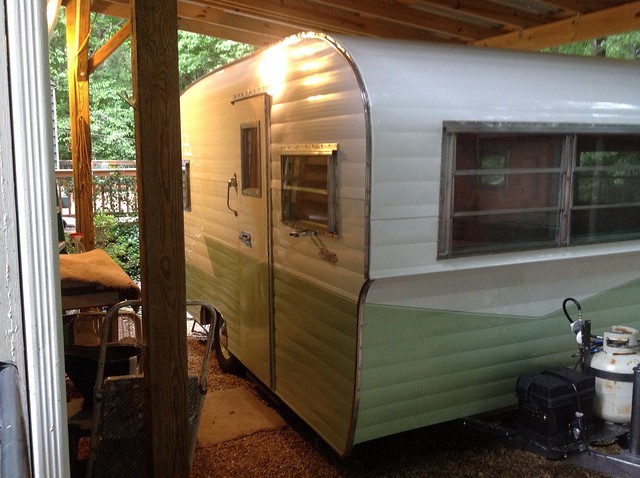
Finished
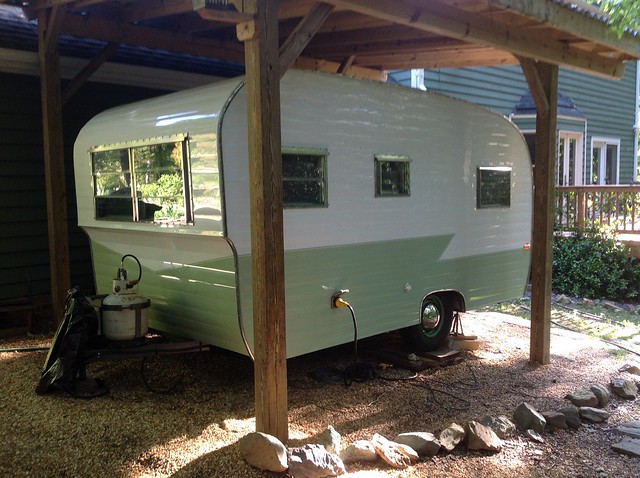
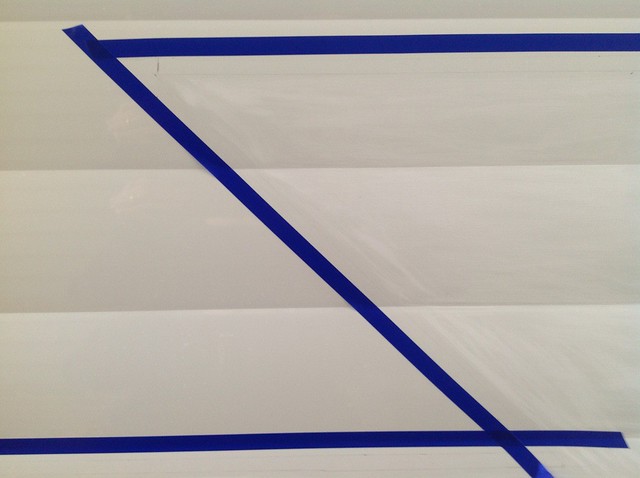
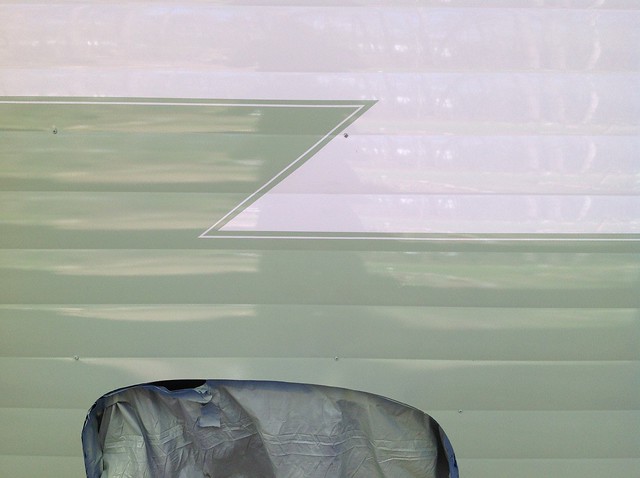
On this camper I used the Polar White on new Hemet Valley RV siding as a starting point. We decided on the standard Z design the camper had from the factory but with color below.
Weather is King in the land of backyard painters.
Ideally you want between 60-80 degrees, humidity below 60%, no wind, no pollen or rain expected for 24 hours. Oddly, that day came for me in the middle of February.
—
In the past I’ve used ACE oil enamel paint with a primer specially formulated for aluminum (non-ferrous metal) with very good results.
See the “$200 paint job” thread here:
vintagetrailertalk.freeforums.net/thread/5166/paint-camper-200?page=1
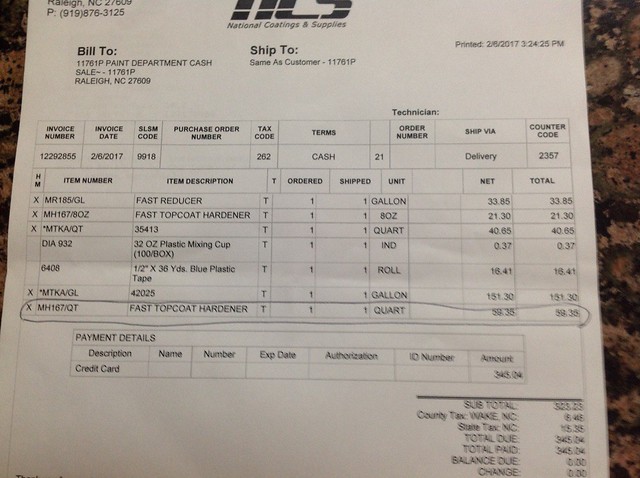
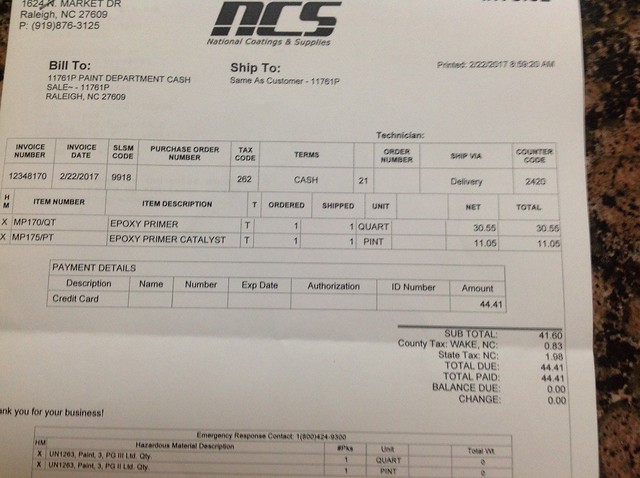
On our 1962 Forester I’m using a automotive paint from PPG. How much did this cost?
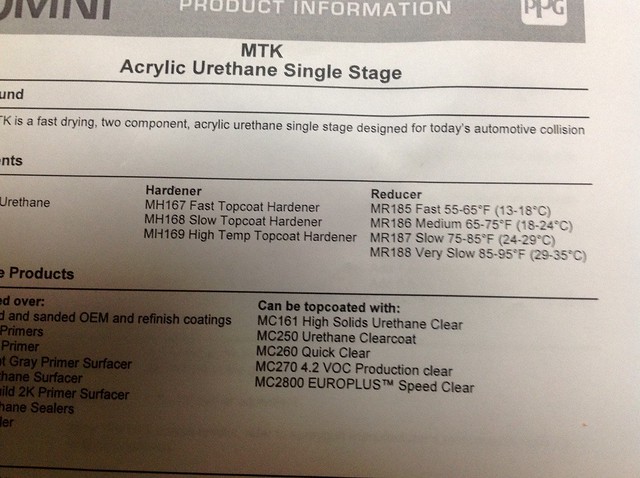
This is acrylic urethane single stage paint. Unlike base coat/clear coat automotive paint this is sprayed (color and gloss) in one coat without sanding between coats.
—
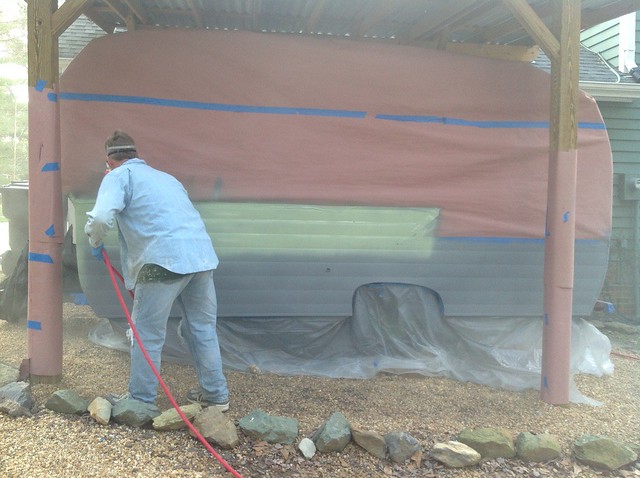
To begin, I wash the area to be painted (with something like TSP) then rinsed REALLY well. Rinse again.
Let dry overnight.
Then gently marked with a pencil where I wanted my Z stripe.
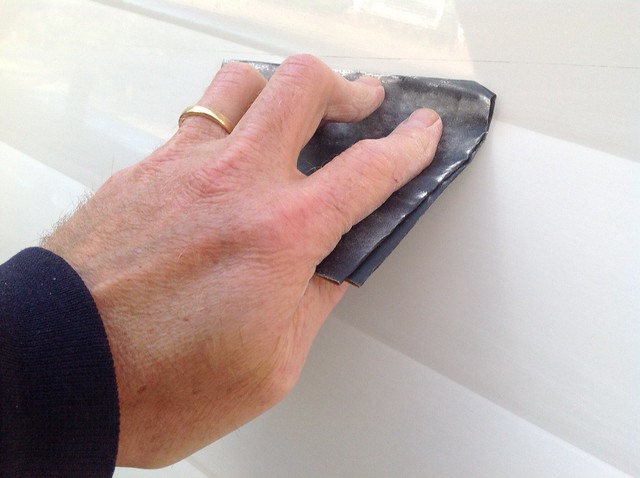
Followed by wet sanding the Hemet white to 1/4” below the pencil line with 400 grit sand paper to take off the shine while being careful not to sand above the line.
I wash the sanded area off with just water.
And sanded the entire area again with 320 grit.
I could have used 320 grit both times but I wasn’t sure how much sanding the Hemet paint could stand. The product sheet for the primer says…
120-180 grit for bare metal
220-320 grit for old finishes
I tested 220 grit on a leftover piece of Hemet siding and it scratched it up too much for my taste.
I then taped 3/4” above the pencil line with 1/2” 3M Fineline tape.
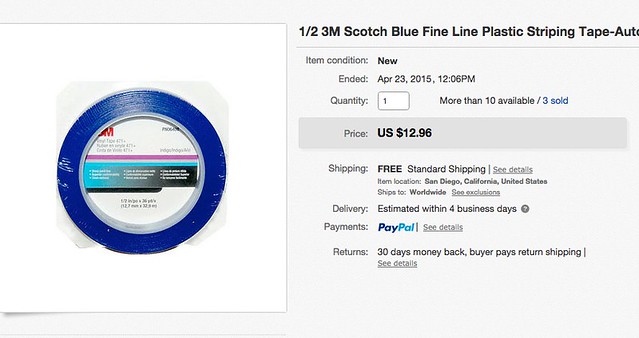
3m Fineline tape does an excellent job staying in place without damaging the paint under it. You can gently sand it without effecting the sharp line it provides. IMO, it’s a must have item.
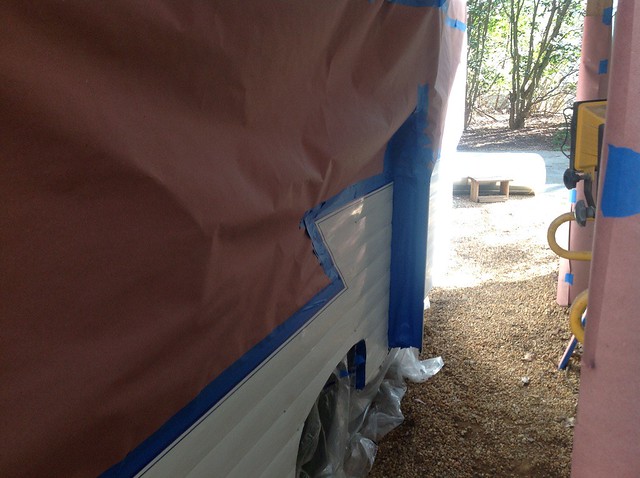
Connecting the Z.
Trimming gently with a sheetrock knife using the tape as a guide. Careful not to cut into the paint below.
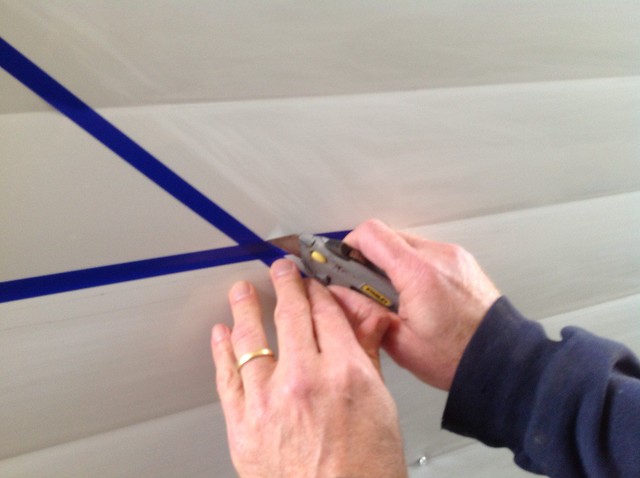
The reason I'm above the pencil line is to leave room for my design pinstripe.
1/8” 3M Fineline tape went 1/4” below the larger tape on the line.
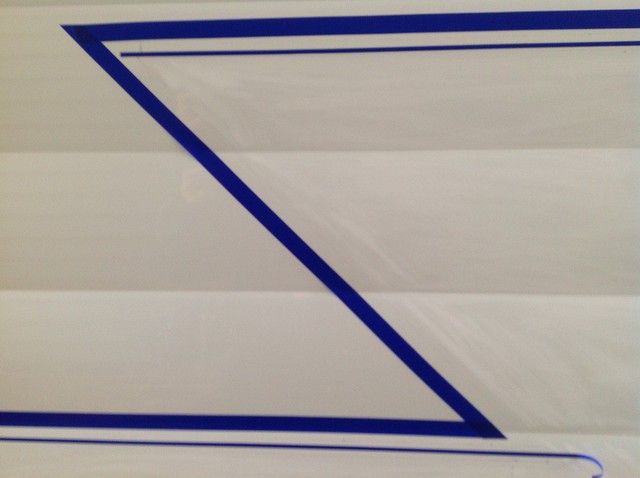
Now I went back and sanded carefully up to the 1/8” tape and between it and the 1/2” tape. So an unsanded stripe will remain after I paint. Hopefully that makes sense.
I then ran a 2” piece of basic painter’s blue tape overlapping the 1/2” Fineline tape.
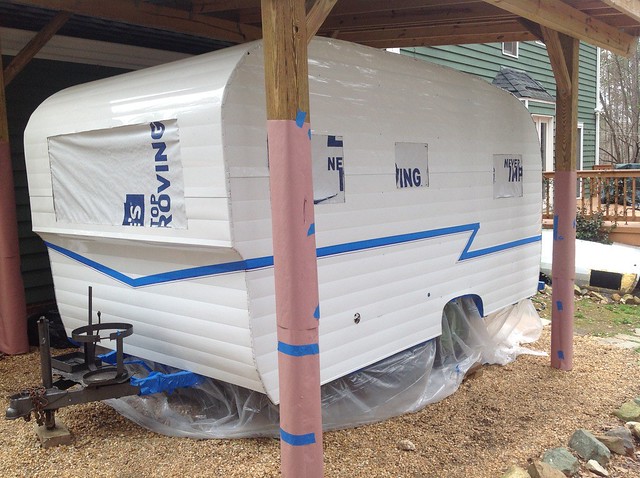
The hinge gets taped too.
The next day:
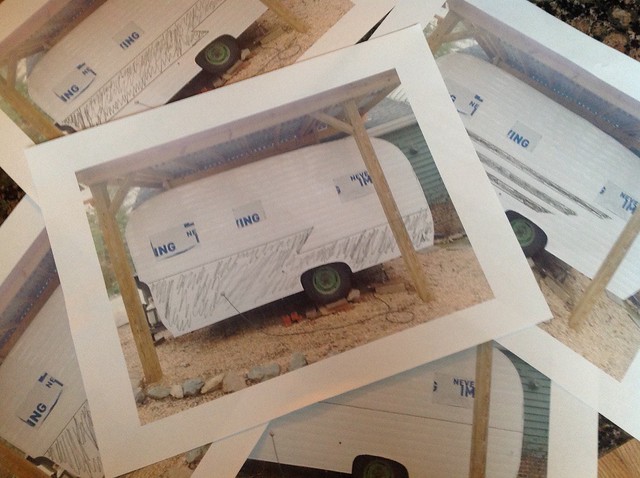
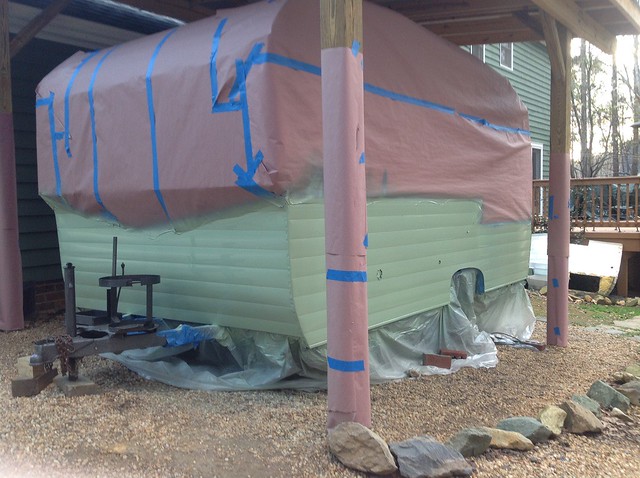
Camper gets covered on top using a roll of Rosin paper. It’s suppose to block moisture better than basic brown builder’s paper. I don’t know if it’s true but for $1 more I was a big spender.
Cover anything within 8’ you don’t want painted.
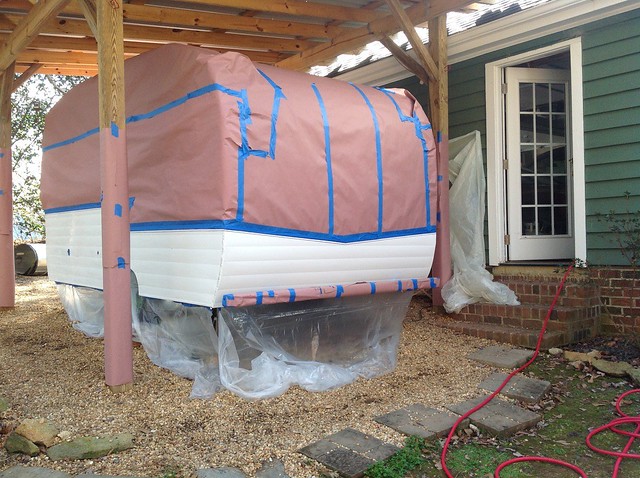
How do I paint the door jam with the door on?
I tape the door jam with overlapping pieces, then the door frame with overlapping tape. So the sticky side is facing the camera coming off the camper and facing away on the door frame. In the middle they meet and stick together. Okay, it looks silly, but it let’s me spray the inside lip of the door and I’ve never had a drop of paint enter the camper.
The next day I was ready to set up my painting equipment.
—
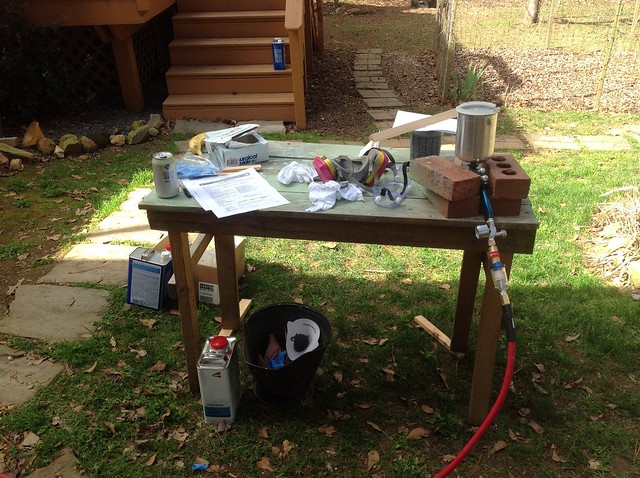
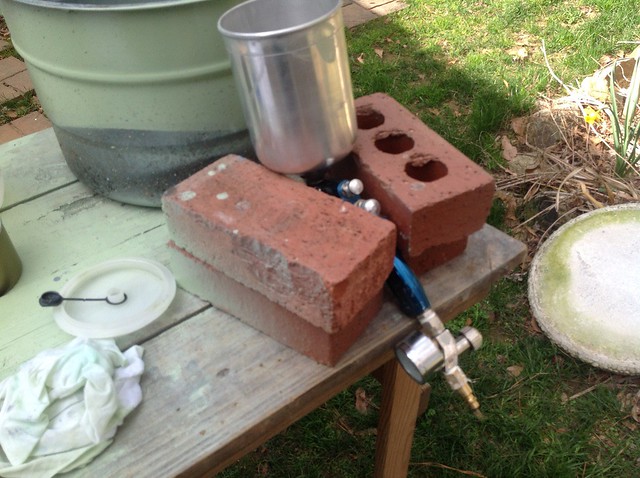
Have you ever seen a more professional painting station?
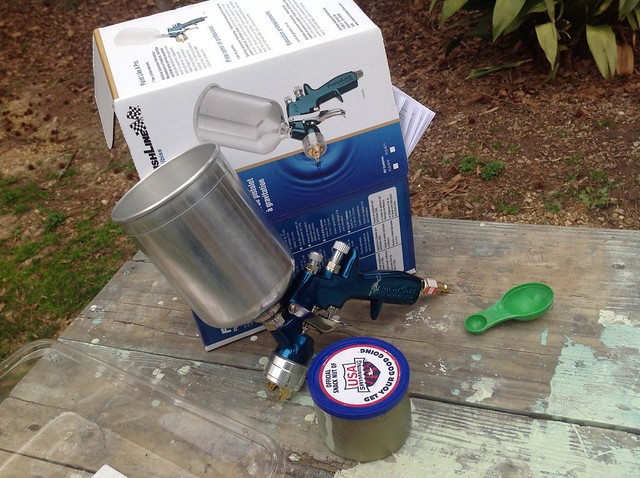
I bought a $200 HVPL spray gun for this job. The air gauge/control in the photo above comes with the gun. I bought the $12 contaminant (oil and water) filter which sits below the gauge in the photo above.
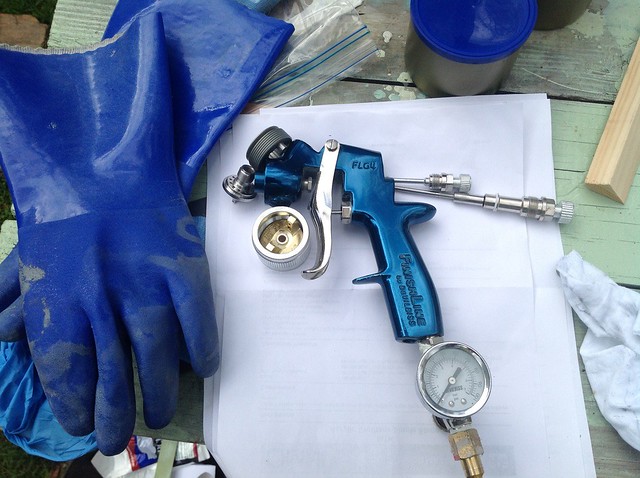
smile.amazon.com/Devilbiss-Finishline-FLG-670-Solvent-Gravity/dp/B007N69IRA/ref=sr_1_3?ie=UTF8&qid=1488052153&sr=8-3&keywords=hvlp+spray+gun&refinements=p_89%3ADeVilbiss
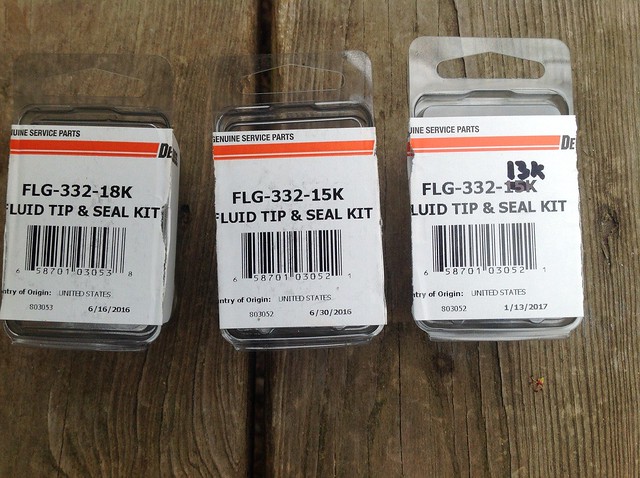
The nice thing about this gun is it comes with three tips:
1.3mm for stains and thin material
1.5mm for most paint
1.8mm for primer and thicker paint like oil enamel
Each tip sold separately cost $40-$50.
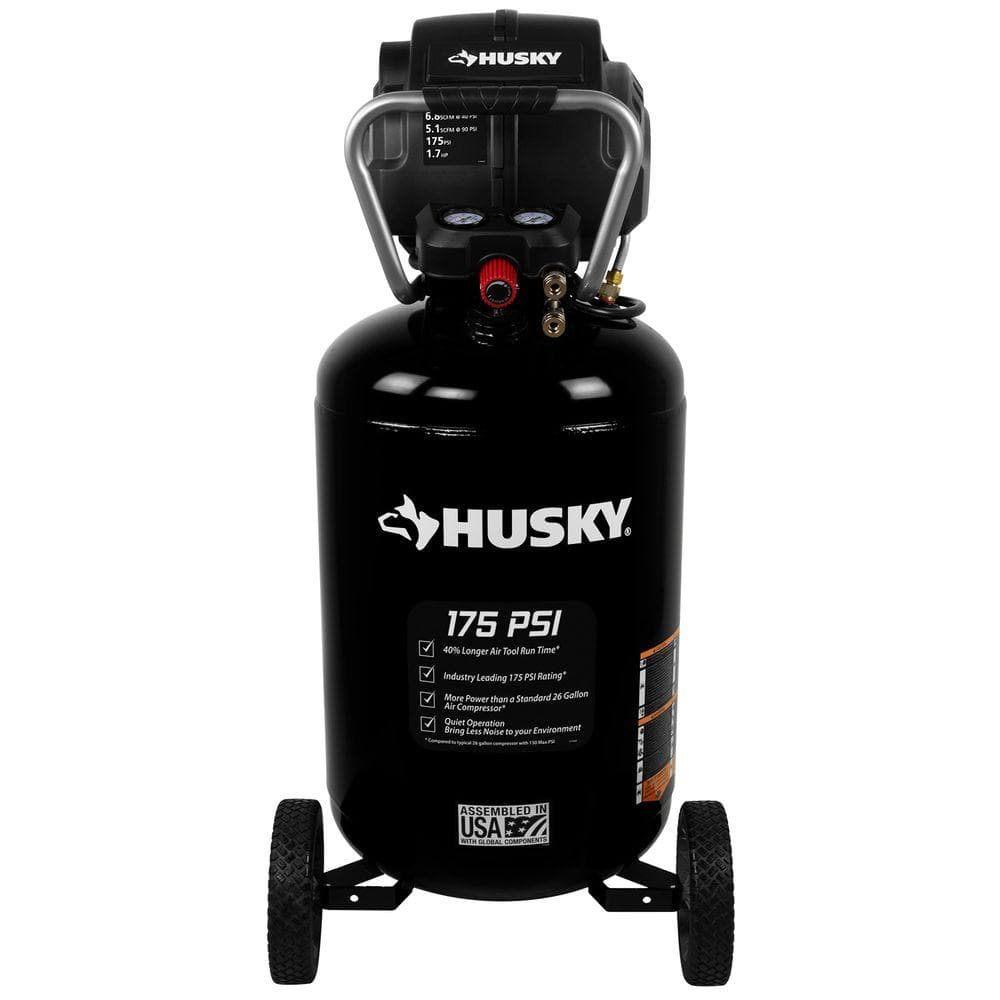
You will need a compressor with a large tank to keep up with a HVLP gun.
Mine sells for $299 at Home Depot.
All the other basic equipment/supplies are covered in my $200 Paint Job thread.
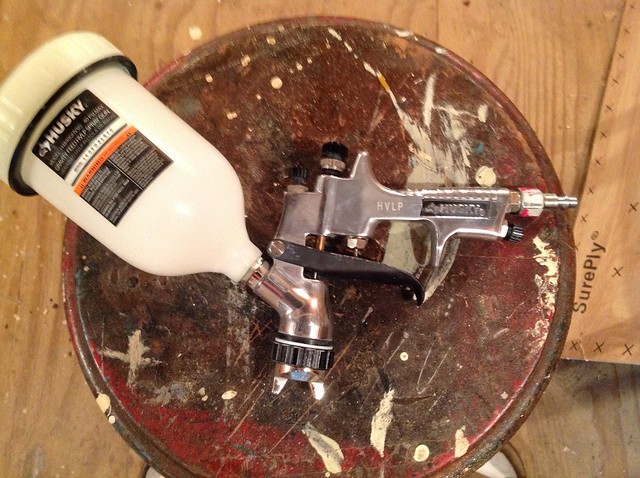
FYI, this is the gun I used on my other campers and it worked well. I believe it costs around $40 at Home Depot and comes with 1.8mm and 1.4mm tips.
—
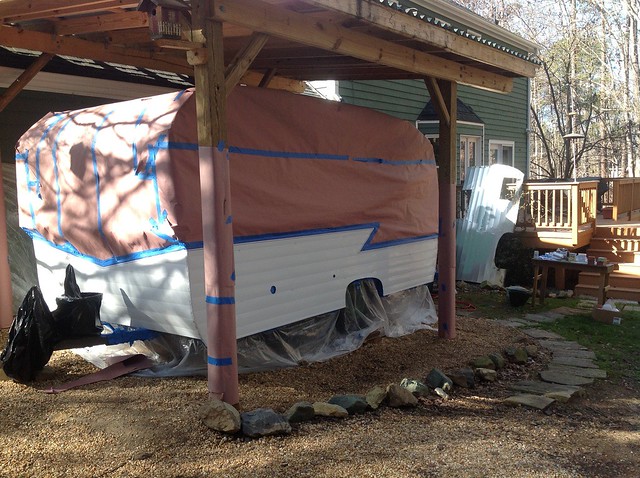
Primer.
I had two options:
High build primer- it leaves a heavy enough layer to fill imperfections. Think scratch not gouge. The downside is it’s more work. You spray, let dry and hand sand the camper again.
Epoxy primer- You spray one coat, wait 5-10 minutes and spray a second. Wait 30 minutes at 70 degrees with 50% humidity and you can spray the paint. No sanding necessary. The downside is it’s not heavy enough to fill small scratches.
I picked Epoxy primer because this is new skin in perfect condition.
(FYI, if you are priming over bare aluminum check with the paint manufacturer (tech department) for the right primer. Not the paint store.)
Having decided on the primer I asked at the paint store for the product sheet. (see below) PPG will also email it to you. It tells you everything you need to know. It’s very easy to understand.
Automotive primer and paint usually comes in two or three parts you mix together just before using it. This one comes with paint, primer and Acetone to thin it out.
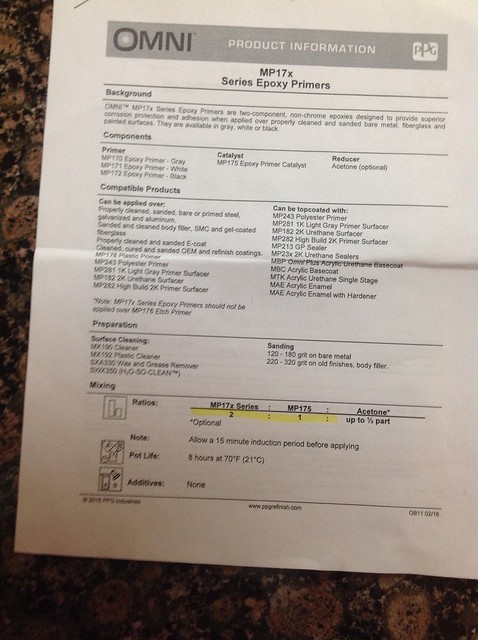
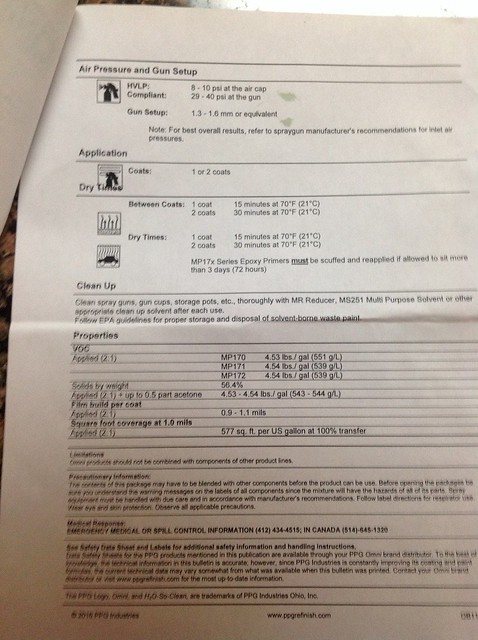
You will also find dry times, time between coats, nozzle size, how long the paint is usable once mixed, all on this sheet.
The hardener and reducer you buy depends on the temperature while painting. The paint store will help you with this.
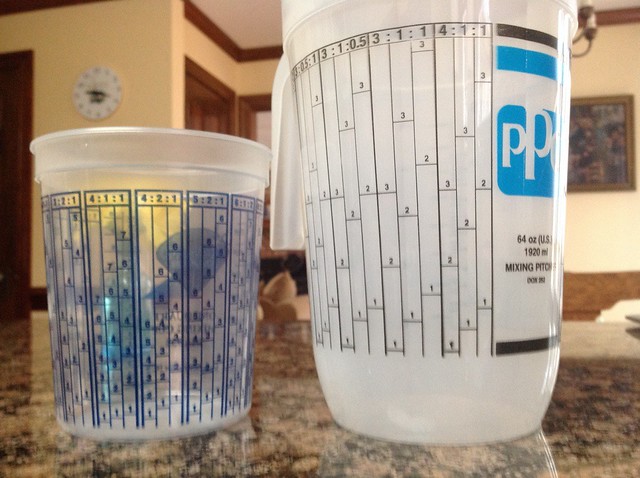
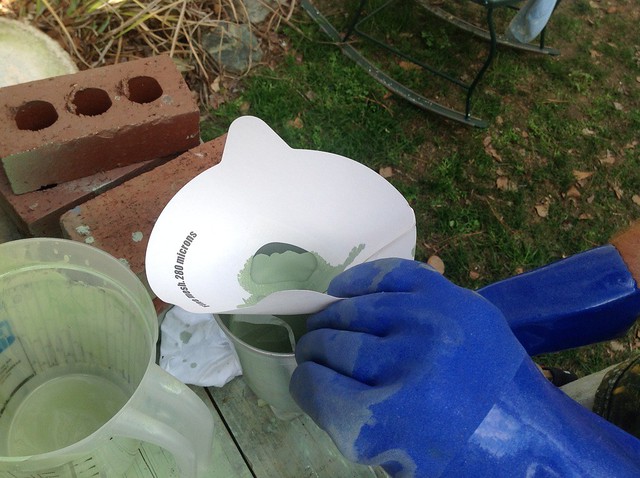
These paint cups are great. All you have to do is find the mix ratio (in this case 4 parts primer, 1 part Hardener, 1/2 part Acetone) and fill to the lines.

The Acetone makes this automotive primer spray smoother but for bare metal you might want to use less (1/4 part) so the coat is heavier. I was told by the PPG tech person that using no Acetone offers the best coat but may cause Fish Eye imperfections.
You may have noticed they give a range for the size of the nozzle. I used a 1.5mm tip and the primer flowed great at 75 degrees. (Warmer obviously means thinner liquid.)
—
I mixed the primer and set up the gun. It’s very easy and there are hundreds of youtube videos on adjusting the gun so I’ll leave that out unless somebody wants me to explain it.
Mix the primer completely and let it sit 15 minutes as the product sheet instructs.
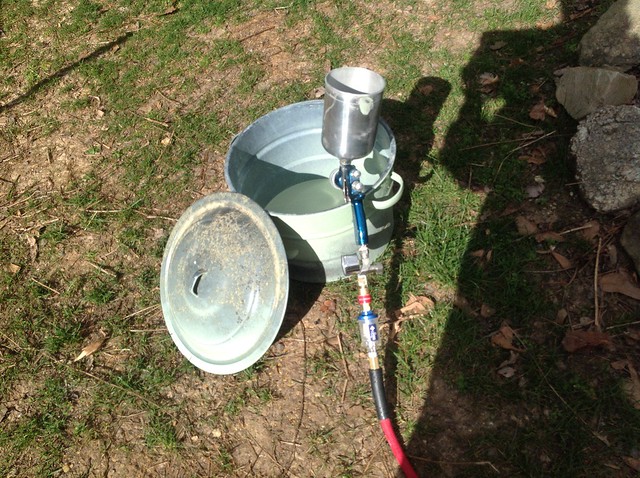
Place the gun somewhere it’s steady. I invented this gun holder myself.
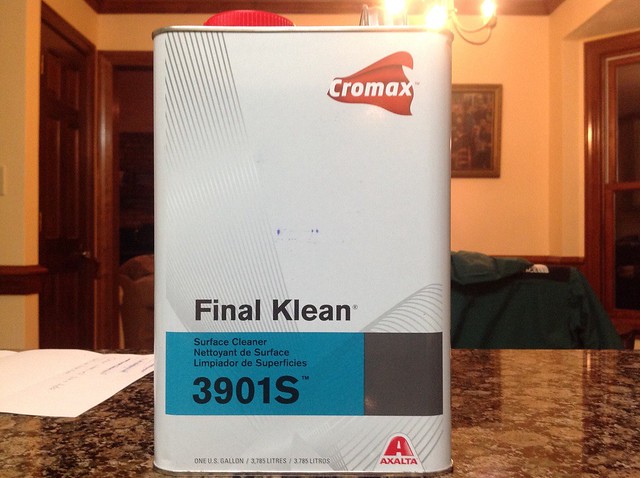
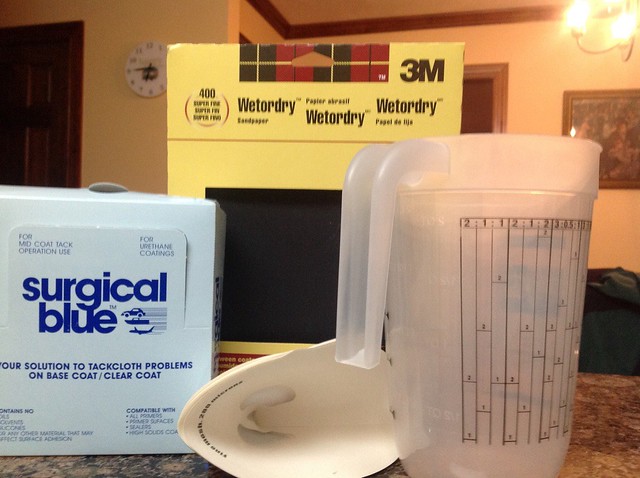
Tack rag the entire area to be painted. Then wipe it down with a cleaner. I’ve used denatured alcohol in the past but this time I decided to try what the pros use. It’s expensive.
Use a filter the paint store provides while pouring the primer/paint into the gun.
(This is paint but you get the idea.)
Spray a test on a piece of cardboard or left over skin. Be sure you’re happy with the flow.
Start spraying a very thin coat on the camper. Not covering completely. This is called a tack coat. It will give you a good tacky base for the second heavier coat.
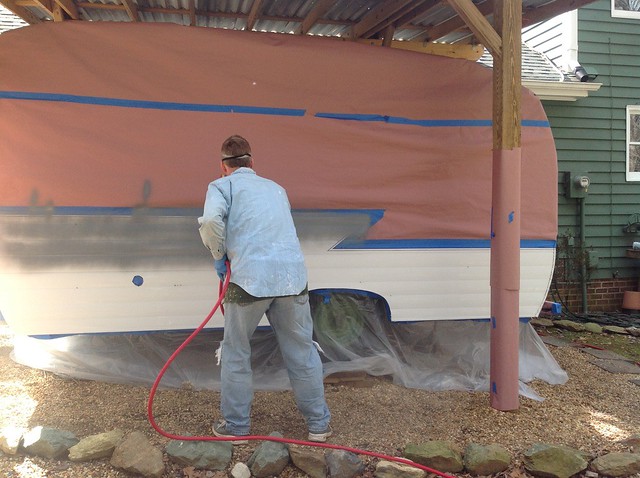
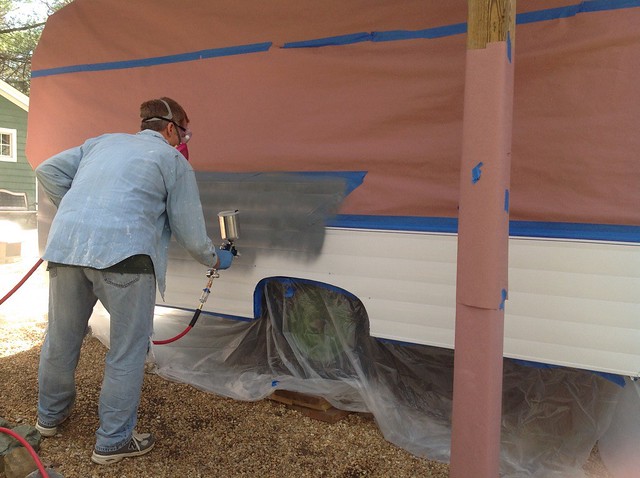
Keep the spray gun level about 6-8” from the surface and keep moving at a steady pace. Practice on the cardboard and you’ll see that moving too slow or stopping with an HVLP gun instantly causes drips or runs. If you need to stop let off the trigger while you are still moving. Overlap each painting pass by about 1/3. You can see it done on Youtube. It’s really very easy.
As the product sheet recommends, at 70 degrees wait 15 minutes before shooting a heavier second coat to cover completely. If it’s cooler wait 30 minutes if it’s warmer 10 might do.
Once the second coat is on you need to wait (as the product sheet instructs) 30 minutes at 70 degrees before spraying the paint. Don't rush it. You actually have 72 hours to paint if you want to break the project into two days. After 72 hours you need to lightly sand the primer (hassle) so try not to wait that long.
It’s time to clean the gun.
—
Before taking the gun apart I wash out the top paint canister with about 3/4 cup of lacquer thinner. Twice. This will clear most of the paint/primer from the tank. Now take another half cup or so and spray it through the gun. This clears most of the paint out. (Keep the goggles and respirator on.) You’ll need something to spray the lacquer thinner in so it’s not killing the lawn.
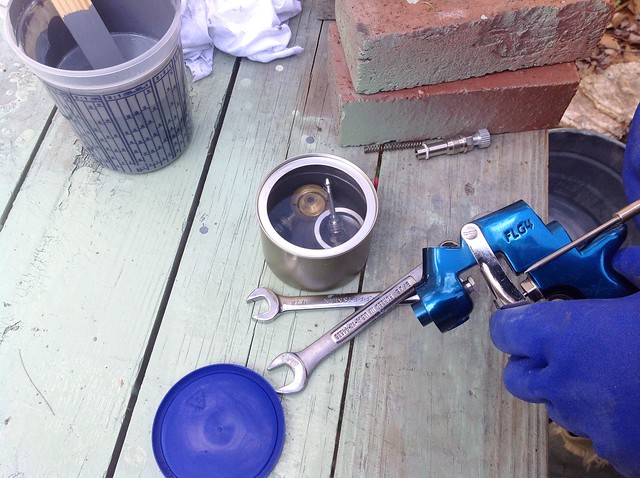
This gun comes apart with 2 wrenches. 1/2” and 9/16”. Here it is apart:
You’ll need gloves to handle the lacquer thinner used to clean the parts. I soak the pieces in a small can while using a brush kit you can buy for $12 on Amazon to clean out the gun.
Once cleaned put it back together but don’t over tighten the pieces. Just snug tight will do.
—
Paint.
This auto paint is mixed in three parts: Just Paint, reducer and hardener. You’ll need a bigger cup than above. Again, they cost about $4. In this photo I have the larger cup, my tack cloths and sand paper of choice.
This auto paint doesn’t have to sit before using like the primer. According to PPG you have 8 hours (pot life) to use it so there is no rush once mixed.
Tack cloth the primed area before spraying. I was told not to use cleanser as it may soften the primer. Pour paint into the small tank on the HVLP gun using a fresh filter. Once again, adjust and test the gun on cardboard or old camper skin. Put on the goggles and respirator and spray.
Again, a thin tack coat first... So thin you will see the primer through it. To do the entire lower portion takes 5-10 minutes to spray. By the time the first coat is finished it may dry enough to spray the second coat. Refill the tank with more paint then touch the tape that was first sprayed…not the camper. If it is tacky but not wet, spray the second coat. If it feels wet you need to wait a few more minutes.
Spray the second coat covering completely but not too heavy. In this case two coats were enough but it’s better to do a third coat than lay the paint on too heavy trying to cover in two.
You’re done painting.
—
Clean the gun and the yard before somebody reports you to the town.
Now wait overnight. DO NOT TOUCH THE CAMPER!
A few facts about the dry time:
At 70 degrees with 50% humidity this single stage paint is dry enough within 45 minutes so that dust isn’t a problem.
It’s no longer tacky within 3-5 hours.
Tape can be removed after 12 hours. I wait 18-24 hours.
The paint dries through a chemical reaction and is fully cured after 16 hours.
Unfortunately it is rarely 70 degrees and 50% humidity for 16 hours straight in NC.
The tech person told me there is the Rule Of 15… If the temperature drops 15 degrees below 70 the drying time doubles. If it rises 15 degrees, the drying time is cut in half. And if humidity goes up or down it effects drying time.
VERY IMPORTANT…If the temp drops below 55 degrees the chemical hardening/drying process stops. It will not start again even if the temp rises above 55.
—
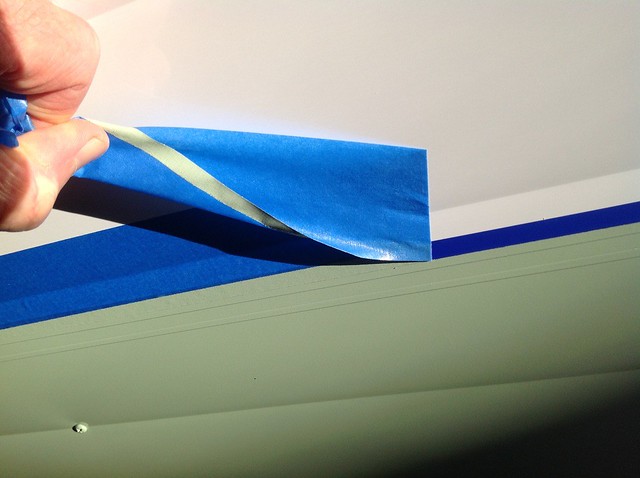
The next day you NEED to take the tape off. Waiting too long or taking it off before at least 12 hours pass may cause you a world of problems.
First, slowly take off just the tape holding the paper on. Take the paper off the camper. Then slowly peel the blue painters tape off the 1/2” Fineline tape making sure pressure is back and away from the paint. Never straight out and never down.
Next remove the 1/2” Fineline Tape also pulling flat against the camper, back and up from the new paint.
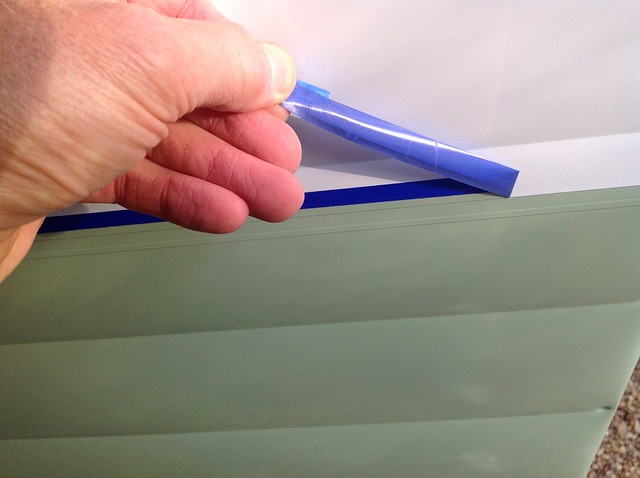
For my design the 1/8” Fineline tape also has to come off. Because this tape has new paint top and bottom I pulled it straight back, not up.
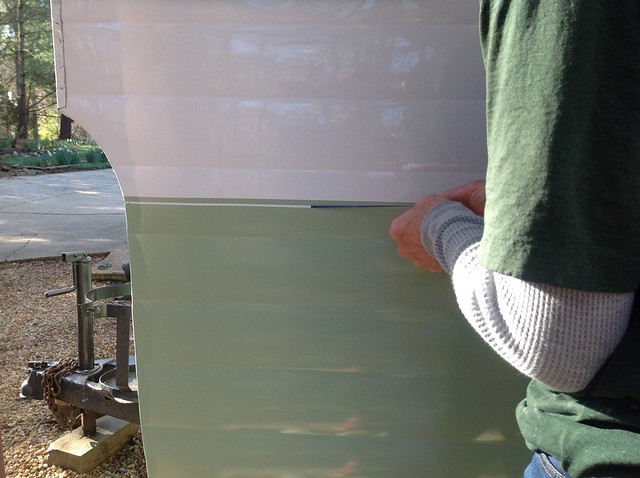
Careful at the Z to pull the tape down to the point.
—
Here is the end result.
Feel free to ask questions.
Have fun with your paint project!
Full disclosure: As usual, the advice I’m sharing was graciously given me by other members, paint tech departments and a couple of pro painters.
—
The day we bought it:
Finished
On this camper I used the Polar White on new Hemet Valley RV siding as a starting point. We decided on the standard Z design the camper had from the factory but with color below.
Weather is King in the land of backyard painters.
Ideally you want between 60-80 degrees, humidity below 60%, no wind, no pollen or rain expected for 24 hours. Oddly, that day came for me in the middle of February.
—
In the past I’ve used ACE oil enamel paint with a primer specially formulated for aluminum (non-ferrous metal) with very good results.
See the “$200 paint job” thread here:
vintagetrailertalk.freeforums.net/thread/5166/paint-camper-200?page=1
On our 1962 Forester I’m using a automotive paint from PPG. How much did this cost?
This is acrylic urethane single stage paint. Unlike base coat/clear coat automotive paint this is sprayed (color and gloss) in one coat without sanding between coats.
—
To begin, I wash the area to be painted (with something like TSP) then rinsed REALLY well. Rinse again.
Let dry overnight.
Then gently marked with a pencil where I wanted my Z stripe.
Followed by wet sanding the Hemet white to 1/4” below the pencil line with 400 grit sand paper to take off the shine while being careful not to sand above the line.
I wash the sanded area off with just water.
And sanded the entire area again with 320 grit.
I could have used 320 grit both times but I wasn’t sure how much sanding the Hemet paint could stand. The product sheet for the primer says…
120-180 grit for bare metal
220-320 grit for old finishes
I tested 220 grit on a leftover piece of Hemet siding and it scratched it up too much for my taste.
I then taped 3/4” above the pencil line with 1/2” 3M Fineline tape.
3m Fineline tape does an excellent job staying in place without damaging the paint under it. You can gently sand it without effecting the sharp line it provides. IMO, it’s a must have item.
Connecting the Z.
Trimming gently with a sheetrock knife using the tape as a guide. Careful not to cut into the paint below.
The reason I'm above the pencil line is to leave room for my design pinstripe.
1/8” 3M Fineline tape went 1/4” below the larger tape on the line.
Now I went back and sanded carefully up to the 1/8” tape and between it and the 1/2” tape. So an unsanded stripe will remain after I paint. Hopefully that makes sense.
I then ran a 2” piece of basic painter’s blue tape overlapping the 1/2” Fineline tape.
The hinge gets taped too.
The next day:
Camper gets covered on top using a roll of Rosin paper. It’s suppose to block moisture better than basic brown builder’s paper. I don’t know if it’s true but for $1 more I was a big spender.
Cover anything within 8’ you don’t want painted.
How do I paint the door jam with the door on?
I tape the door jam with overlapping pieces, then the door frame with overlapping tape. So the sticky side is facing the camera coming off the camper and facing away on the door frame. In the middle they meet and stick together. Okay, it looks silly, but it let’s me spray the inside lip of the door and I’ve never had a drop of paint enter the camper.
The next day I was ready to set up my painting equipment.
—
Have you ever seen a more professional painting station?
I bought a $200 HVPL spray gun for this job. The air gauge/control in the photo above comes with the gun. I bought the $12 contaminant (oil and water) filter which sits below the gauge in the photo above.
smile.amazon.com/Devilbiss-Finishline-FLG-670-Solvent-Gravity/dp/B007N69IRA/ref=sr_1_3?ie=UTF8&qid=1488052153&sr=8-3&keywords=hvlp+spray+gun&refinements=p_89%3ADeVilbiss
The nice thing about this gun is it comes with three tips:
1.3mm for stains and thin material
1.5mm for most paint
1.8mm for primer and thicker paint like oil enamel
Each tip sold separately cost $40-$50.
You will need a compressor with a large tank to keep up with a HVLP gun.
Mine sells for $299 at Home Depot.
All the other basic equipment/supplies are covered in my $200 Paint Job thread.
FYI, this is the gun I used on my other campers and it worked well. I believe it costs around $40 at Home Depot and comes with 1.8mm and 1.4mm tips.
—
Primer.
I had two options:
High build primer- it leaves a heavy enough layer to fill imperfections. Think scratch not gouge. The downside is it’s more work. You spray, let dry and hand sand the camper again.
Epoxy primer- You spray one coat, wait 5-10 minutes and spray a second. Wait 30 minutes at 70 degrees with 50% humidity and you can spray the paint. No sanding necessary. The downside is it’s not heavy enough to fill small scratches.
I picked Epoxy primer because this is new skin in perfect condition.
(FYI, if you are priming over bare aluminum check with the paint manufacturer (tech department) for the right primer. Not the paint store.)
Having decided on the primer I asked at the paint store for the product sheet. (see below) PPG will also email it to you. It tells you everything you need to know. It’s very easy to understand.
Automotive primer and paint usually comes in two or three parts you mix together just before using it. This one comes with paint, primer and Acetone to thin it out.
You will also find dry times, time between coats, nozzle size, how long the paint is usable once mixed, all on this sheet.
The hardener and reducer you buy depends on the temperature while painting. The paint store will help you with this.
These paint cups are great. All you have to do is find the mix ratio (in this case 4 parts primer, 1 part Hardener, 1/2 part Acetone) and fill to the lines.
The Acetone makes this automotive primer spray smoother but for bare metal you might want to use less (1/4 part) so the coat is heavier. I was told by the PPG tech person that using no Acetone offers the best coat but may cause Fish Eye imperfections.
You may have noticed they give a range for the size of the nozzle. I used a 1.5mm tip and the primer flowed great at 75 degrees. (Warmer obviously means thinner liquid.)
—
I mixed the primer and set up the gun. It’s very easy and there are hundreds of youtube videos on adjusting the gun so I’ll leave that out unless somebody wants me to explain it.
Mix the primer completely and let it sit 15 minutes as the product sheet instructs.
Place the gun somewhere it’s steady. I invented this gun holder myself.
Tack rag the entire area to be painted. Then wipe it down with a cleaner. I’ve used denatured alcohol in the past but this time I decided to try what the pros use. It’s expensive.
Use a filter the paint store provides while pouring the primer/paint into the gun.
(This is paint but you get the idea.)
Spray a test on a piece of cardboard or left over skin. Be sure you’re happy with the flow.
Start spraying a very thin coat on the camper. Not covering completely. This is called a tack coat. It will give you a good tacky base for the second heavier coat.
Keep the spray gun level about 6-8” from the surface and keep moving at a steady pace. Practice on the cardboard and you’ll see that moving too slow or stopping with an HVLP gun instantly causes drips or runs. If you need to stop let off the trigger while you are still moving. Overlap each painting pass by about 1/3. You can see it done on Youtube. It’s really very easy.
As the product sheet recommends, at 70 degrees wait 15 minutes before shooting a heavier second coat to cover completely. If it’s cooler wait 30 minutes if it’s warmer 10 might do.
Once the second coat is on you need to wait (as the product sheet instructs) 30 minutes at 70 degrees before spraying the paint. Don't rush it. You actually have 72 hours to paint if you want to break the project into two days. After 72 hours you need to lightly sand the primer (hassle) so try not to wait that long.
It’s time to clean the gun.
—
Before taking the gun apart I wash out the top paint canister with about 3/4 cup of lacquer thinner. Twice. This will clear most of the paint/primer from the tank. Now take another half cup or so and spray it through the gun. This clears most of the paint out. (Keep the goggles and respirator on.) You’ll need something to spray the lacquer thinner in so it’s not killing the lawn.
This gun comes apart with 2 wrenches. 1/2” and 9/16”. Here it is apart:
You’ll need gloves to handle the lacquer thinner used to clean the parts. I soak the pieces in a small can while using a brush kit you can buy for $12 on Amazon to clean out the gun.
Once cleaned put it back together but don’t over tighten the pieces. Just snug tight will do.
—
Paint.
This auto paint is mixed in three parts: Just Paint, reducer and hardener. You’ll need a bigger cup than above. Again, they cost about $4. In this photo I have the larger cup, my tack cloths and sand paper of choice.
This auto paint doesn’t have to sit before using like the primer. According to PPG you have 8 hours (pot life) to use it so there is no rush once mixed.
Tack cloth the primed area before spraying. I was told not to use cleanser as it may soften the primer. Pour paint into the small tank on the HVLP gun using a fresh filter. Once again, adjust and test the gun on cardboard or old camper skin. Put on the goggles and respirator and spray.
Again, a thin tack coat first... So thin you will see the primer through it. To do the entire lower portion takes 5-10 minutes to spray. By the time the first coat is finished it may dry enough to spray the second coat. Refill the tank with more paint then touch the tape that was first sprayed…not the camper. If it is tacky but not wet, spray the second coat. If it feels wet you need to wait a few more minutes.
Spray the second coat covering completely but not too heavy. In this case two coats were enough but it’s better to do a third coat than lay the paint on too heavy trying to cover in two.
You’re done painting.
—
Clean the gun and the yard before somebody reports you to the town.
Now wait overnight. DO NOT TOUCH THE CAMPER!
A few facts about the dry time:
At 70 degrees with 50% humidity this single stage paint is dry enough within 45 minutes so that dust isn’t a problem.
It’s no longer tacky within 3-5 hours.
Tape can be removed after 12 hours. I wait 18-24 hours.
The paint dries through a chemical reaction and is fully cured after 16 hours.
Unfortunately it is rarely 70 degrees and 50% humidity for 16 hours straight in NC.
The tech person told me there is the Rule Of 15… If the temperature drops 15 degrees below 70 the drying time doubles. If it rises 15 degrees, the drying time is cut in half. And if humidity goes up or down it effects drying time.
VERY IMPORTANT…If the temp drops below 55 degrees the chemical hardening/drying process stops. It will not start again even if the temp rises above 55.
—
The next day you NEED to take the tape off. Waiting too long or taking it off before at least 12 hours pass may cause you a world of problems.
First, slowly take off just the tape holding the paper on. Take the paper off the camper. Then slowly peel the blue painters tape off the 1/2” Fineline tape making sure pressure is back and away from the paint. Never straight out and never down.
Next remove the 1/2” Fineline Tape also pulling flat against the camper, back and up from the new paint.
For my design the 1/8” Fineline tape also has to come off. Because this tape has new paint top and bottom I pulled it straight back, not up.
Careful at the Z to pull the tape down to the point.
—
Here is the end result.
Feel free to ask questions.
Have fun with your paint project!
Full disclosure: As usual, the advice I’m sharing was graciously given me by other members, paint tech departments and a couple of pro painters.
—


