smac75
Junior Member

Posts: 70 
Likes: 3
Currently Offline
|
Post by smac75 on Aug 15, 2017 9:28:25 GMT -8
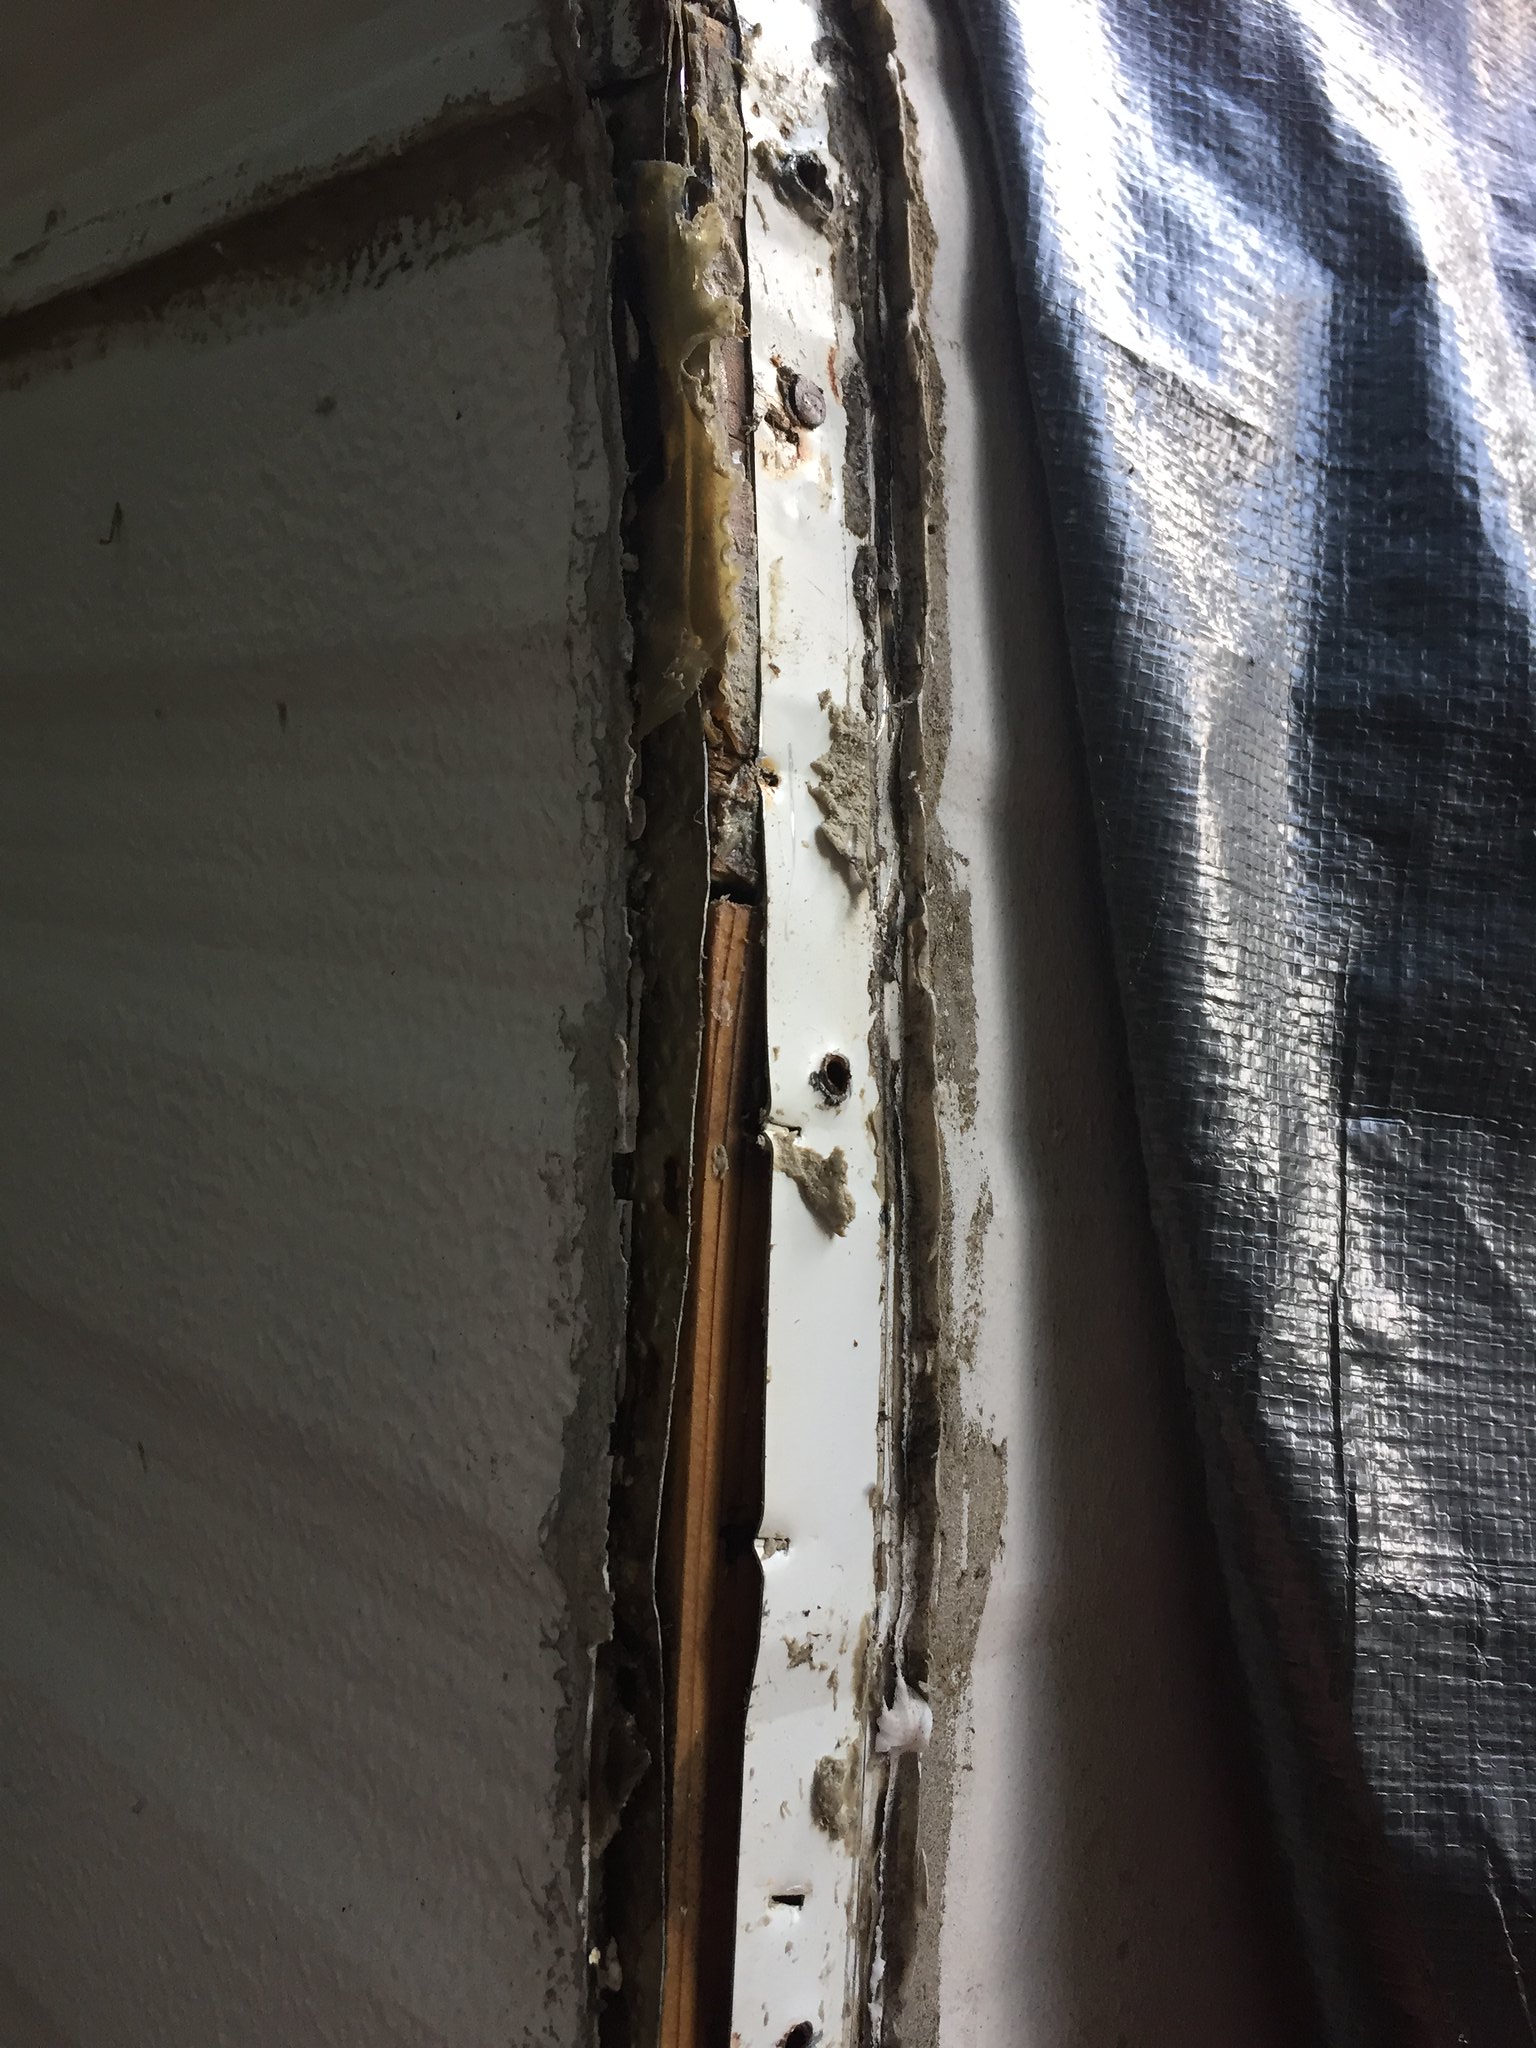
I have corner cap rail instead of j rail. My metal doesn't fold over itself. This screwed in corner cap rail is the only thing holding the roof and sides together. I am very concerned once I complete my repairs that new putty tape under the cleaned up corner cap rail isn't going to cut it. I am reading about putting some gutter seal inside each screw hole before inserting the screws. Any other suggestions? It's so tempting to use a tape of some sort as the first layer to hold the sides to the roof and then install the cap rail but I'm not sure the putty under the rail would adhere properly to any kind of tape. 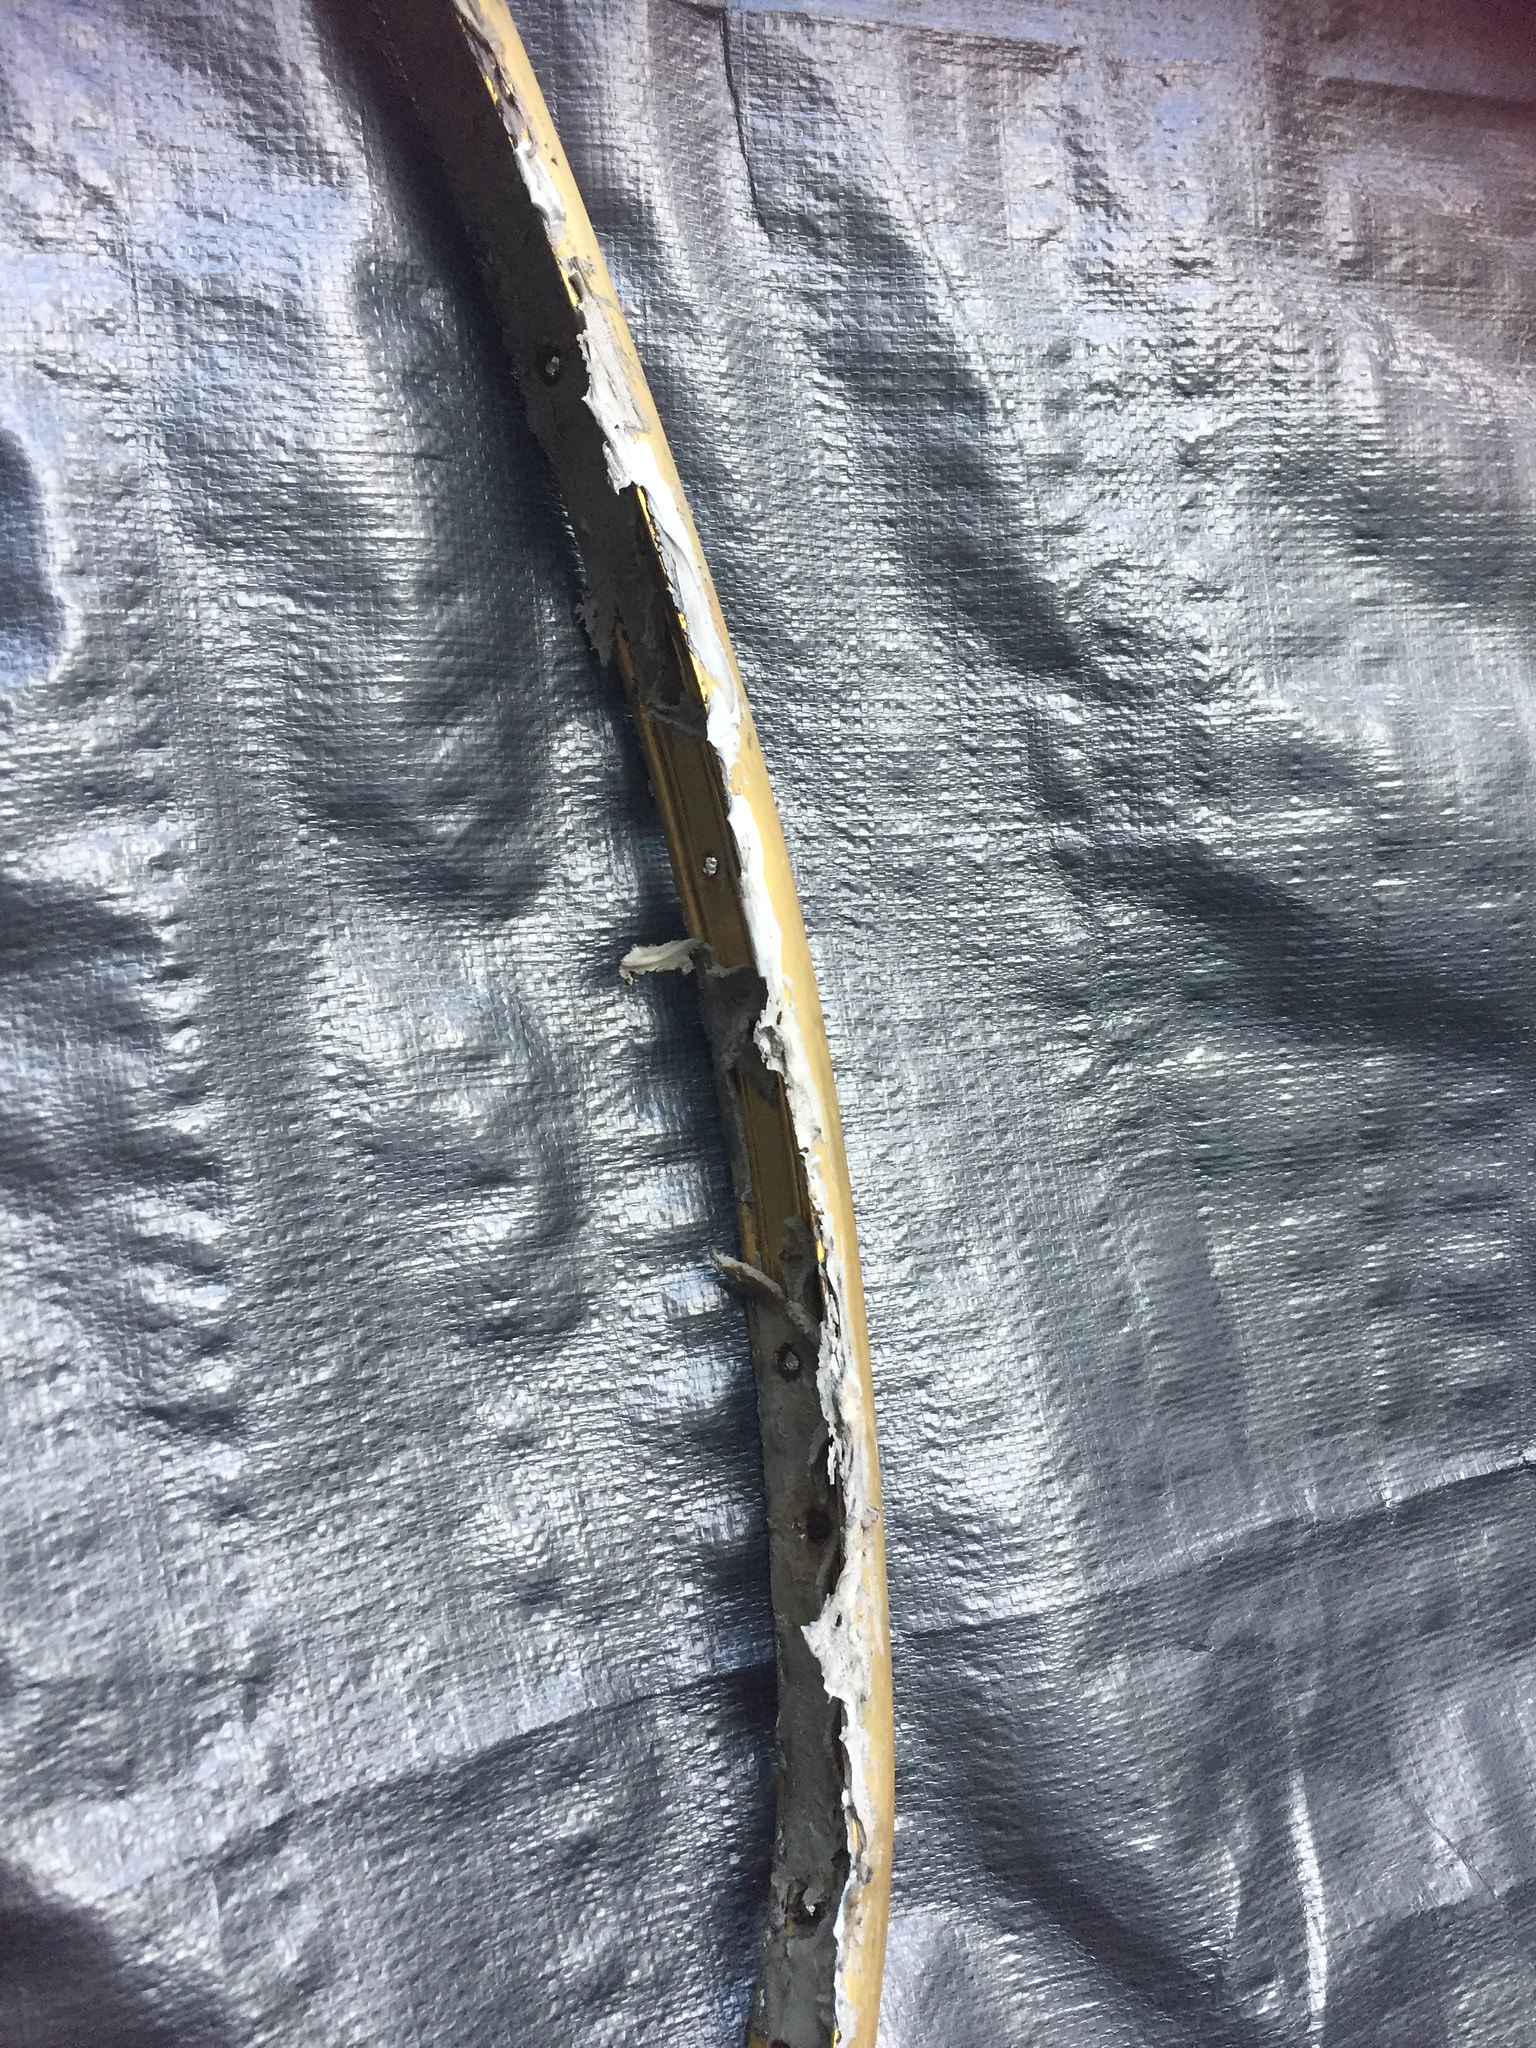 IMG_1005 IMG_1005 by
 IMG_1002 IMG_1002 by |
|
nccamper
Administrator 
Posts: 7,744 
Likes: 2,871
1962 Forester- 1956 Shasta
Currently Offline
|
Post by nccamper on Aug 15, 2017 11:23:39 GMT -8
Are you planning to remove and repair the wood exposed? If at all possible you need the skin covering the wood.
Are you getting new skin? I may have asked that before, in which case forgive the repeat of the question.
If the skin is being replace it's not an issue.
With that said, if money is an issue (and it always is an issue) I might wrap a piece of aluminum around the corner, seal it well with something like gutter seal and then go with two layers of putty. I use two layers on the vent, front and rear windows.
|
|
smac75
Junior Member
Posts: 70
Likes: 3
Currently Offline
|
Post by smac75 on Aug 15, 2017 11:40:36 GMT -8
Are you planning to remove and repair the wood exposed? If at all possible you need the skin covering the wood. Are you getting new skin? I may have asked that before, in which case forgive the repeat of the question. If the skin is being replace it's not an issue. With that said, if money is an issue (and it always is an issue) I might wrap a piece of aluminum around the corner, seal it well with something like gutter seal and then go with two layers of putty. I use two layers on the vent, front and rear windows. Hi, yes, planning on replacing rotted wood - corners and a few rafters. This type of camper doesn't have the foldover of the roof skin to the side skins. They literally just butt up against each other and are covered with the corner cap (difference than J rail which just attaches to the side of the trailer). I am not replacing the metal. Do you mean using aluminum tape under the cap rail? |
|
nccamper
Administrator
Posts: 7,744
Likes: 2,871
1962 Forester- 1956 Shasta
Currently Offline
|
Post by nccamper on Aug 15, 2017 12:19:08 GMT -8
I was thinking tape or aluminum flashing under the skin with gutter seal between the skin and tape. Then putty the corner cap. If it's more than a foot or two with the gap shown it may need tape not aluminum flashing. I use Tyvek on my campers with good results. A vapor barrier followed by tape then corner cap should work. Is it as good as new skin? No. But it should be water tight. 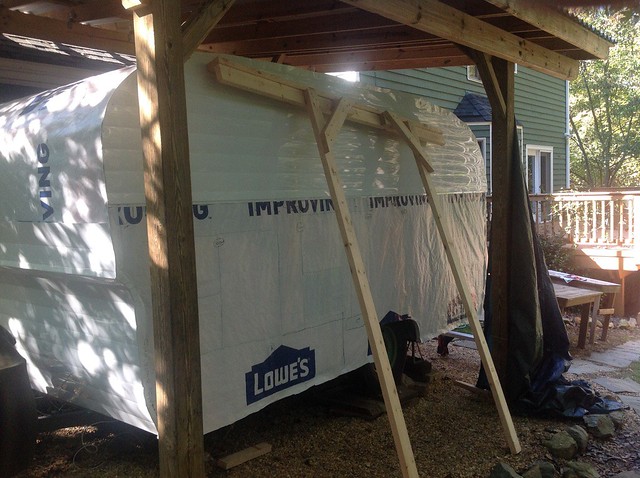 Forester-brace for siding Forester-brace for siding As you obviously know, putty against wood as it was from the factory would be a risky way to go. The gap problem may disappear after you repair and re-frame. |
|
kirkadie
1K Member

Posts: 1,156
Likes: 556
'69 Serro Scotty Hilander
Currently Offline
|
Post by kirkadie on Aug 15, 2017 12:39:05 GMT -8
Scotty has the same kind of cap rail. There was an obvious gap between sides and back on all 4 lower corners which was caused by wood rotting and swelling, then getting abused by PO, etc. Once I replaced ALL the wood, that problem was solved. I seriously doubt your trailer had that skin gap when it left the factory as they cut the side skin flush with walls and then installed and cut the roof skins flush to the sides. Once you replace that rot, you should be back a better edge joint. Here is a product we heard about back in early Spring that got some positive reviews and might be an answer, but it needs a clean (like new kinda clean) to stick well. It is said to be flexible enough to forgive slight movement as you trailer rolls down the road. They have a vid on applying it... catalog.sealdesignllc.com/product-category/seal-tite-corner-seal/ |
|
smac75
Junior Member
Posts: 70
Likes: 3
Currently Offline
|
Post by smac75 on Aug 15, 2017 16:39:13 GMT -8
Thank you for the great help. I will look into these options.
|
|
|
|
Post by vikx on Aug 15, 2017 21:51:44 GMT -8
I think you do need something on the butt joints. I would use waterproofing tape and trim it if you need to so it doesn't show under the cap. It's going to be dicey because of the skinny overlap on the side.
Also, I would use pure butyl tape on the caps. It is stickier and seals better/longer than RV butyl putty.
OSI gutter seal is great stuff and can be used as a primary sealant before the above. You're going to have to let the trailer tell you what it needs.
Get the wood fixed and post some pix. We will help.
|
|
smac75
Junior Member
Posts: 70
Likes: 3
Currently Offline
|
Post by smac75 on Aug 16, 2017 4:12:00 GMT -8
I think you do need something on the butt joints. I would use waterproofing tape and trim it if you need to so it doesn't show under the cap. It's going to be dicey because of the skinny overlap on the side. Also, I would use pure butyl tape on the caps. It is stickier and seals better/longer than RV butyl putty. OSI gutter seal is great stuff and can be used as a primary sealant before the above. You're going to have to let the trailer tell you what it needs. Get the wood fixed and post some pix. We will help. Thank you Vikx. I'm not sure where you are suggesting using the OSI GS - under the tape that will hold the butted sides/roof together? On top of the tape but under the butyl? Also, having a hard time finding your recommended OSI MICRO GS in Clear. Seem to only be able to find "OSI GS121". Same thing? |
|
|
|
Post by vikx on Aug 16, 2017 20:46:14 GMT -8
GS 121 is the same thing but is a waste of money. It dries out in the caulk tube. If you get the smaller toothpaste type of tube, it will last years. Also much easier to use and control...
The first thing to do is rebuild the trailer and reframe so the metal fits as tight as possible. The metal will need to be nailed or stapled in place. When everything is as close as you can get it, sparingly dab OSI on every divot or hole, as well as the staples/nail heads. LESS IS MORE. Smooth with a paint thinner dipped finger and let dry.
Now you are ready to assess the joint and decide what you want to do. Waterproofing tape will protect the joint but it does add some thickness. I don't often use the tape. You might do some heavy research on something sticky but thinner that might span the joint. It must be discrete.
Finally, you are ready to add the cap rail. Use butyl on the cap, both sides. You'll pry have to trim to fit. if you clean the scissors frequently, it will help. (paint thinner)
|
|
stillgotomx
Member
Posts: 46
Likes: 8
1964 Chinook Tow-trailer 13'
Currently Offline
|
Post by stillgotomx on Jun 19, 2019 13:47:52 GMT -8
Howdy I am not there yet, but see an upcoming similar issue, though not exactly the same. I have the wraparound corners, and a J rail, but the old skin is just not wanting to come around the corner, and by the look of it, never was quite long enough even initially. I have been at this nine months, and am getting low on funds. The rest of the skin is in good shape. Any ideas on how to work-around this one? There is fresh wood underneath that I have shaved down to gain some millimiters, but it is not enough.
thanks, mark
|
|
nccamper
Administrator
Posts: 7,744
Likes: 2,871
1962 Forester- 1956 Shasta
Currently Offline
|
Post by nccamper on Jun 19, 2019 19:18:32 GMT -8
I only know two ways to deal with this type of issue...new skin or shave it down until it folds over. It seems like you have covered the shaving option.
You could do a temp patch and make sure the camper is covered when not in use until you can afford the new skin. I might consider a small piece aluminum under the short skin, a layer of Proflex Dicor or gutter seal followed by the drip rail. This is obviously not a permanent repair.
|
|
stillgotomx
Member
Posts: 46
Likes: 8
1964 Chinook Tow-trailer 13'
Currently Offline
|
Post by stillgotomx on Jun 19, 2019 20:07:37 GMT -8
hmmm maybe some more shaving---thanks
|
|
mobiltec
5K Member
 I make mistakes so you don't have to...
Posts: 9,822
Likes: 3,749
1954 Jewel In Progress...
Currently Offline
|
Post by mobiltec on Jun 20, 2019 7:55:16 GMT -8
Howdy I am not there yet, but see an upcoming similar issue, though not exactly the same. I have the wraparound corners, and a J rail, but the old skin is just not wanting to come around the corner, and by the look of it, never was quite long enough even initially. I have been at this nine months, and am getting low on funds. The rest of the skin is in good shape. Any ideas on how to work-around this one? There is fresh wood underneath that I have shaved down to gain some millimiters, but it is not enough.
thanks, mark
Many times, if you have removed skin and then tried to put it back on and the roof doesn't fit again, it's because the trailer is out of level and plumb. Try jacking up one corner at a time either front or rear and see what happens. Usually, once you find the corner that needs to be lifted a bit you will see the metal begin to line up. |
|
stillgotomx
Member
Posts: 46
Likes: 8
1964 Chinook Tow-trailer 13'
Currently Offline
|
Post by stillgotomx on Jun 20, 2019 8:07:45 GMT -8
Now that seems like a real probability with this beast.....thanks, I'll get on that. Otherwise I looked it over again and I think I have more wood I can carve out underneath.
|
|
stillgotomx
Member
Posts: 46
Likes: 8
1964 Chinook Tow-trailer 13'
Currently Offline
|
Post by stillgotomx on Jun 22, 2019 3:43:17 GMT -8
AHAA! Yeah, a little jacking up on the far corner made a huge difference. I think with some additional trimming (and cleaning up more d*** silicone), I am confident this is gonna be a generous around-the-corner fit. Whew.
Excellent suggestions, and I thank you.
Gee, since I'm a genius, why didn't I think of this?
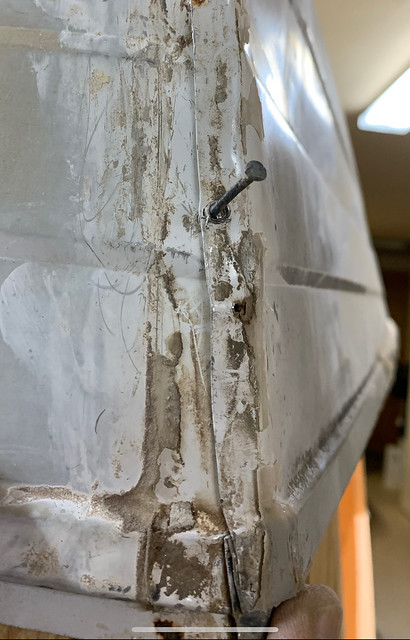 streetside corner streetside corner by stillgotomx, on Flickr |
|


