|
|
Post by vikx on Apr 12, 2015 21:35:45 GMT -8
Don't give up! I think you can do it now. The trick is to let the metal tell you what is needed. I had to notch the roof and rear skins on the Cardinal. Sealed with Gutter Seal will not leak. Nothing is perfect, you just try to get it close... 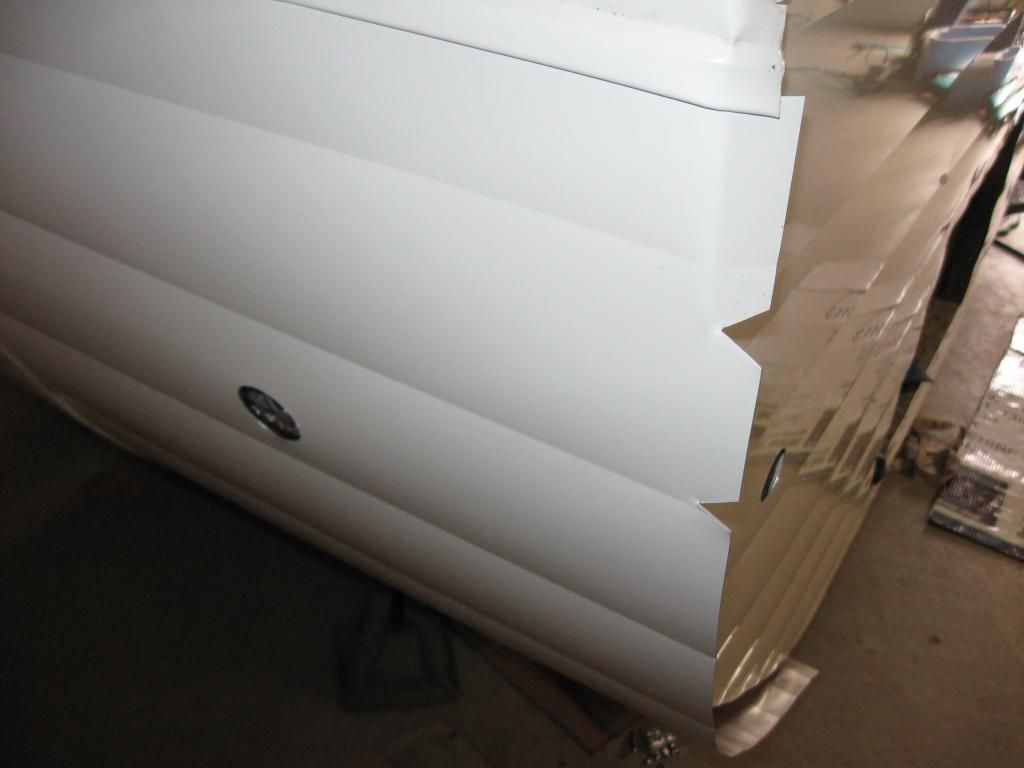 Here, you can't even see the notches, just the grey Gutter Seal: 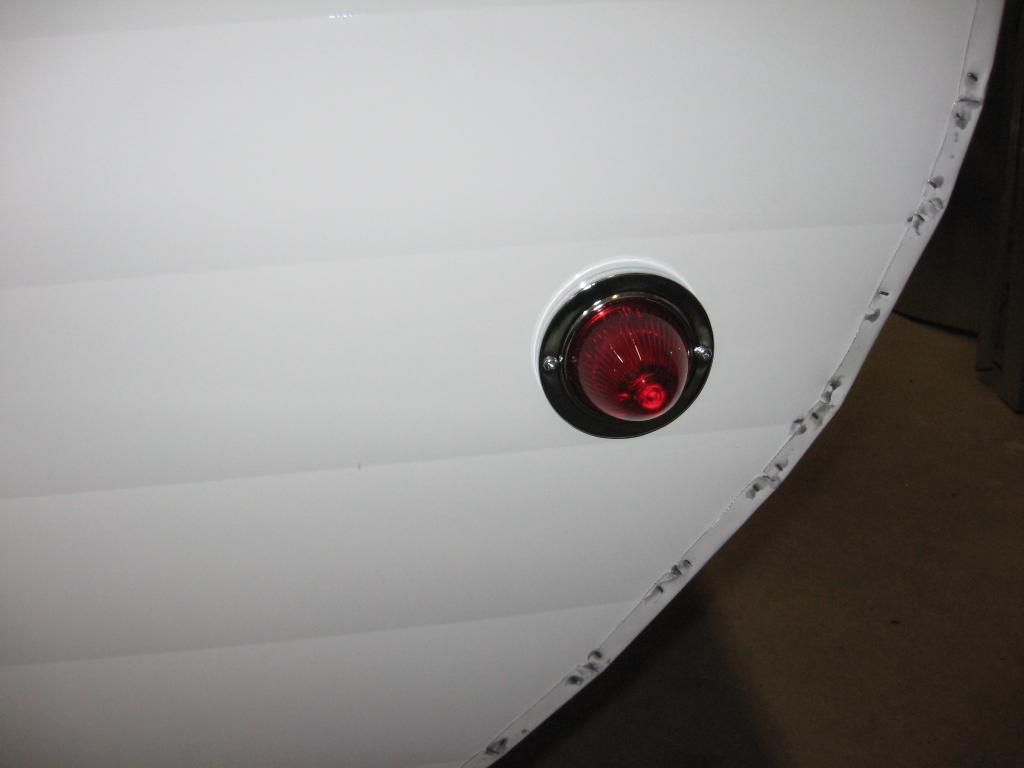 The cuts pretty much squeeze together. Have a helper, even if just a second set of eyeballs. Tie straps help and test as you go. If you run into buckles and problems, take your time, make adjustments and you will do well. If the pro is close enough, you might go see if person how he does it. And/or watch him do yours. The next time, you won't need him. LOL. |
|
bmxovich
Active Member

Posts: 187 
Likes: 69
1952 Airfloat Skipper
Currently Offline
|
Post by bmxovich on Apr 13, 2015 17:50:04 GMT -8
Great build, nice craftsmanship. Lots of good info in your thread.
|
|
davek
Active Member
Posts: 173
Likes: 94
Currently Offline
|
Post by davek on May 9, 2015 7:58:30 GMT -8
Great build. Looking forward to updates.
|
|
coldham
Active Member
Posts: 138
Likes: 35
1954 Terry
Currently Offline
|
Post by coldham on May 10, 2015 20:36:48 GMT -8
Thanks for all the kind words and encouragement. I need it.
I drove about three hours to cache campers in Palmer ak. The owner spent a long time explaining how he skins the roof and showed me some examples. Nice guy! The shop was full of new builds and repair work so I got to see a few roofs and built some confidence. They built me a new roof panel and front and rear skins. I still need to break the pattern in the front and rear skins. I got some pointers on that as well. The only bare aluminum he had was pretty thick even thicker than what was on my trailer originally. He said it would be a little harder to work but it was doable. I like the idea of thicker skin but I hope I can get the fold overs to look good. He had j rail for cheap so I bought three sixteen foot sticks of that also. I was getting pretty good at fixing mine and I even had most of the silver slop blasted off but I couldn't resist the shiny new J rail sitting on his shelves.
Next weekend I will attempt the roof install. I'll take pictures and share what I learn. If I start to fail again I'll probably pull the camper to cache campers and have him finish it for me.
I also entered a road lottery to be able to drive a private vehicle into Denali National Park. Usually the park is closed to private vehicles but they open it for a few days in the fall for the lucky few who win the road lottery. Wish me luck.
|
|
coldham
Active Member
Posts: 138
Likes: 35
1954 Terry
Currently Offline
|
Post by coldham on May 17, 2015 18:58:20 GMT -8
Thanks for all the tips. The roof went on great and looks better than I could have hoped for... Almost perfect. Here are a few tips I picked up from members here and at the camper place I visited last weekend that were really helpful.
Secure the middle of the roof on one side and square it up. Then pull it tight.
Use duck bill vice grips with loops welded on to grab the Pittsburg seam and pull the skin tight. This worked great. I used ratchet staps to pull the skin really really tight.
Use the fancy sheers that mobile tec recommends to cut the excess metal. They turned this into a one hour job instead of a one day job with my old sheers.
Use a board on the roof to keep it flat and pushed down. Then hammer the seam downward to fold it over. Go six inches at a time on each side. I nailed it as I went.
Use a second set of eyes to focus on the big picture while you focus on the small details. I didn't take this piece of good advice and it almost cost me. I almost had a seam running through my roof vent which probably would have been a disaster down the road. I noticed befor I got too far and was able to correct it.
|
|
coldham
Active Member
Posts: 138
Likes: 35
1954 Terry
Currently Offline
|
Post by coldham on May 17, 2015 19:04:26 GMT -8
|
|
coldham
Active Member
Posts: 138
Likes: 35
1954 Terry
Currently Offline
|
Post by coldham on May 17, 2015 19:07:51 GMT -8
|
|
coldham
Active Member
Posts: 138
Likes: 35
1954 Terry
Currently Offline
|
Post by coldham on May 17, 2015 19:11:37 GMT -8
|
|
coldham
Active Member
Posts: 138
Likes: 35
1954 Terry
Currently Offline
|
Post by coldham on May 17, 2015 19:18:48 GMT -8
|
|
RinTin
Full Member
Posts: 760
Likes: 292
Currently Offline
|
Post by RinTin on May 18, 2015 7:24:45 GMT -8
Congrats on your success!! Its no fun to do things over but sure feels good to get it right.
|
|
davek
Active Member
Posts: 173
Likes: 94
Currently Offline
|
Post by davek on May 22, 2015 22:05:00 GMT -8
Fantastic!!! So close to done. Keep after it.
|
|
|
|
Post by vikx on May 24, 2015 21:57:09 GMT -8
Good on ya, Coldham!!
|
|
coloradocamper
Junior Member
Posts: 94 
Likes: 25
1956 Terry Trailer
Currently Offline
|
Post by coloradocamper on Aug 13, 2015 19:57:44 GMT -8
Where did you go? Please update, this is like a good book that you can't wait to turn the page, only to find the last chapter is missing...
|
|
coldham
Active Member
Posts: 138
Likes: 35
1954 Terry
Currently Offline
|
Post by coldham on Aug 13, 2015 21:22:57 GMT -8
Sorry, I've been a slacker on my updates. Here's the cliff notes version to catch up. Finished the roof. Stripped the paint on the sides. Put some aluminum cleaner on the skin. New j-rail. Then went camping! There's still some small things left to do like the vent and some trim but it's pretty much done.  |
|
SusieQ
Global Moderator 
Posts: 4,781
Likes: 1,197
'62 Shasta Compact
Currently Offline
|
Post by SusieQ on Aug 13, 2015 21:30:33 GMT -8
Wow, it looks fabulous! And that pic is just beautiful. I've followed you from the very beginning. So glad to see you're camping in it. You did a great job!
|
|


