Drake
Junior Member

Posts: 82 
Likes: 16
'59 Shasta AirFlyte
Currently Offline
|
Post by Drake on Dec 15, 2014 17:44:21 GMT -8
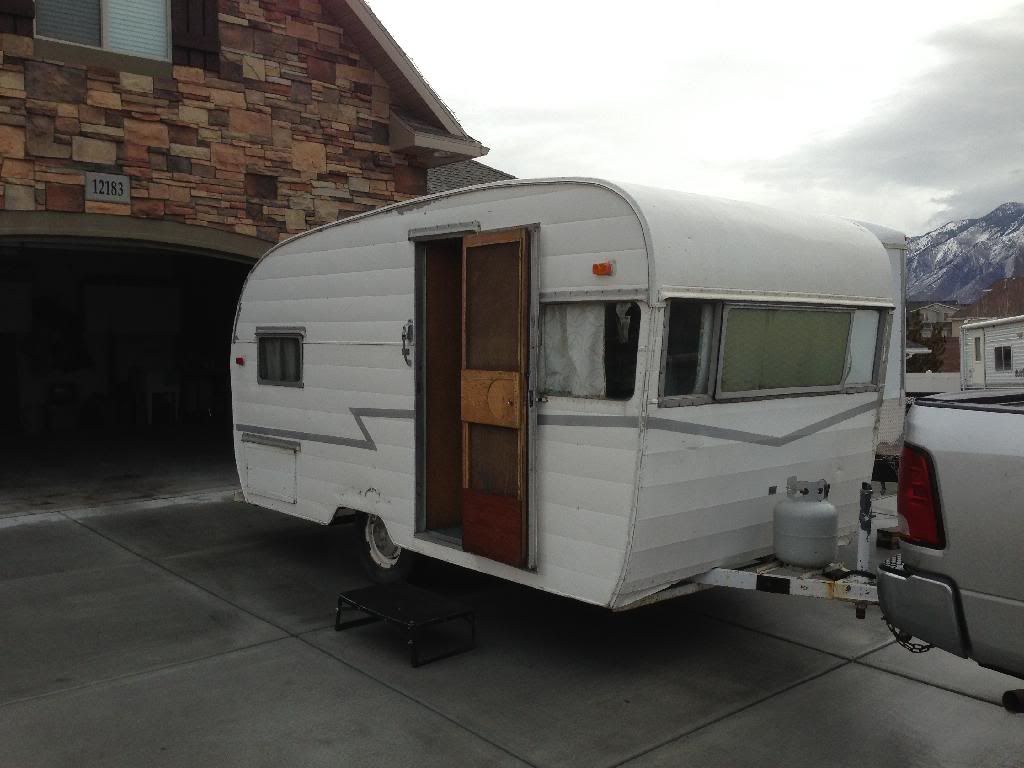
So I bought this trailer last March and only was able to remove the paint during the summer because I was busy with my business. Its a seasonal business and so I have plenty of time during the winter to work on it. I needed to find a place to work on it out of the weather, so I looked around for shop space to rent for 3-4 months and that didn't work out, everyone wanted a year lease minimum. So "plan B" was to get the trailer in my garage some how, I took the axle out from under it and put casters under the corners and wheeled it in about 2 weeks ago. The weather has been unseasonably warm here in Utah and so I have been able to continue working my business the last couple of weeks so no work on the trailer. Today I started pulling screws, removed all the eyebrows, awning rail, drip moldings, and roof vent in preparation of removing the top skin to repalce sagging roof framing, roof skin is coated with roll-on water proofing goop(it will be replaced with new skin) and one interior birch roof panel that has water damage. Heres a few photos of the early progress: 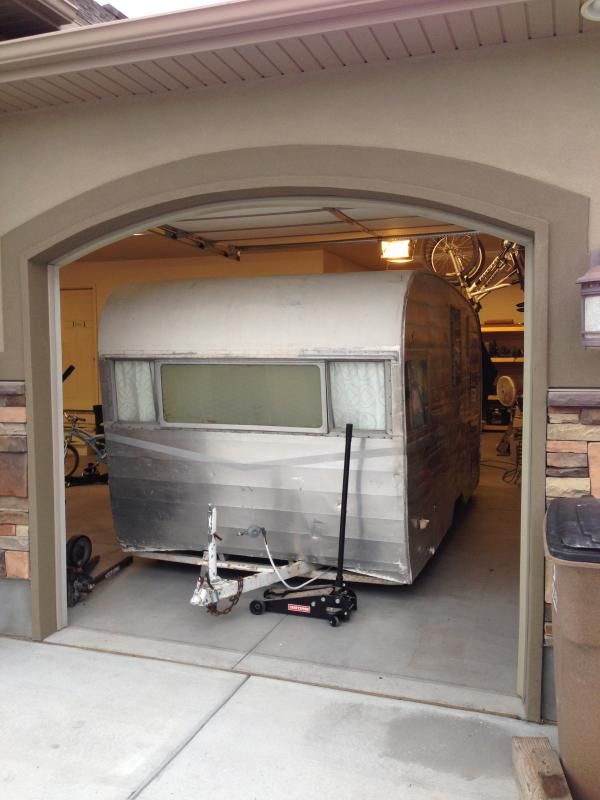 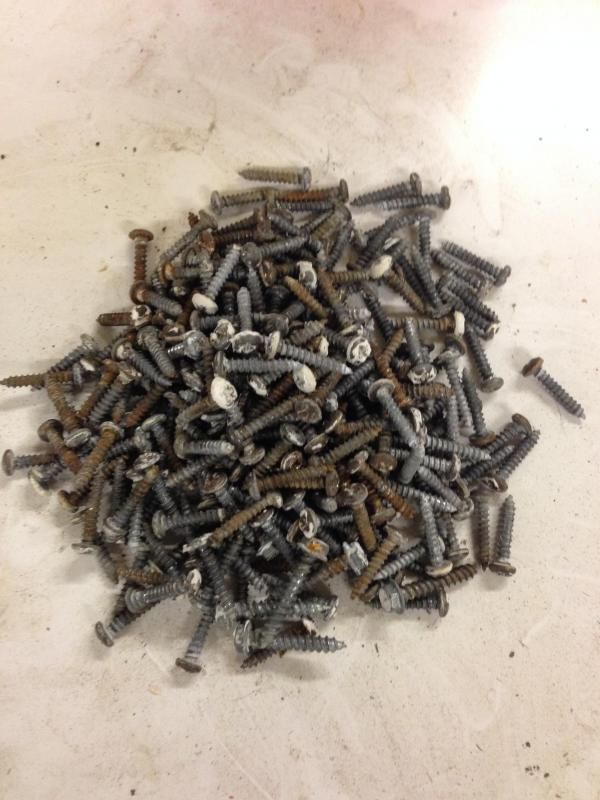 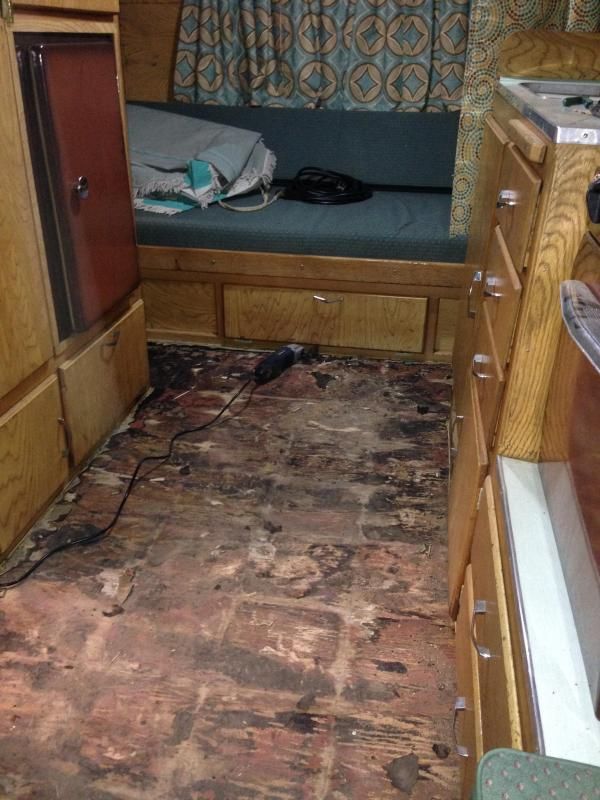 I also started pulling up the original tile and the carpet that was glued to it. I should be able to keep going with the repairs on a regular basis this winter. Wish me luck I'll need it. |
|
RJ
Active Member
Posts: 416
Likes: 144
Currently Offline
|
Post by RJ on Dec 15, 2014 18:25:13 GMT -8
And the journey begins. Best of luck Drake on your winter endeavors. Nice looking old trailer!
|
|
gomesie
Member
Posts: 26
Likes: 5
1964 Scotty Highlander
Currently Offline
|
Post by gomesie on Dec 15, 2014 19:14:32 GMT -8
Nice trailer. What did you use to strip the paint?
|
|
Drake
Junior Member
Posts: 82
Likes: 16
'59 Shasta AirFlyte
Currently Offline
|
Post by Drake on Dec 15, 2014 20:16:13 GMT -8
 [/URL] This paint stripper worked great on all the paint but didn't do very well on the white waterproof goop that was spread all over the top skin and drip rail. |
|
gomesie
Member
Posts: 26
Likes: 5
1964 Scotty Highlander
Currently Offline
|
Post by gomesie on Dec 16, 2014 5:11:42 GMT -8
I am doing a frame rebuild on a Scotty Highlander now and need to strip the paint from windows and molding was hesitant on using a cosmic stripper will give this a try.
When my boys were young we made 4 summer vacation trips out your way with a Lance Truck camper and by far I enjoyed Utah the best. Great fun place. Wife and I hope do go there again when I finish this camper.
|
|
mobiltec
5K Member
 I make mistakes so you don't have to...
Posts: 9,822
Likes: 3,749
1954 Jewel In Progress...
Currently Offline
|
Post by mobiltec on Dec 16, 2014 8:38:28 GMT -8
So far very good Drake. I'll be watching so make sure and post plenty of photos of your progress. If you are doing a blog or webpage of some sort of your project could you send me the link for my website? I have a section where I display viewers projects... I envy your being able to work inside....
|
|
Drake
Junior Member
Posts: 82
Likes: 16
'59 Shasta AirFlyte
Currently Offline
|
Post by Drake on Jan 7, 2015 8:15:43 GMT -8
Yesterday I was able to spent some time working on the trailer again. Removed front and rear windows, removed non OEM tail lights, removed nails from roof skin(roof skin is now completely detached and ready to come off). As good as shape as my trailer looked like before I started taking things apart there is definately going to be more wood replacement than antcipated. Just by pulling back a little on the rear and front skins I can see "curbing" that will need to be replaced and I'm sure there will be more as I continue pulling those panels all the way off today. Good news is, I found a local supplier for my new roof skin Bestway Trailer & Camper Repair, Inc www.bestwaytrailer.com that will save me about $340 from what I was quoted by a supplier in California for a new skin, most of the savings is shipping costs. Maybe now I can look at replacing other skin pieces that I was going to leave on but didn't really want to with the savings. One quick question: I'm going to check a specialty wood supplier here for 1/8" Ash plywood(that's what's in my Shasta) If I cannot find it, what have you all used instead of ash? Is there anything that will shellac right to give a similar look and color? 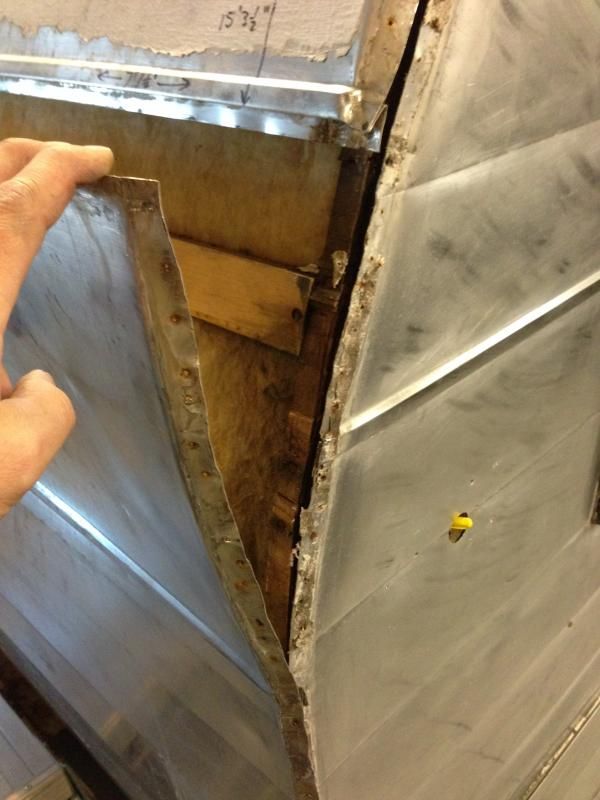 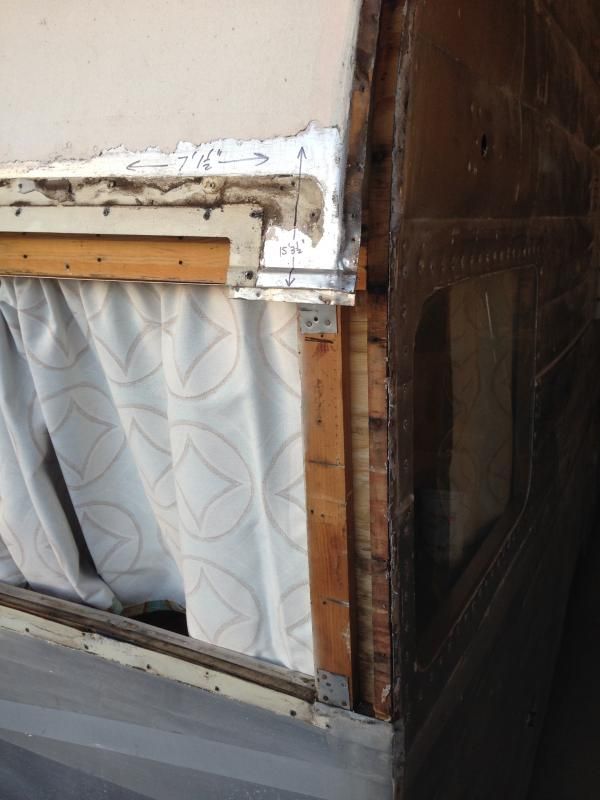  |
|
Drake
Junior Member
Posts: 82
Likes: 16
'59 Shasta AirFlyte
Currently Offline
|
Post by Drake on Jan 7, 2015 9:51:25 GMT -8
Found one sided 4'X8'X 3/16" ash ply with a MDF core for $35.00 per sheet at Mac Beath Hardwood. It matches the thickness pretty well with the Shatsa Magazine rack from my trailer. Any probelms with using an MDF core material? I don't think I will ever find ash with a plywood core.
|
|
|
|
Post by schweetcruisers on Jan 7, 2015 10:09:19 GMT -8
Found one sided 4'X8'X 3/16" ash ply with a MDF core for $35.00 per sheet at Mac Beath Hardwood. It mataches the thickness pretty well with the Shatsa Magazine rack from my trailer. Any probelms with using an MDF core material? I don't think I will ever find ash with a plywood core. I would absoulutly not use MDF in a trailer.... 1) it's heavy, very heavy 2) it's fragile, it will probably snap if it's used on the front curve 3) with the movement of a trailer it will probably wallow out around nails and or crack 4) if it gets wet it's ruined, it will puff up, deform, swell and or desinagrate |
|
|
|
Post by danrhodes on Jan 8, 2015 13:15:14 GMT -8
Found one sided 4'X8'X 3/16" ash ply with a MDF core for $35.00 per sheet at Mac Beath Hardwood. It matches the thickness pretty well with the Shatsa Magazine rack from my trailer. Any probelms with using an MDF core material? I don't think I will ever find ash with a plywood core. My local lumberyard can order 1/8 ash ply panels, but they are $80. I will probably just use birch as many other have, which is only about $22. |
|
nccamper
Administrator 
Posts: 7,744
Likes: 2,871
1962 Forester- 1956 Shasta
Currently Offline
|
Post by nccamper on Jan 8, 2015 14:38:19 GMT -8
From my limited experience, birch really looks fine with ash after 3 coats of amber shellac. The grain looks a little different, but not bad at all. If the original wood is Amber you will have to play with it...maybe one coat of amber on the old wood and three on the new. Matching the yellowish tint in our Shasta Compact was impossible. I haven't heard of anyone doing it well. I sanded the entire camper down (4 days of sanding) and went amber. I had to use the "banned in 30 states" stripper to get three coat of house paint off the outside of one camper. At one point the industrial gloves melted. Three coats Amber 2 coats clear, Bulls eye.  |
|
Drake
Junior Member
Posts: 82
Likes: 16
'59 Shasta AirFlyte
Currently Offline
|
Post by Drake on Jan 11, 2015 19:11:57 GMT -8
|
|
|
|
Post by wisconsinjoe on Jan 18, 2015 19:29:55 GMT -8
Drake,
Saw those warped sagging roof rafters, if you can call those rough 1x3s rafters. Welcome to the world of vintage engineering. Here's what I did when I found that exact thing in our camper: I cut new straight poplar rafters that simply were scabbed onto the sagging ones and attached them with glue and screws through pre-drilled pilot holes. It really doesn't matter if the ceiling sags inside. You probably barely notice. I've wondered if it might be even stronger if I scabbed something like angle aluminum instead of wood.
|
|
Drake
Junior Member
Posts: 82
Likes: 16
'59 Shasta AirFlyte
Currently Offline
|
Post by Drake on Jan 18, 2015 20:21:40 GMT -8
Drake, Saw those warped sagging roof rafters, if you can call those rough 1x3s rafters. Welcome to the world of vintage engineering. Here's what I did when I found that exact thing in our camper: I cut new straight poplar rafters that simply were scabbed onto the sagging ones and attached them with glue and screws through pre-drilled pilot holes. It really doesn't matter if the ceiling sags inside. You probably barely notice. I've wondered if it might be even stronger if I scabbed something like angle aluminum instead of wood. I need to replace the ceiling panel section that the vent is in beacuse its is rotting away. I have already removed the bowed roof rafters and ceiling panel. I removed the rear framing and lower panel yesterday. just haven't got around to posting pics yet. I hope to start adding in new pieces this week. I have already bought the framing lumber just waiting to get ASH veneer and 1/8" lauan ply to laminate together to make the ceiling and rear interior panels. Ash veneer should be availale to pick up Tuesday or Weds. I'm ready to start putting this back together. Thanks for the 12v electrical tips. |
|
|
|
Post by wisconsinjoe on Jan 18, 2015 20:41:40 GMT -8
I need to replace the ceiling panel section that the vent is in beacuse its is rotting away. I have already removed the bowed roof rafters and ceiling panel. I removed the rear framing and lower panel yesterday. just haven't got around to posting pics yet. I hope to start adding in new pieces this week. I have already bought the framing lumber just waiting to get ASH veneer and 1/8" lauan ply to laminate together to make the ceiling and rear interior panels. Ash veneer should be availale to pick up Tuesday or Weds. I'm ready to start putting this back together. Thanks for the 12v electrical tips. Cool idea about making your own ash plywood with veneer. How will you do that? Vacuum press? What kind of glue? Contact glue and roller method? What is veneer source and cost? |
|