boandsusan
Active Member

Posts: 282
Likes: 34
Currently Offline
|
Post by boandsusan on Jul 8, 2013 19:30:57 GMT -8
The following is a step by step, of the under the bed AC installation, which Bo and I did in a 72 Shasta Compact last year. 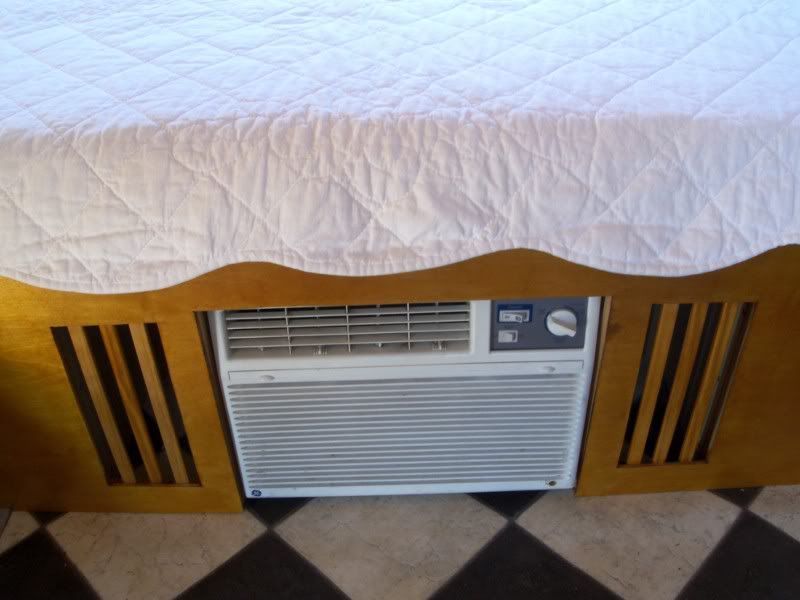 |
|
boandsusan
Active Member
Posts: 282
Likes: 34
Currently Offline
|
Post by boandsusan on Jul 8, 2013 20:02:14 GMT -8
When framing the front of the bed we allowed for the exact measurements of the AC unit (you need a tight fit). 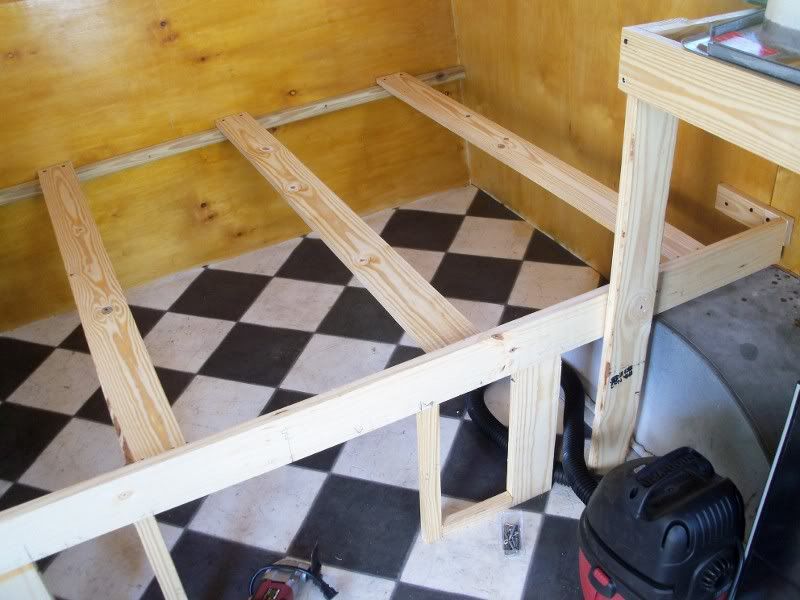 |
|
|
|
boandsusan
Active Member
Posts: 282
Likes: 34
Currently Offline
|
Post by boandsusan on Jul 8, 2013 20:12:16 GMT -8
Next I took a piece of conduit and covered the bottom with a bit of screen and then used silver tape to wrap the bottom so that I could easily see it under the camper to check for water flow. 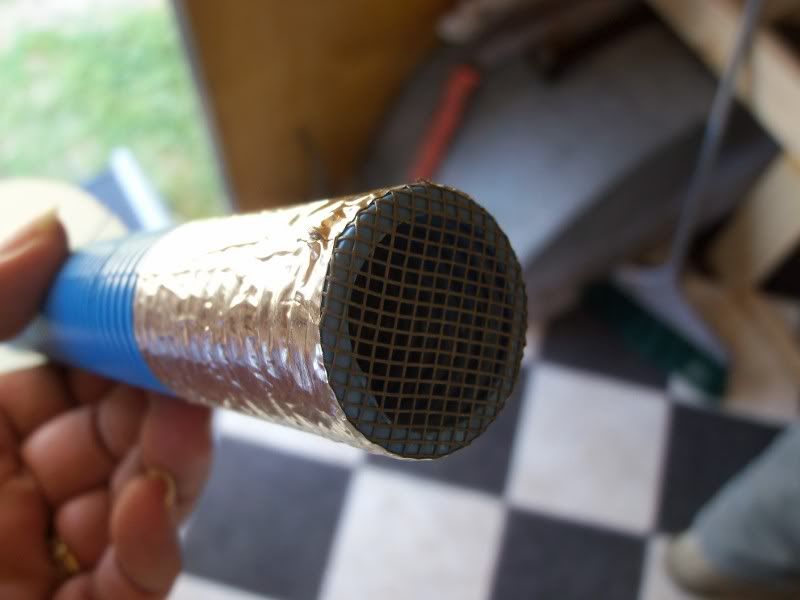 |
|
boandsusan
Active Member
Posts: 282
Likes: 34
Currently Offline
|
Post by boandsusan on Jul 8, 2013 20:14:02 GMT -8
Drain hose inserted into the hole in the floor.. 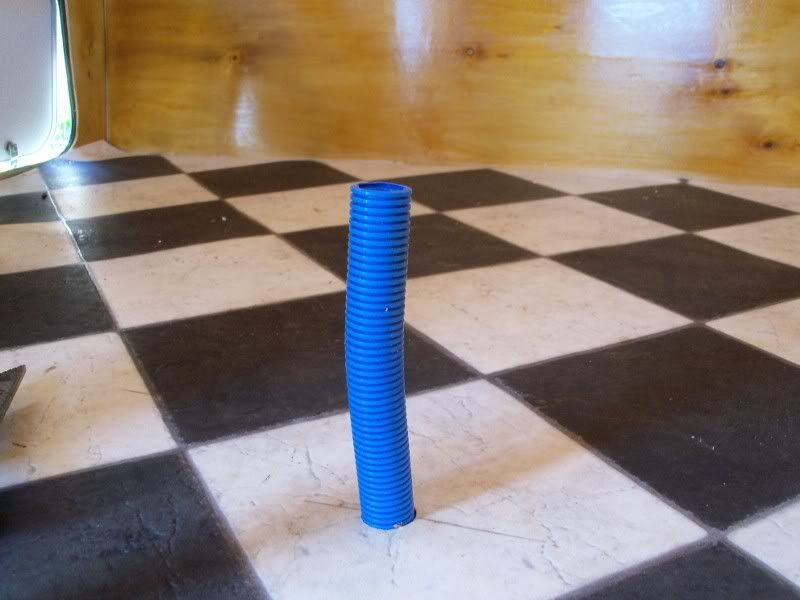 |
|
|
|
Post by vikx on Jul 8, 2013 23:21:21 GMT -8
Thank you so much for posting this!
|
|
boandsusan
Active Member
Posts: 282
Likes: 34
Currently Offline
|
Post by boandsusan on Jul 9, 2013 6:26:50 GMT -8
Your welcome vikx. When I get some good shots of the closet installation, I`ll post it too.
|
|
|
|
boandsusan
Active Member
Posts: 282
Likes: 34
Currently Offline
|
Post by boandsusan on Jul 9, 2013 7:18:48 GMT -8
Now a hood was built over the hole to direct the heat from the back of the unit through the floor. We used 3/4 plywood on the hood to keep the heat off the bed. 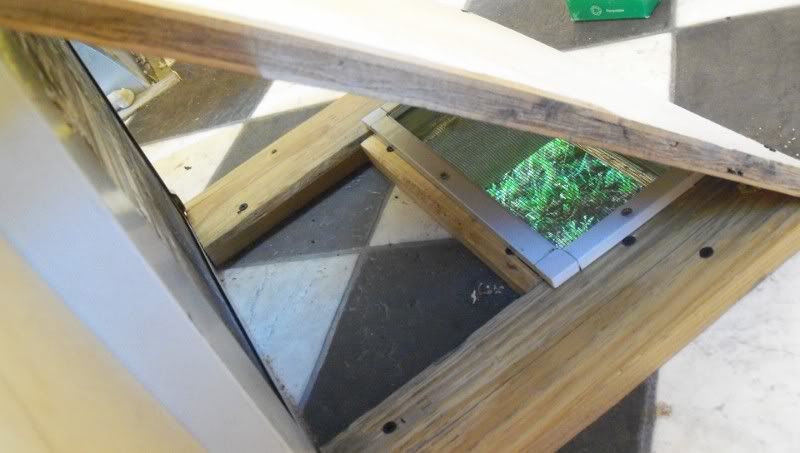 |
|
boandsusan
Active Member
Posts: 282
Likes: 34
Currently Offline
|
Post by boandsusan on Jul 9, 2013 7:22:22 GMT -8
For lack of another word, "Wing boxes" were built on the sides, so that preconditioned air could be sucked into the side vents on the AC. 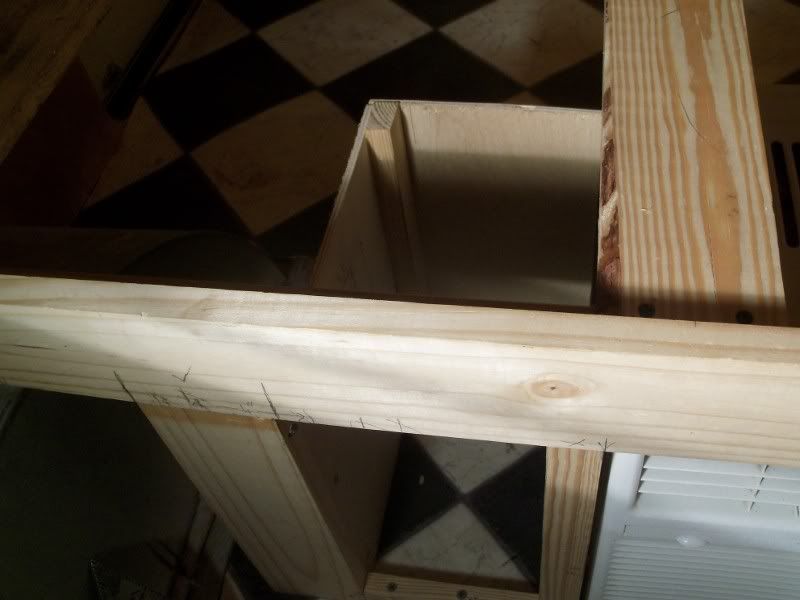 |
|
boandsusan
Active Member
Posts: 282
Likes: 34
Currently Offline
|
Post by boandsusan on Jul 9, 2013 7:25:40 GMT -8
Next we covered the whole top of the AC and "wing boxes", tightly with 3/4 plywood. 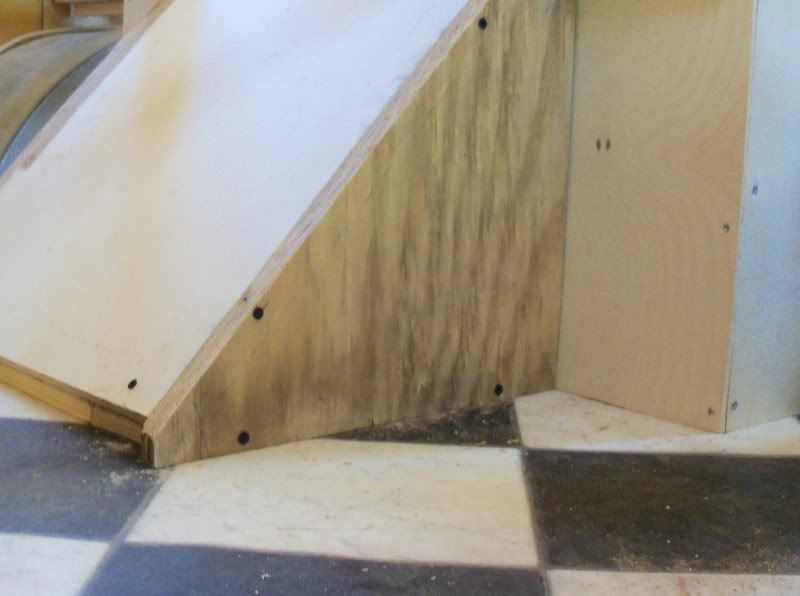 |
|
boandsusan
Active Member
Posts: 282
Likes: 34
Currently Offline
|
Post by boandsusan on Jul 9, 2013 7:30:08 GMT -8
For the facing we used a piece of Birch and I glued and tacked pieces of left over flat trim on the backside of the vents. |
|
boandsusan
Active Member
Posts: 282
Likes: 34
Currently Offline
|
Post by boandsusan on Jul 9, 2013 7:46:34 GMT -8
This method works great if you don`t live in the South. By July it started having a problems cooling (during the day only). We don`t stay in out campers during the day anyway and it still kept it cool enough to take a power nap in the afternoons so it wasn`t a problem for us. We sold this camper and camp often with her new owner who uses a small elec fan on her front dinette table, to circulate the cool air better. When I have time to take some decent pictures, I`ll post a thread of the "in the closet" installation that we did in the camper that we are currently using.
|
|
1958 Shasta "Penny"
Active Member
Posts: 167
Likes: 35
1958 Shasta Airflyte 16
Currently Offline
|
Post by 1958 Shasta "Penny" on Jul 9, 2013 8:06:02 GMT -8
Thank you for this helpful info. I am having to decide where to put an AC unit and really do not want to have a roof type unit.
Would be interested in seeing your closet version as soon as possible!
|
|
boandsusan
Active Member
Posts: 282
Likes: 34
Currently Offline
|
Post by boandsusan on Jul 9, 2013 9:27:53 GMT -8
Thank you for this helpful info. I am having to decide where to put an AC unit and really do not want to have a roof type unit. Would be interested in seeing your closet version as soon as possible! Your welcome. IMO the 1x2 inch framing will NOT support a roof type AC unit, and will cause all kinds of roof leaks/possible collapsed roof. 2x4`s would be needed to support that kind of weight, even then your poor walls would be trying to support the extra weight from the unit plus the added weight of the 2x4`s  . The closet version works on the same principle but requires cutting a hole in the exterior skin and installing a baggage door. Most people are opposed to cutting the skin on a vintage, which I admit....I was too. But, because the skin was already cut for an AC when we got this camper, we went with it and are super pleased with the result. So much so, that I am going to do the same thing with the 63 Shasta 1500 that we picked up a couple of weeks ago. Instead of using an existing closet I`m considering an install like this..... Saving my closet space  . 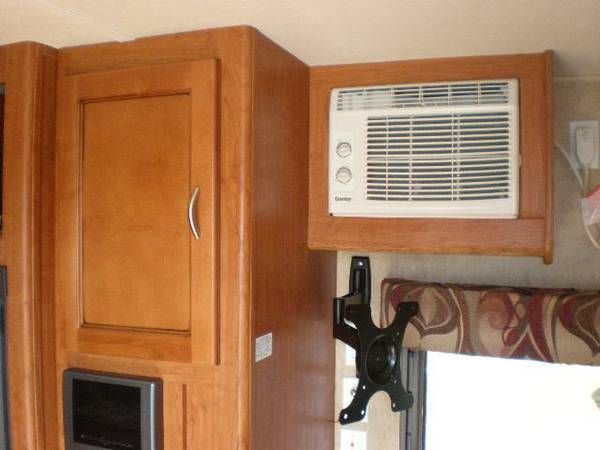 |
|


 .
. .
.