tmRoth
New Member
Posts: 19 
Likes: 2
1959 (approx.) Aristocrat
Currently Offline
|
Post by tmRoth on Feb 19, 2017 18:22:26 GMT -8
Wow, that floor looks great. It never occurred to me to do something other than squares.
Sorry if I missed it, but what type of tiles are you using?
|
|
mel
Senior Member
 1964 Shasta Airflyte
Posts: 1,729 
Likes: 523
Currently Offline
|
Post by mel on Feb 19, 2017 18:26:39 GMT -8
Looks great! Would love to see how you made that flower
|
|
CorvettCrzy
Full Member

Posts: 934
Likes: 273
'58 Corvette, '64 Franklin
Currently Offline
|
Post by CorvettCrzy on Feb 19, 2017 19:09:43 GMT -8
Wow, that floor looks great. It never occurred to me to do something other than squares. Sorry if I missed it, but what type of tiles are you using? Armstrong VCT, Tyrian Purple (although I purchased mine a couple years ago and it doesn't have the black in it that it shows on the Armstrong site), and Lemon Yellow. |
|
CorvettCrzy
Full Member
Posts: 934
Likes: 273
'58 Corvette, '64 Franklin
Currently Offline
|
Post by CorvettCrzy on Feb 19, 2017 19:35:20 GMT -8
Looks great! Would love to see how you made that flower Sure, no problem. First I drew the flower on a 9x9 cardboard, then my husband made positive and negative stencils out of plexiglass. We heated the tile and hand cut them with a box cutter. The edges were pretty rough so I spent quite a bit of time trimming and fitting making the petals slightly larger to avoid gaps. Our biggest problem was the very thin area between the petals and at the edges, we broke a lot of tiles, if I did it again I would design for thicker edges. Then Jim decided to make a jig to router out the petals. This worked well but again they would break at thin points so we just went with the original hand cut. If I did it again I would try the router jig, the edges were so smooth. It was tricking getting the petals into the tiles.  0219172220a 0219172220a by Corvett
crzy, on Flickr As you can see I gave up on a two color petal, one was hard enough.  0102172211a 0102172211a by Corvett crzy, on Flickr 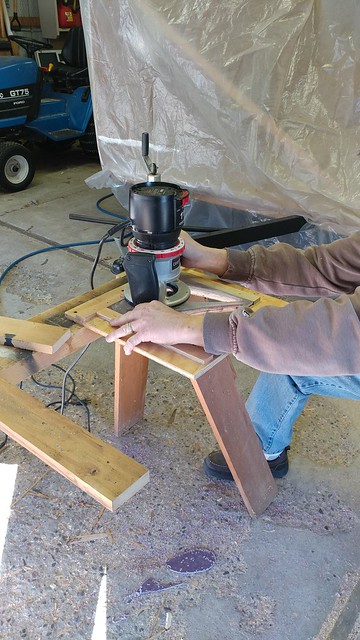 0218171521 (1) 0218171521 (1) by Corvett crzy, on Flickr |
|
mrmarty51
Leading Member
Posts: 1,787
Likes: 423
1972 HOMEMADE
Currently Offline
|
Post by mrmarty51 on Feb 19, 2017 20:20:14 GMT -8
mrmarty51 Thanks, I'm sure sometimes my husband wished I wasn't so, but he usually just gives me a shake of the head and does his best to help. And that is all any man can do. Sometimes the best help from Me is to just get out of the way. LOL |
|
|
|
Post by vikx on Feb 19, 2017 22:18:02 GMT -8
A little trick for you:
Once you have the pattern close and trimmed to make you happy, bevel the low edge to tighten the tile fit. Really easy and you'd be surprised how tight you can fit the tiles...
|
|
gypsywolf
New Member
Posts: 1
Currently Offline
|
Post by gypsywolf on Feb 28, 2017 7:37:38 GMT -8
I've got one too, not sure how to post pictures yet, but sure am thrilled to find yours!
|
|
mrmarty51
Leading Member
Posts: 1,787
Likes: 423
1972 HOMEMADE
Currently Offline
|
Post by mrmarty51 on Feb 28, 2017 11:25:25 GMT -8
I've got one too, not sure how to post pictures yet, but sure am thrilled to find yours! Hello GypsieWolf, Welcome to the VTT forum. Here is a link to theh tutorial about posting pics. in the forum. I prefer flikr as photo bucket seems to bog down the computer. Just click on the link below. link |
|
ladywendolyn
2K Member
Posts: 2,315
Likes: 928
1964 Golden Falcon
Currently Offline
|
Post by ladywendolyn on Mar 7, 2017 21:05:04 GMT -8
CorvettCrzy I don't know if you have decided on your countertop yet, but on one counter that I "repaired" I sanded the bad spots and painted them with art paints to exactly match the counter. Then epoxy over everything. You could not see the difference. Just an idea...
|
|
mel
Senior Member
1964 Shasta Airflyte
Posts: 1,729
Likes: 523
Currently Offline
|
Post by mel on Mar 8, 2017 5:10:09 GMT -8
CorvettCrzy I don't know if you have decided on your countertop yet, but on one counter that I "repaired" I sanded the bad spots and painted them with art paints to exactly match the counter. Then epoxy over everything. You could not see the difference. Just an idea... Do you have any photos of this? someone drilled a hole in my table top, I was thinking about doing something similar |
|
CorvettCrzy
Full Member
Posts: 934
Likes: 273
'58 Corvette, '64 Franklin
Currently Offline
|
Post by CorvettCrzy on Mar 8, 2017 15:55:06 GMT -8
CorvettCrzy I don't know if you have decided on your countertop yet, but on one counter that I "repaired" I sanded the bad spots and painted them with art paints to exactly match the counter. Then epoxy over everything. You could not see the difference. Just an idea... Do you have any photos of this? someone drilled a hole in my table top, I was thinking about doing something similar After reading your suggestion ladywendolyn I took another look at my table. It would be a total redo, I would be literally repainting about 90% of the table, but I'm going to take another look at the counter. If some of the suggestions I received for burn marks etc. worked, it's a possibility, but I still have to find a fix for the table. The brushed yellow sample I received (which I like the best) is too golden, so the plain pale yellow or purple are the only current options. I looked at the website that mel (I believe) posted of her favorite laminate, but they won't send samples to home owners. I might try to find a local store that sells their product to take a look at samples. Keep the ideas coming, all are appreciated. Whatever I use, I'd really like to use the overhead cupboard cracked yellow sliding doors, so I need to find something that will work with them. Ugh. |
|
ladywendolyn
2K Member
Posts: 2,315
Likes: 928
1964 Golden Falcon
Currently Offline
|
Post by ladywendolyn on Mar 8, 2017 15:57:53 GMT -8
If you send me a link to the sample you want, I can order it and throw it in the mail to you. I'm a designer so I can get all kinds of samples.
|
|
ladywendolyn
2K Member
Posts: 2,315
Likes: 928
1964 Golden Falcon
Currently Offline
|
Post by ladywendolyn on Mar 8, 2017 16:00:16 GMT -8
mel I'm sorry I don't have a photo. We sold the house... however I would encourage you to just experiment with craft paint and then put clear varathane if it's a temporary fix. I'm actually going to have an artist friend paint over a black stain in my trailer where the wood is fine, bits it's stained. It can be very effective.
|
|
CorvettCrzy
Full Member
Posts: 934
Likes: 273
'58 Corvette, '64 Franklin
Currently Offline
|
Post by CorvettCrzy on Mar 15, 2017 20:41:27 GMT -8
The last word on the floor. I was pretty happy with the floor with the exception of some gaps around the flower petals and a few seams. If we were going to do it again we would start with a router set up. Unfortunately back when we first started working on the floor we cut our tiles by hand which resulted in the gaps that you see in the pictures below. Keep in mind that I got Very close with the camera so that they could be clearly seen. We may have reduced the amount of the gaps with the router but by the time we worked that out I didn't want to use up any more of my tiles and I didn't want to have to purchase an entire box for just a few. So, I needed to figure out a way to "fill" the gaps. The system I came up with was probably not the best. It'll get us through, but if for some reason the fill doesn't stay I will redo it using epoxy. You can get more information on the notes on the pictures, but basically I ground up tile, taped the gap off and filled it with layers of super glue and tile dust. It's not the best fix and admittedly I got lazy and wanted to be finished with the floor. I expect a study of epoxy is in my future. So here it is, the good bad and ugly. All in all once it was cleaned and polished, I'm pretty happy with it. 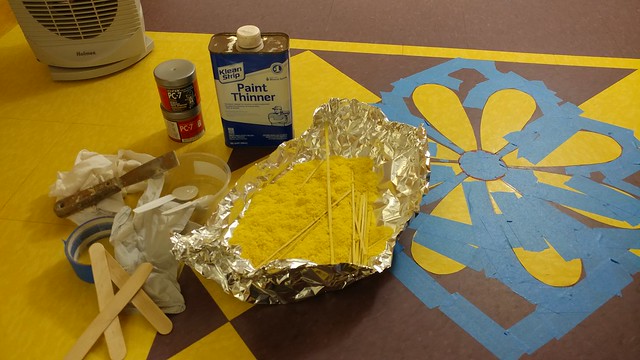 Materials Materials by Corvett crzy, on Flickr 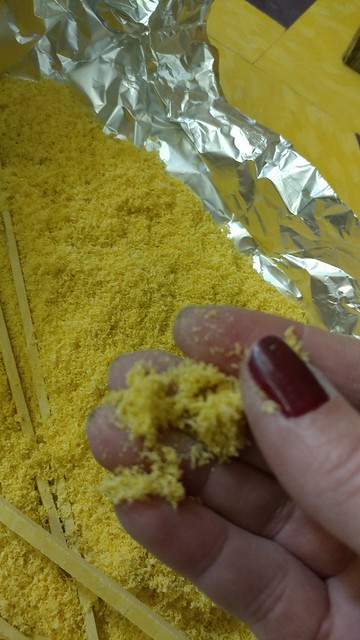 VCT Shavings VCT Shavings by Corvett crzy, on Flickr 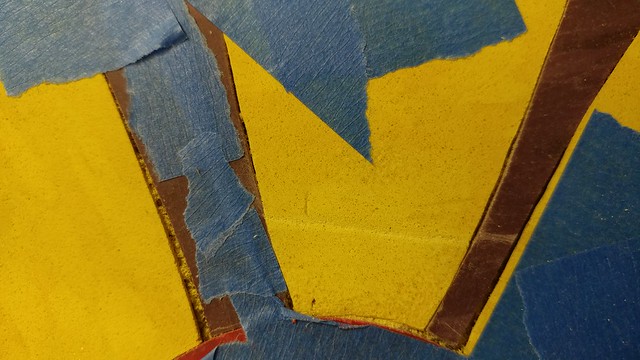 Gaps 1 Gaps 1 by Corvett crzy, on Flickr  Gaps 2 Gaps 2 by Corvett crzy, on Flickr 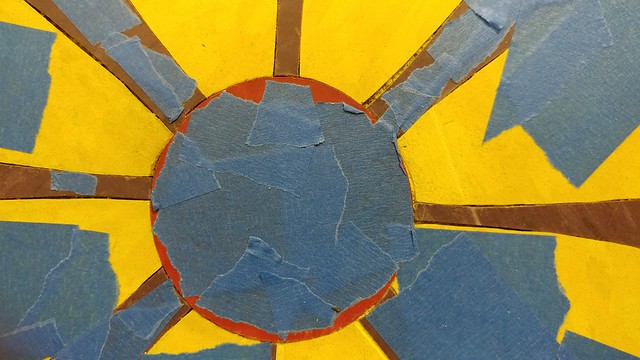 Gaps 3 Gaps 3 by Corvett crzy, on Flickr 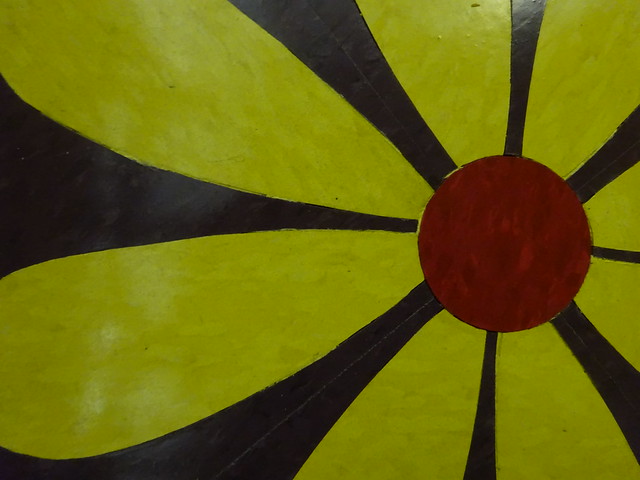 After fill and wax After fill and wax by Corvett crzy, on Flickr 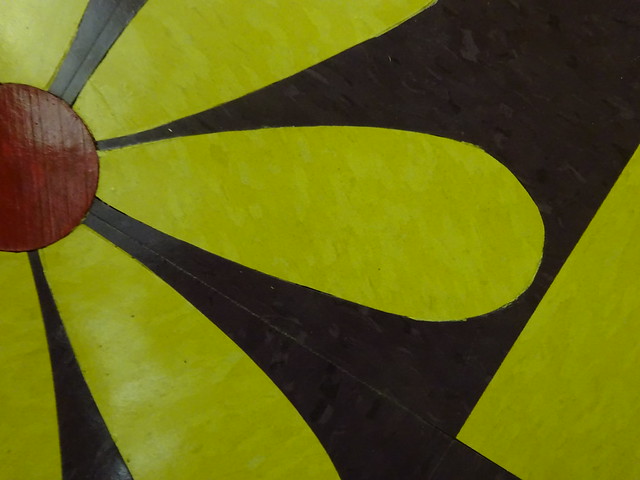 After Fill and wax 2 After Fill and wax 2 by Corvett crzy, on Flickr 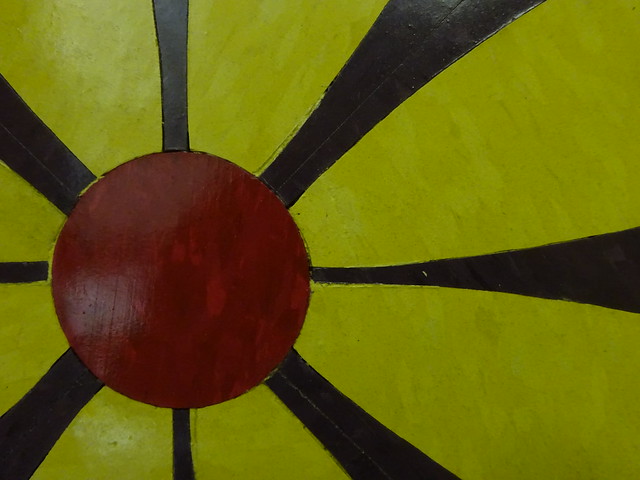 After Fill and wax 3 After Fill and wax 3 by Corvett crzy, on Flickr 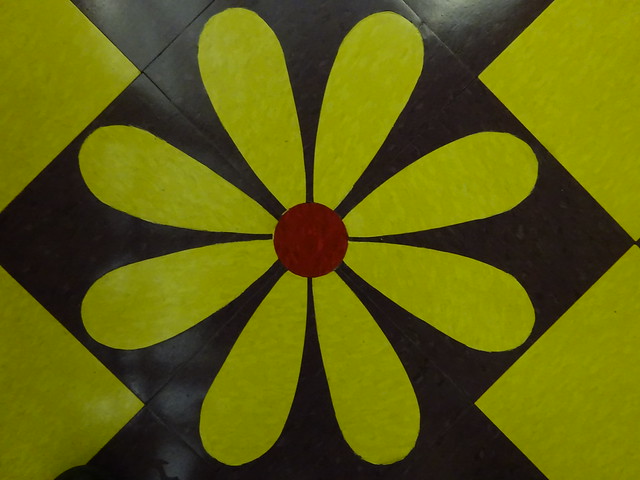 Finished Finished by Corvett crzy, on Flickr And the finished floor: 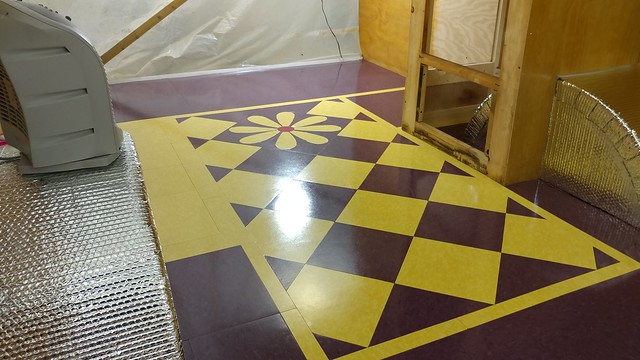 0226172202a 0226172202a by Corvett crzy, on Flickr Lessons learned: Too much heat is a very bad thing, acetone EATS vct tile (which can have some advantages but be very careful), when making a stencil for VCT avoid excessively thin areas, don't let VCT sit for too long (extreme temps, be even more careful, I think it gets more brittle), it's better not to ship it, and a little polish can make it look beautiful even if it's not perfect! |
|
mel
Senior Member
1964 Shasta Airflyte
Posts: 1,729
Likes: 523
Currently Offline
|
Post by mel on Mar 16, 2017 5:11:30 GMT -8
I love your flower, its definitely worth all the work you put in, even if its no perfect. You'll probably be the only one who notices the defects.
|
|


