theresa
1K Member
 from Northern Maine ~ Proud new owner of Lola, a 1960 Shasta Airflyte and Pearl, a 1962 Mobile Scout
Posts: 1,055 
Likes: 347
Currently Offline
|
Post by theresa on Jan 3, 2017 16:06:11 GMT -8
I shellacked in my garage with zero real ventilation and had no issues with bothersome fumes. Good luck!
|
|
mrmarty51
Leading Member
Posts: 1,787 
Likes: 423
1972 HOMEMADE
Currently Offline
|
Post by mrmarty51 on Jan 3, 2017 19:21:37 GMT -8
A very gorgeous little camper.
Boy, this camper bugs got Me to a fever pitch. LOL
|
|
CorvettCrzy
Full Member

Posts: 934
Likes: 273
'58 Corvette, '64 Franklin
Currently Offline
|
Post by CorvettCrzy on Jan 3, 2017 21:11:15 GMT -8
Well, it was a balmy 50 degrees here today, figured I'd better take advantage of the unseasonably Hot  weather and get a couple more coats of shellac on the birch panels. I decided on the french polish method last spring when I did my first coat. It took some time and I was very careful. In January, looking at the temp. falling on a daily basis, I wasn't as careful but I think they turned out just fine. I used about a quart of shellac for 5 birch panels, wondering, if I'm putting it on too thin or too thick? They didn't come out as dark as I expected they would, but that's ok, kind of like it lighter and they'll darken with age...  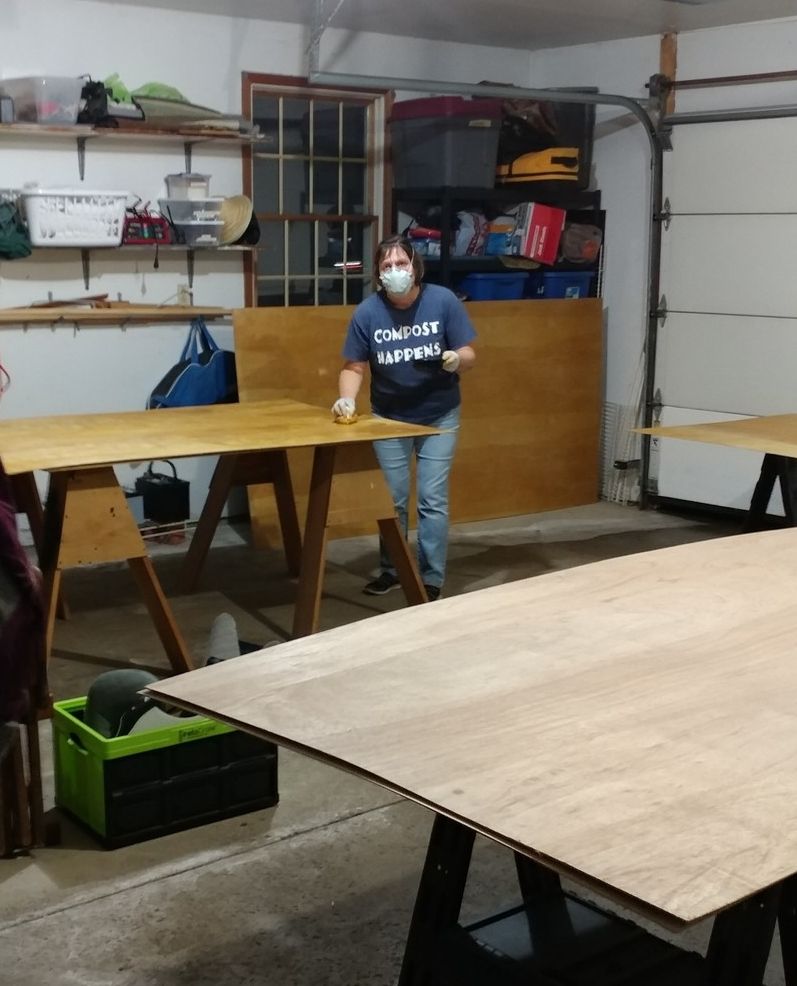 I decided to do it in the garage, with heat. I cracked the bottom of the garage door and an upper window, felt a slight breeze, figured that was good enough. Furnace started up at least 3 or 4 times, garage and house still standing. Thanks for the encouragement!!! Did a test spot on the wall in the barn (no heat) to see what would happen............ Panel at front of pic is backside. |
|
|
|
Post by vikx on Jan 3, 2017 22:06:00 GMT -8
I use about a quart for 3 panels. It kind of depends on how "thirsty" the panel is. I've noticed that I'm needing 4 coats the last year or so rather than 3. Who knows if it's the panel or diluted shellac?
|
|
CorvettCrzy
Full Member
Posts: 934
Likes: 273
'58 Corvette, '64 Franklin
Currently Offline
|
Post by CorvettCrzy on Jan 3, 2017 22:18:02 GMT -8
Vikx, What do you use to determine how many coats are enough? Color? Feel? Something specific about appearance?
I noticed that there are spots that appear "dryer" than others but even when I go over them, they don't change.
|
|
msgoehring
Full Member
Just call me Margaret the shellac, buff, sand an shine queen.
Posts: 860
Likes: 303
1957 Westerner Deluxe
Currently Offline
|
Post by msgoehring on Jan 4, 2017 21:12:59 GMT -8
If you LIGHTLY sand the panels with like 400 grit sandpaper after the last color coat and in between the clear coats I've found that the color evens out better. I basically use the sandpaper like a washcloth and lightly go over the whole panel until it feels uniformly smooth. Mine are so smooth they feel like formica or something just as smooth. I really like that and think the wood will clean easier.
Just something I thought I'd mention.
|
|
|
|
Post by vikx on Jan 4, 2017 21:16:19 GMT -8
Well, the first coat is crap, we all know that; streaky, light and dark. I do the 2nd coat after the first is dry to the touch. I don't sand yet. The panel dries overnight. Sand lightly with 220 and apply the 3rd coat. That is when I begin to see the shine and lack of dry spots. I've not been able to get a good shine in the last year with the 3rd coat. Sand again and apply the 4th coat. I eyeball sideways and shine a light here and there to insure good coverage.
Granted, I'm not doing a French polish. I just want a nice look that is easy to touch up. So far, it's turned out pretty well. With your Corvette ply walls, you should have better quality panels than I usually work with. I think a lot of shellac coverage depends on the wood surface itself.
|
|
CorvettCrzy
Full Member
Posts: 934
Likes: 273
'58 Corvette, '64 Franklin
Currently Offline
|
Post by CorvettCrzy on Jan 4, 2017 21:17:15 GMT -8
If you LIGHTLY sand the panels with like 400 grit sandpaper after the last color coat and in between the clear coats I've found that the color evens out better. I basically use the sandpaper like a washcloth and lightly go over the whole panel until it feels uniformly smooth. Mine are so smooth they feel like formica or something just as smooth. I really like that and think the wood will clean easier. Just something I thought I'd mention. Uh - oh - clear coats? I just put 3 coats of amber. Am I supposed to poly it after? I would prefer it to be smooth. Thanks for mentioning. I sanded them first before I started the shellac. Unless I get another unseasonal break in the weather I may be sanding and adding another coat after it's assembled. At least that's better than 3 I guess. What about the poly? |
|
|
|
Post by vikx on Jan 4, 2017 21:35:24 GMT -8
3 to 4 coats of shellac is fine. Some people prefer clear shellac over the amber, depending on the color preferred. Some like Poly, but I've never needed it.
HINT: do NOT try to paint the ceiling panels after installation. The shellac will run right down your arm...
|
|
msgoehring
Full Member
Just call me Margaret the shellac, buff, sand an shine queen.
Posts: 860
Likes: 303
1957 Westerner Deluxe
Currently Offline
|
Post by msgoehring on Jan 4, 2017 21:47:31 GMT -8
Yeah I wanted mine to shine a bit because they are so much darker than others since I tinted the shellac to get a color i liked better with less orange. So I put 2 coats of clear shellac on to finish them off.
|
|
CorvettCrzy
Full Member
Posts: 934
Likes: 273
'58 Corvette, '64 Franklin
Currently Offline
|
Post by CorvettCrzy on Jan 4, 2017 21:57:57 GMT -8
3 to 4 coats of shellac is fine. Some people prefer clear shellac over the amber, depending on the color preferred. Some like Poly, but I've never needed it. HINT: do NOT try to paint the ceiling panels after installation. The shellac will run right down your arm... And from that day on she could never lower her hairless arm again..........................  |
|
theresa
1K Member
from Northern Maine ~ Proud new owner of Lola, a 1960 Shasta Airflyte and Pearl, a 1962 Mobile Scout
Posts: 1,055
Likes: 347
Currently Offline
|
Post by theresa on Jan 5, 2017 7:38:28 GMT -8
I thinned my shellac, and did 3 coats of Amber and two coats of clear (French polish method). I too had some "dry" looking spots, but I think they were just blemishes, if you will, in the panels.
|
|
mrmarty51
Leading Member
Posts: 1,787
Likes: 423
1972 HOMEMADE
Currently Offline
|
Post by mrmarty51 on Jan 6, 2017 12:26:35 GMT -8
I thinned my shellac, and did 3 coats of Amber and two coats of clear (French polish method). I too had some "dry" looking spots, but I think they were just blemishes, if you will, in the panels. The trim in my house is made from maple flooring from an old mansion that My dad and I tore down, way back in the early sixties. I took it to California and had My brother work it iver, in His cabinet shop and make it into trim. It might not apply to shallac but then it might. I cleared with polyurethane. three coats, sanding between the second and third coat. the third coat did have some dry looking places so i sanded again with 400 grit, did another coat of clear and that coat went on so smooth it was unbelievable. I did put it on with a pretty wet brush and it smoothed out and looks very nice. |
|
mrmarty51
Leading Member
Posts: 1,787
Likes: 423
1972 HOMEMADE
Currently Offline
|
Post by mrmarty51 on Jan 6, 2017 12:50:50 GMT -8
Here is a pic. of the trim. My brother could not figure out how to hide the rust and balck from the nail holes. i told Him I did not want to hide them, it is all part of the history. LOL  IMG_2996 IMG_2996 by Martin Draper, on Flickr |
|
CorvettCrzy
Full Member
Posts: 934
Likes: 273
'58 Corvette, '64 Franklin
Currently Offline
|
Post by CorvettCrzy on Jan 27, 2017 20:35:50 GMT -8
Thanks for all the advice! I decided to lightly sand with 500 grit (what I had on hand), add 1 more additional coat of Amber Shellac, and a coat of clear. 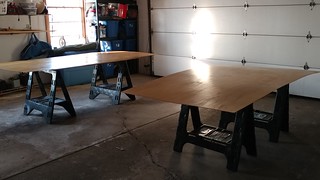 Shellac Ceiling Panels Shellac Ceiling Panels by Corvett crzy, on Flickr Decided that after purchasing 2 quarts of Amber, it was time to go for the gusto and get a gallon, seeing as I have to do two more birch panels (at least) and all of the window trim, and most likely 2 or 3 more coats on my walls. I soon discovered that Amber shellac is only available in qts. The big box stores say on line that you have to purchase 2 gallons at a time. What to do.................go to my local Ace store of course!!! I love my hardware store!! Gave them a call and asked if they had a gallon of Amber - nope - but they'd sell me 4 qts for the price of a gallon!!! Perfect! Then they gave me the sad news about not being able to tint their Oil Enamel any more..................Then they gave me suggestions on where I might still be able to find someone who could. Told them I'd be back for more parts and my Aluminum primer! 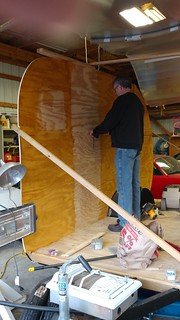 Measuring for Closet Measuring for Closet by Corvett crzy, on Flickr Jim just pointed out tonight that I didn't cover the area above the door. Hopefully I can blend that in. I do not like shellacking plywood. I'm also not looking forward to sanding it some more. The closet it almost finished. He wanted to put the birch on with brads (seems someone used them on the front of the closet, I'm thinking as a repair) but the twisty nails were used on the sides, so things went in my favor when I realized I'd lent my sister his brad nailer  twisty nails it is!! Now came the dilemma of the VCT installation. I'd prefer to have the floor in before any cabinetry but we have a little issue with an uninsulated barn, wobbly sidewalls and 27 degrees. We decided to "tent" it and did a test run with a primer coat on the floor. Plastic, two small heaters, a few staples and support boards laid across the top, wahla.... 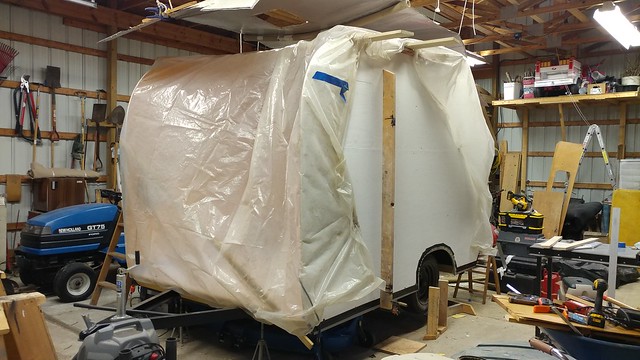 It's not pretty but it's effective It's not pretty but it's effective by Corvett crzy, on Flickr 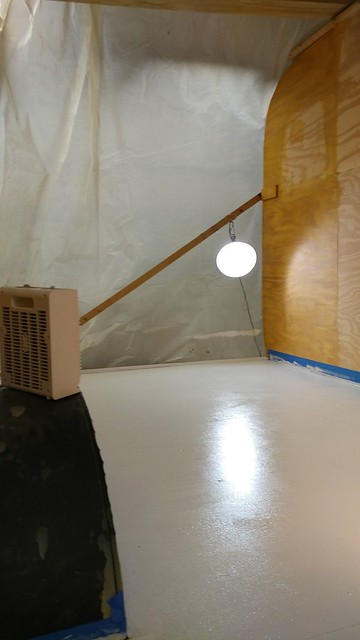 May have to finish my shellac with this setup May have to finish my shellac with this setup by Corvett crzy, on Flickr 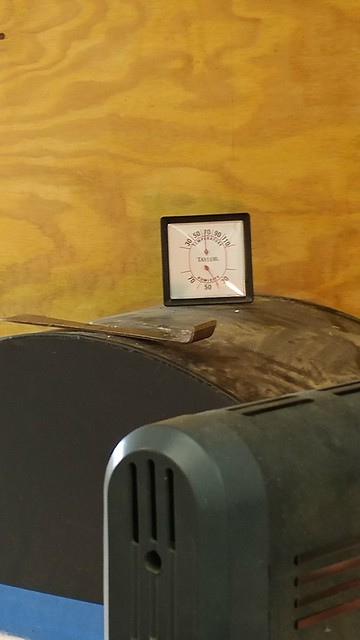 A balmy 65 degrees A balmy 65 degrees by Corvett crzy, on Flickr #x27;s not pretty but it's effective by Corvett crzy, on Flickr The result was a balmy 65 degrees, had to unplug it because it was getting kind of warm. Seemed to work well enough for the primer. I imagine we'll attempt the tile within the next couple of days. Jim has laid a ton of VCT at Ford's, although never under these temp conditions. If we can keep it fairly consistent for a couple of days, that should be the biggest challenge. Can't wait to see the floor down. Working on layout configurations. Trying to decide whether to have a border or run the diagonals all the way across under the cabinets (which would be much easier). Also been reading up on electrical..................my motto has always been "Wish it, Dream it, Do it" but I cannot seem to get a grasp on this electrical. I find it sooooo confusing. |
|


 weather


 twisty nails it is!!