|
|
Post by frankreach on Oct 7, 2019 5:08:34 GMT -8
Hi All - I just recently got a 1972 (i think this is the correct date) Shasta Compact. I just started renovations and took off the skins to the first side. I am thinking I can do the repairs to this side without taking off the whole wall. What do you think by looking at the pictures? The real damage seems localized to the extremities and windows. All of the boards and paneling in the middle are good. On a separate, but related question, there is evidence of mold at the bottom right corner (see pic) so I think at least that section of the panel needs to be cut off. Would you cut off just that section or change the whole panel? If the whole panel, is there a way to take off the whole panel without taking out the wall? I'm thinking not. Thanks! Click on the below hyperlinks to take you to the pictures. 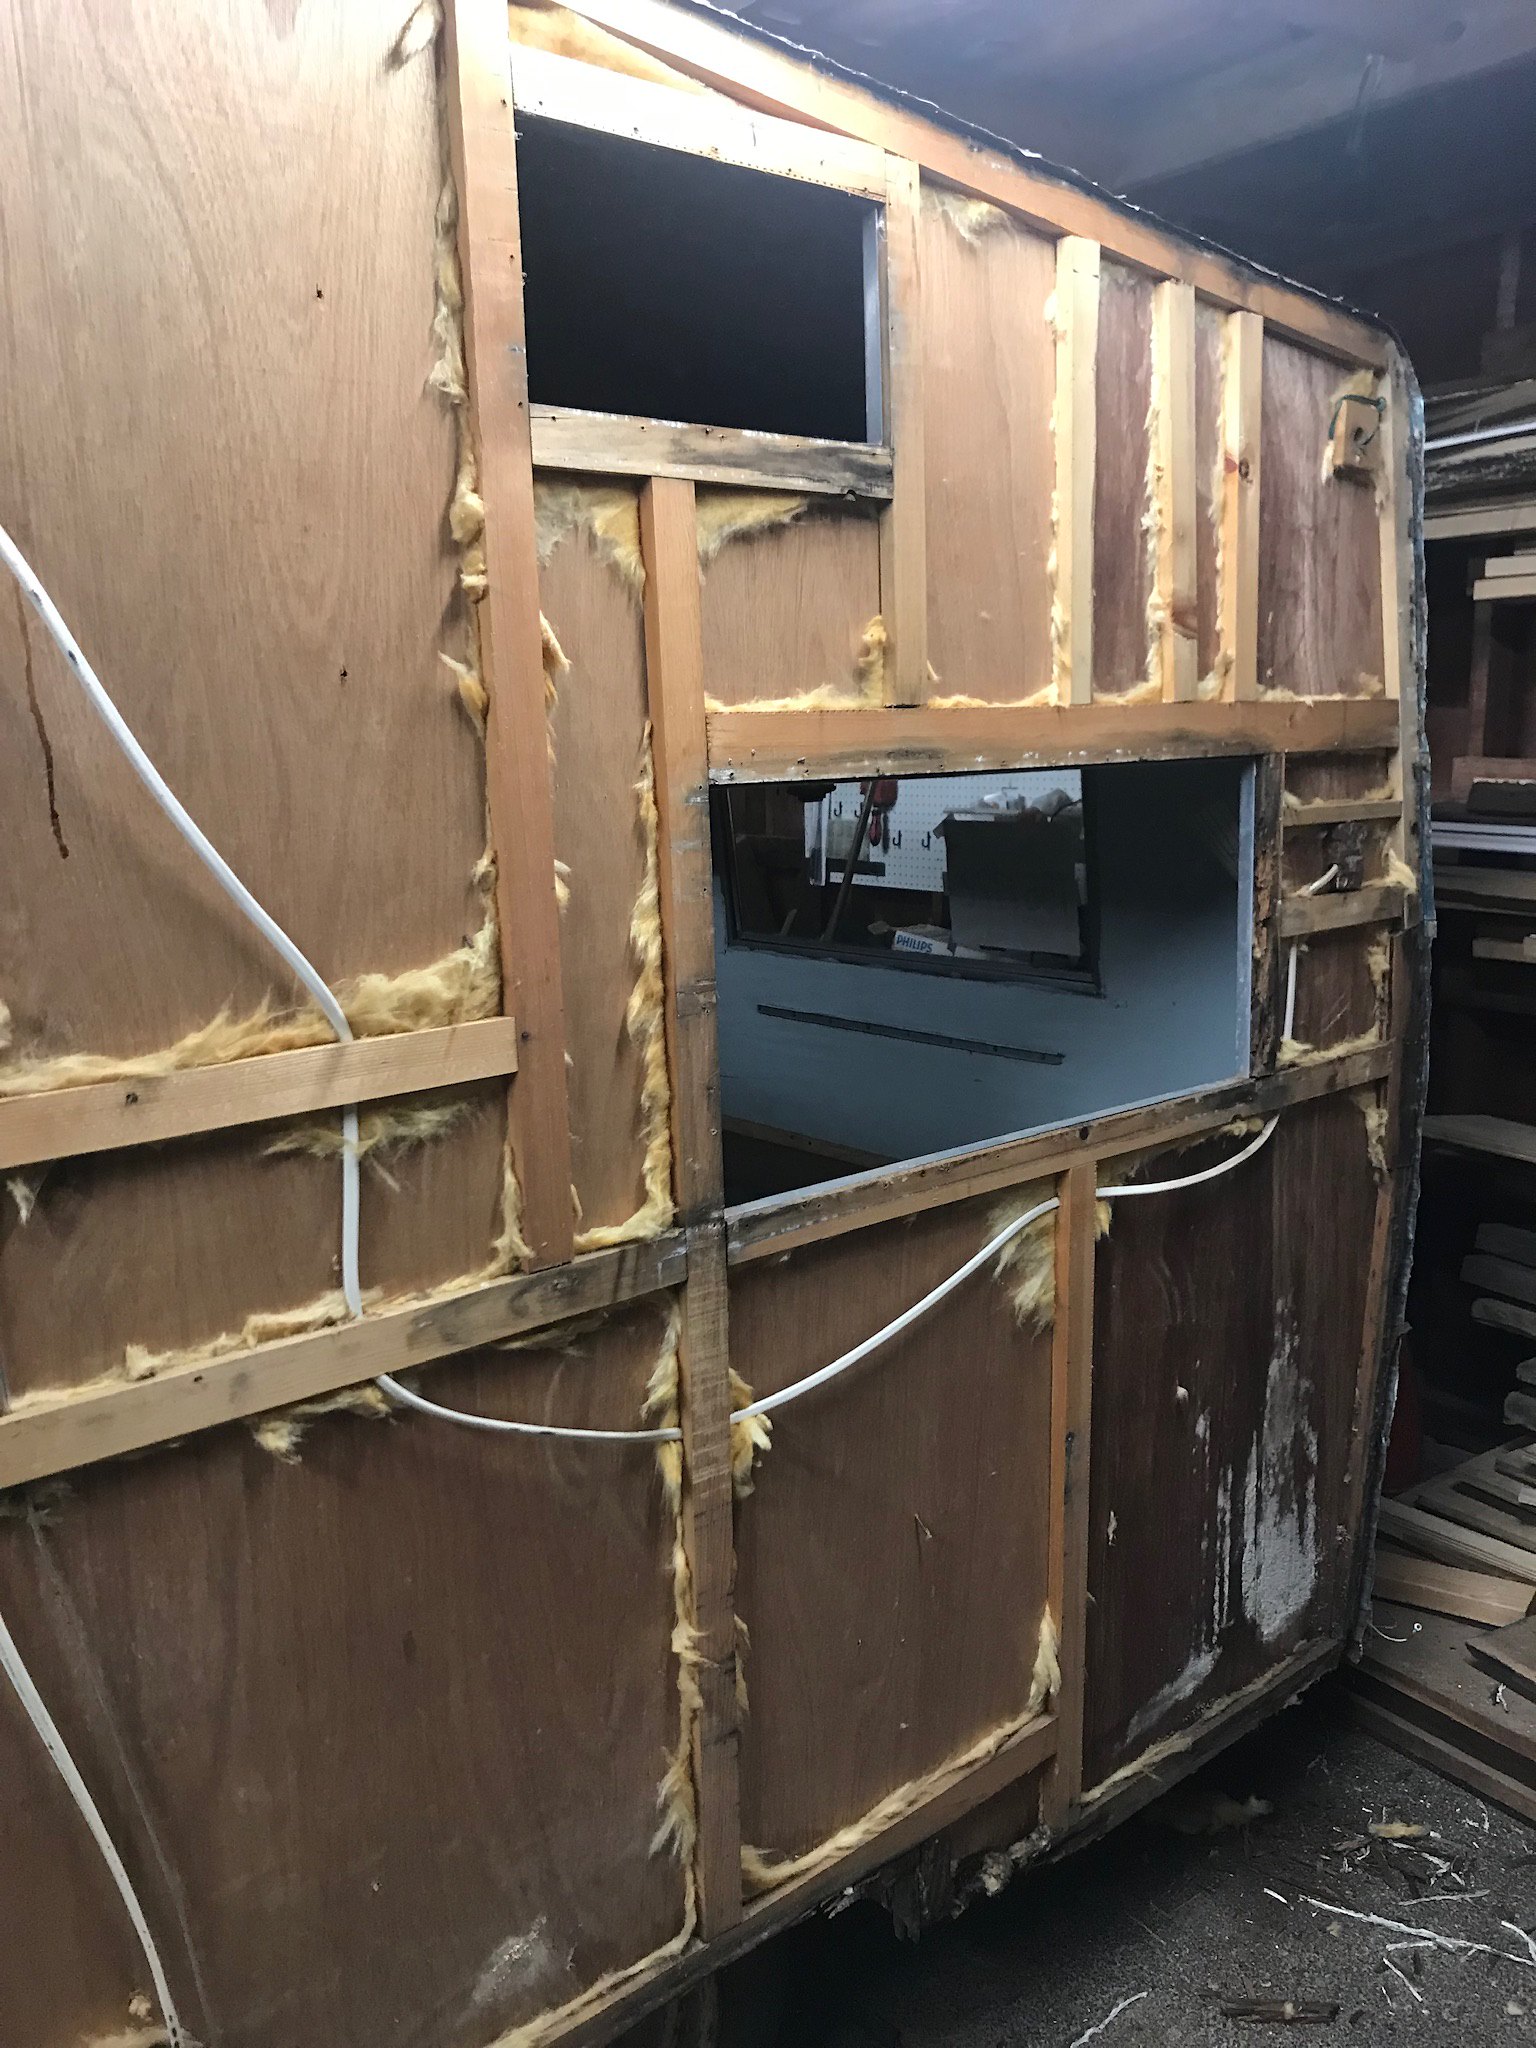 IMG_2035 IMG_2035 by Frank Peralta, on Flickr 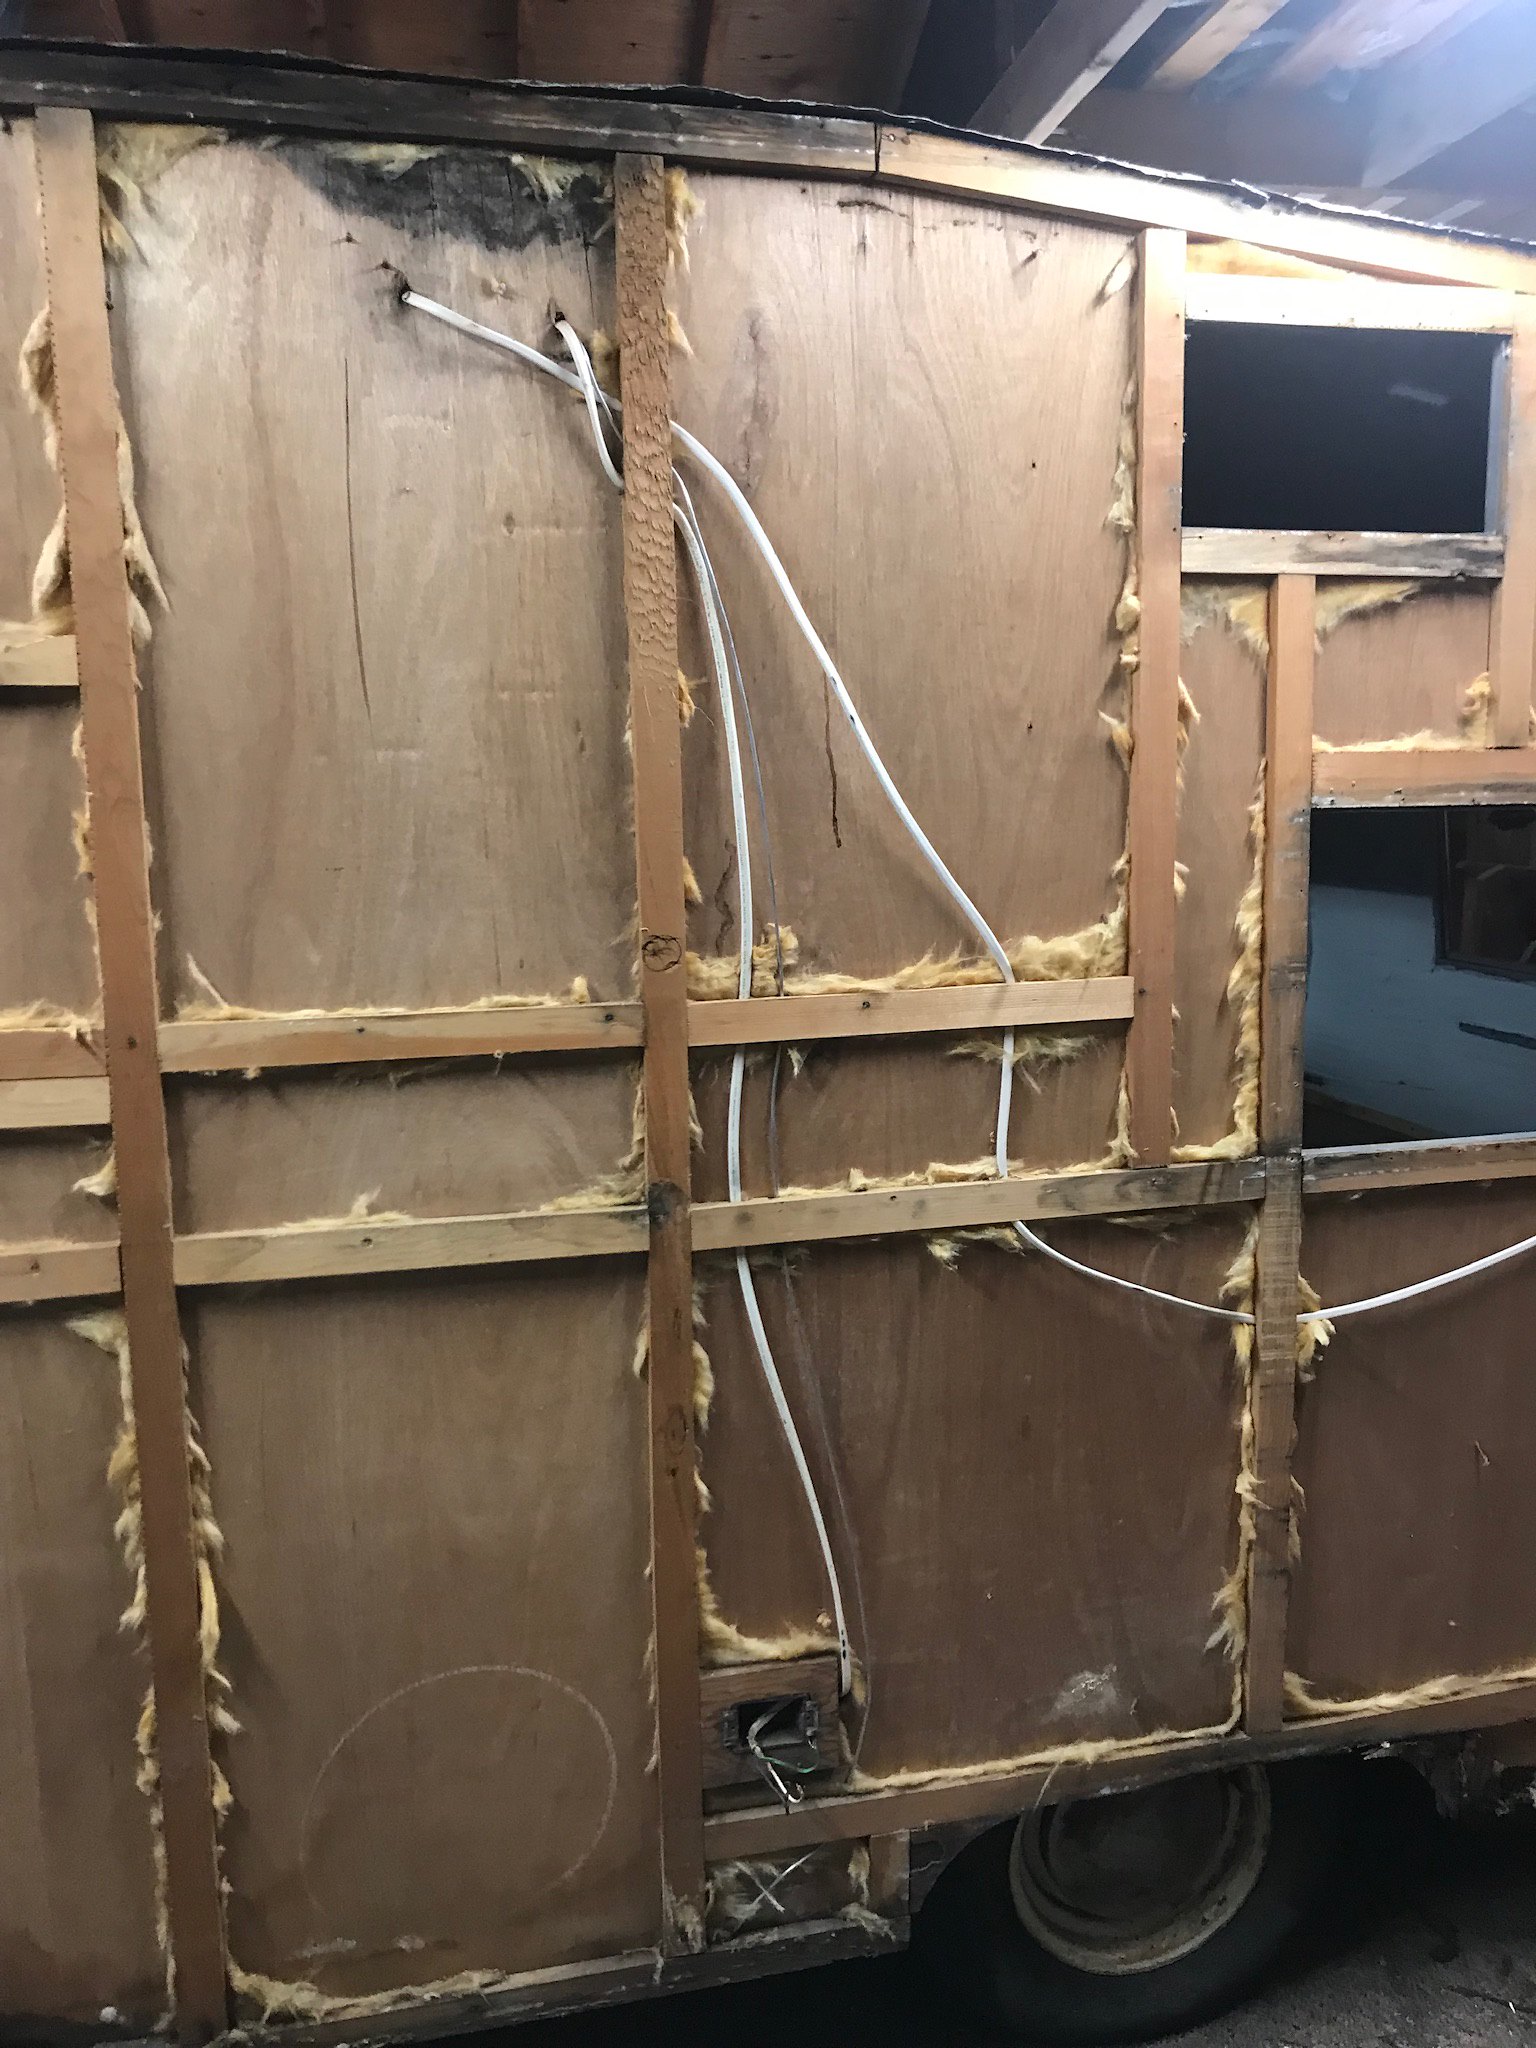 IMG_2034 IMG_2034 by Frank Peralta, on Flickr 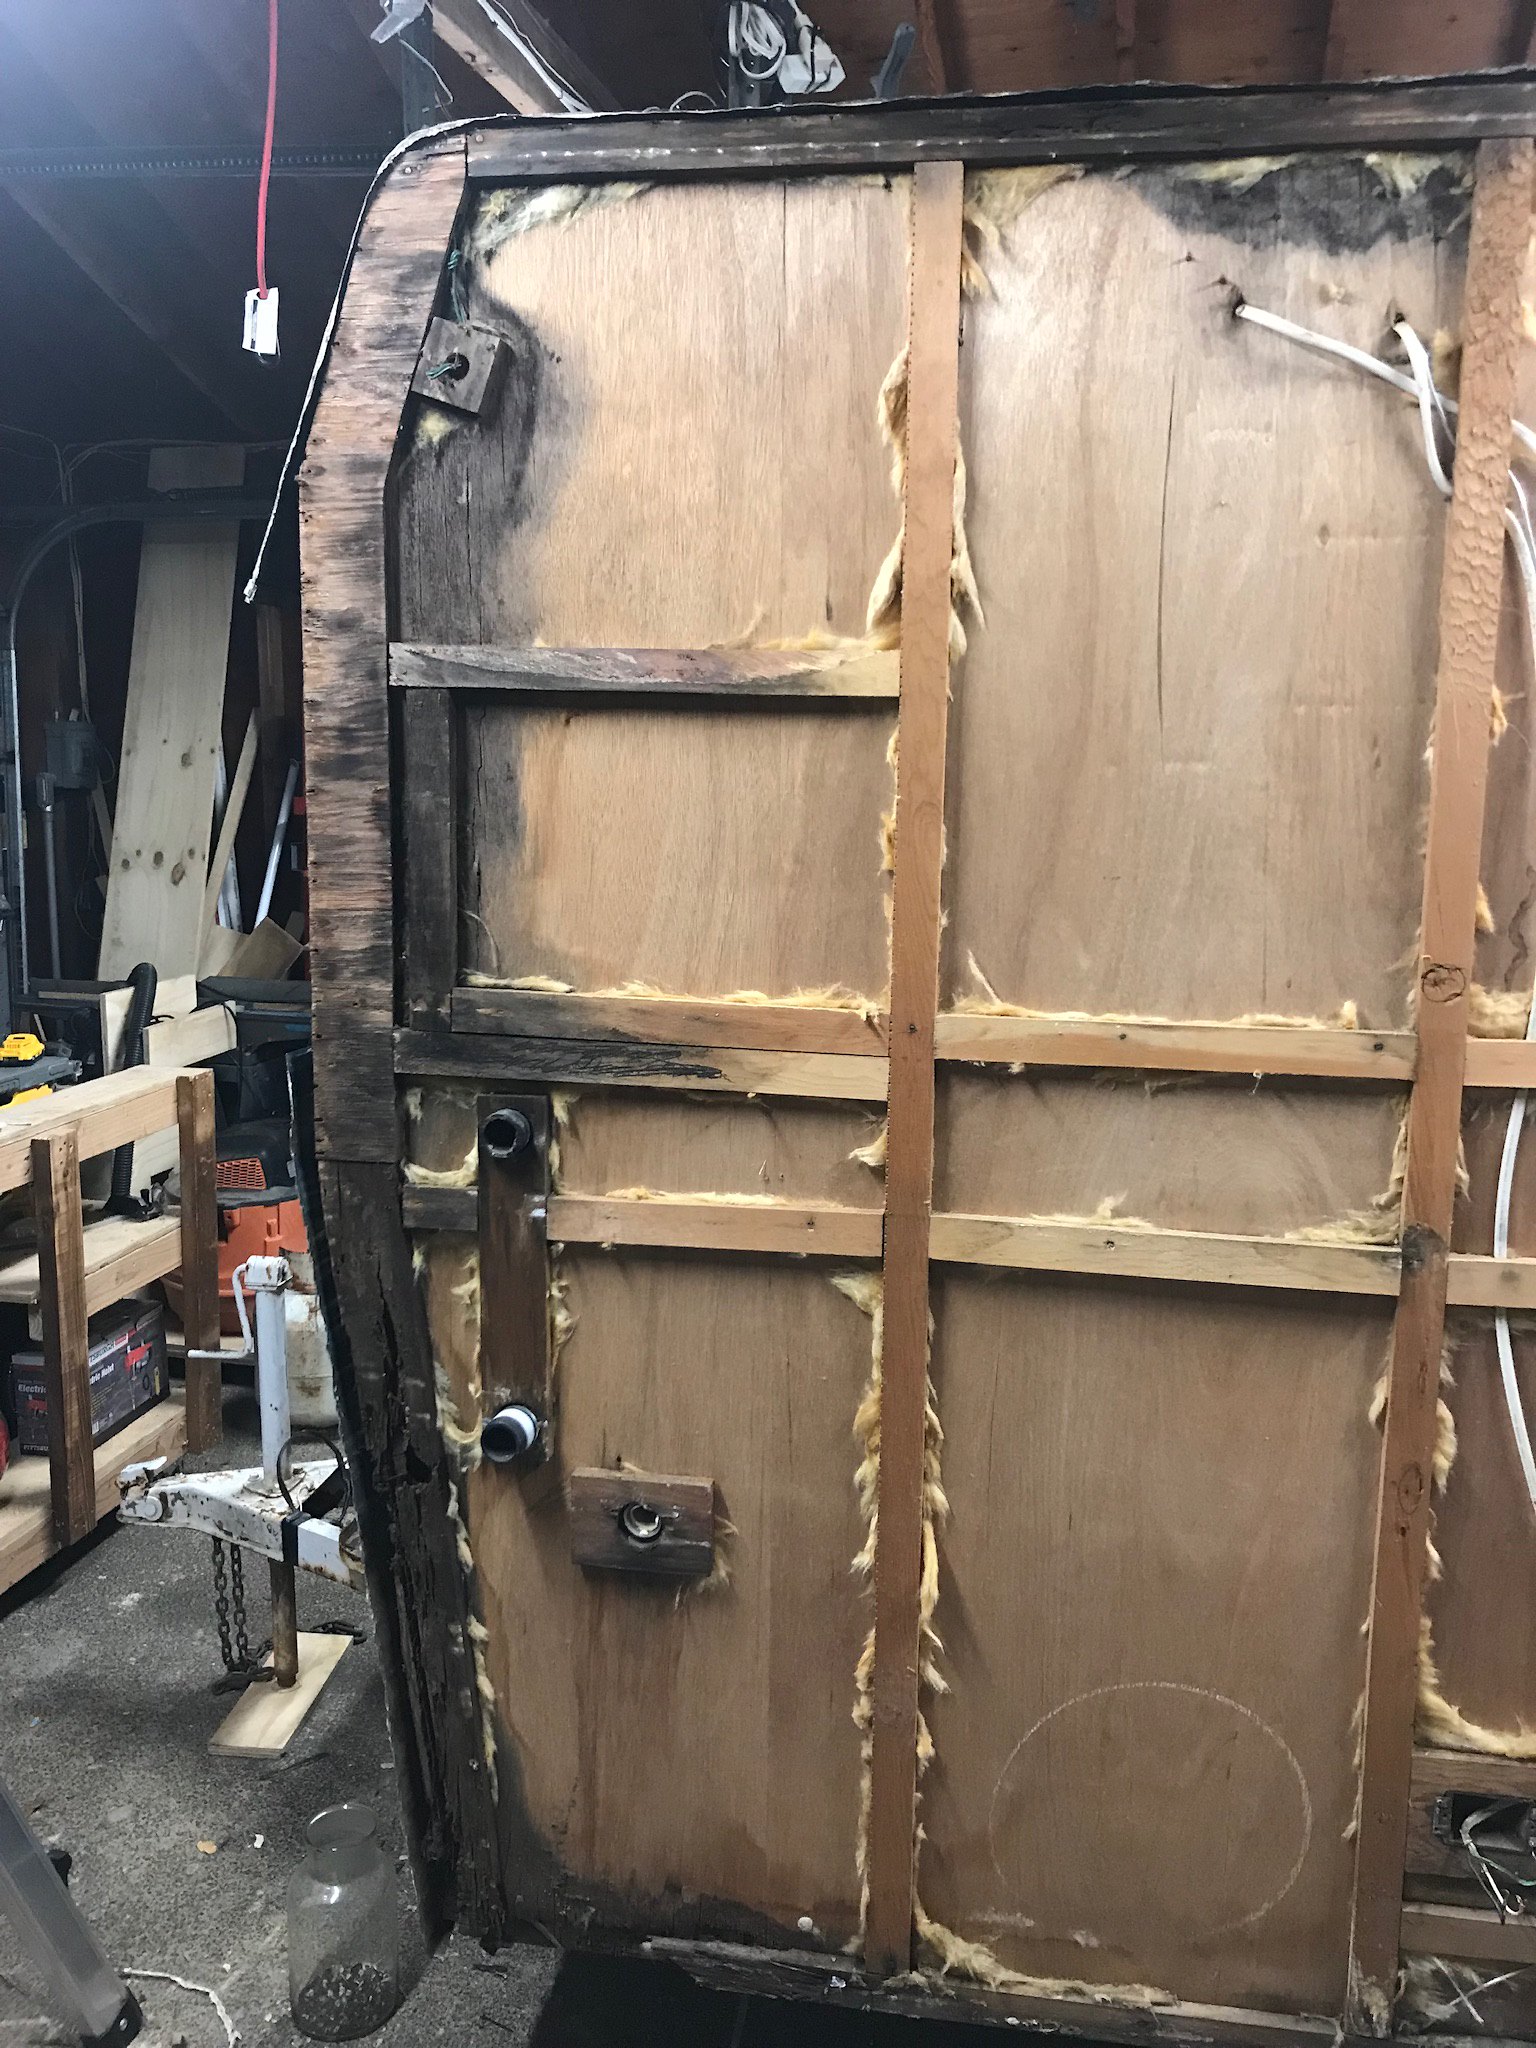 IMG_2033 IMG_2033 by Frank Peralta, on Flickr Forth Pic |
|
WhitneyK
Active Member

Posts: 492 
Likes: 169
'67 Shasta Compact
Currently Offline
|
Post by WhitneyK on Oct 7, 2019 5:23:37 GMT -8
Pictures will really help. I'm working on a '67 Compact (got it splattered all over the barn currently). Pretty sure they're all built the same during the '65 to early 70's time period. Here is a tutorial on how to post pix through Flickr. How to add photos hosted on FlickrSet up an account through them. Can also use Google photo, but I'm not sure if that works for everybody? They say DO NOT use PhotoBucket to store your photos. |
|
|
|
Post by frankreach on Oct 7, 2019 6:16:37 GMT -8
Pictures will really help. I'm working on a '67 Compact (got it splattered all over the barn currently). Pretty sure they're all built the same during the '65 to early 70's time period. Here is a tutorial on how to post pix through Flickr. How to add photos hosted on FlickrSet up an account through them. Can also use Google photo, but I'm not sure if that works for everybody? They say DO NOT use PhotoBucket to store your photos. Done! Thank you. Your way is easier! |
|
|
|
Post by vikx on Oct 7, 2019 10:50:16 GMT -8
You can easily save the paneling and mid wall on your trailer. Repair what is necessary at the tops and bottoms (floating the roof will give you access at top). Then piece the paneling you want to replace. Cut carefully with a multi tool at the studs/cross pieces. You may have to add backers to support at the seams. Depends how accurate you are with the cut on the old supports.
It's really not bad at all, so have fun with it. Check the floor edges too.
|
|
|
|
Post by frankreach on Oct 7, 2019 16:49:09 GMT -8
Thanks for the advice. I think I’ll follow that route see where I land. Btw, I got the book. It’s been very helpful so far.
|
|
|
|
Post by vikx on Oct 7, 2019 19:01:18 GMT -8
Thanks for the advice. I think I’ll follow that route see where I land. Btw, I got the book. It’s been very helpful so far. Great! You can always email me with questions. |
|
Hamlet
2K Member

Posts: 2,819
Likes: 925
Currently Offline
|
Post by Hamlet on Oct 8, 2019 8:34:08 GMT -8
Another thought... if the paneling itself is mostly just discolored from mold, but is sound, you may want to think about how much discoloration you are willing to tolerate on the inside of the trailer. If it’s not too bad, you could repair any rotten framing and not do any cutting on the panels themselves. There are ways you can minimize, although not completely eliminate, the discoloration. Or if you wanted to spend the time and money, you could do a brand new all birch interior. I know it’s not period correct, but we’ve seen several toaster style Compact owners make the switch and it looks gorgeous. Our Compact sprung a leak in a back corner that has stained it a bit. It’s not too bad, so after repairs, we will just leave it. Kinda like wrinkles, gives it character. (At least I say that every time I look in a mirror.)
|
|


/Campers/67%20Shasta?preview=2019-02-03+18.01.00.jpg)


