PT
Active Member

Posts: 460 
Likes: 260
1964 Aloha & 1962 Holiday House
Currently Offline
|
Post by PT on Oct 24, 2018 19:47:35 GMT -8
Hey everybody -
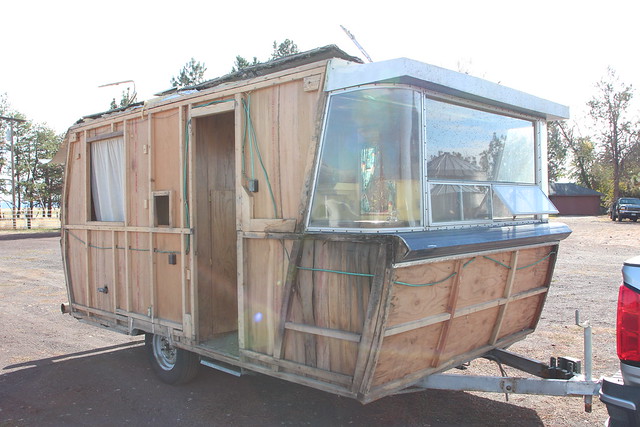
I really enjoyed rehabbing my '64 Aloha (http://vintagetrailertalk.freeforums.net/thread/6728/64-aloha-safe-ready-camp) with the help of the VTT crew. It's been perfect for dry camping in the middle of nowhere and we've used it a ton!
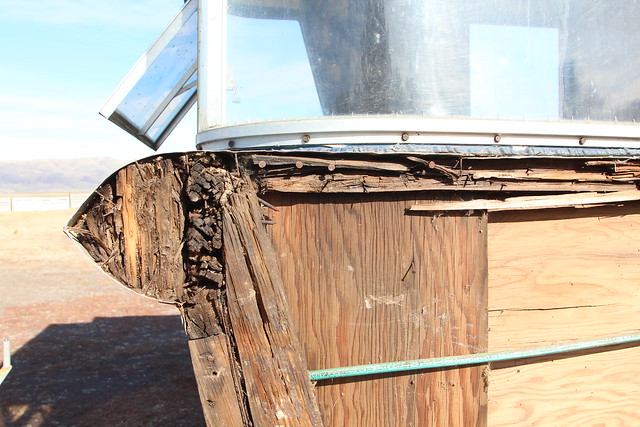
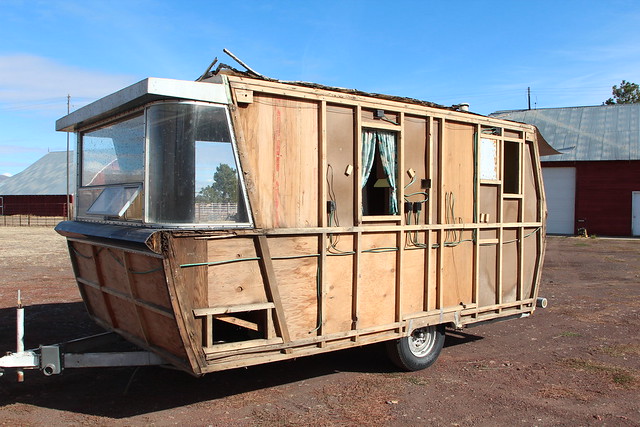
I've been looking for a new project for a few months and this Holiday House is going to keep me occupied for a long time. It'll be our fancy camper for when we need to be semi-civilized with hookups and indoor-ish plumbing. Just getting the skins off and will be posting progress on this thread along with plenty of questions elsewhere on VTT. Hopefully the walk-around video linked below will work. Rot photos coming soon!
|
|
|
|
Post by vikx on Oct 24, 2018 20:18:56 GMT -8
GREAT trailer project!! Can't wait...
|
|
RinTin
Full Member
Posts: 760
Likes: 292
Currently Offline
|
Post by RinTin on Oct 25, 2018 9:56:39 GMT -8
This is a project a lot of us will want to follow. Thanks for sharing.
|
|
PT
Active Member
Posts: 460
Likes: 260
1964 Aloha & 1962 Holiday House
Currently Offline
|
Post by PT on Oct 27, 2018 21:32:19 GMT -8
|
|
|
|
Post by vikx on Oct 28, 2018 21:18:24 GMT -8
Well built trailer! Looks like those big windows were leakers after a while...
Not sure on the answer to your question. If you're SURE you'll be replacing the roof, go ahead and make a hole. Me, I'm a little leary of damage that might cause me trouble.
Have fun with it. What a nice project.
|
|
PT
Active Member
Posts: 460
Likes: 260
1964 Aloha & 1962 Holiday House
Currently Offline
|
Post by PT on Oct 29, 2018 18:22:47 GMT -8
Thanks Vikx - I'm definitely replacing the roof skin and paneling - so I went with the sunroof method and it worked well :-). Didn't cut any framing... Just didn't trust the roof to hold my weight even with the 2x4 and plywood approach. 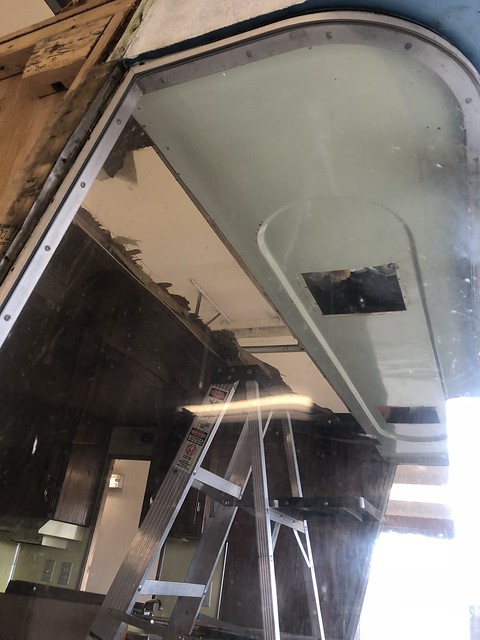 013 013 by |
|
HOTRODPRIMER
Full Member
Posts: 774
Likes: 257
1957 Shasta
Currently Offline
|
Post by HOTRODPRIMER on Oct 31, 2018 8:19:16 GMT -8
Big project but man is it a nice looking camper. Danny
|
|
PT
Active Member
Posts: 460
Likes: 260
1964 Aloha & 1962 Holiday House
Currently Offline
|
Post by PT on Nov 9, 2018 22:20:10 GMT -8
|
|
|
|
Post by vikx on Nov 9, 2018 23:05:10 GMT -8
This type of info is priceless, PT. Thank you for sharing. And we all LOVE this trailer...
|
|
aries
Active Member
Posts: 122
Likes: 20
Currently Offline
|
Post by aries on Nov 10, 2018 1:44:12 GMT -8
Nice job pt! Appears a lot of thought went into structural design.This is a keeper.
|
|
PT
Active Member
Posts: 460
Likes: 260
1964 Aloha & 1962 Holiday House
Currently Offline
|
Post by PT on Dec 14, 2018 22:22:48 GMT -8
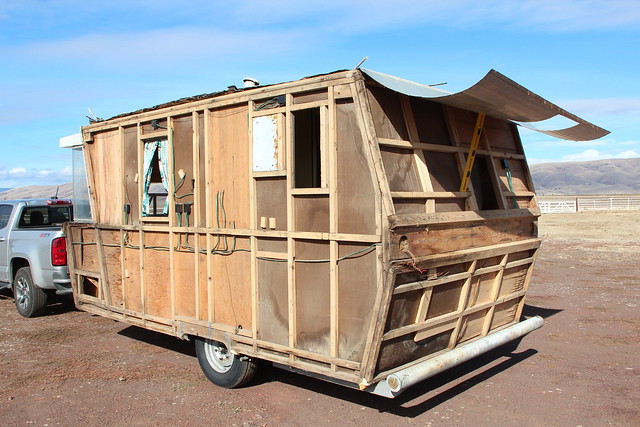
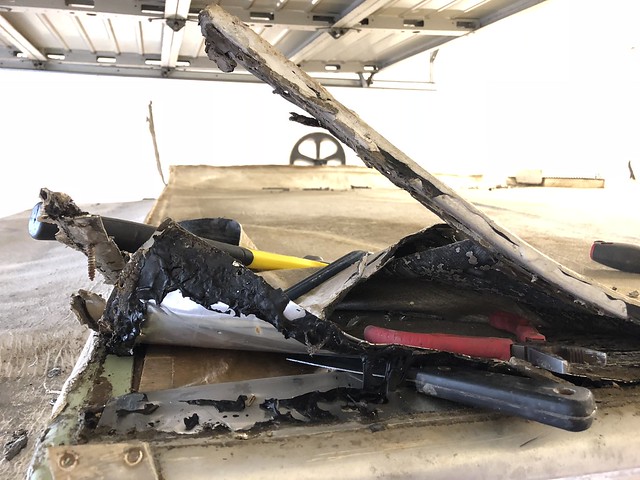
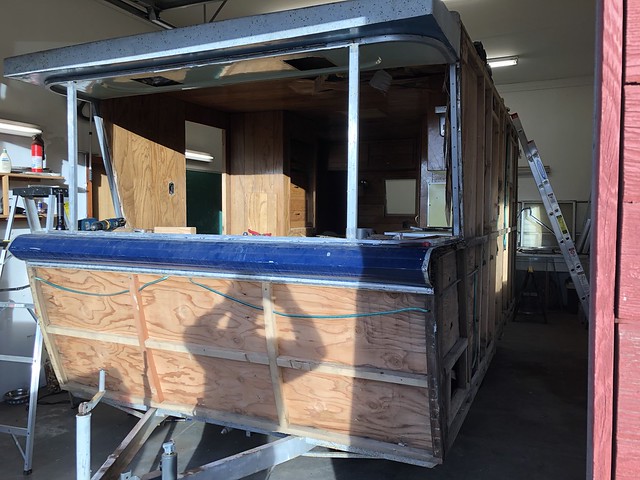
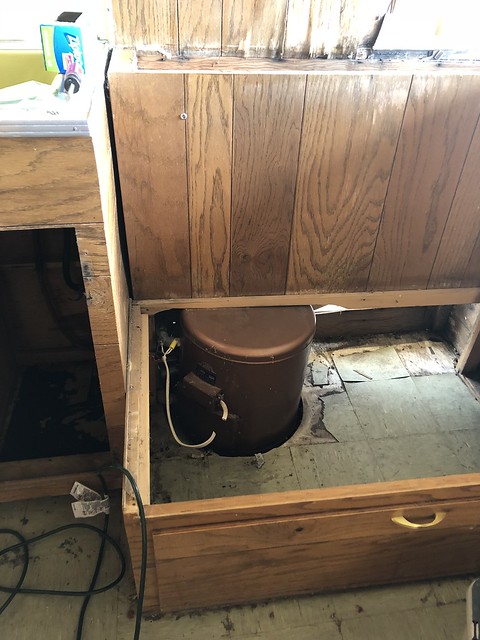
“You know how you eat an elephant? One bite at a time,” my dad used to say… I’ve repeated that line quite a few times as I get deeper into this project. I’ve also taken lots and lots of pictures like these…  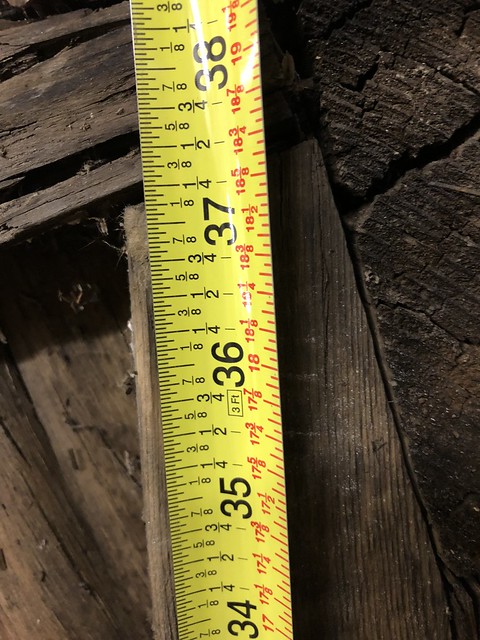 I take more of them after I get that queasy “how in the hell will this thing ever go back together feeling.” The Holiday House has plenty of odd angles and the cantilever kind of front end combined with a good bit of rot in the area had me worried that it would fall apart as I tried to replace framing – especially as I removed the large rigid window frame that ties the final diagonal roof support into the front end. Because of the funky angles a sliding T-bevel has become part of my tool kit. It’s a handy way to transfer angles from frame pieces you’re removing to the cuts required on replacements.  As a precaution I also made braces that ran from the hitch area back up to the front of the trailer to keep it from falling apart as I replaced framing. 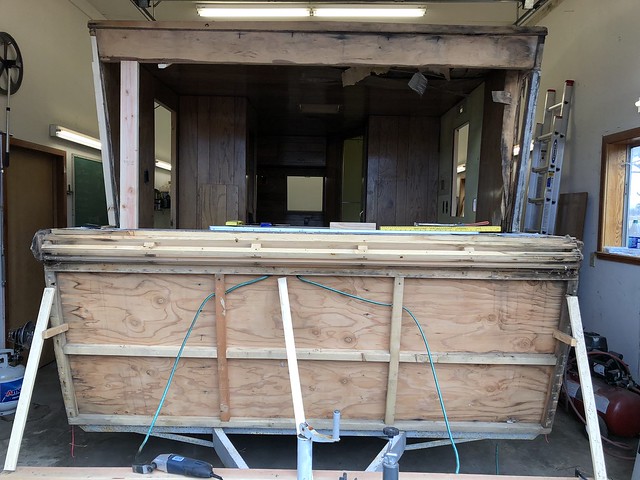 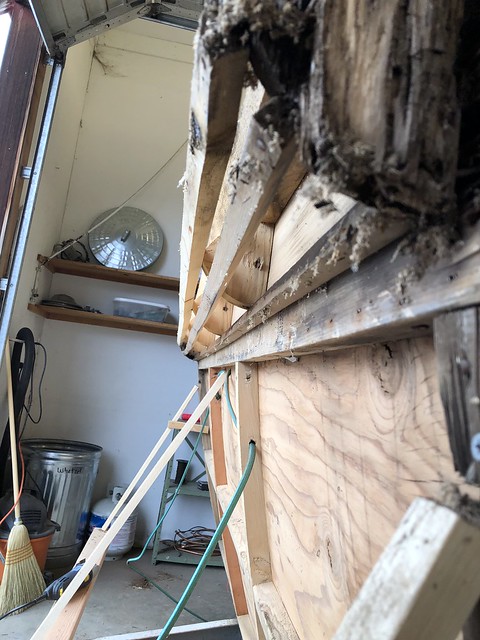 Tomorrow will mark two months since I got the HH to the workshop and started the rehab. I think the front end was likely the most challenging area and have gotten through that pretty well. All wall framing replaced on the front and opened it up to address flooring. 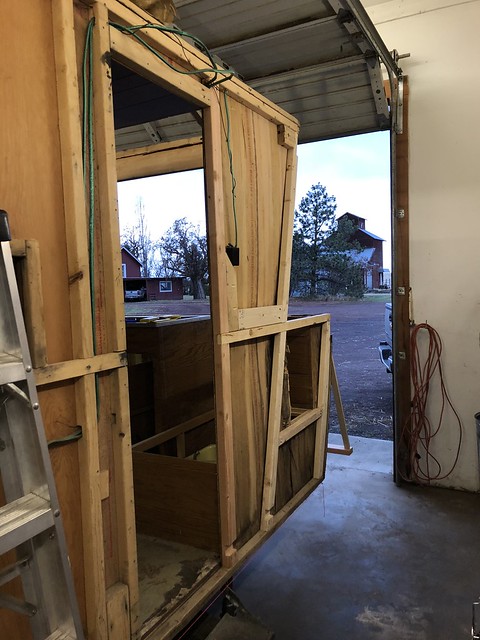 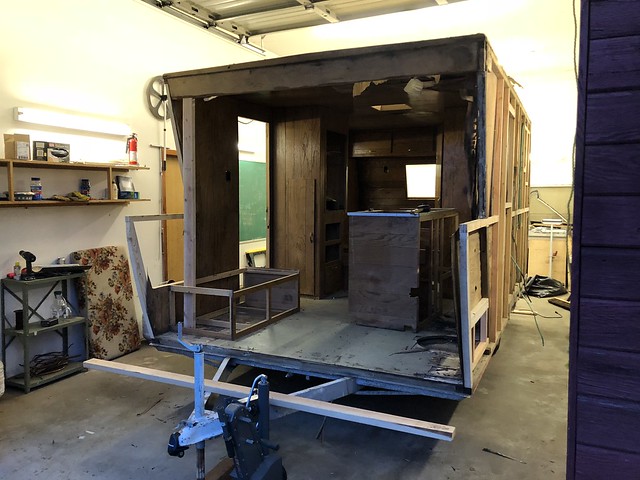 Hot tip above – if you want to remove your dinette seat frame – don’t run your roof support through the middle of it ;-)… Old batteries weigh down the front end and keep the trailer from doing wheelies! 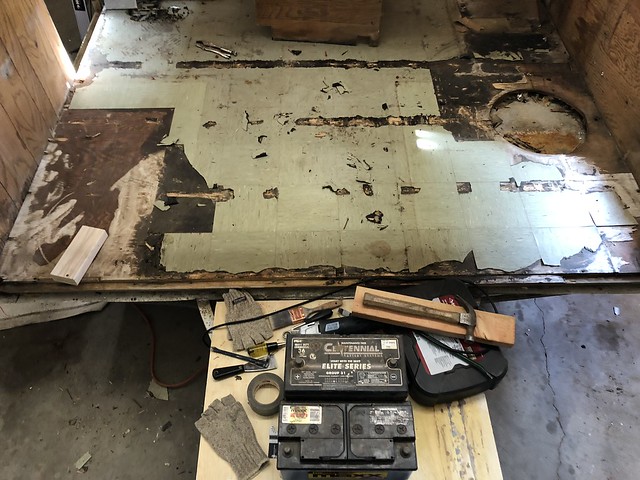 Sixty five nails and six carriage bolts later the front 4 feet of flooring comes up to be replaced and new insulation added. Going to ¾ from 5/8 inch plywood so all floor to ceiling cabinets, etc. will be shaved down by 1/8 inch. 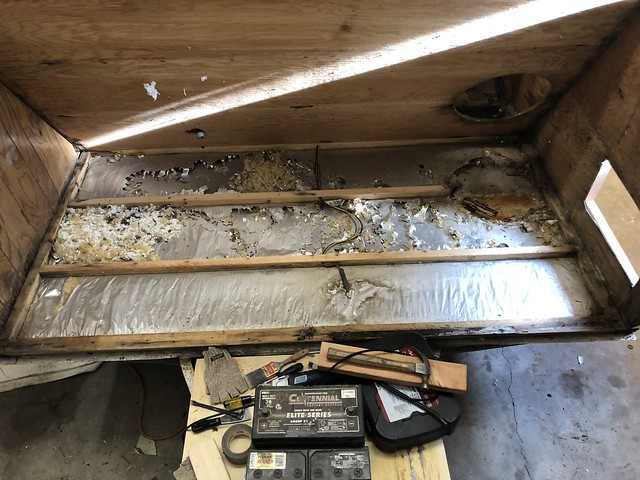 Mom – what’s that buzzing noise under the floor? 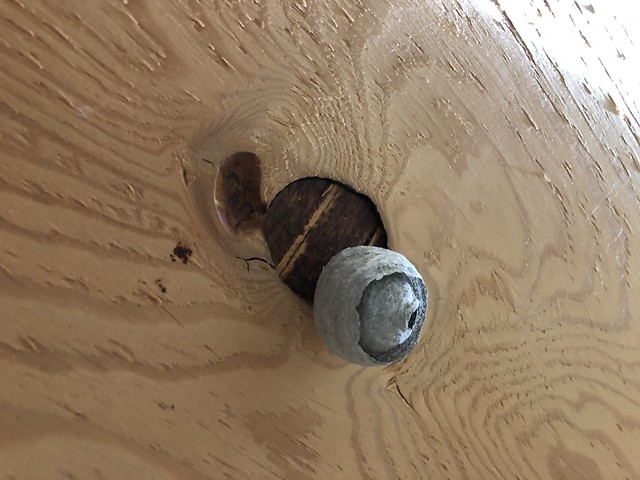 |
|
Hamlet
2K Member

Posts: 2,819
Likes: 925
Currently Offline
|
Post by Hamlet on Dec 15, 2018 11:02:13 GMT -8
Fabulous, just fabulous!
|
|
|
|
Post by danrhodes on Dec 15, 2018 14:06:11 GMT -8
How do you shave 1/8" off the cabinets without chipping the veneer? I wish I could have done that in a few spots
|
|
PT
Active Member
Posts: 460
Likes: 260
1964 Aloha & 1962 Holiday House
Currently Offline
|
Post by PT on Dec 15, 2018 16:59:39 GMT -8
I'll need to put new veneer on most if not all of the floor to ceiling pieces after I get the frames trimmed down or rebuilt - but there's one that I'll try to shave down with the veneer still on the frame. It probably won't work - but after removing the cabinet I'll try a belt sander with the belt running in toward the interior of the cabinet on one or both ends. If I take it slow and angle the sander right I might get lucky and that gimp can hide a little imperfection :-).
|
|
roadtripper
Active Member
Posts: 311
Likes: 116
Currently Offline
|
Post by roadtripper on Dec 16, 2018 7:04:16 GMT -8
This is a fun one to follow. Nice job on all the pictures. One thing I learned——you can’t take too many of framing and utilities.
|
|