mobiltec
5K Member
 I make mistakes so you don't have to...
Posts: 9,823 
Likes: 3,749
1954 Jewel In Progress...
Currently Offline
|
Post by mobiltec on Jun 15, 2019 16:48:42 GMT -8
|
|
nccamper
Administrator 
Posts: 7,745
Likes: 2,872
1962 Forester- 1956 Shasta
Currently Offline
|
Post by nccamper on Jun 16, 2019 8:37:59 GMT -8
It does feel great the first time the lights come on.  |
|
Alaska Shasta
Active Member

Posts: 230
Likes: 246
1964 Shasta
Currently Offline
|
Post by Alaska Shasta on Jun 19, 2019 21:08:12 GMT -8
|
|
|
|
Post by Teachndad on Jun 20, 2019 9:42:34 GMT -8
HI Bryan, I finally had time to read through your entire restoration thread in one sitting. I have thoroughly enjoyed reading the thread. You came up with some resourceful “fixes”. You have done an outstanding job. Very Very Nice! I had some questions. I noticed you added some wood to the area just above the wheel well cut outs and then also under the windows near the bottom of the front wall. What gave you the inspiration to do this? Before - Entire curbside wall 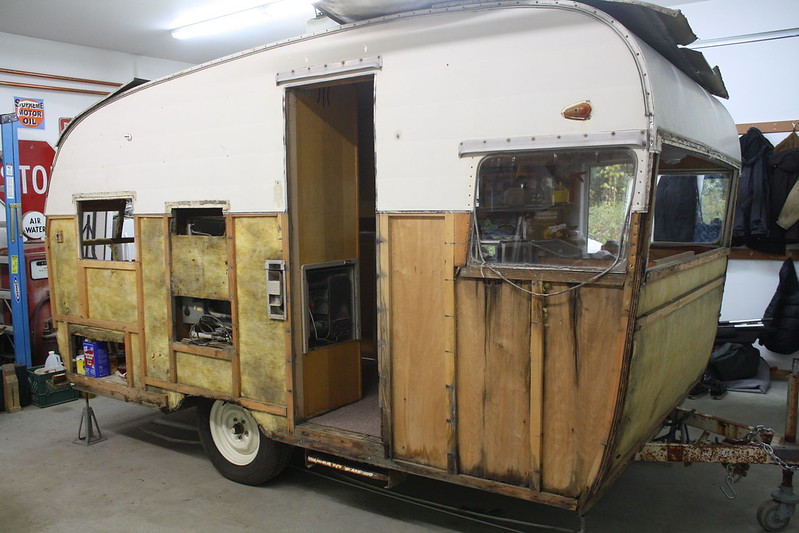 After - wood over wheel well cut out 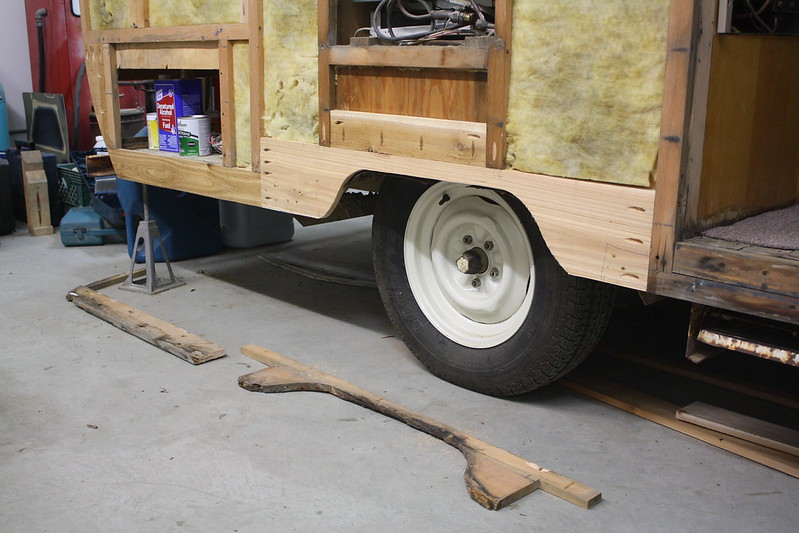 After - added horizontal wood lower curbside wall 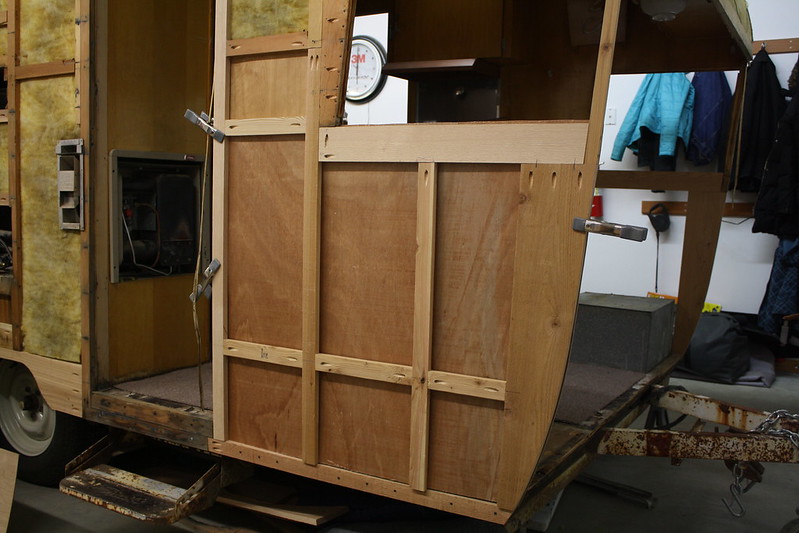 The image below was taken at a different time. At the bottom of the wall studs, It looks like you anchored the wall, stud, but you didn't use pocket holes. What is the wall stud anchored into? In the image above, it looks like you hadn't finished the base of the walls studs, because I see no screw holes in the base of the wall studs.  Cheers, Rod |
|
Alaska Shasta
Active Member
Posts: 230
Likes: 246
1964 Shasta
Currently Offline
|
Post by Alaska Shasta on Jun 20, 2019 14:30:42 GMT -8
Thank you for the kind words. So, to the questions. I added wood in areas that to me appeared to need extra strength, such as above the new fender well wood. The extra horizontal wood on the dinette wall is where the interior dinette seat frame anchors, from the inside. Shasta just screwed it to the 1/8" plywood. At the base of the stud walls, no pocket screw was needed since you are able to screw right into the original perimeter wood on the frame. Blow the picture up and you will see the screw heads. Great questions, thanks
|
|
Alaska Shasta
Active Member
Posts: 230
Likes: 246
1964 Shasta
Currently Offline
|
Post by Alaska Shasta on Jun 23, 2019 12:30:52 GMT -8
|
|
debranch
Active Member
Wee Camp
Posts: 237 
Likes: 90
71 Shasta Compact
Currently Offline
|
Post by debranch on Jun 23, 2019 13:19:43 GMT -8
I hope you have your first trip planned..... Debra
|
|
Alaska Shasta
Active Member
Posts: 230
Likes: 246
1964 Shasta
Currently Offline
|
Post by Alaska Shasta on Jun 23, 2019 14:35:00 GMT -8
Yep, on the bank of the Chena River east of Fairbanks. Very peaceful and beautiful.
|
|
Alaska Shasta
Active Member
Posts: 230
Likes: 246
1964 Shasta
Currently Offline
|
Post by Alaska Shasta on Jun 29, 2019 10:08:05 GMT -8
|
|
mobiltec
5K Member
I make mistakes so you don't have to...
Posts: 9,823
Likes: 3,749
1954 Jewel In Progress...
Currently Offline
|
Post by mobiltec on Jun 29, 2019 10:38:36 GMT -8
Yep... They are always rotten around the door handle and at the bottom of the door.
|
|
Alaska Shasta
Active Member
Posts: 230
Likes: 246
1964 Shasta
Currently Offline
|
Post by Alaska Shasta on Jun 30, 2019 9:03:49 GMT -8
|
|
|
|
Post by Teachndad on Jun 30, 2019 11:04:57 GMT -8
WOW! that's NICE!
|
|
Alaska Shasta
Active Member
Posts: 230
Likes: 246
1964 Shasta
Currently Offline
|
Post by Alaska Shasta on Jun 30, 2019 12:13:11 GMT -8
|
|
Alaska Shasta
Active Member
Posts: 230
Likes: 246
1964 Shasta
Currently Offline
|
Post by Alaska Shasta on Jul 4, 2019 12:46:14 GMT -8
|
|
|
|
Post by Teachndad on Jul 5, 2019 5:43:14 GMT -8
Hey Bryan, Nice to see things coming together. Looking great! How did you join your corners on the door? I noticed the door frame had that piece of aluminum that looks like a kick plate.  Since the rot monster found a good home in the original door behind it, did you ever consider cutting the that part of the door frame away to reduce the chances that it happen again? Rod |
|


